Automations & Sequences > Follow-ups post-send |
My campaign finished sending, and I realize I want to send auto follow-ups
You sent out a campaign… but now that it’s done, you realize you really should’ve included some auto follow-ups as well.
There are a few ways we can tackle this, let’s walk through them step-by-step.
First step: Determine if you’ve enabled “Allow adding follow-ups after a campaign is sent”
Your first stop is the GMass dashboard.
Open the GMass dashboard, go into Settings, and open the Auto Follow-ups section
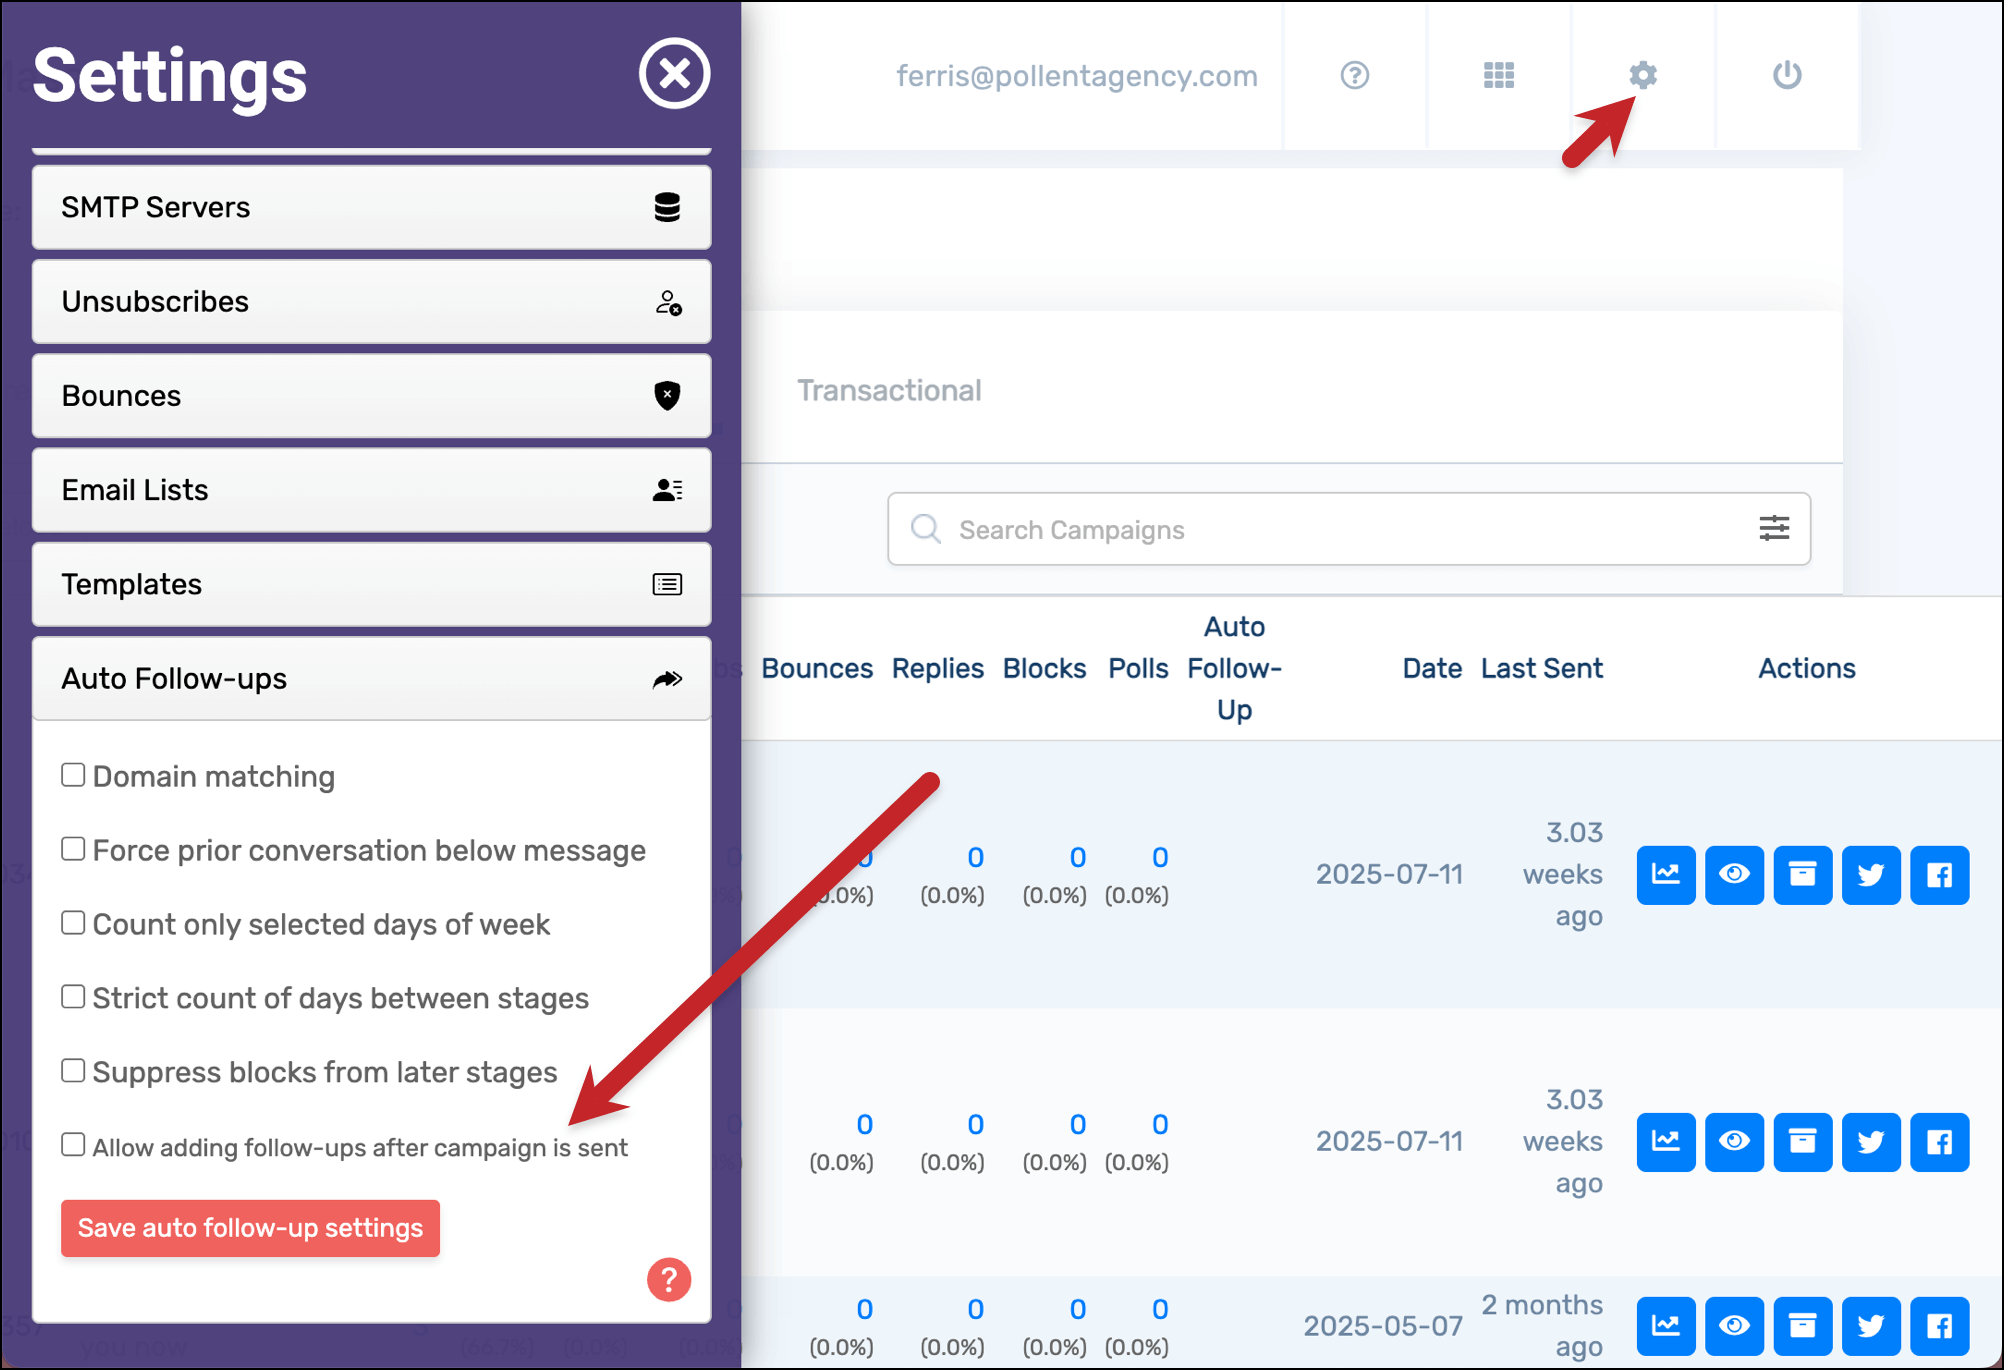
You’re looking for a specific setting here, Allow adding follow-ups after campaign is sent.
IF you checked that box in the past so this was enabled, head on to the next section.
If that box is unchecked, skip down to the section titled Step-by-step guide – if you did not enable “Allow adding follow-ups after a campaign is sent”.
Step-by-step guide – if you enabled “Allow adding follow-ups after a campaign is sent”
Great! You previous enabled your ability to add follow-ups after a campaign is sent.
1. Head to Gmail, go to the Drafts folder, and find your campaign draft
By default, GMass deletes a campaign draft after it’s done sending — unless you had “Allow adding follow-ups after campaign is sent” enabled.
Since you had that enabled, your draft should be here in the folder.
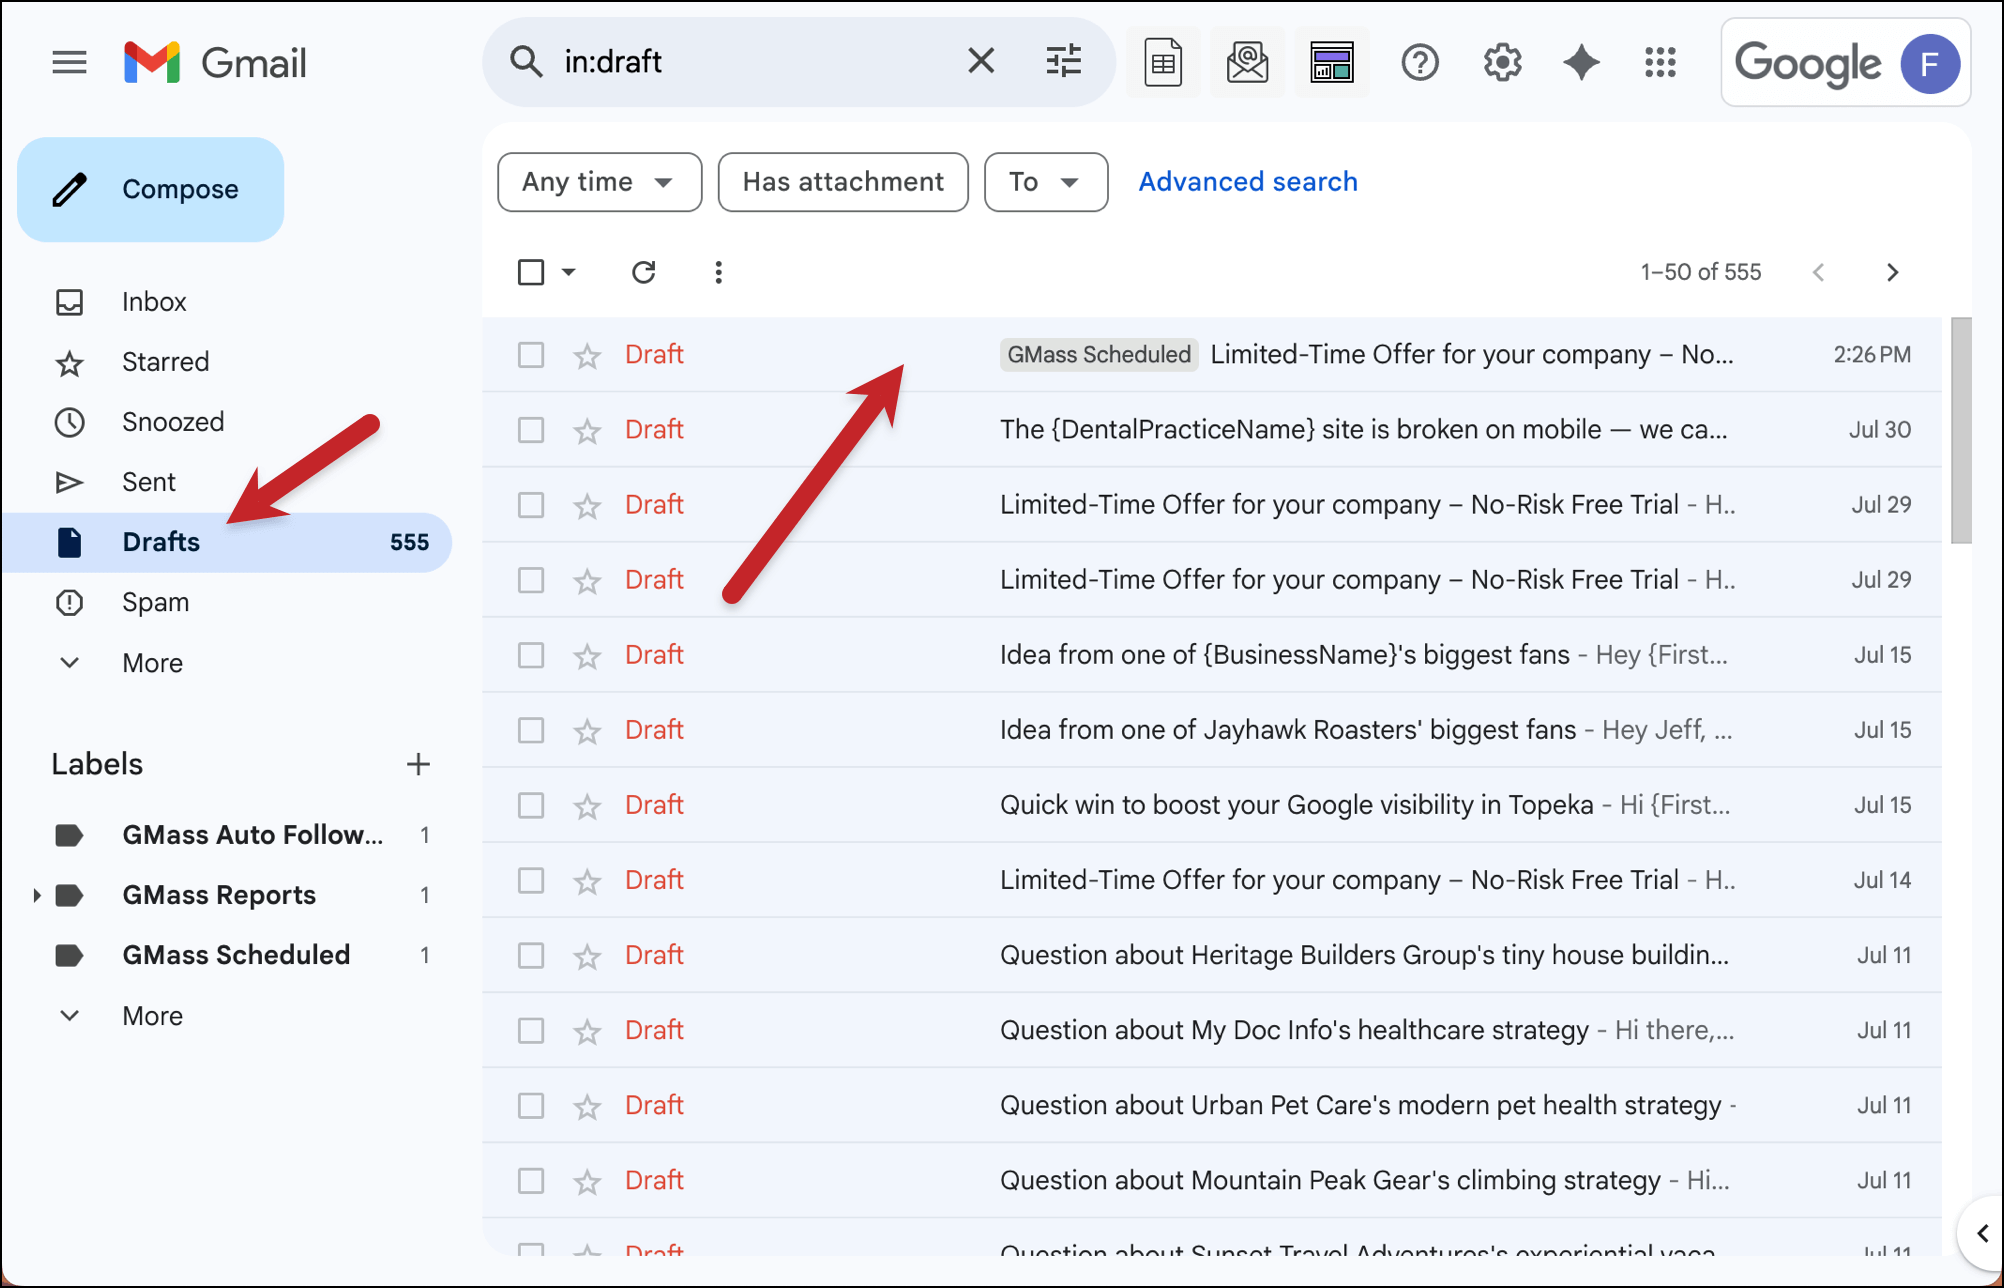
Open up that draft.
2. In the GMass settings box, enter your auto follow-ups
Open the GMass settings box for the draft.
Go to the Auto follow-ups section and enter your auto follow-ups.
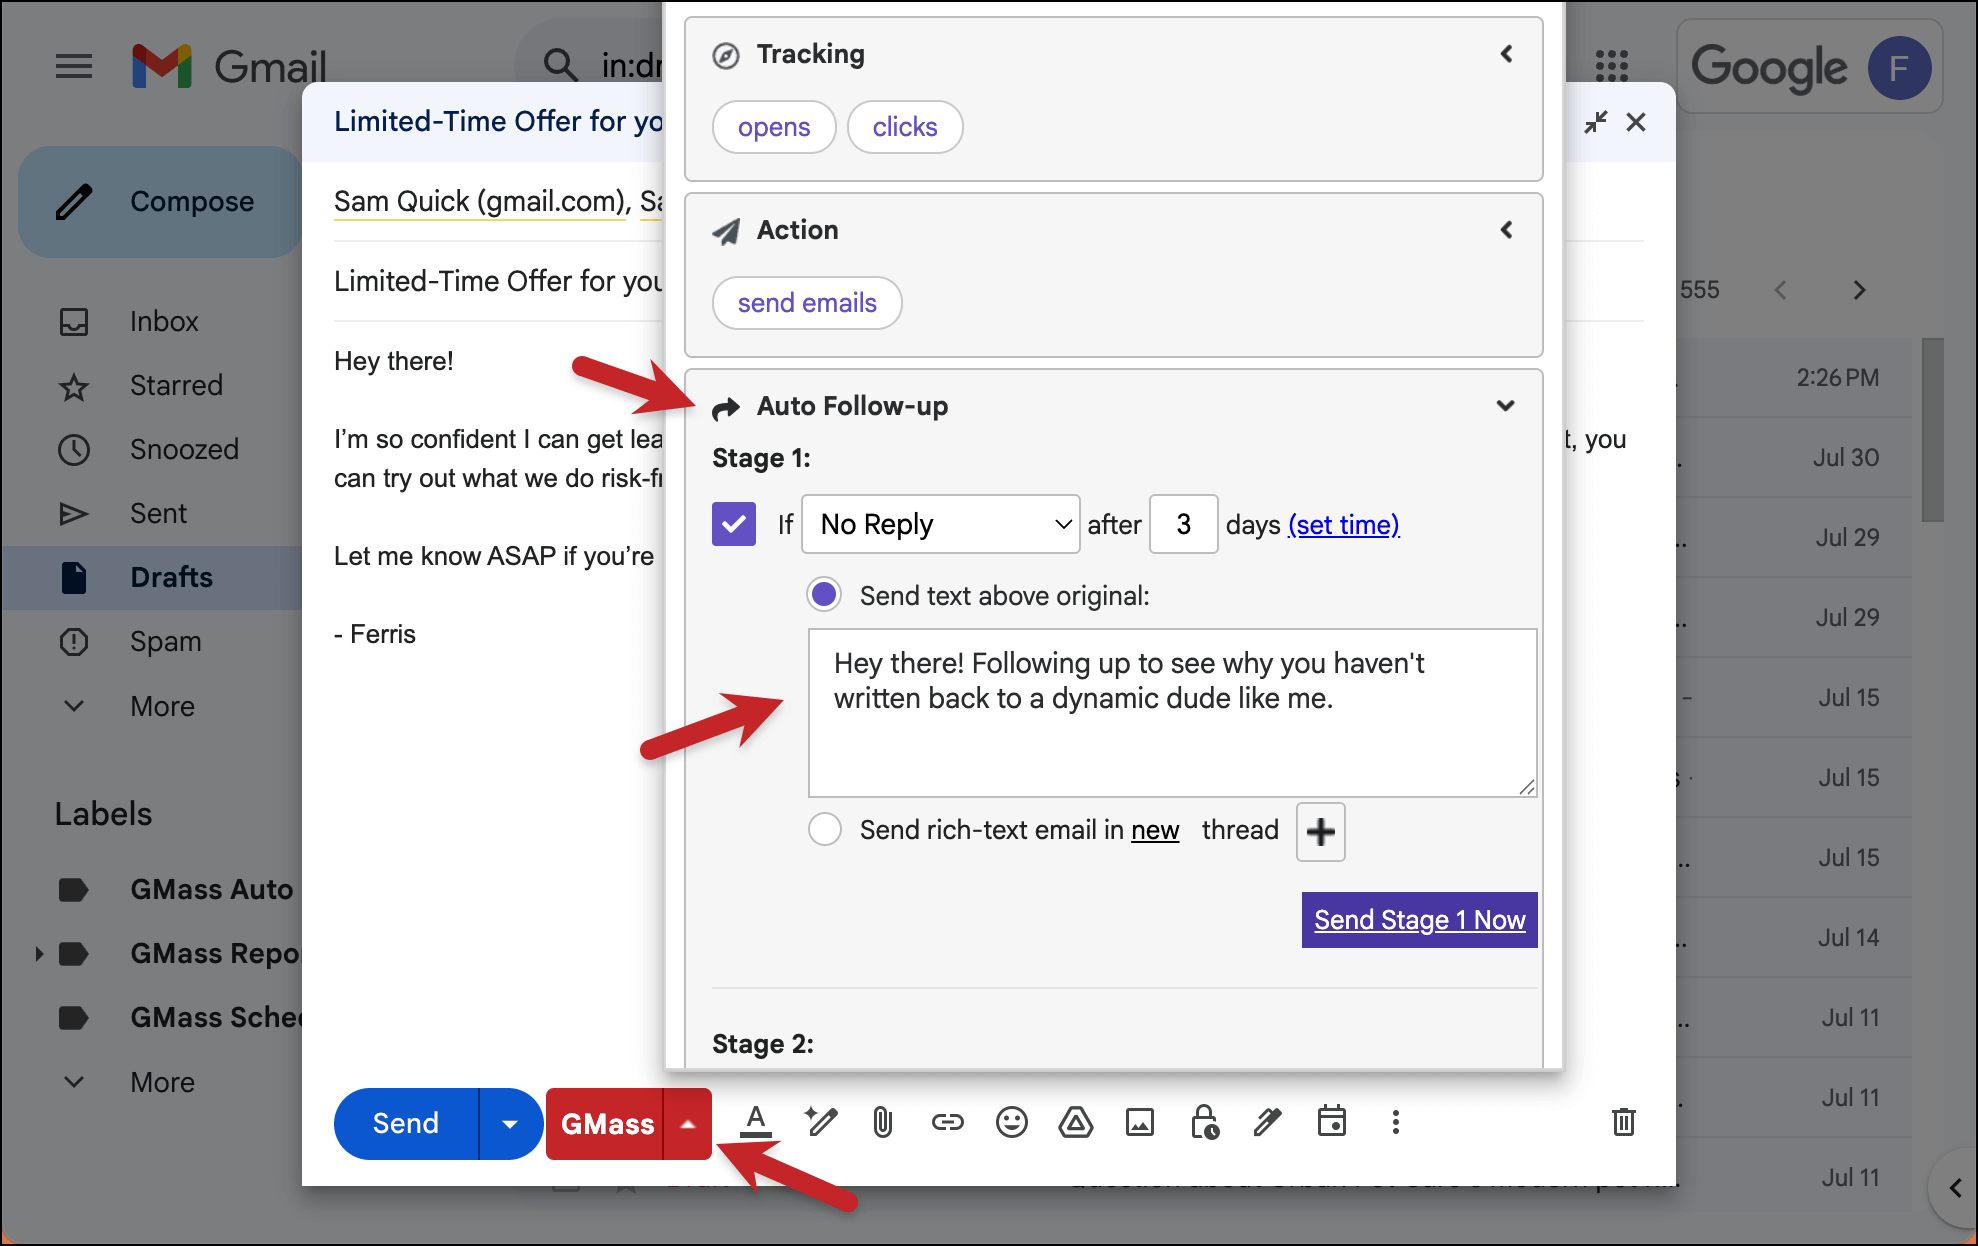
3. Click the green “Save changes” button
Scroll to the bottom of the Settings box and click SAVE changes.

Your auto follow-ups will be saved to your campaign and will now go out as scheduled.
✅ You’re all set. Skip down to the More Resources section to continue.
Step-by-step guide – if you did not enable “Allow adding follow-ups after a campaign is sent”
The bad news? Since that setting wasn’t enabled, GMass has removed the draft of your campaign from the Gmail Drafts folder.
The good news? It’s still pretty simple to send follow-ups to everyone from that campaign.
What we’ll do is we’ll create a new campaign that will serve as your follow-ups. You can still do everything with this campaign that normal auto follow-ups do (send based on user actions/behavior, scheduling, sending it as replies).
1. Head to Gmail and click the GMass follow-up campaign button
In the Gmail window, click the second button GMass has added to the right of the search bar.
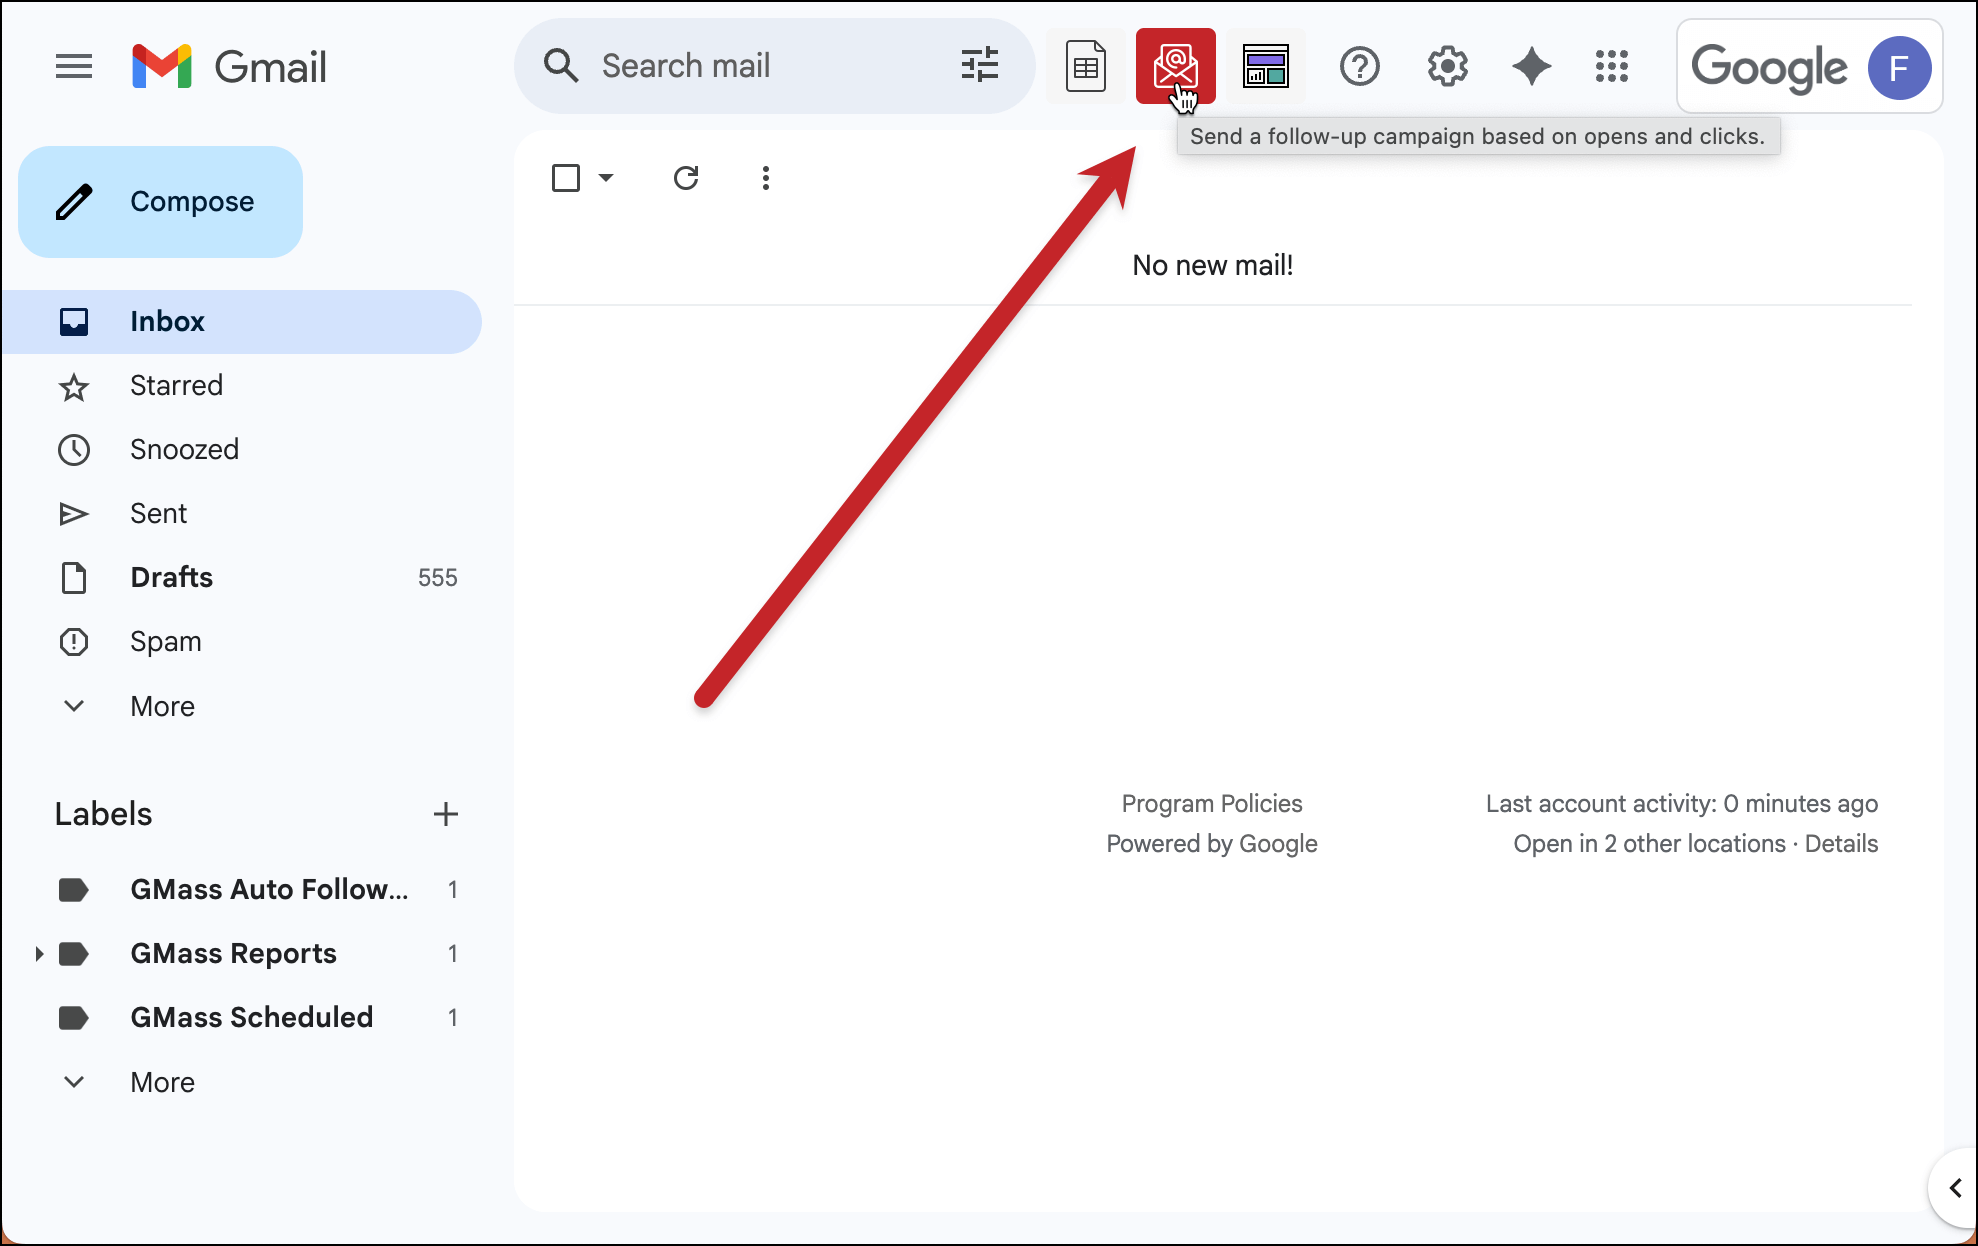
This button is to create a behavior-based segmented campaign.
In this case, we’re using a new campaign as our stand-in for auto follow-ups. Since we can’t add the follow-ups to the old campaign itself, we’ll make a new campaign that will serve the exact same purpose and operate the exact same way.
2. Choose your campaign from the dropdown list
Find the campaign you just sent in the dropdown list.
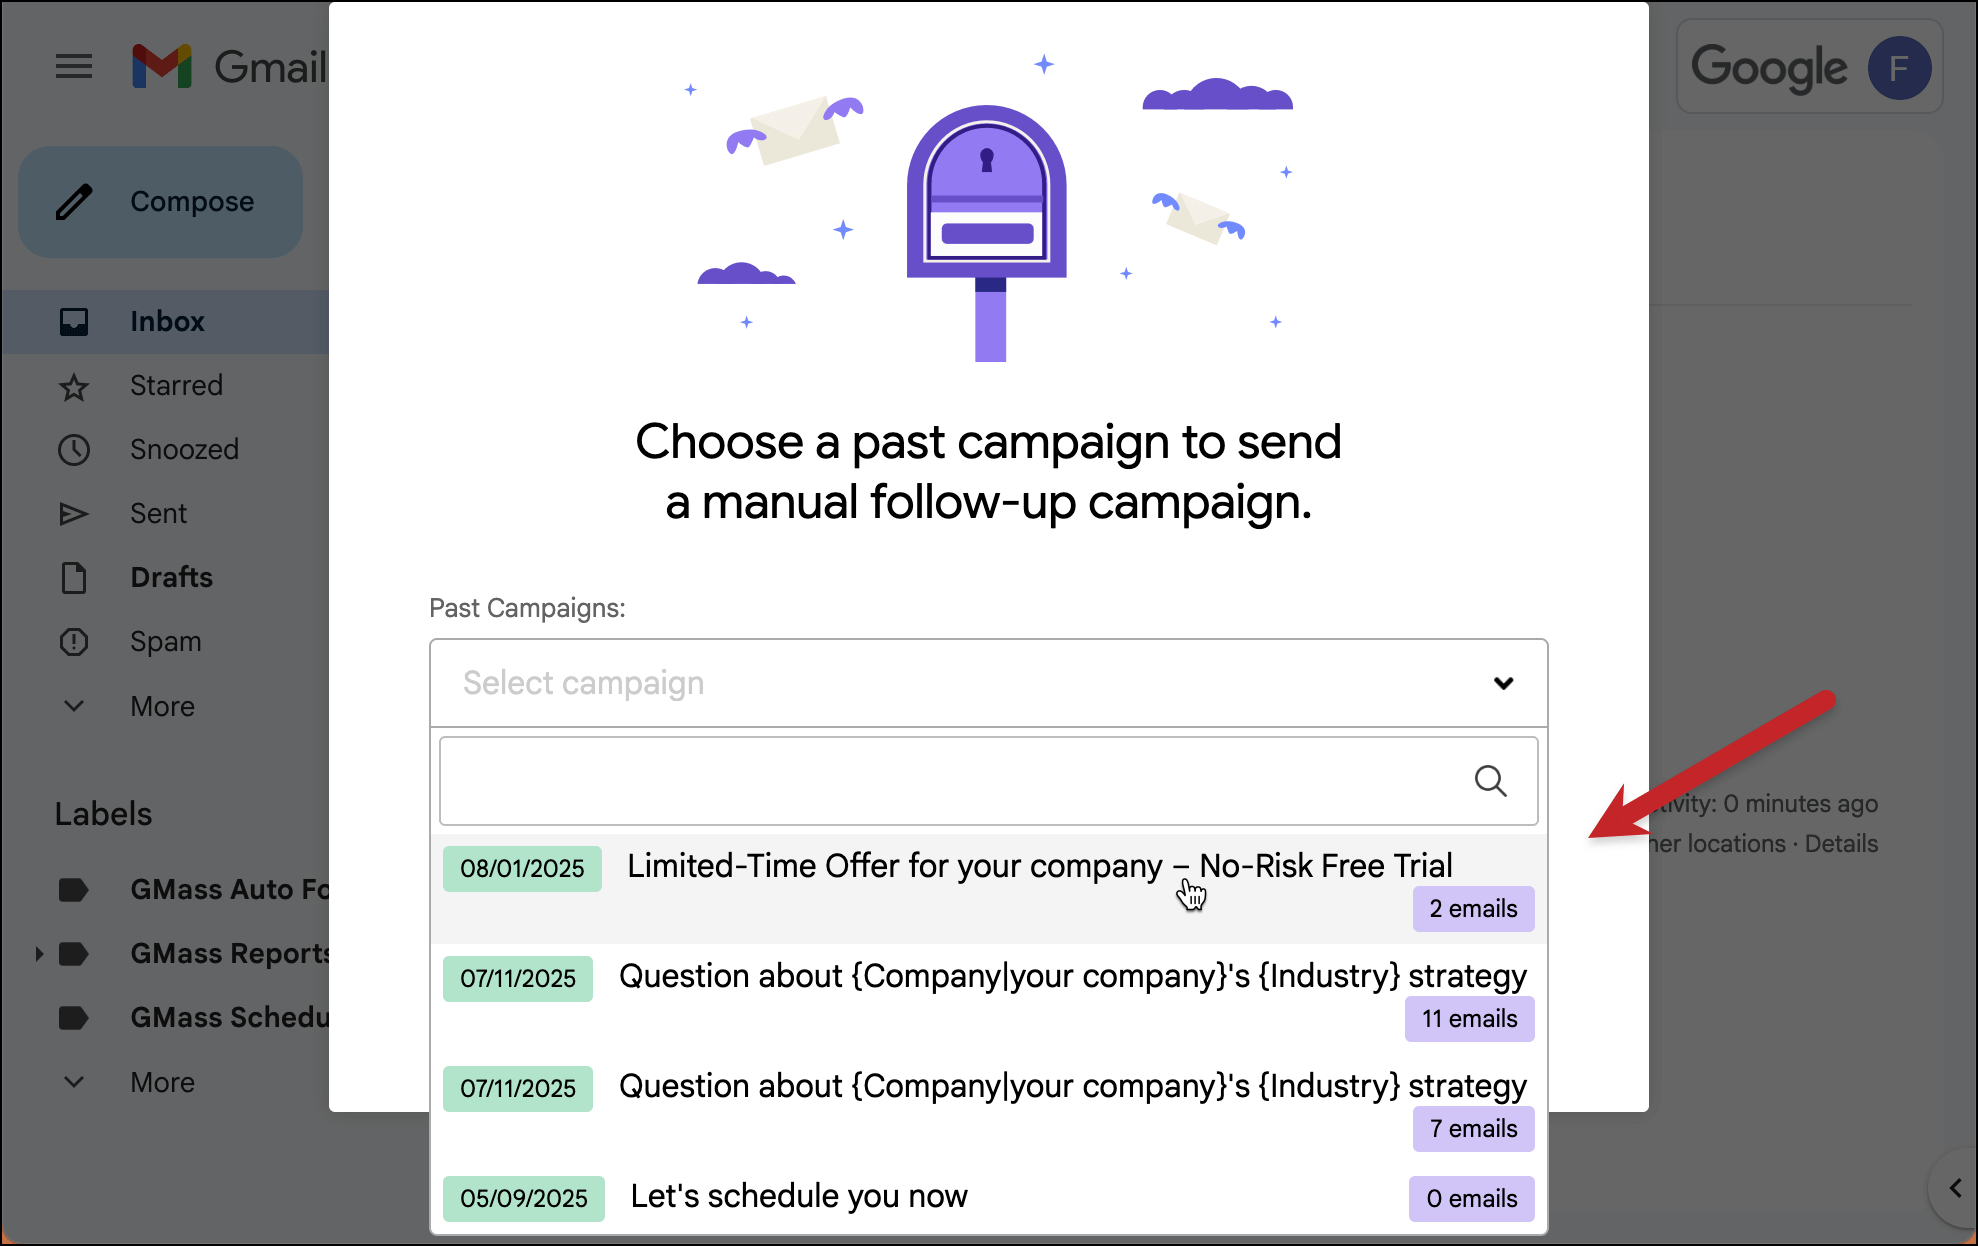
3. Choose “Sent”, “Didn’t Reply”, or whatever matches your desired action
If you want everyone from the initial campaign to get your first follow-up, choose “Sent” from the dropdown — then this follow-up campaign will go to everyone.
But if you only want to send your follow-ups to, say, people who didn’t reply to the initial campaign, choose “Didn’t Reply”. You could also choose “Didn’t click” or any of the other options here.

4. Type in the initial message (which is first follow-up)
Now type your message into the Gmail compose window.
This will be the first “follow-up”, even though technically this is a new campaign.
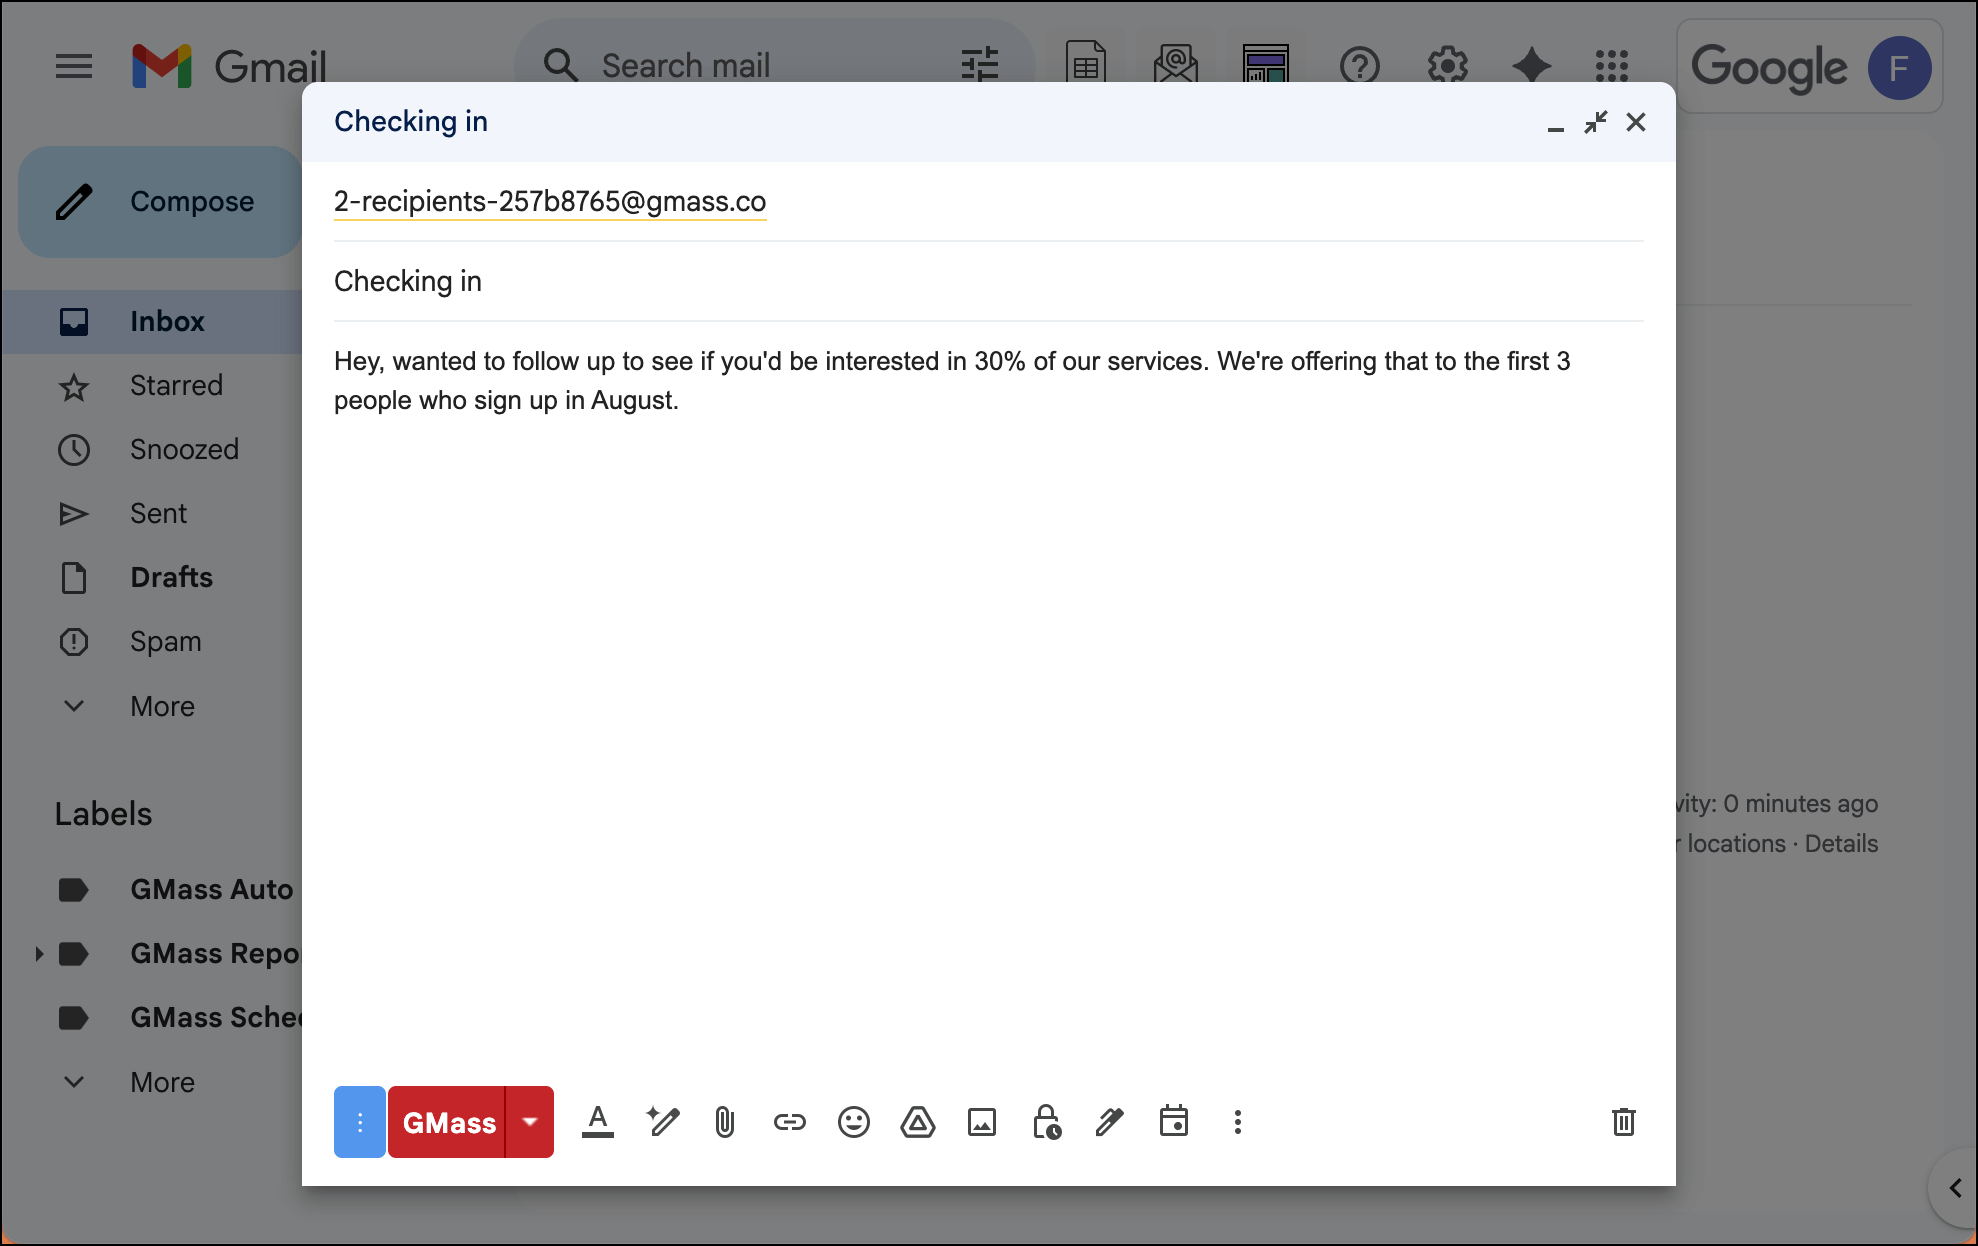
5. Optional: Decide if you want this to go out as a reply in the same thread as your previous campaign or with its own subject line
Even though we’re using this new campaign as a follow-up, by default it would go out in a new thread with a new subject line.
You can change that, however, with a setting in the GMass settings box.
If you want this first follow-up message to go out as a reply to the previous campaign, in the Advanced section, choose Send as: Replies and choose your prior campaign from the dropdown box.

6. Add more auto follow-ups if desired
Now you can add more stages of follow-ups here.
You’ll add them to this new follow-up campaign. So in the settings box, type in your next auto follow-up messages.

Note that your time frame on these follow-ups (e.g., 3 days) is from when you send out this new follow-up campaign, not from your original campaign.
7. Schedule your first message, then send
The last step here is to schedule when you want the first message in this new follow-up campaign to send. You’ll schedule that in the normal Scheduling area of the settings box.
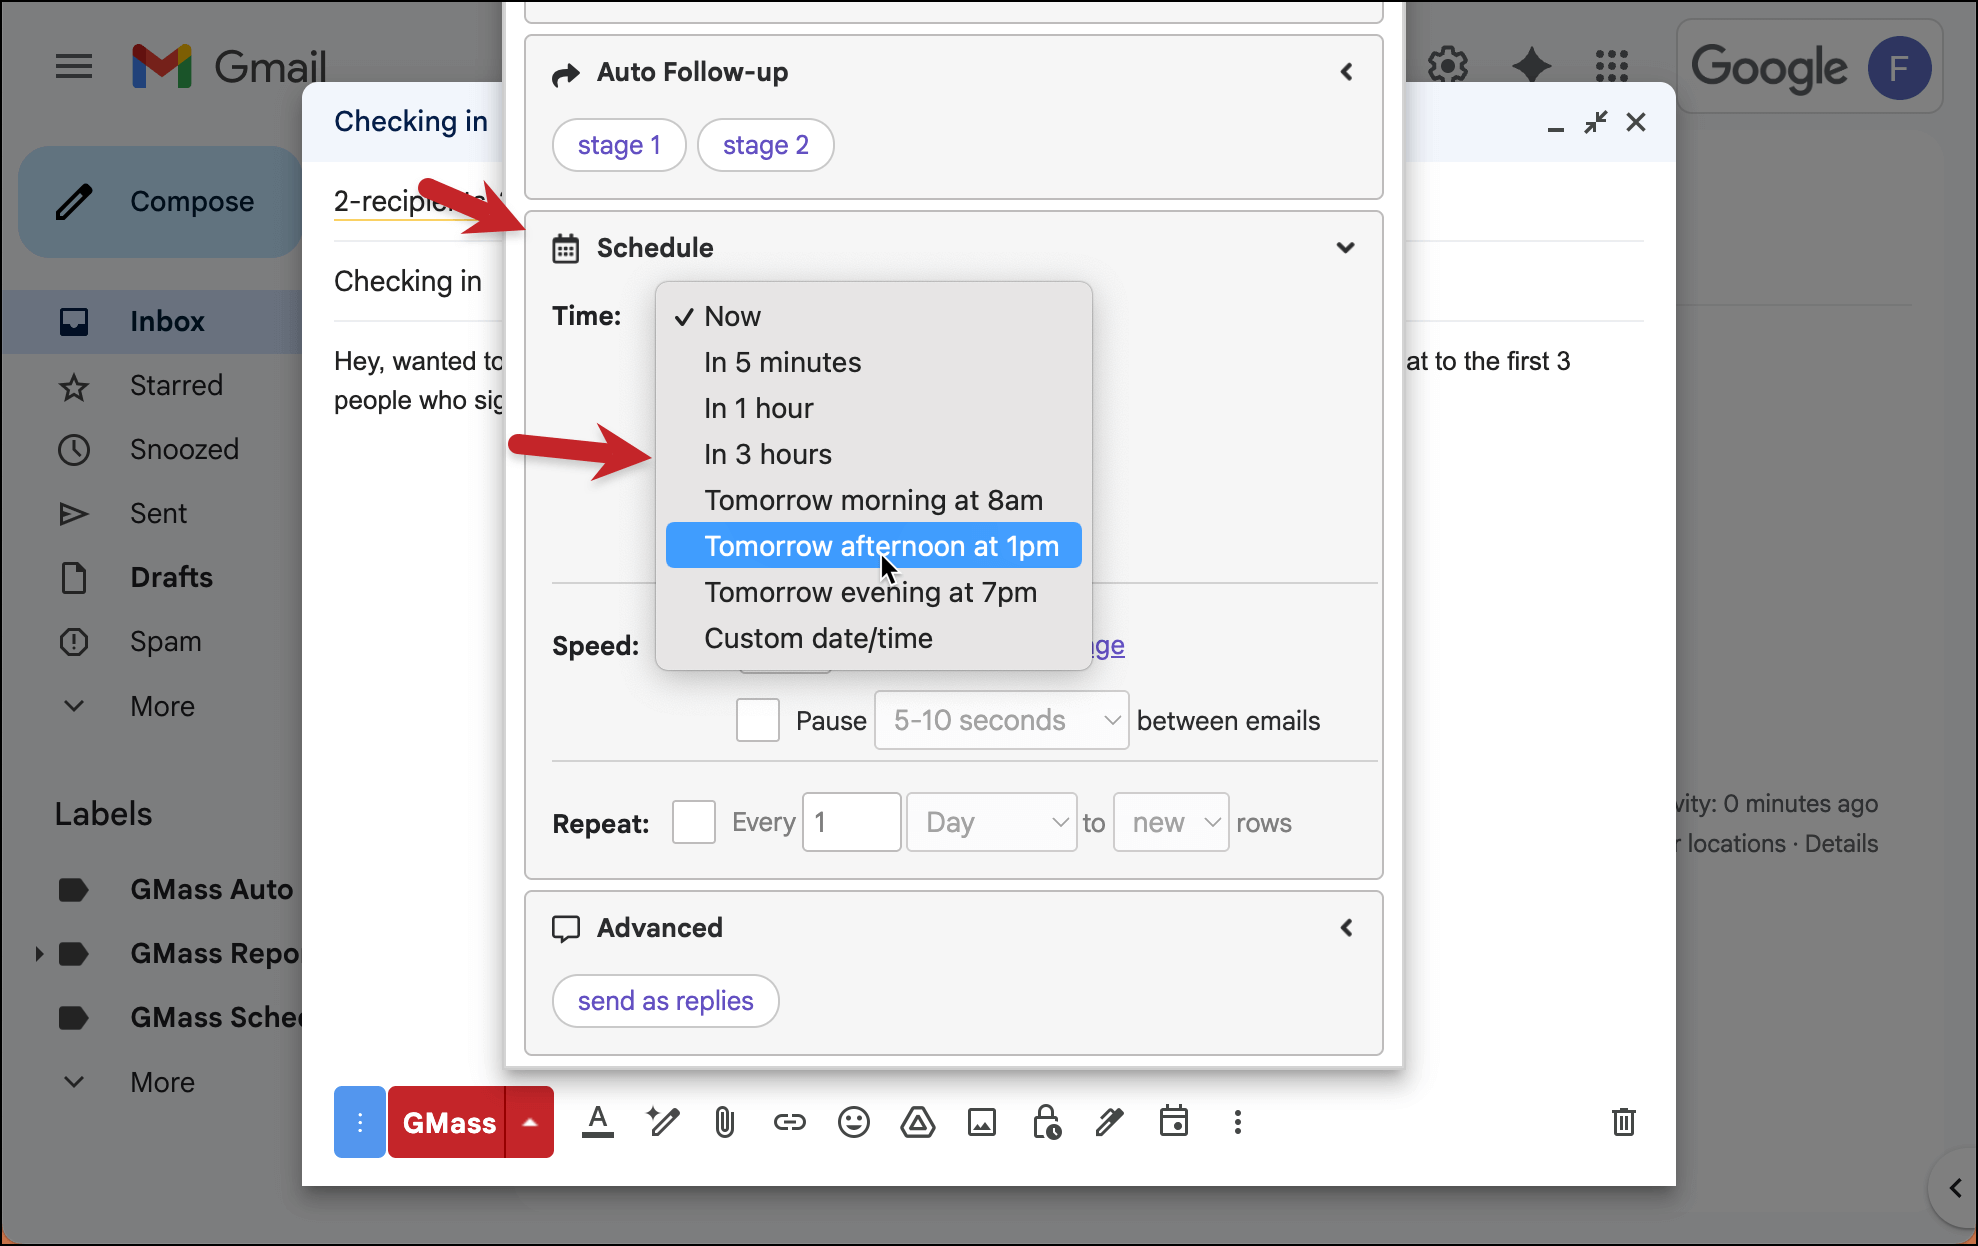
Pick whatever time works for your first follow-up.
8. Hit the red GMass button to send this follow-up campaign
You’re all set to send this new campaign which will serve as your auto follow up sequence.
✅ You’re all set.
More resources
- Here’s our full guide on how to cancel, pause, edit, or add auto follow-up emails
- Need to push an auto follow-up out immediately rather than wait for its scheduled time?
- Here are a few more looks at the technique I used in this article: Our guide to segmented, behavior-based campaigns and an article on how to send a follow-up email campaign manually
- You may, at some point, want to know how to remove someone from an auto follow-up sequence
- Did you know you can send unlimited follow-up stages with GMass?