
Want to track down every single email in your inbox that’s waiting on you for a reply?
It’s easy to overlook one or two dangling threads. Between the way Gmail threads messages and your inbox filling up throughout the day, it can feel too easy to forget there’s a message still waiting on you.
We recently rolled out The Reply Project here at GMass, which is a tool to help you blaze through your inbox and get through your replies 10x faster than you ever have before.
But if your inbox has tons of emails in it… it can sometimes be intimidating to get through it. Even at 10x speed.
So I thought it would be great to figure out a way we could find and label every email in your inbox that’s waiting on your response. That way, you could search by that label in Gmail or in The Reply Project to focus solely on emails that need your attention.
Unfortunately, there’s no built in way to search for those emails in Gmail. None of their search operators will surface only message threads where the last message came from someone other than you.
So we’ll need to use a Google Apps Script to pull this off.
In this tutorial, I’ll show you how to set it up. (Don’t worry, it’s all cut-and-paste; no coding know-how required.)
Here’s how to have Gmail automatically label any threads waiting on you for a reply — and then how to respond to those messages faster than you ever have before with The Reply Project.
Add Needs Reply Labels: Table of Contents
- Step 1: Preparing the Google Apps Script
- Step 2: Automating the Process
- Step 3: Using Your New Label to Streamline Replies in The Reply Project
- You’re All Set!
Step 1: Preparing the Google Apps Script
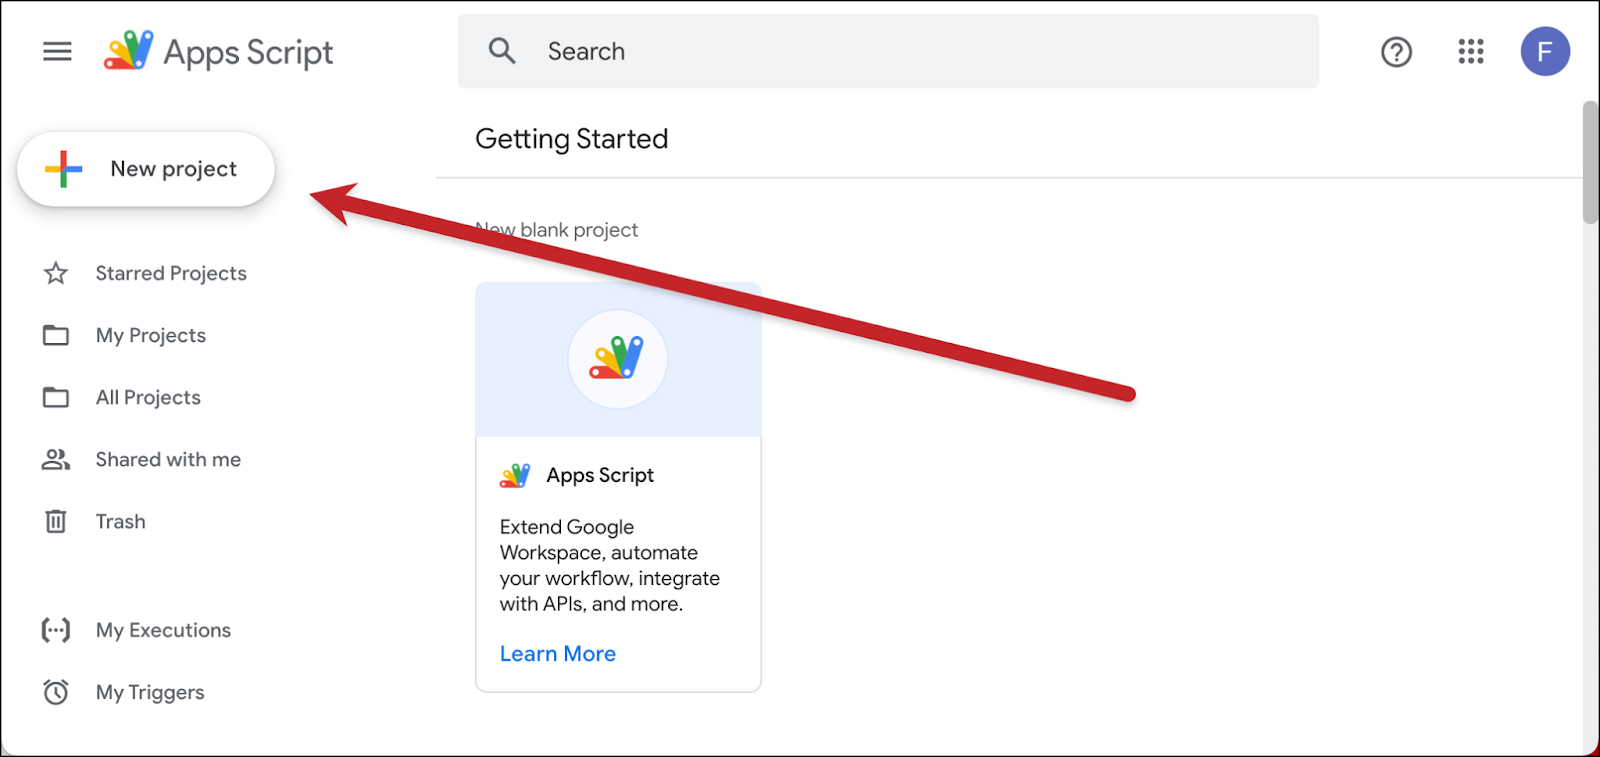
Head to the Google Apps Script home page and click the New project button on the sidebar.
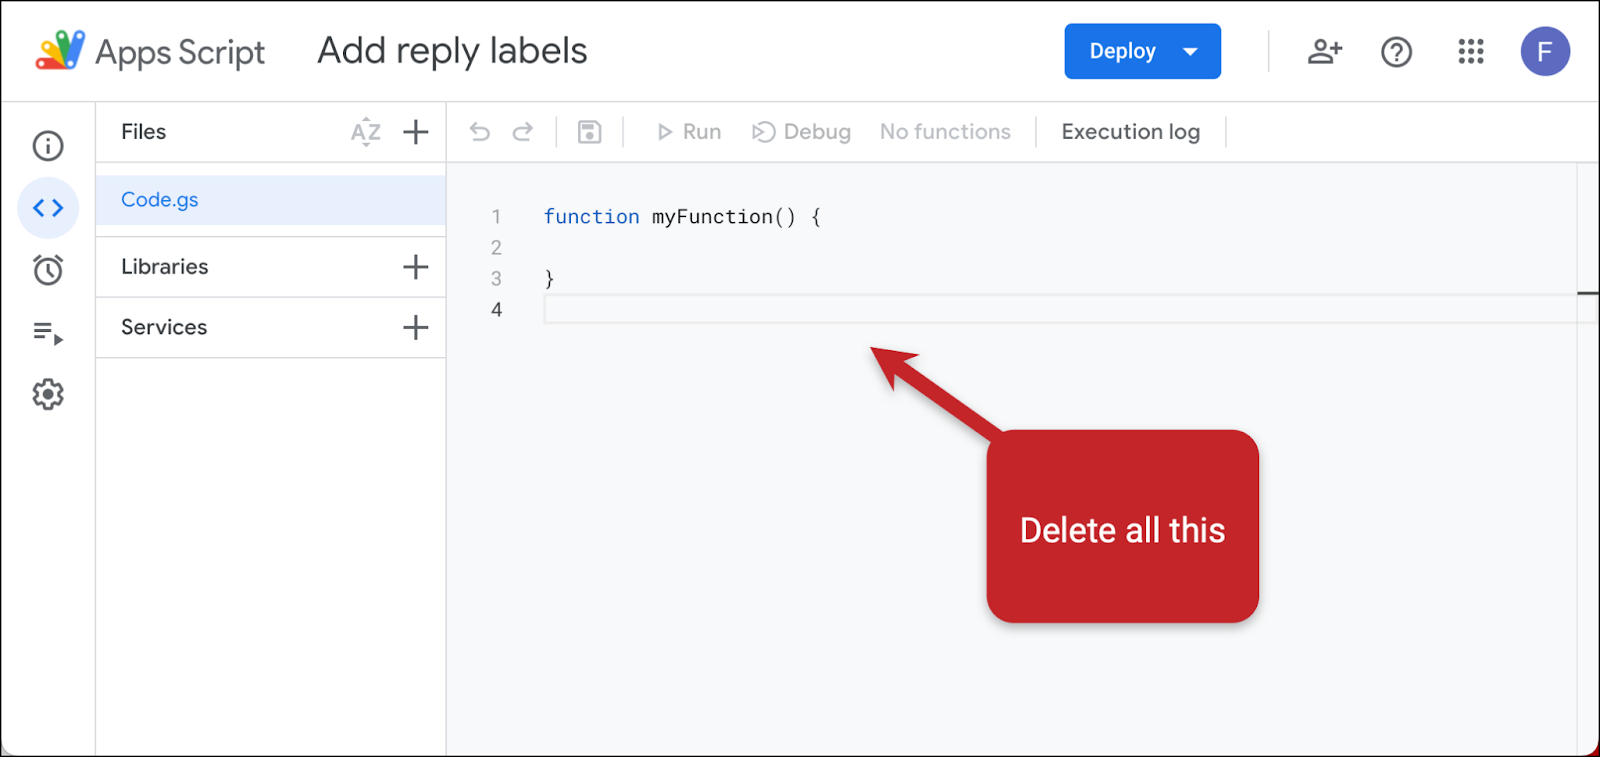
You can replace the title (Untitled project) with whatever name you’d like. I went with Add reply labels.
Then click into the main scripting area and delete everything in there (function myFunction () {}).
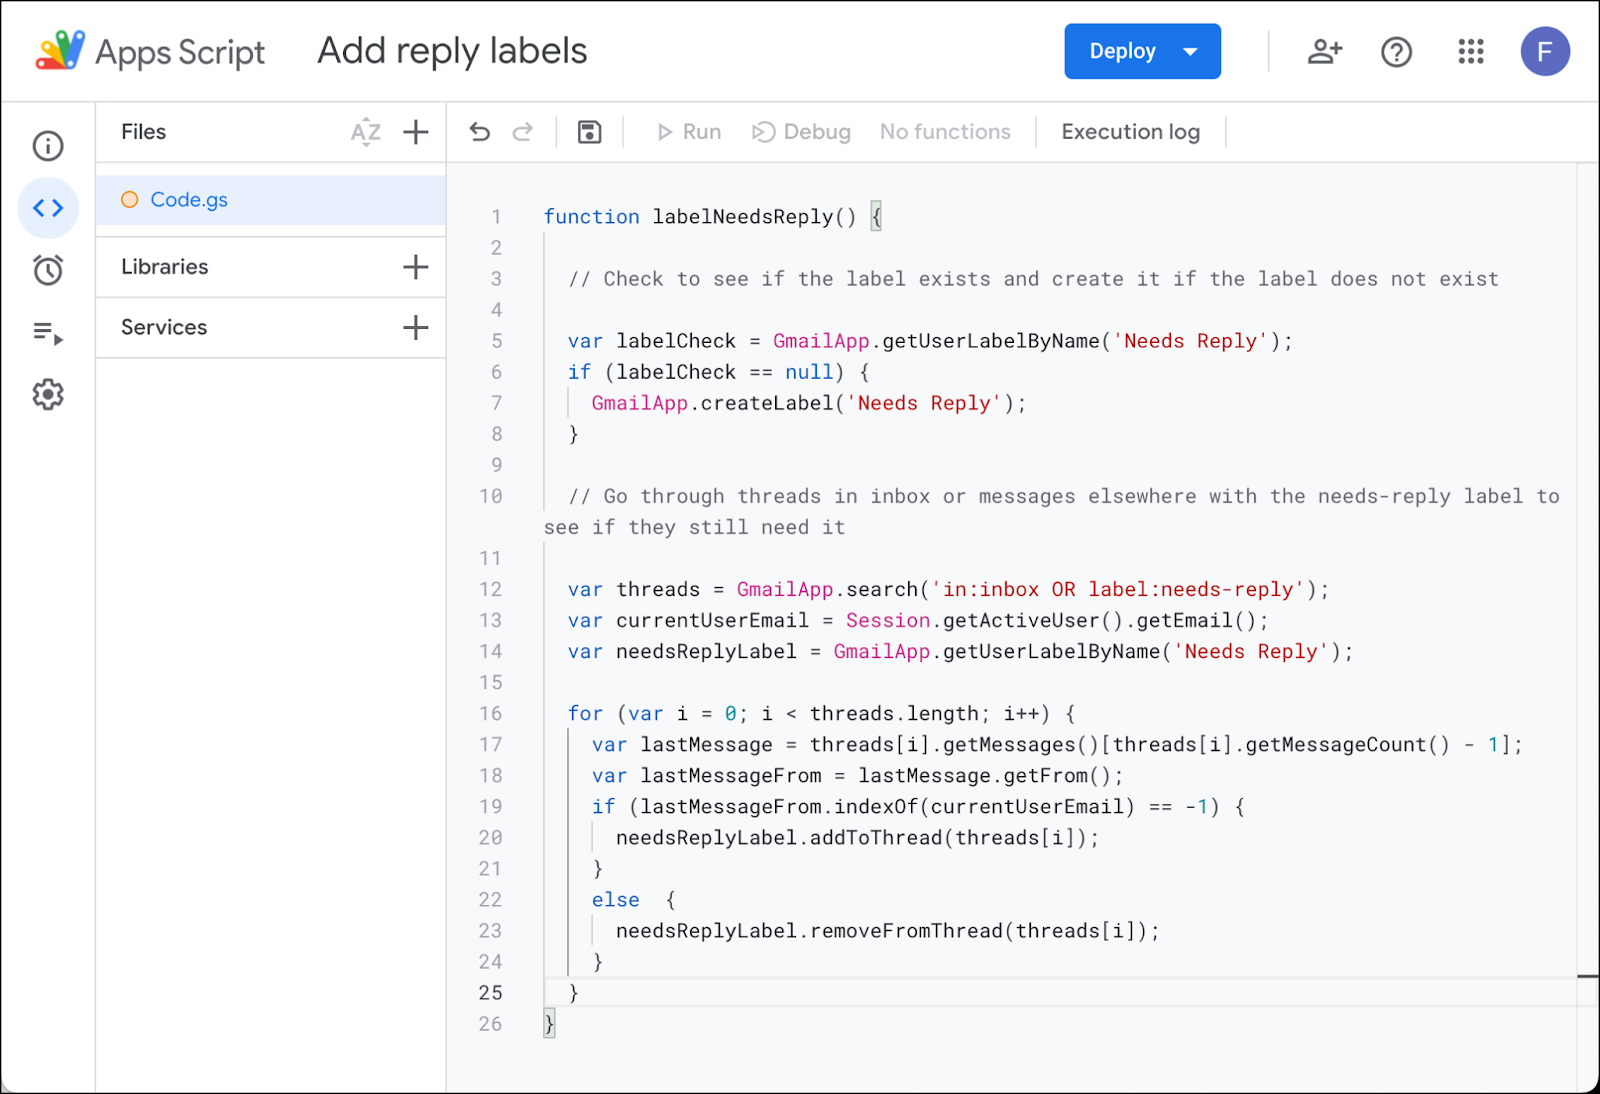
Copy all the code here.
See the Pen
Untitled by Sam G (@samgmass1)
on CodePen.
Then paste it into the Google Apps scripting area.
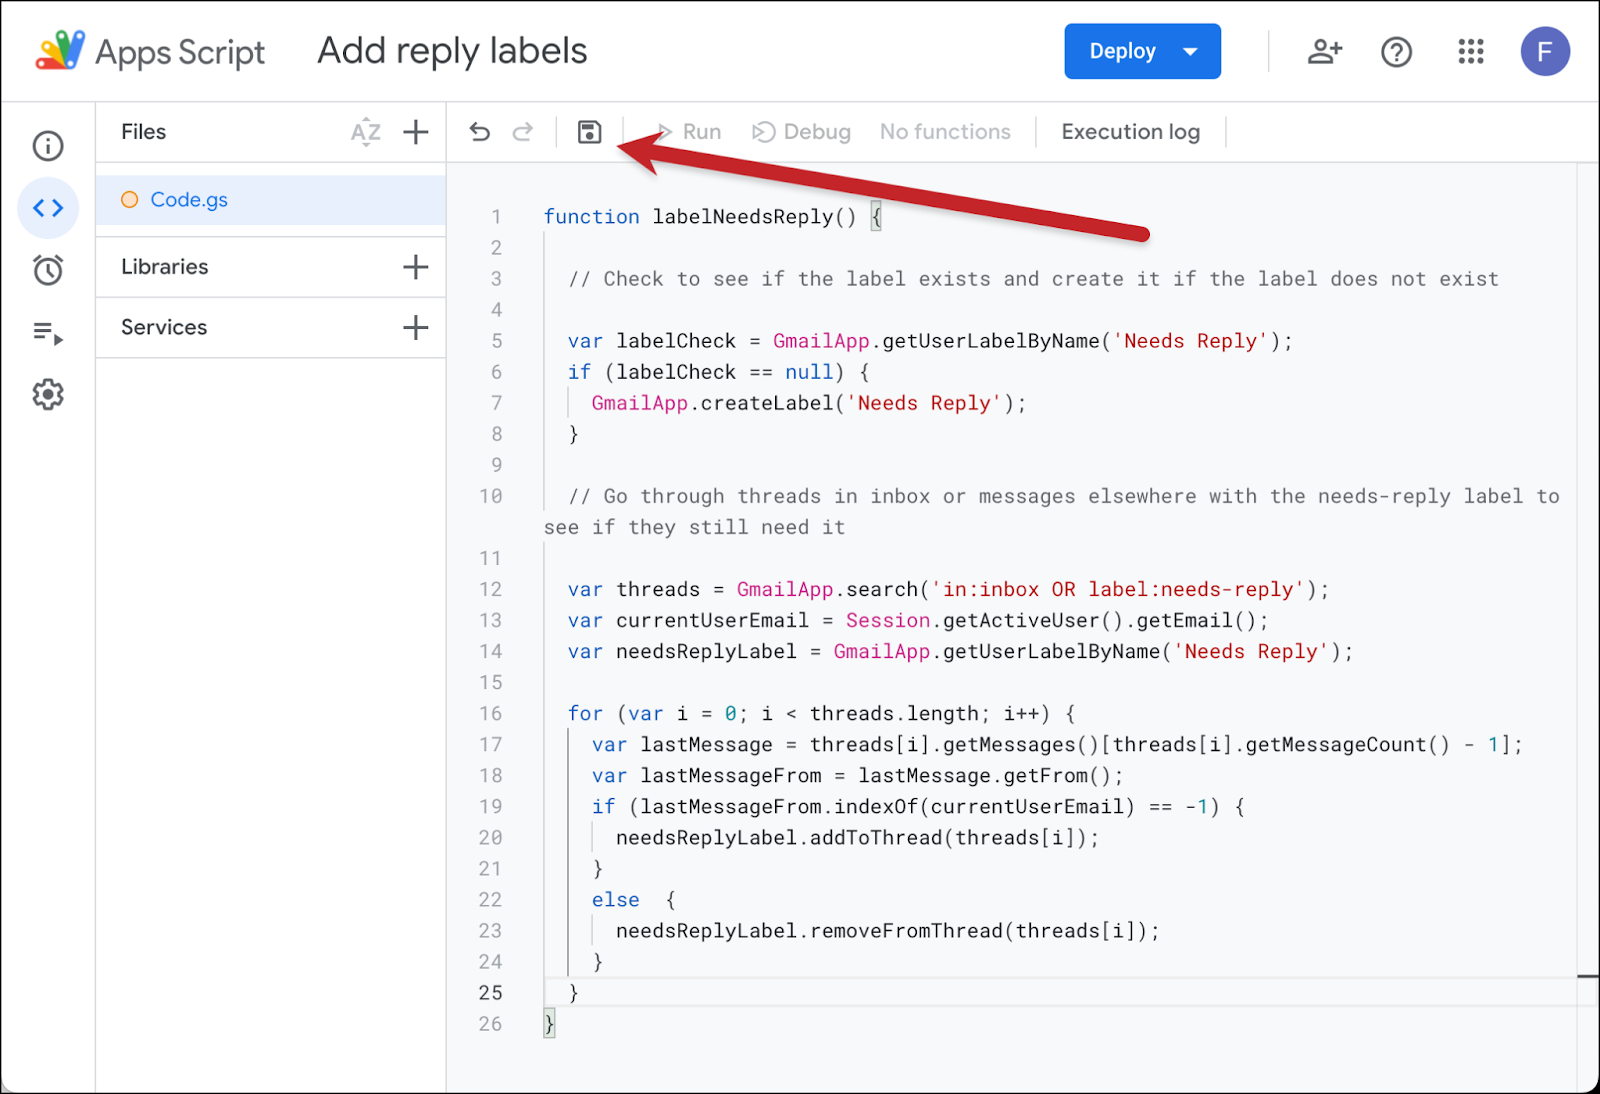
Click on the floppy disk icon to save.
Click on Run.
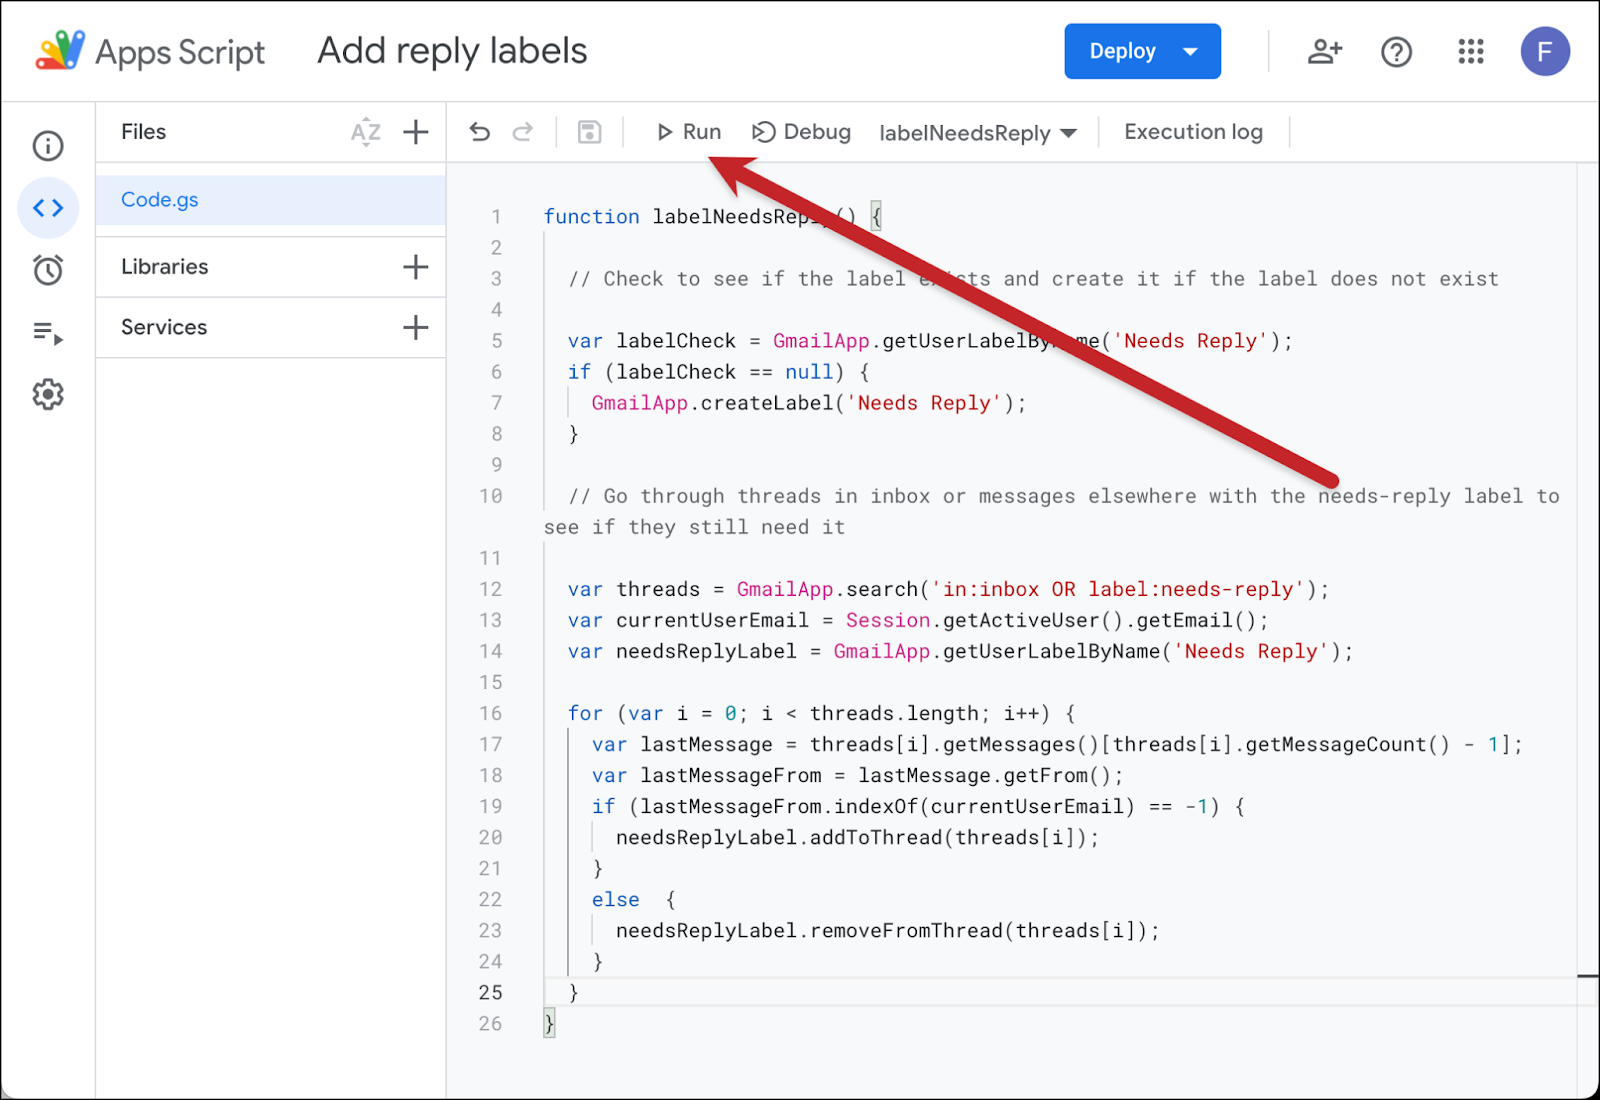
Google will think for a moment, then you’ll need to give the script permission to run. Click Review permissions.
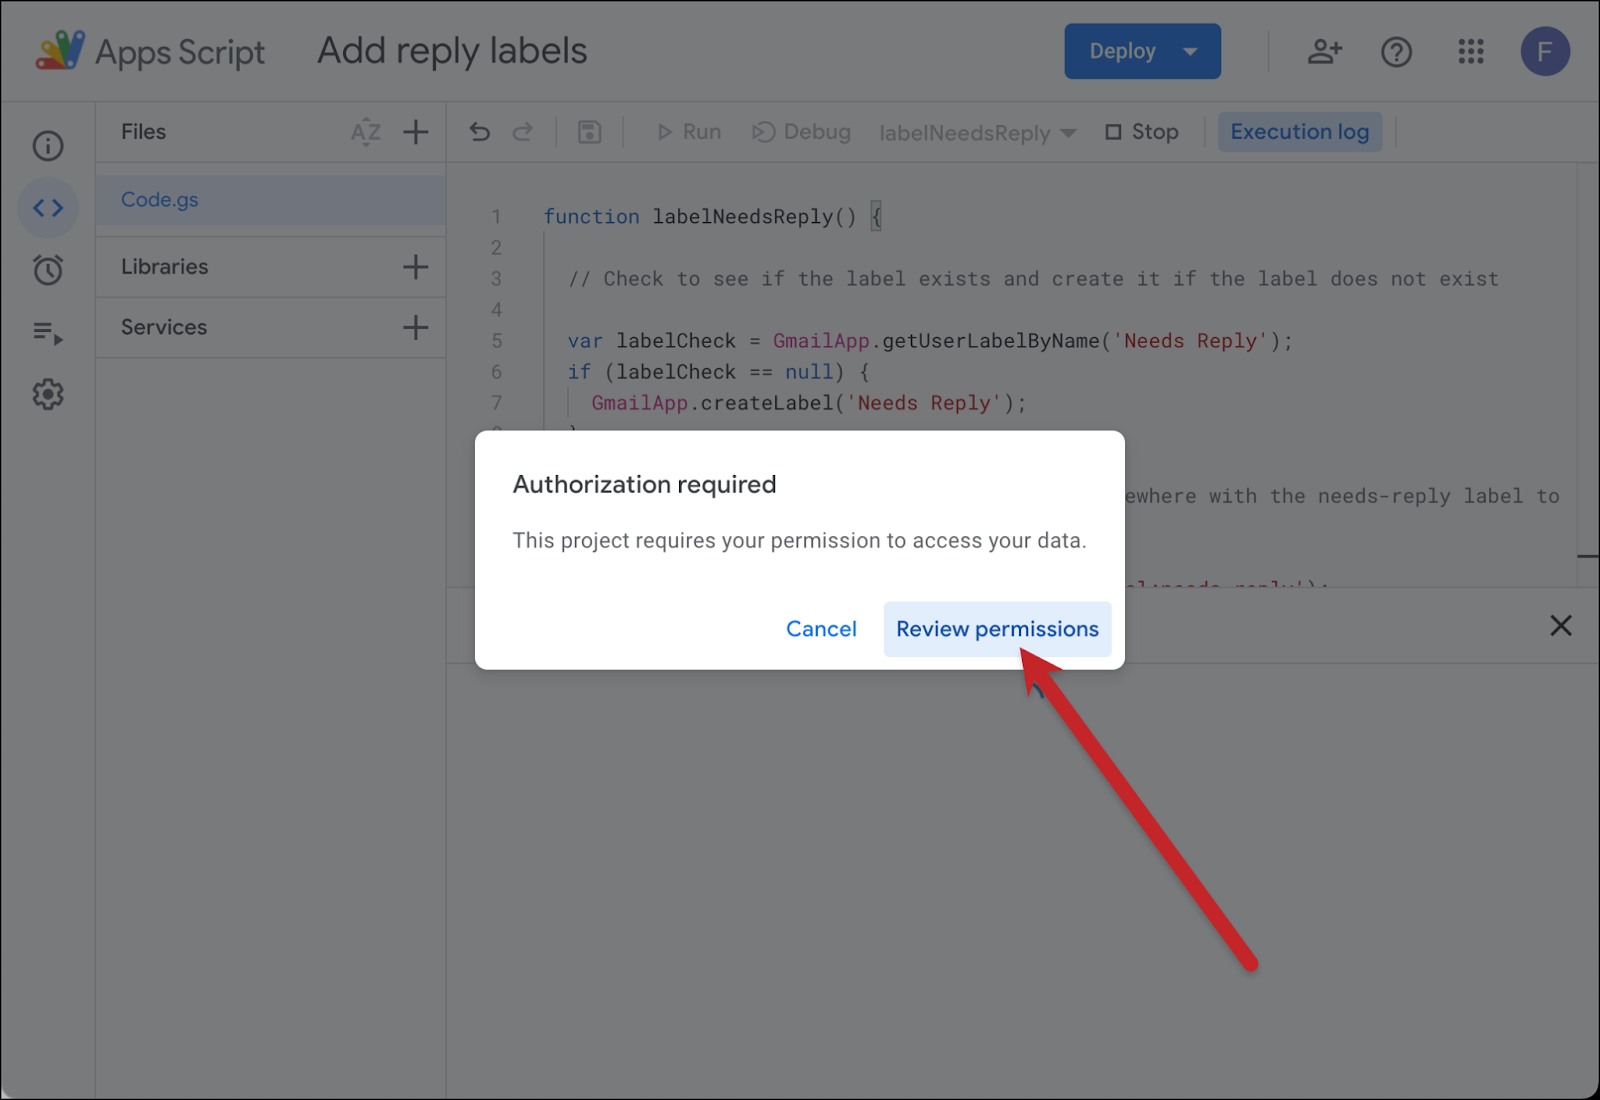
Choose your account. Then click Allow.
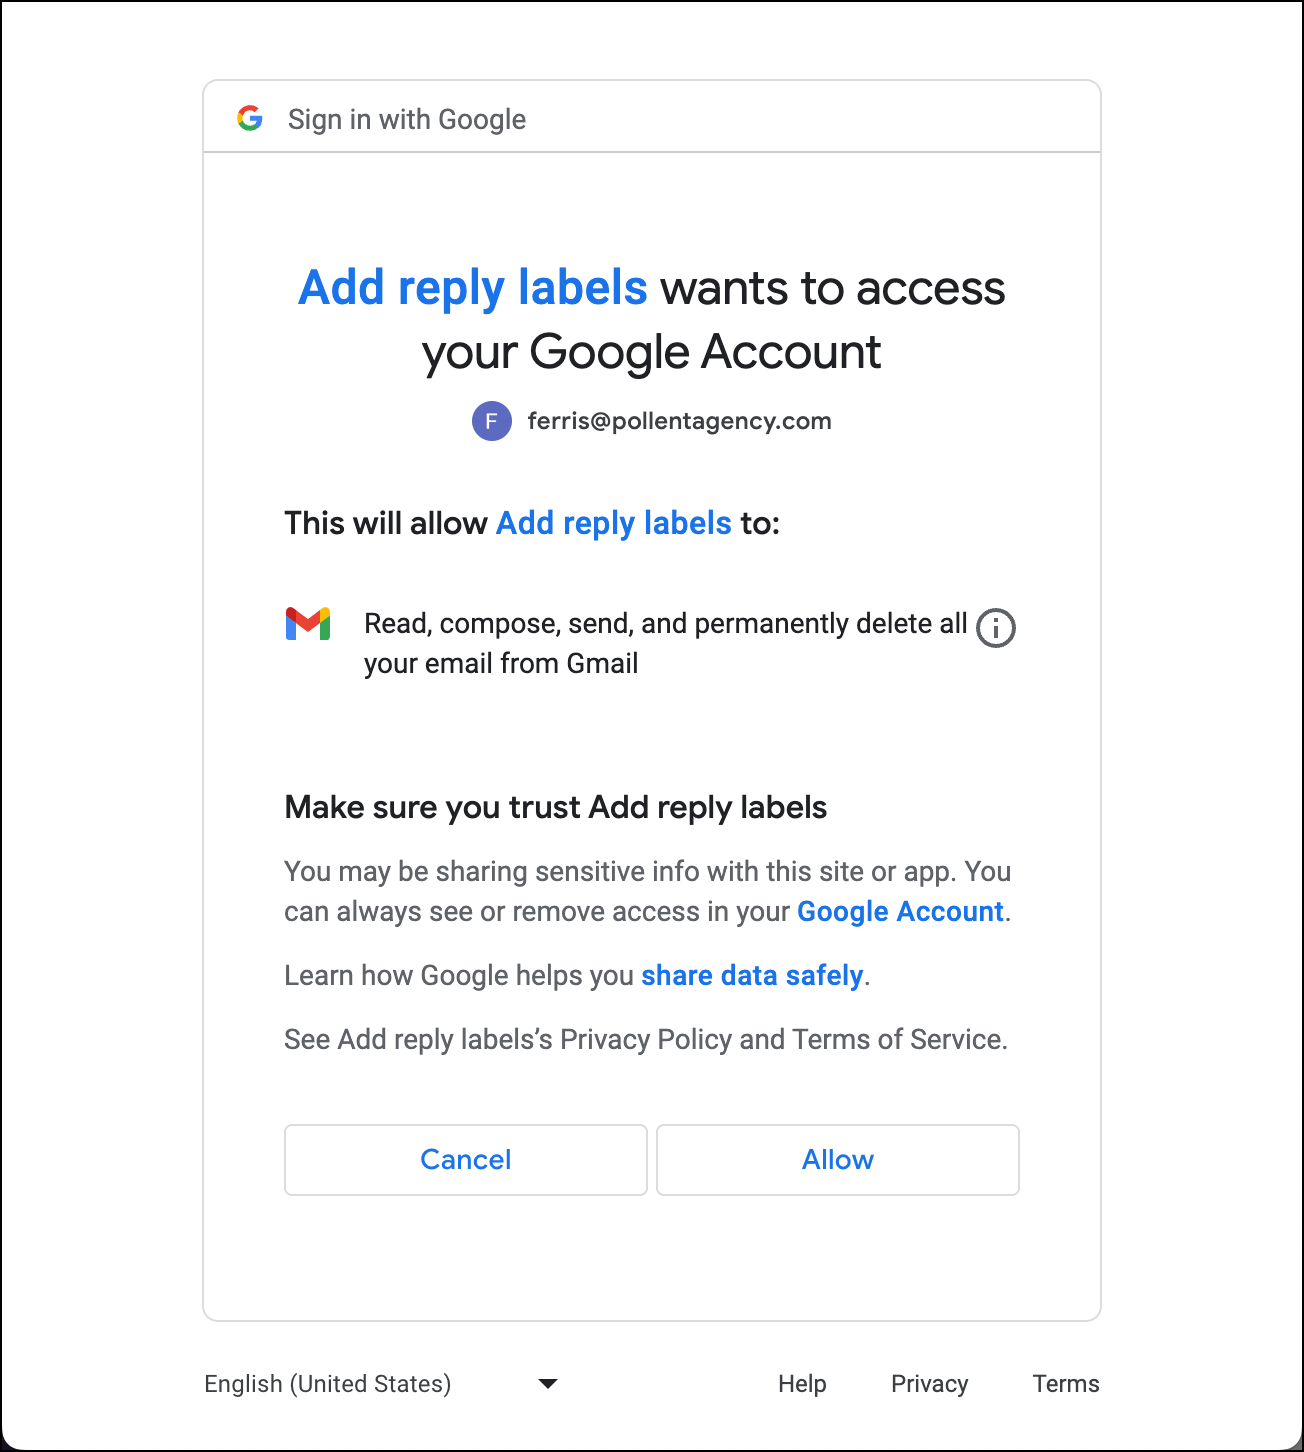
Note: You may get a warning that the script is unsafe, if you’re running it from a regular @gmail.com account. In that case, proceed and give it permissions anyway. You’re the only one running this script so it’s not risky, Google is just being extra cautious.
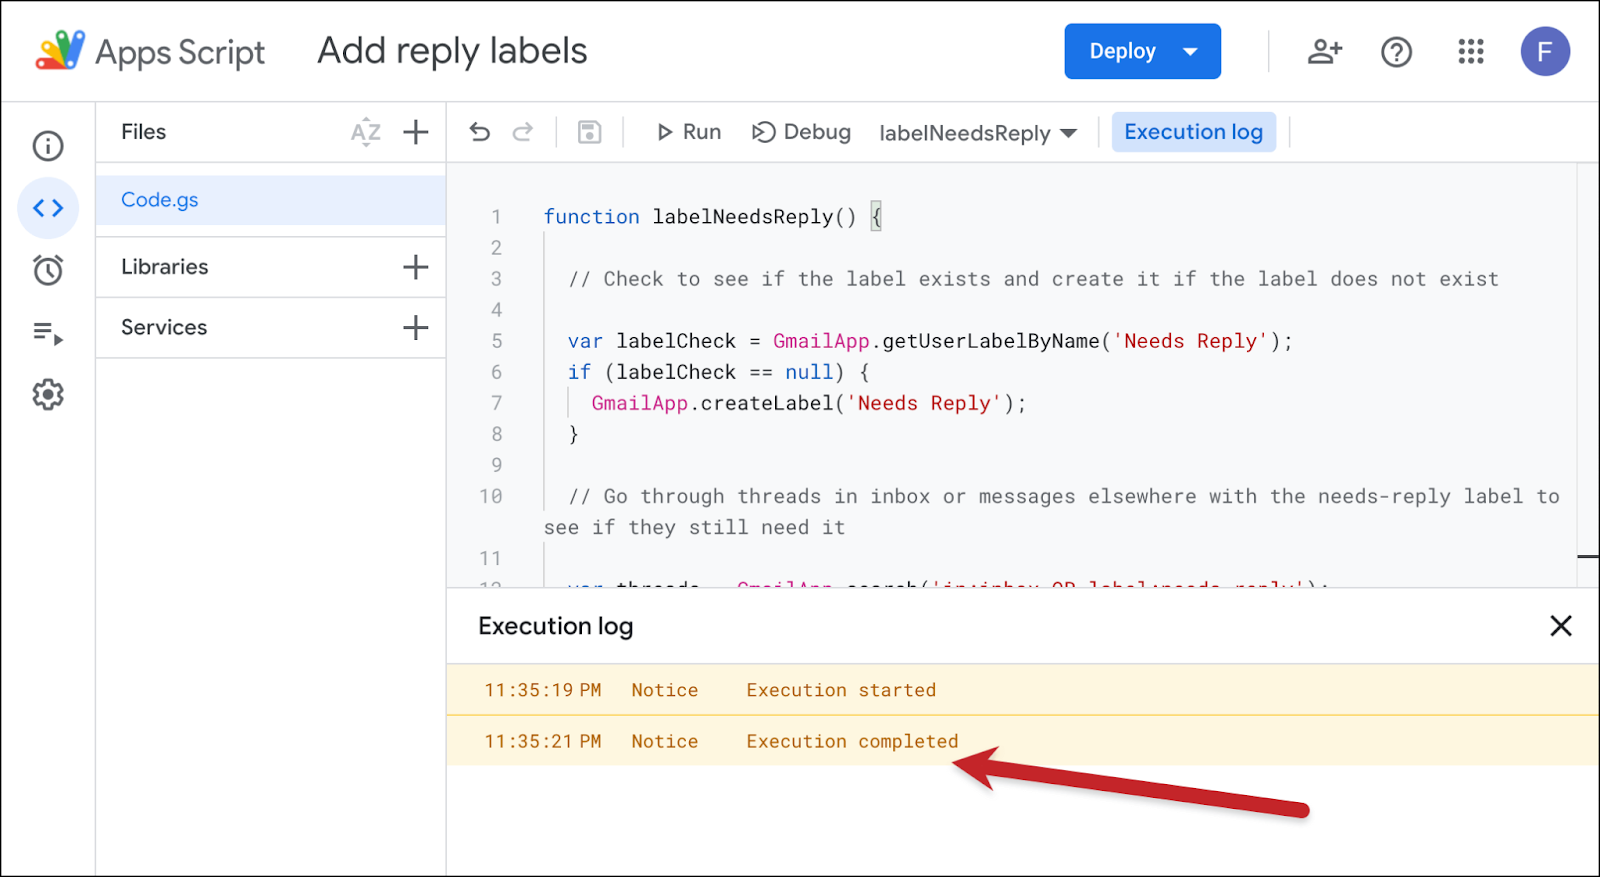
Assuming all went well, you should see the triumphant Execution completed in the Apps Script log.
Head over to Gmail and refresh the window.
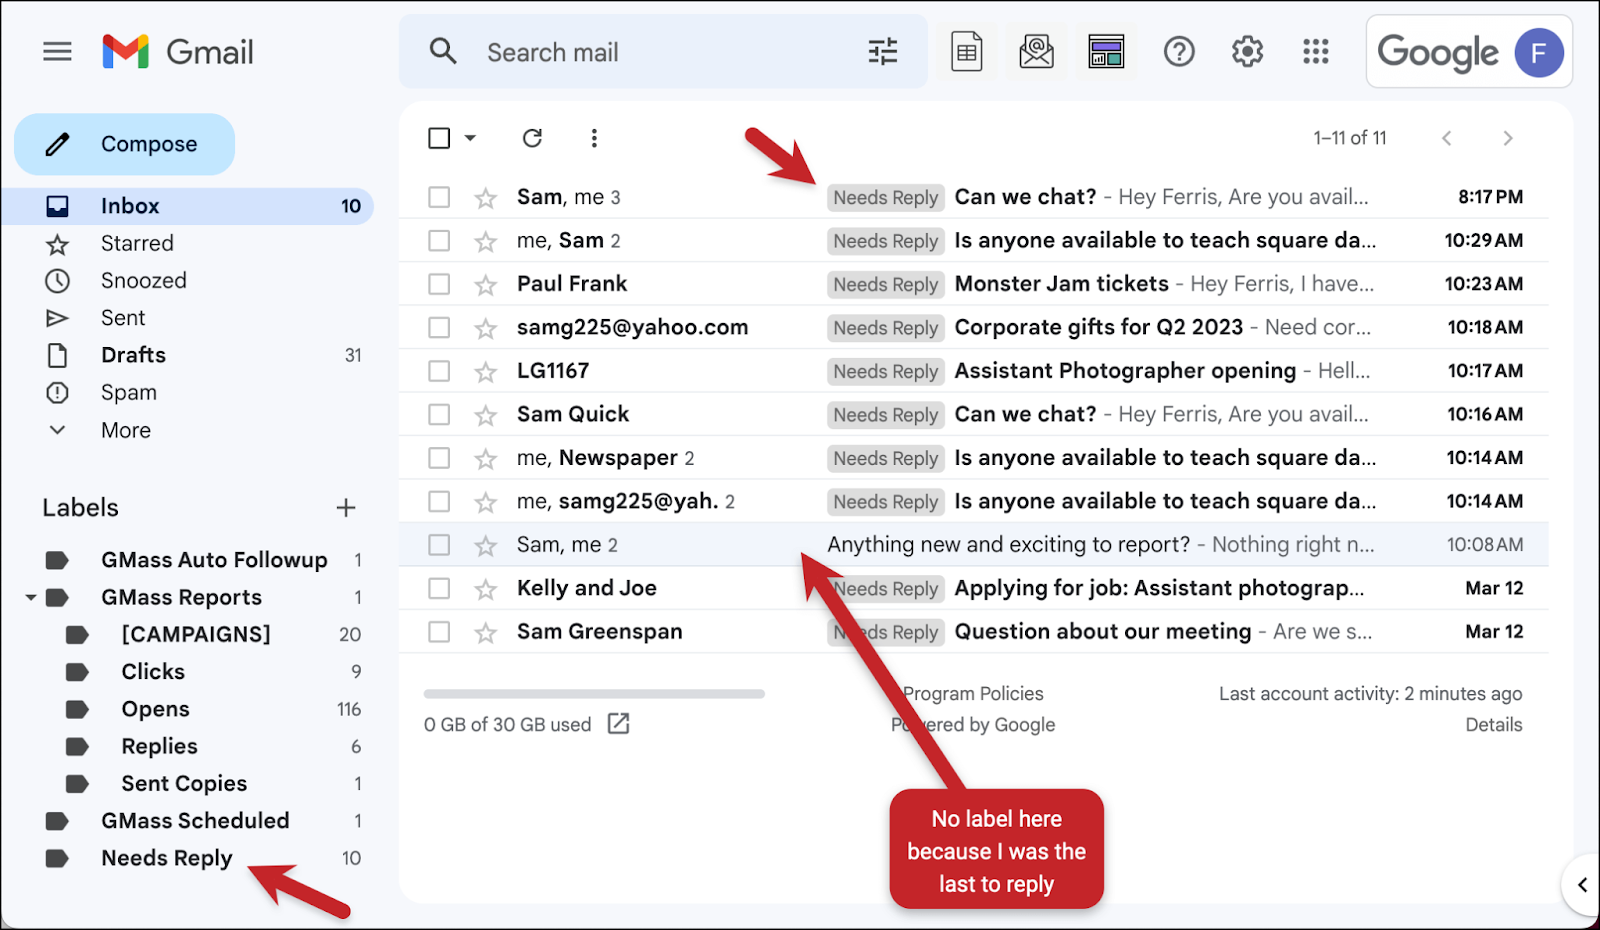
You’ll see that the script created the Needs Reply label and applied it to the correct threads in your inbox.
Now every email in your inbox where someone other than you was last to reply now has the Needs Reply label. Any emails where you were the most recent one to reply in the thread will not have the label. And the Needs Reply label is also on your sidebar.
Step 2: Automating the Process
You can manually run this script any time by going back to the main Apps Script page, clicking into the script, and hitting Run.
But for the sake of convenience, we want this script to process the emails in our inbox automatically.
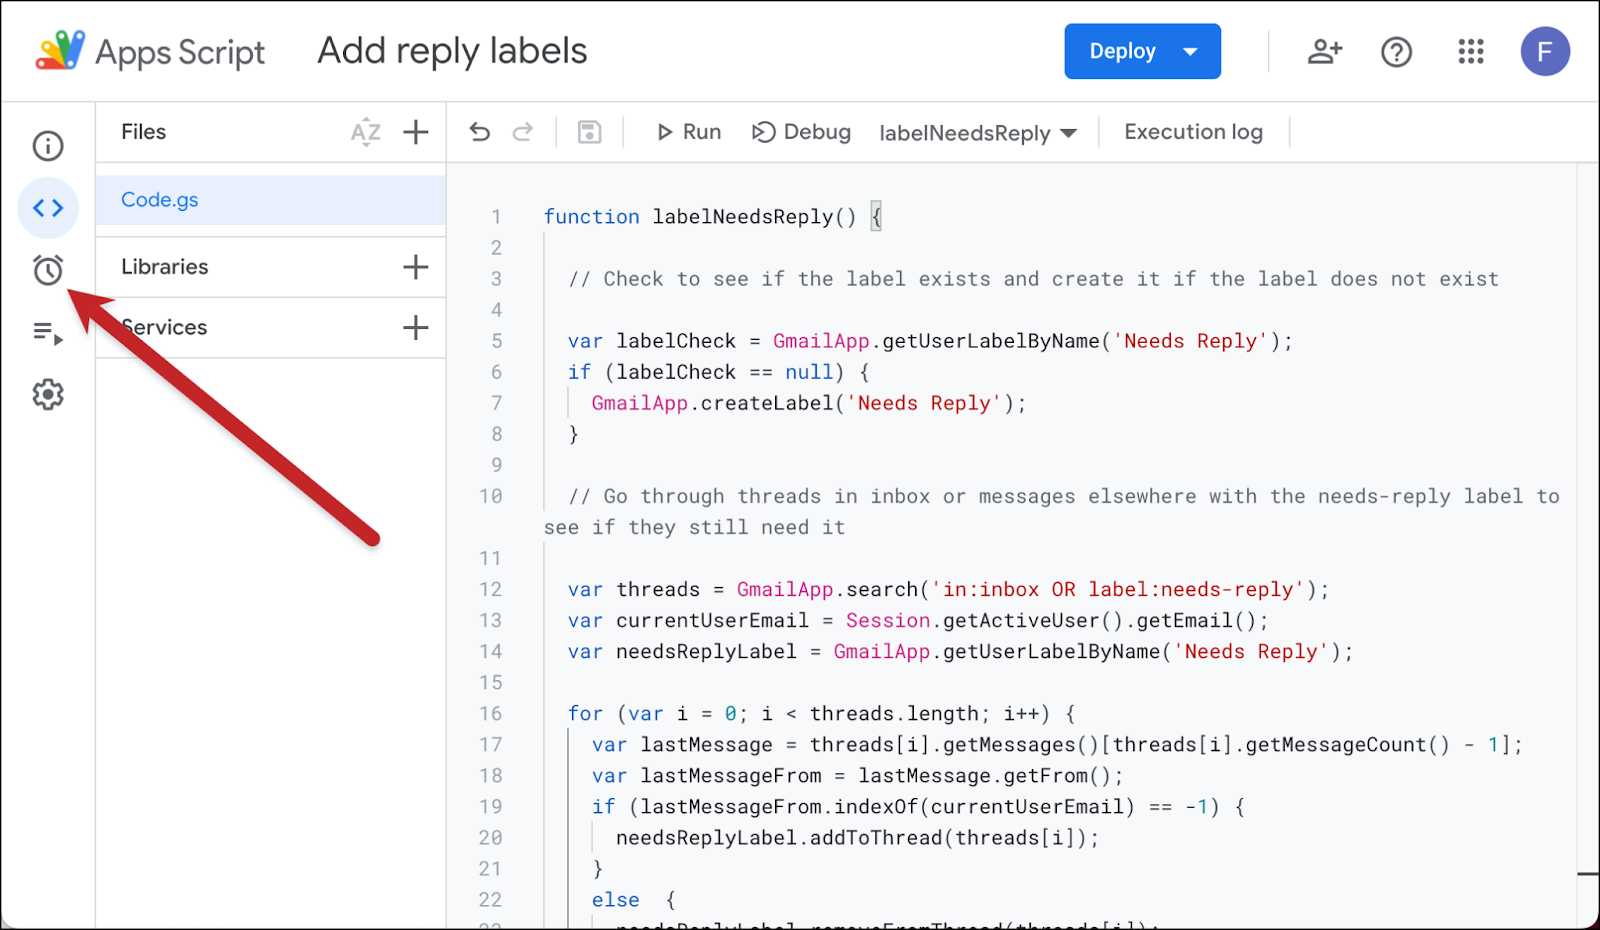
Go back to the Apps Script tab and click on the stopwatch icon on the left sidebar.
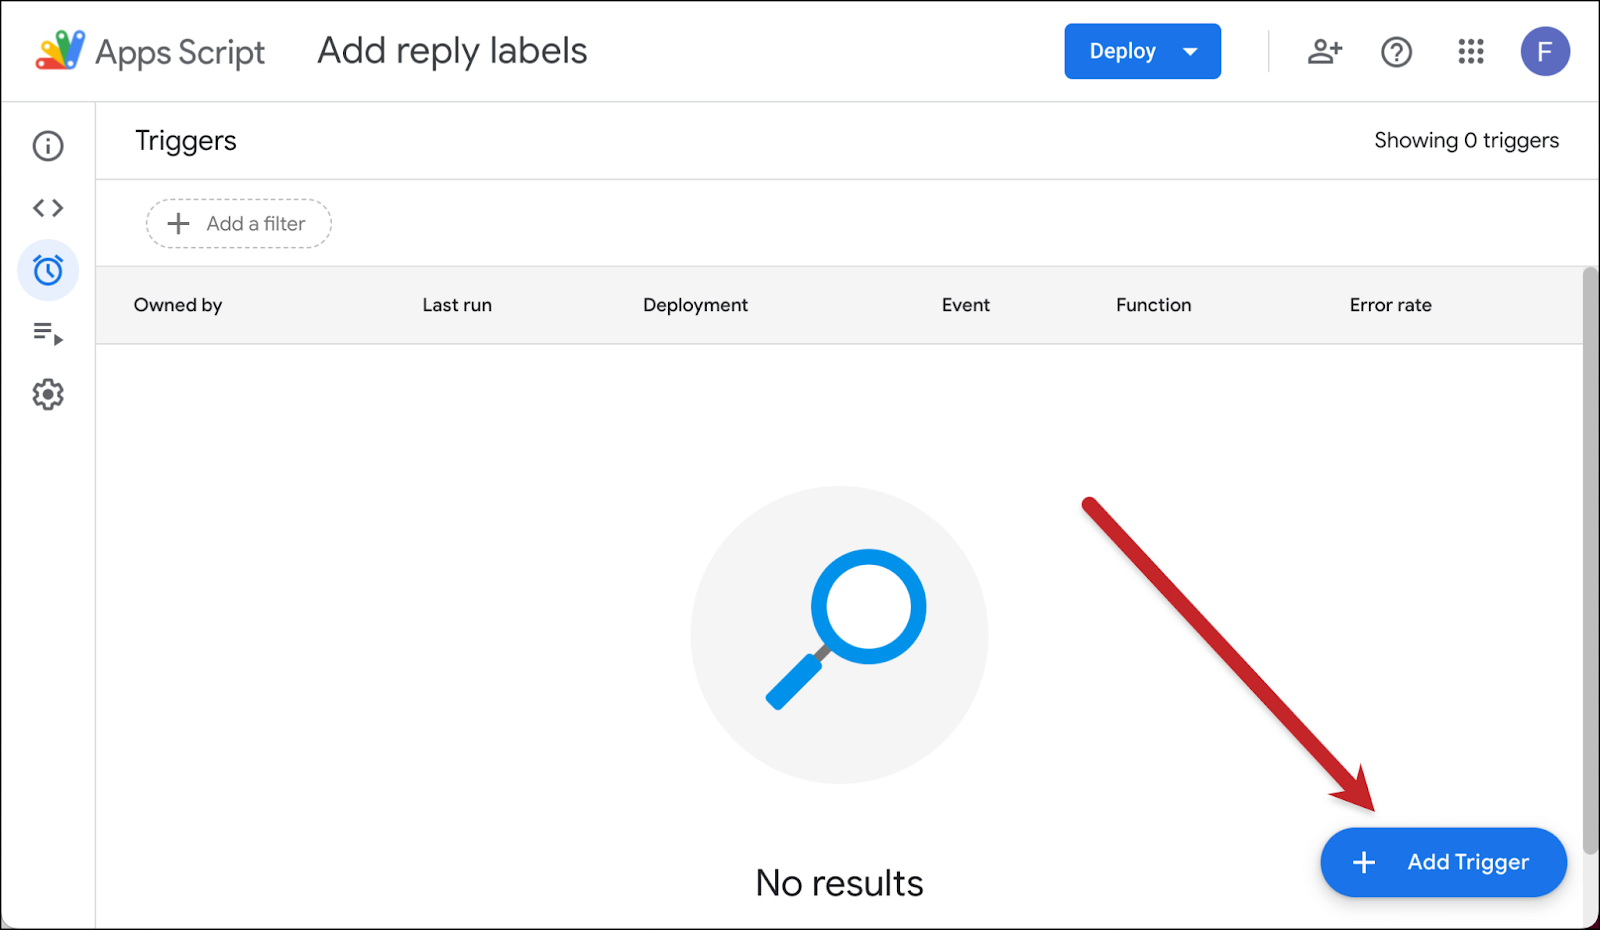
Now click on the Add Trigger button.
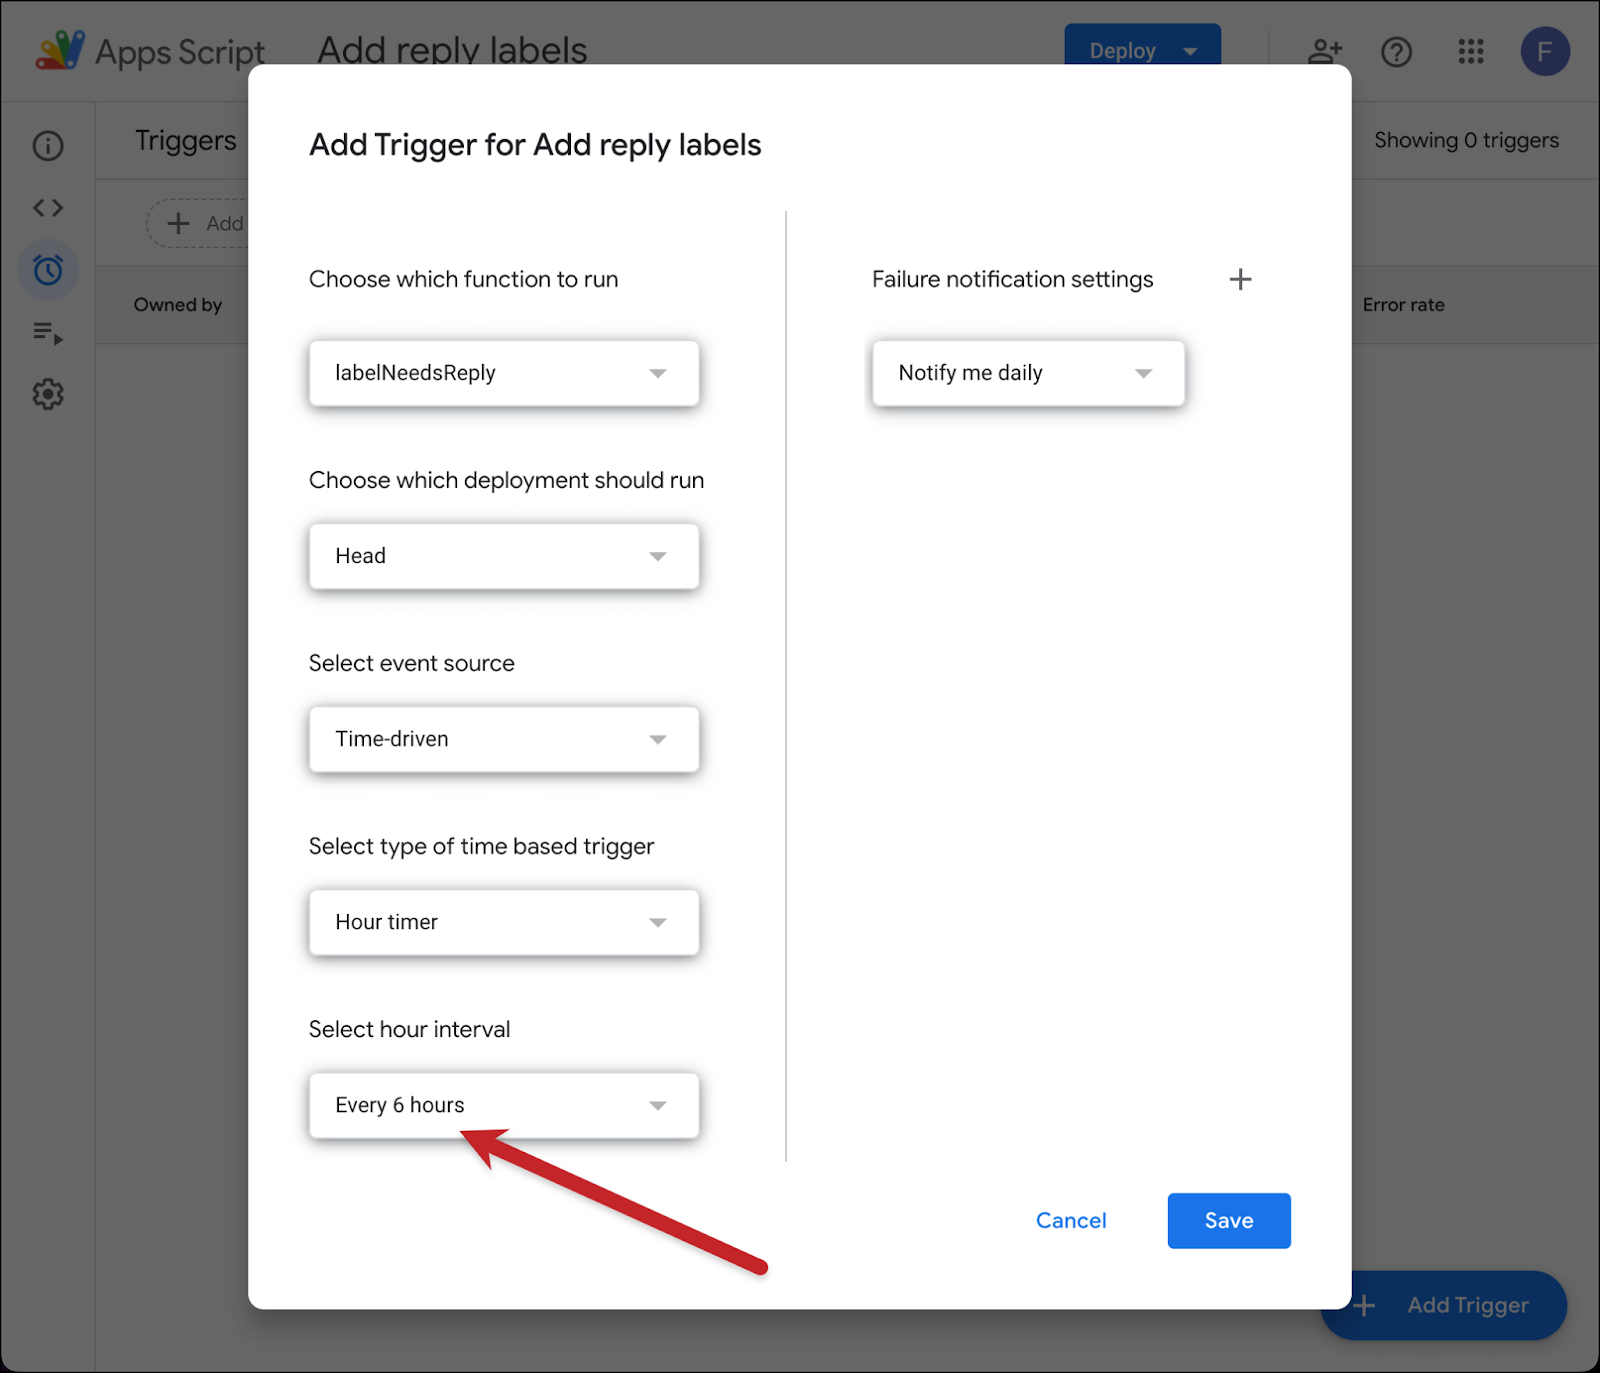
Here are the settings:
- Choose which function to run – labelNeedsReply
- Choose which deployment should run – Head
- Select event source – Time-driven
- Select type of time based trigger – Hour timer
- Select hour interval – Up to you. I am having this run Every 6 hours; feels like four times a day is about right.
- Failure notification settings – Notify me daily.
Then click Save. (You may need to give Google permissions again.)
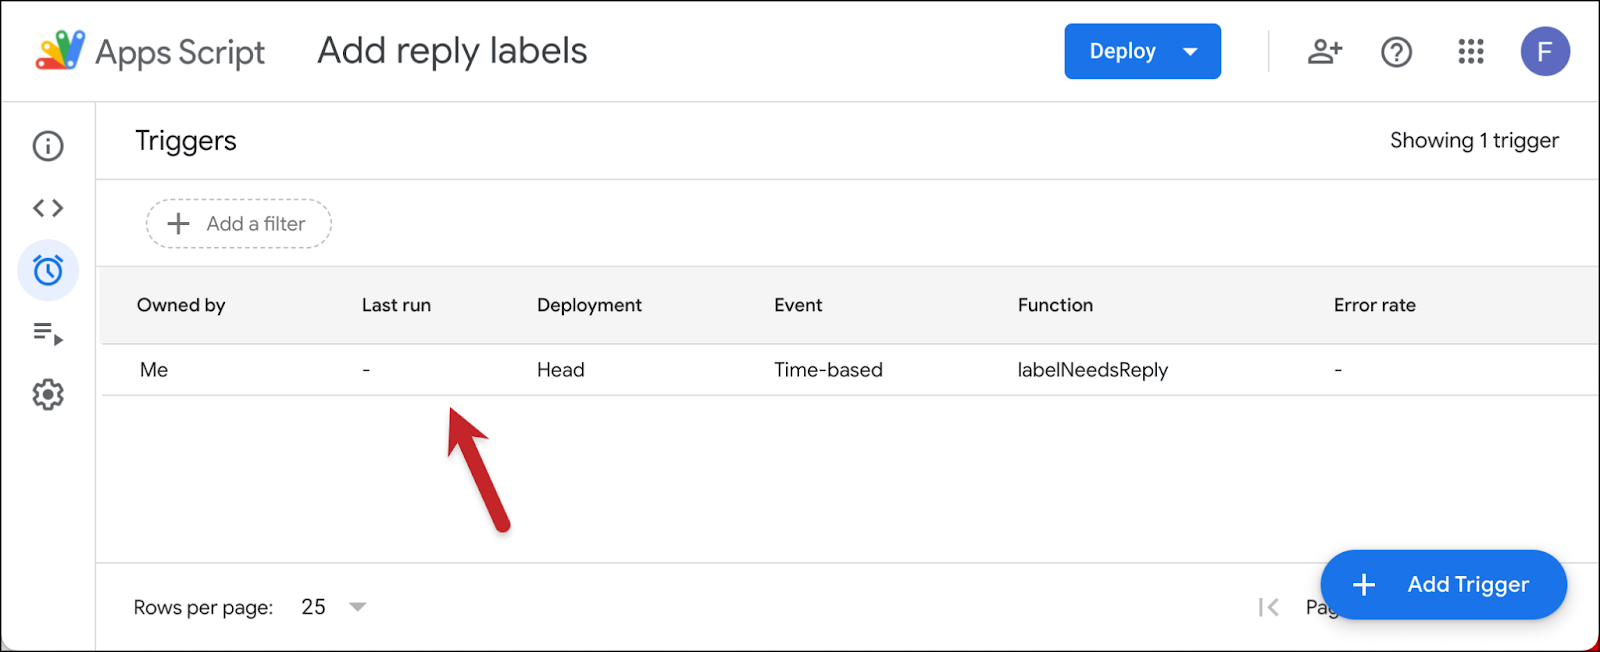
Assuming all went well, you should now see your script in your Triggers list. It will now run automatically in the background at whatever interval you specified.
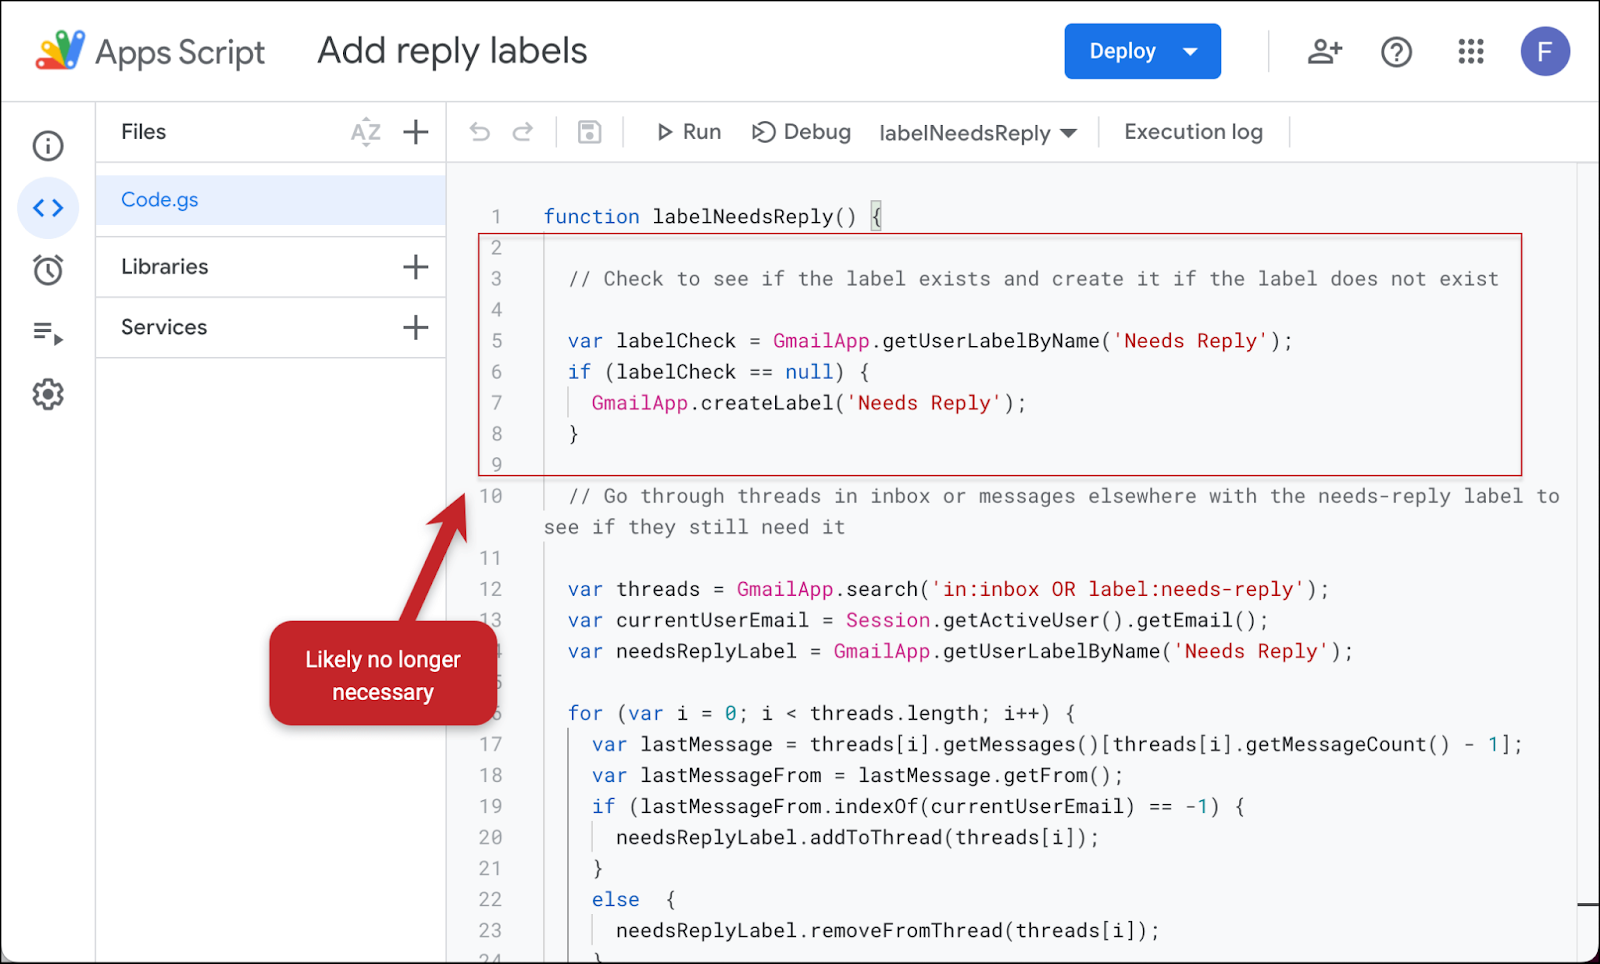
Optional step: You can delete lines 2 through 9 from the script if you want to make it a tiny bit faster and more efficient. Now that you’ve created the Needs Reply label, you don’t need the script to check for it every time.
But if you think you might mess with the label one day… or you just don’t feel good about messing with the code at all… you can leave it in place.
Step 3: Using Your New Label to Streamline Replies in The Reply Project
Now that you’ve flagged every email in your inbox waiting on your response, you can use that to streamline your flow in The Reply Project.
Go to The Reply Project page and sign in with your Gmail account. If this is your first time using it, you’ll need to give it permissions (even if you’re already a GMass user).
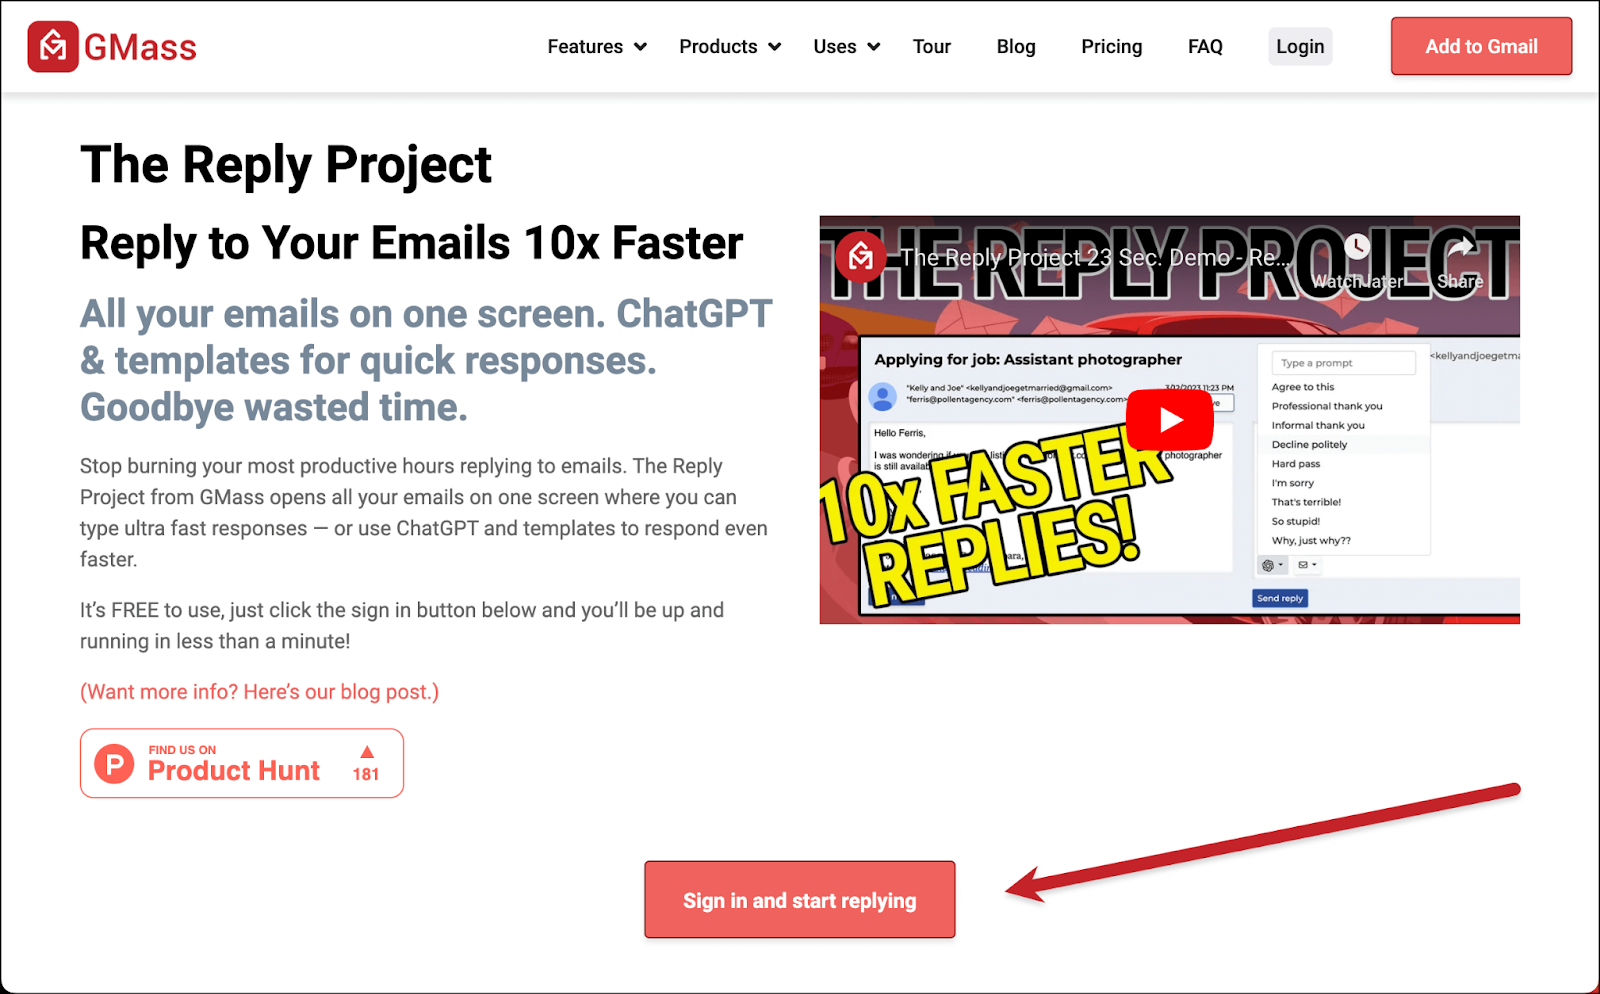
The Reply Project brings up every email in your inbox by default.
However, the search bar at the top works exactly like the Gmail search bar. So in that box, type in label:needs-reply and hit Enter/Return.
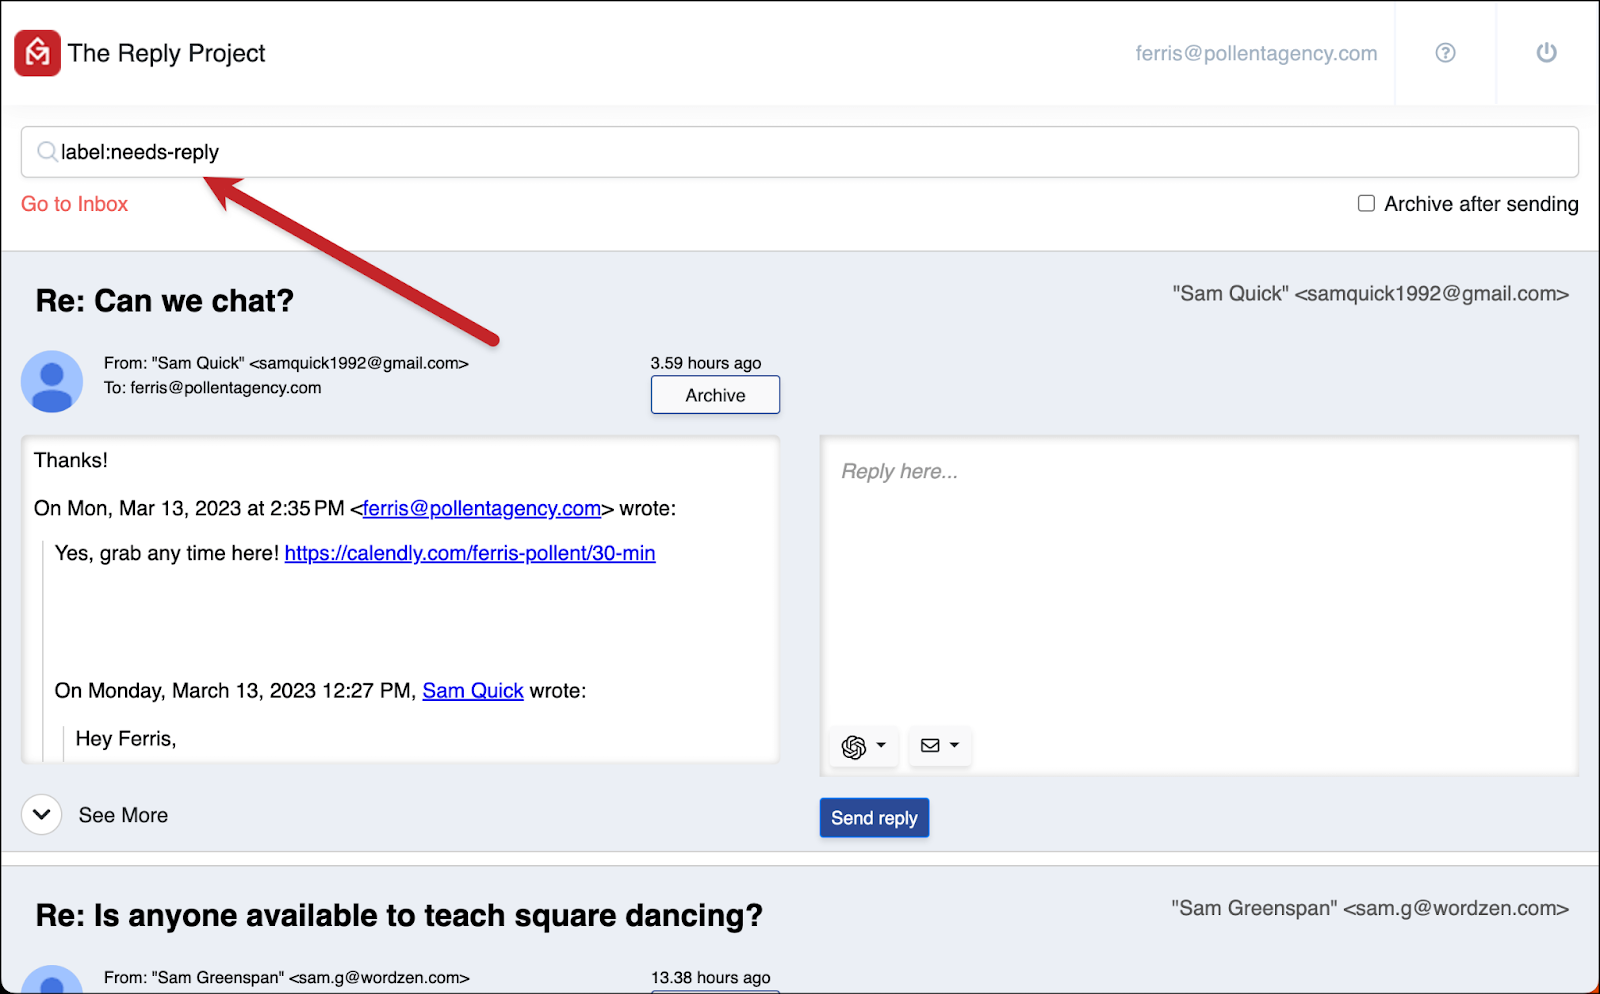
The Reply Project will now only show you the messages with the Needs Reply label, meaning they’re waiting on a reply from you.
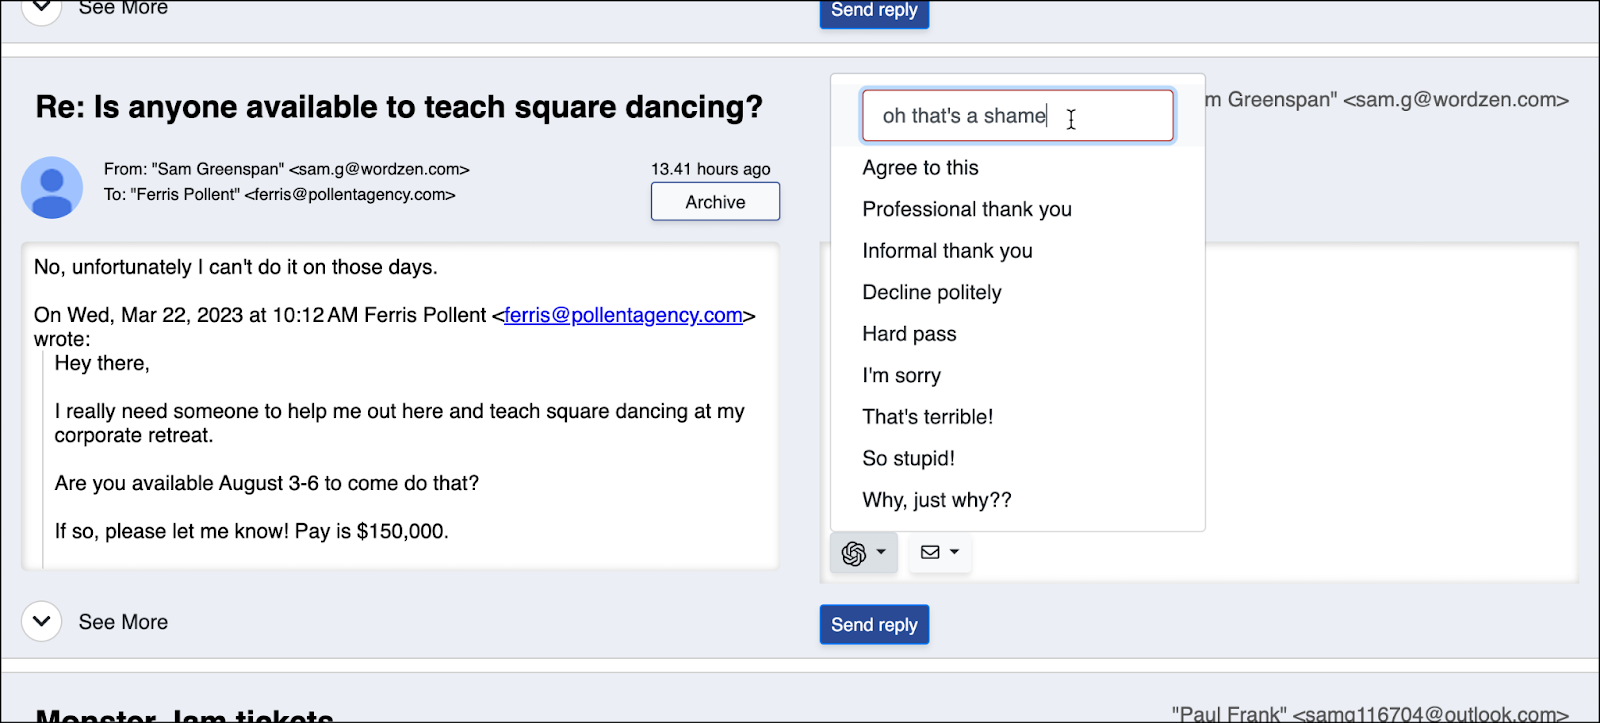
And you can respond ultra fast by typing in replies or using templates or ChatGPT.
You’re All Set!
The Apps Script will continue running in the background (without you even knowing it!) and labeling the appropriate email threads with Needs Reply.
Also, when it runs, it will detect threads that have the label where you’ve since responded and it will remove the Needs Reply label. And that will work even if you’re using The Reply Project’s Archive after sending feature (or if you manually archive the messages).
Hope this script serves you well and helps you get into a reply flow with The Reply Project even faster than before.
And finally, for more about the all the great features of The Reply Project, check out our blog post on using it for fast replies.
Only GMass packs every email app into one tool — and brings it all into Gmail for you. Better emails. Tons of power. Easy to use.
TRY GMASS FOR FREE
Download Chrome extension - 30 second install!
No credit card required

thanks
My administrator please help me to use this site HTMB to my Gmail account.