As an email marketer, you’ll most likely start your campaign with a Google spreadsheet for prospecting and list management. Whether you’re sending emails manually or using a third-party email marketing service, Google Spreadsheets is an unquestionable must-have for keeping track of list data and monitoring outreach communication efforts.
When you Google “outreach tracker” or “outreach tracking spreadsheet,” you’ll find numerous downloadable outreach tracking templates. Those are basic spreadsheets that must be updated manually. There is no email marketing solution on the market that can connect to a spreadsheet in the same way the user has customized it, access its data to send personalized emails, and update it automatically with campaign statistics such as email opens, clicks, and replies. GMass makes this automation possible.
This article will show you how to use Google Spreadsheets as an automated outreach tracker. You’ll also learn how to use GMass, a Gmail add-on, to send and track outreach campaigns via your spreadsheets.
Make an Outreach Tracking Spreadsheet That Updates Automatically
Step 1: Create and Format Your Outreach Tracking Spreadsheet
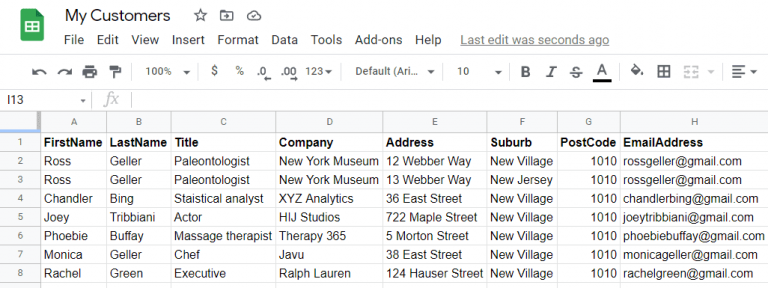
To begin, you’ll need to create a Google spreadsheet. You are free to personalize and build your Spreadsheet in any way you like. At the most basic level, your Spreadsheet may include First Name, Last Name, and Email address. You may add additional columns in your Spreadsheet as per your use case. For example:
-
- If you’re running a content marketing or PR campaign, you may add columns such as the writer’s name, title, publication type, pitch status, and last contact date.
- If you’re working on an Influencer Marketing Campaign, your Spreadsheet may include extra columns such as Website DA, Twitter handle, YouTube handle, number of followers, or Status.
- If you’re running an email outreach campaign for link building, the Spreadsheet will include columns such as Website Address, DA (Domain Authority), Website Traffic, DR (Domain Rating), and Status.
Keep the following in mind while creating your outreach tracking spreadsheet. If you already have a Google spreadsheet template that works for you, simply format it as shown below:
-
- Make sure the rows and columns are correctly formatted for optimal results. The first row should have column headers, and actual data should start on the second row.
- Don’t use spaces or special characters for your column titles; stick with numbers and letters instead. For example, FirstName, LastName, Company, EmailAddress, etc.
- At least one column should be set up with email addresses in your Spreadsheet, and GMass will detect it automatically as the recipient address column.
- If your Spreadsheet has multiple columns with email addresses, keep the column with the recipient email addresses to the left of other columns.
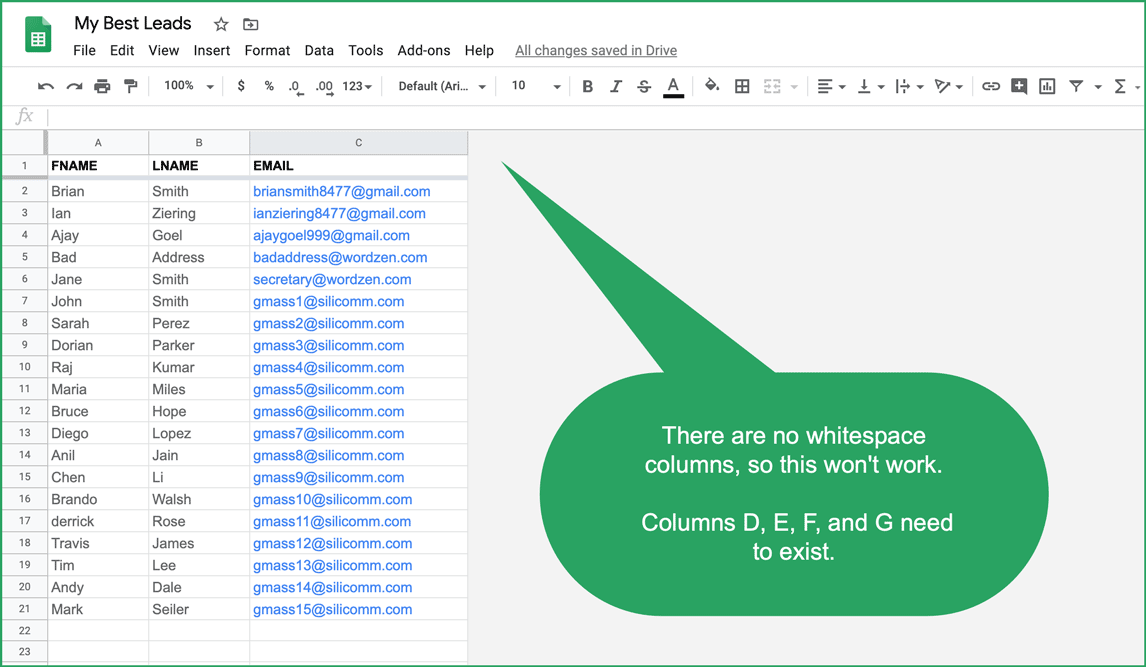
- You must have at least four empty columns after your last column of data to allow GMass to write on your sheet.
Step 2: Adding Automation: Connect GMass to your Spreadsheet
-
- Log in to your Gmail account, which you’ll be using to send emails.
- Add GMass to your Gmail account.
- Choose your Worksheet: Locate the Sheets button near the search bar in Gmail and click on it. A dialog box will appear with a list of Google Sheet files in your Google account, as shown above. Your Spreadsheet should be accessible through the same Gmail account.

-
- If you have multiple worksheets in your Google Spreadsheet, GMass will display a drop-down menu that lets you pick the one you want.

Step 3: Enable Automated Outreach Tracking in Your Spreadsheet
-
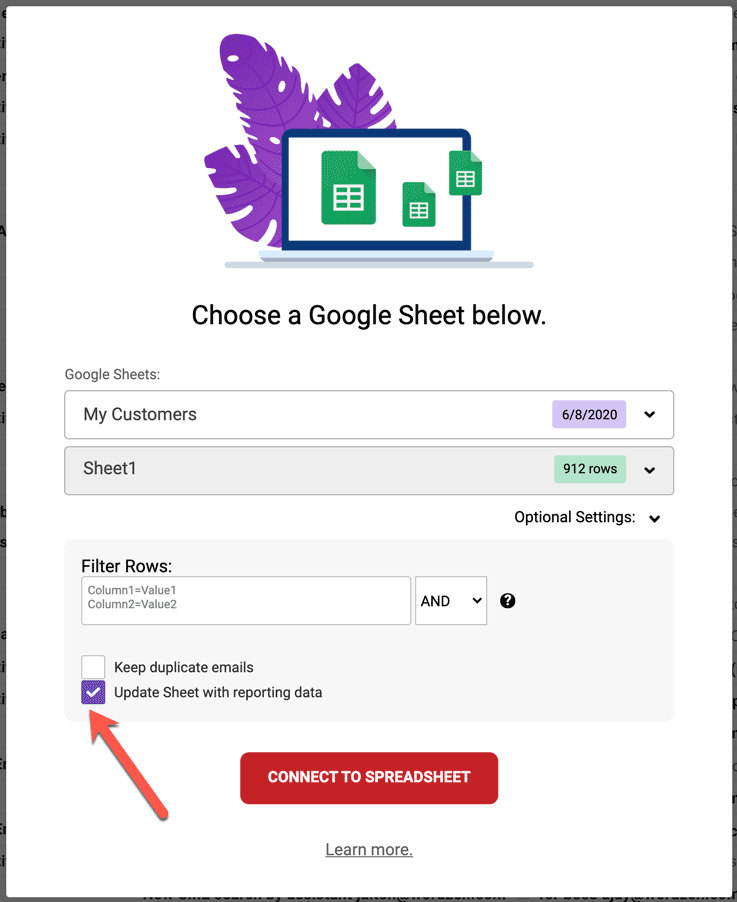
- Click on the checkbox “Update Sheet with reporting data.” Once you enable this setting, your Google Sheet will automatically be updated after you’ve sent out the outreach campaign and your email subscribers have opened, clicked, replied to, or taken other engagement actions on your emails.
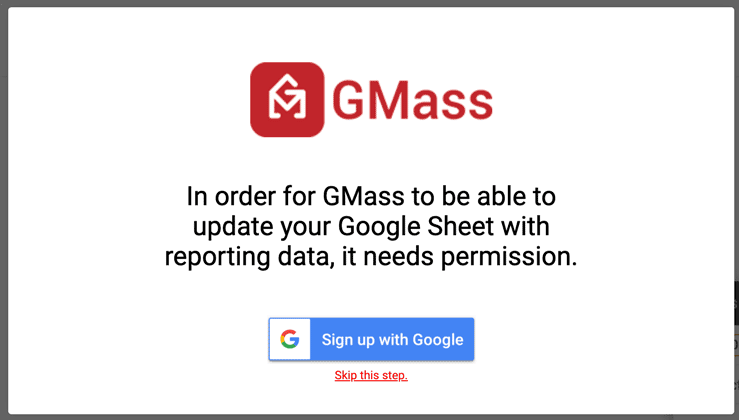
Note: If you haven’t given GMass permission to write to your Sheets, a pop-up will appear asking you to allow it. Please read our guide to updating your Google Sheet with campaign data for further information.
Step 4: Send Your Emails with GMass
Compose your email and hit the GMass button to send your outreach campaign.
Personalize Your Email (Optional):
You may also personalize your emails with GMass using the Outreach spreadsheet data. Insert merge variables (or placeholders) in your email subject or message wherever you want to personalize it.

The Google Sheet column header enclosed in curly brackets is how you format merge variables (or placeholders). If you type a left curly bracket character ({) into your draft email, A flyout menu with your placeholders will appear. For example, if the column is called Name, you may use {Name} in your Gmail template to personalize it depending on that merge field.
Check out our guide to email personalization and Google sheets mail merge.
Step 5: See the outreach tracker in action!
When you use GMass to send an outreach campaign, you’ll be able to track its progress in your outreach tracking spreadsheet. As soon as the first event occurs, it will write the column headers to the first row of the Spreadsheet.
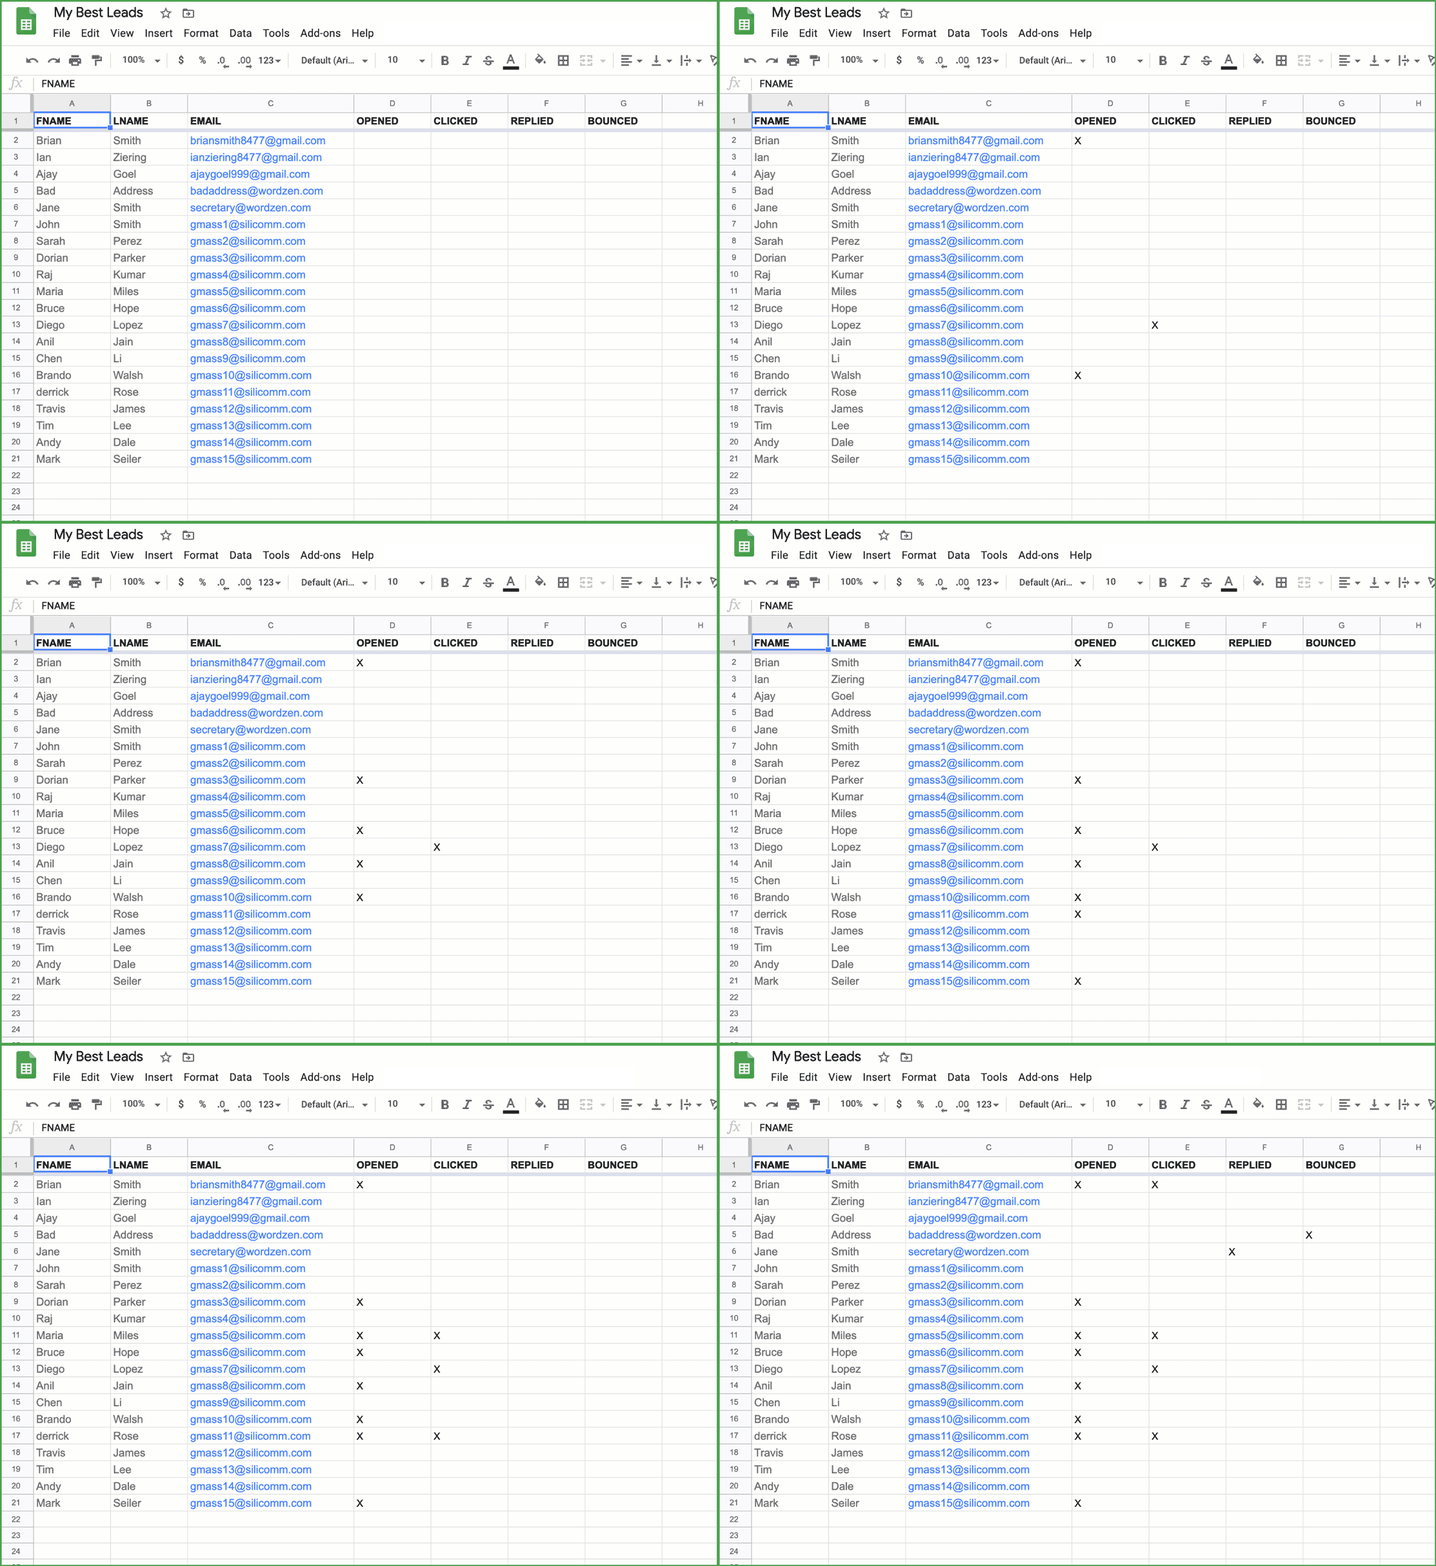
For example, on the first email “open,” GMass will label the spreadsheet column “OPENED,” and an X will be placed in the corresponding row to indicate that it’s open. You don’t need to add the column headings in the Spreadsheet manually; all you have to do is make sure there are blank columns available for use.
This way, you can quickly see how each person has engaged with your mail merge or cold email campaign. In addition, you can use this data to further refine follow-up campaigns by filtering on the columns that have values equal to X.
Check out our guide to updating your Google Sheet with campaign data for more details.
Email marketing. Cold email. Mail merge. Avoid the spam folder. Easy to learn and use. All inside Gmail.
TRY GMASS FOR FREE
Download Chrome extension - 30 second install!
No credit card required

What tracking do i get if I use one spreadsheet for multiple campaigns?