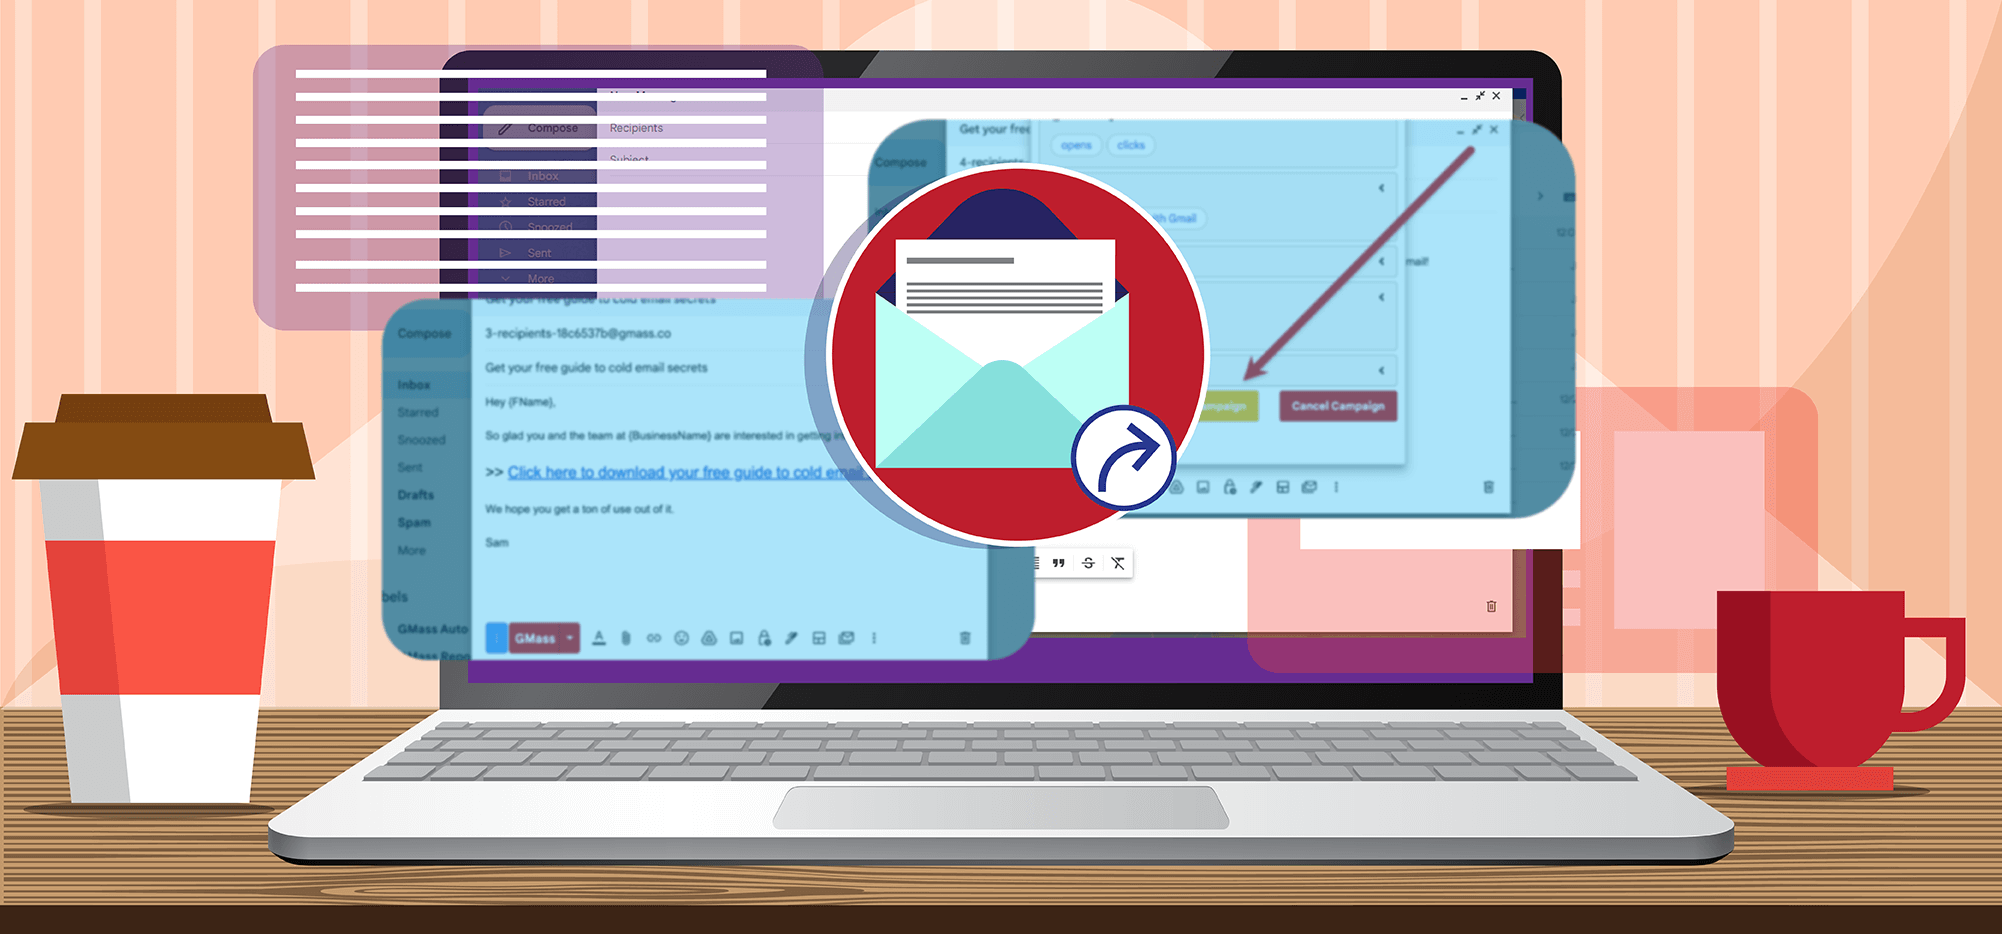
One of GMass’s popular features is the ability to send segmented campaigns based on how recipients interacted with a previous campaign. For example, you could send a new campaign to everyone who received but didn’t open a prior one. Or send a new campaign to everyone who opened but didn’t reply. Or to everyone who clicked.
When you set up a segmented campaign, GMass creates a new mailing list for you out of everyone who meets your segmentation criteria at the time. So if you’re creating a new segmented campaign based on everyone who clicked on a prior campaign, GMass will grab everyone who clicked up to that moment.
But if someone clicks it after you generate your segmented list for the new campaign, they won’t be added to the new campaign automatically.
In GMass’s Facebook group (where we discuss email marketing, cold email, and GMass strategies), a member of the community recently asked:
It is possible to do what Neil is asking. However, it takes a combination of several GMass and Google features to pull it off:
- Recurring campaigns
- Updating GMass campaign sheets with reporting data
- Filtering to send to only selected rows of a spreadsheet
- Throttled frequency
- A Google Apps Script
I’m going to demonstrate how to set up a dynamic campaign that goes out daily to people who click on a campaign. You could set up multiple dynamic campaigns as well, including opens and replies. You could also set this up for people who open but don’t click or don’t reply.
After you see the method in action you should be able to adapt it based on your needs.
Here’s how to create dynamic recurring segmented campaigns that automatically send new campaigns to email recipients based on the action they take on the initial email.
Auto-Send Campaigns After Action: Table of Contents
- Step 1: Setting Up Your Google Sheet and Initial Campaign
- Step 2: Pause Your Initial Campaign to Set Up Your Recurring Segments
- Step 3: Creating the Recurring Automation
- Step 4: Unpause and Speed Up the Initial Campaign
- Recurring Segmented Campaigns: Modifications and Possibilities
Step 1: Setting Up Your Google Sheet and Initial Campaign
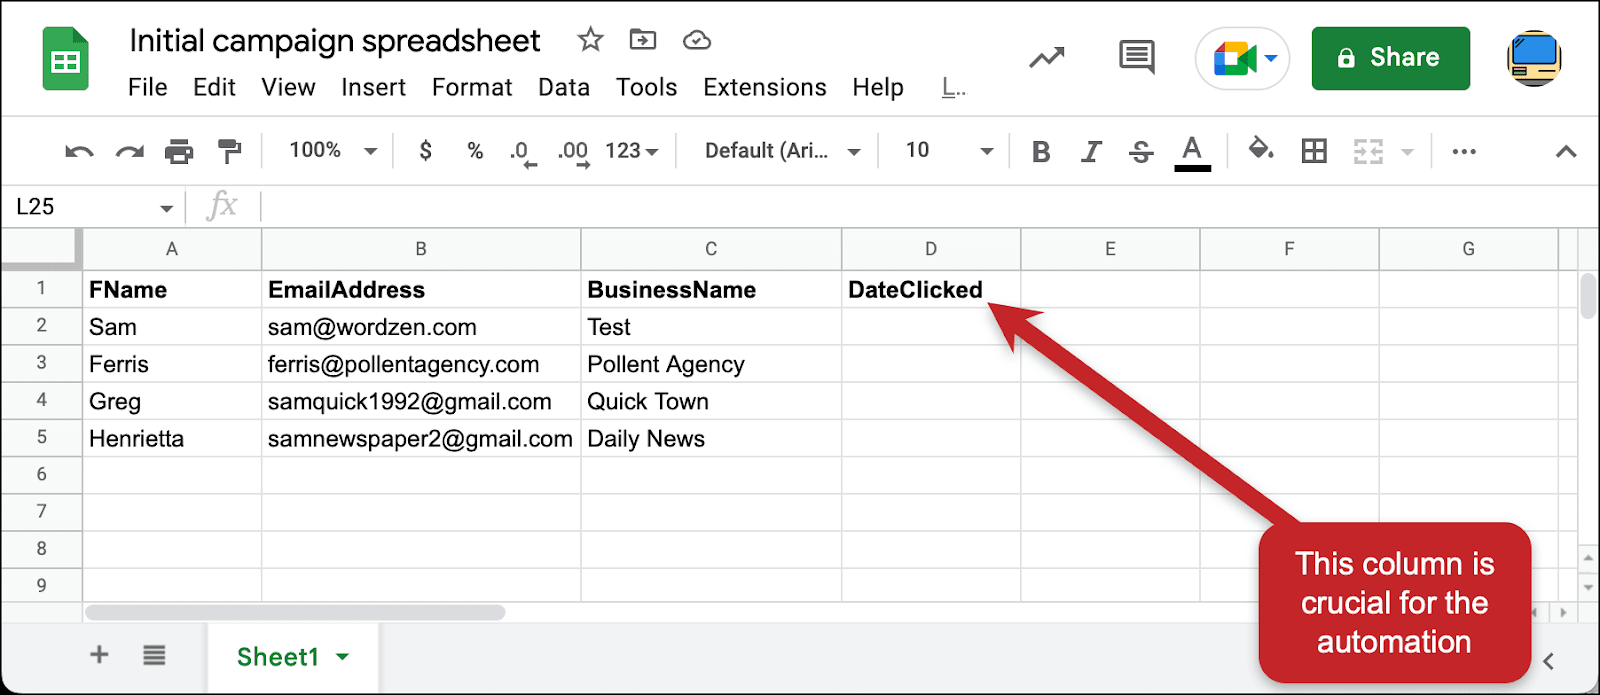
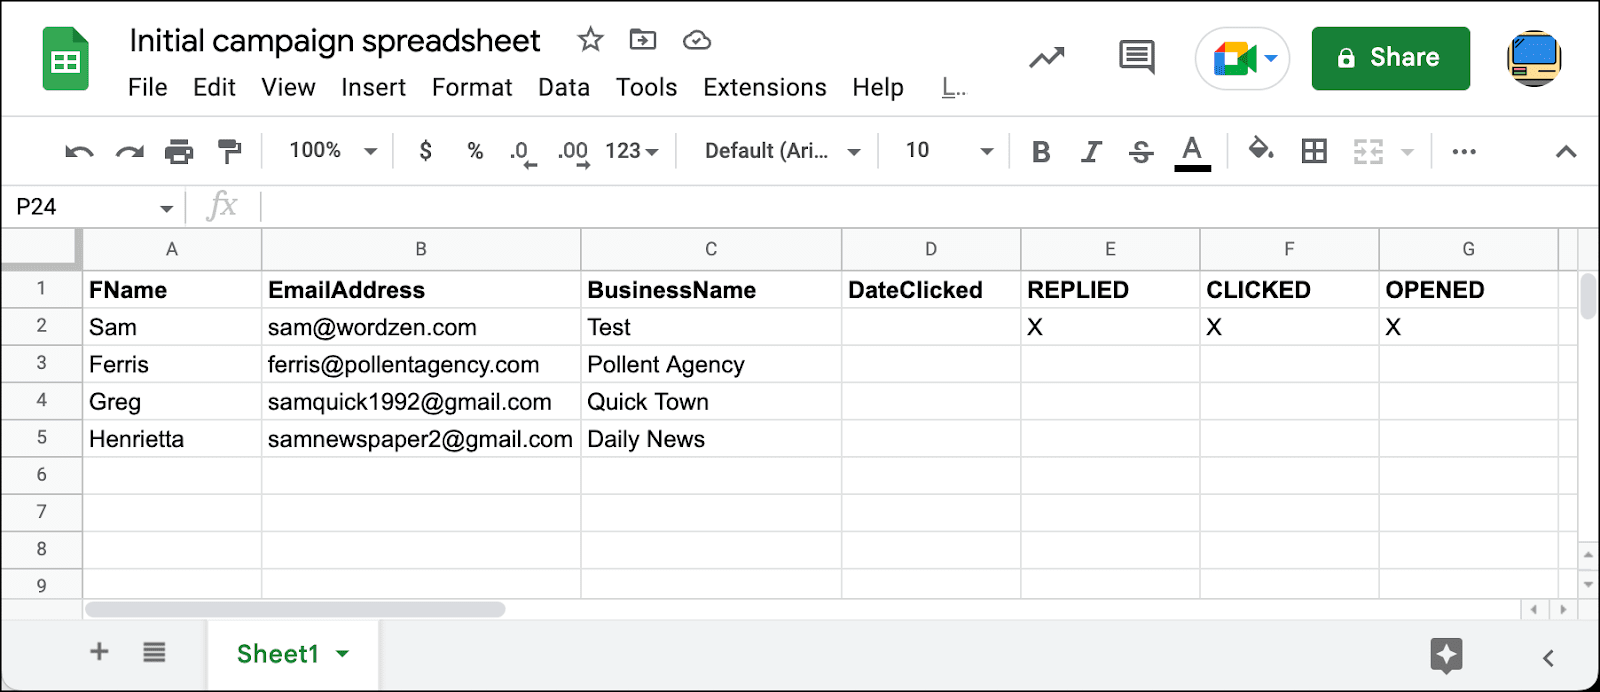
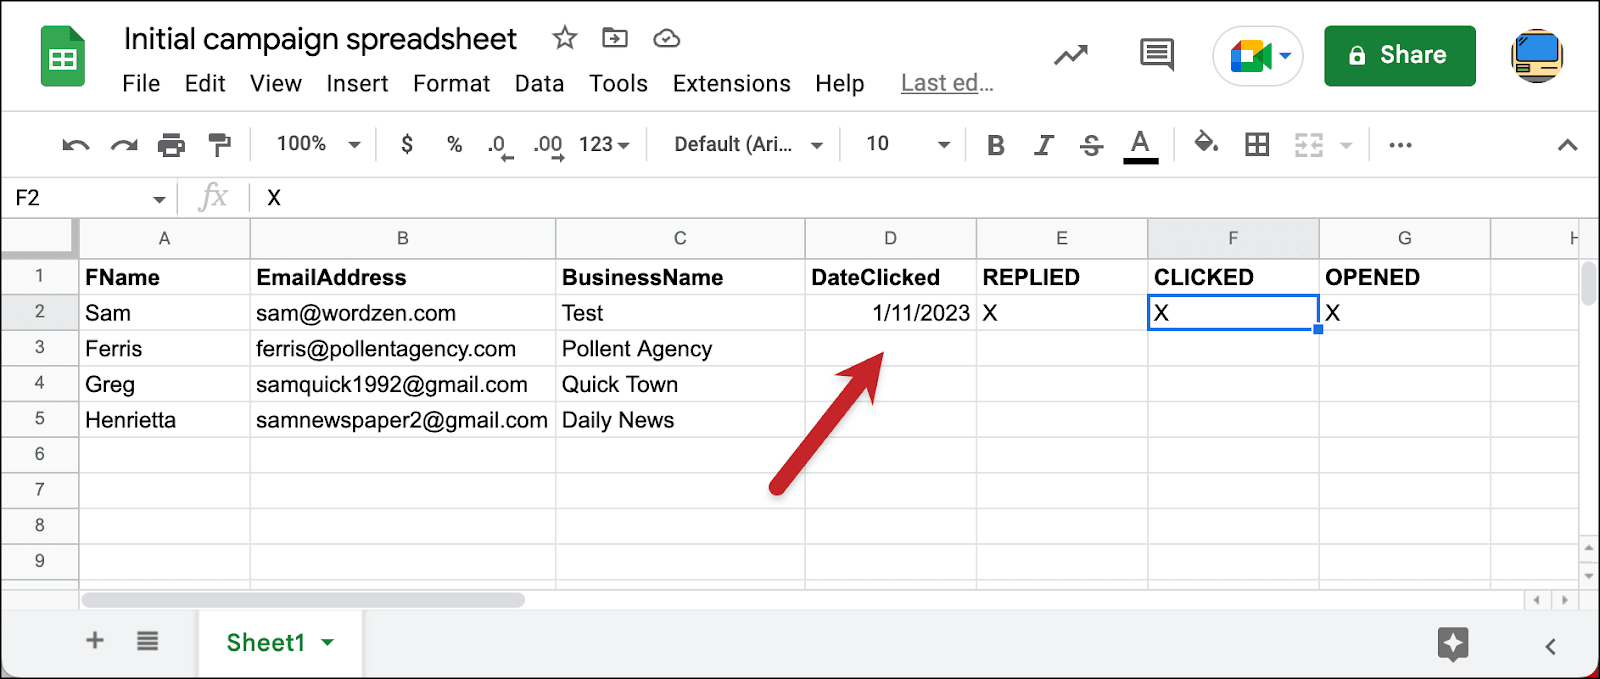
When you create your Google Sheet for your initial campaign, you’ll need to add an extra column that monitors when someone takes your desired action (for my example, that’s clicks). GMass will use that column to make sure it sends the automated recurring campaign to the right people at the right time.
Set up your initial Google Sheet
Here’s how my example Google Sheet looks. You can use whatever mail merge columns you need — just make sure you create a column for the date clicked. (Or whatever action on which you’re going to segment.)
Important: Add your own email address as the first row. You’ll need to be the first one to open/click/reply to generate the reporting columns in the spreadsheet and for the initial recurring campaign.
One more little nuance: Regardless of where you are in this world, we need to set the Google Sheet’s timezone to GMT. That will be important later as we’re syncing it up with GMass’s servers to make sure the correct emails go out on the correct dates.
Go to File > Settings and switch the time zone down to (GMT + 00:00) GMT (no daylight saving). That change will only affect this Google Sheet, not your others.
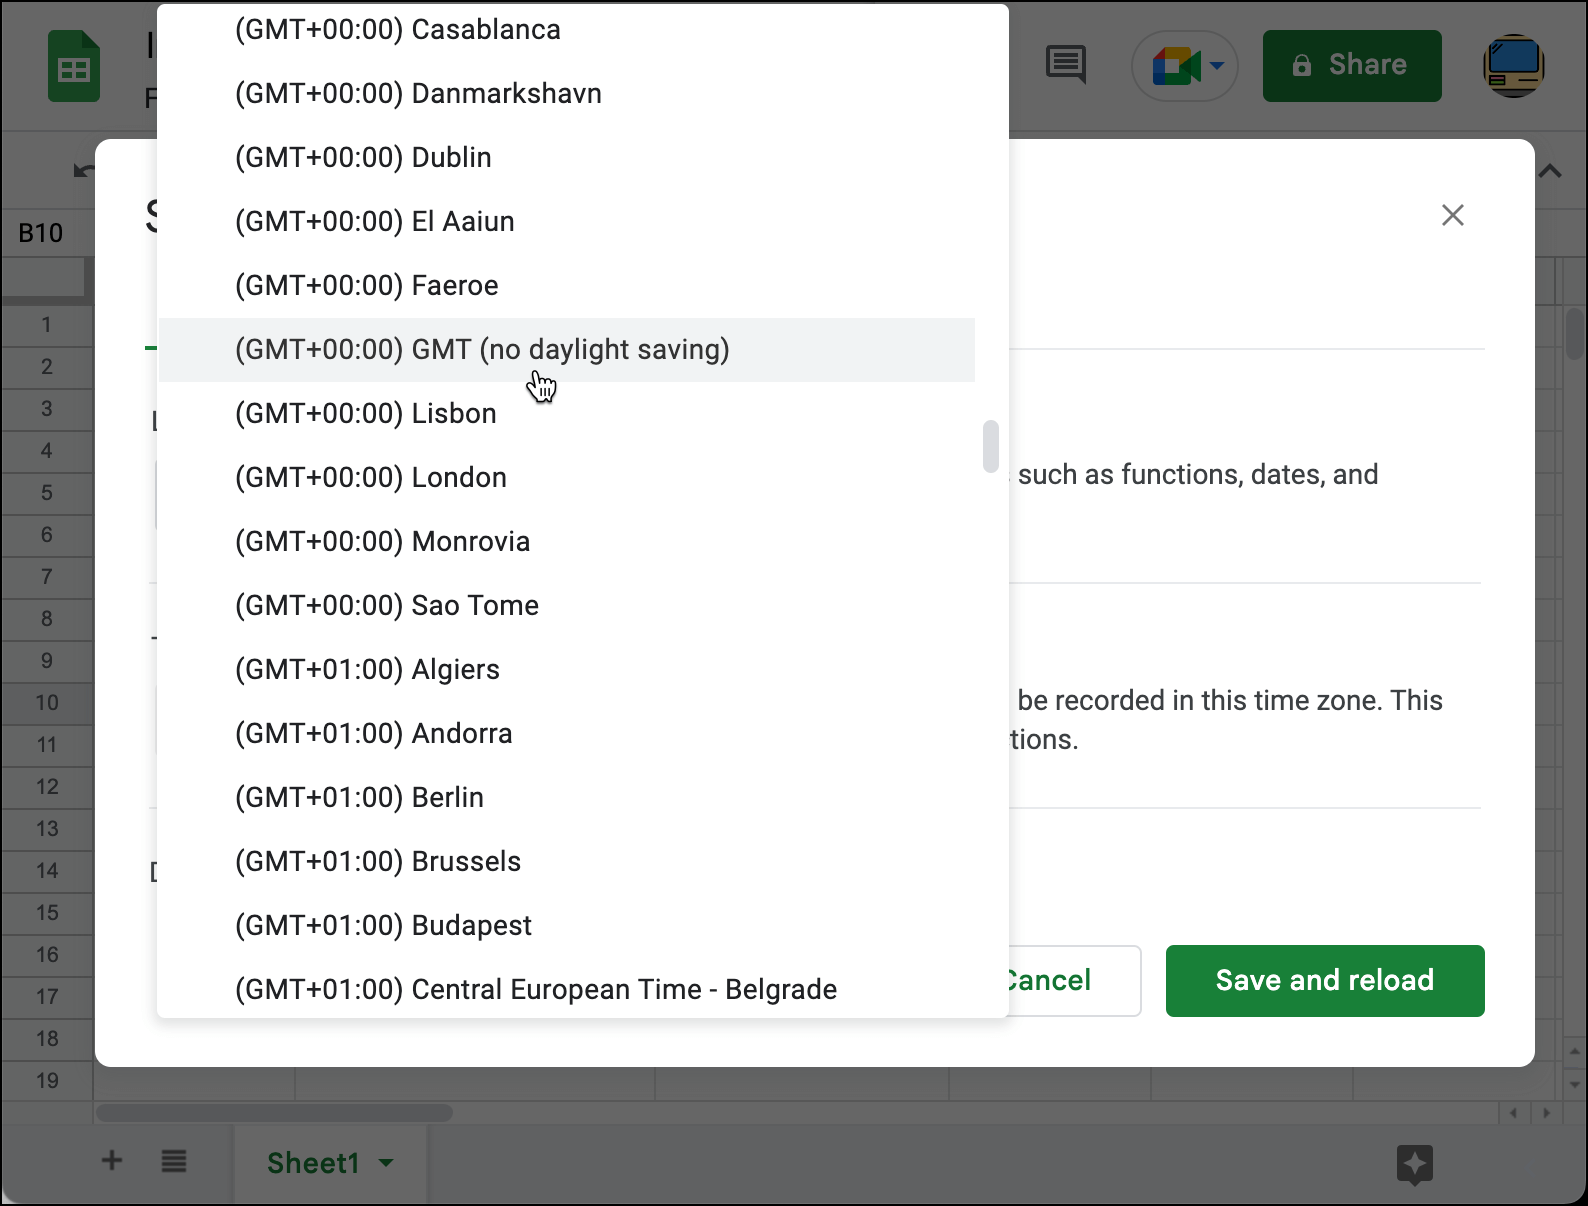
We just need to make sure all our robots are doing their thing in the same virtual time zone.
Connecting your Google Sheet to your initial campaign
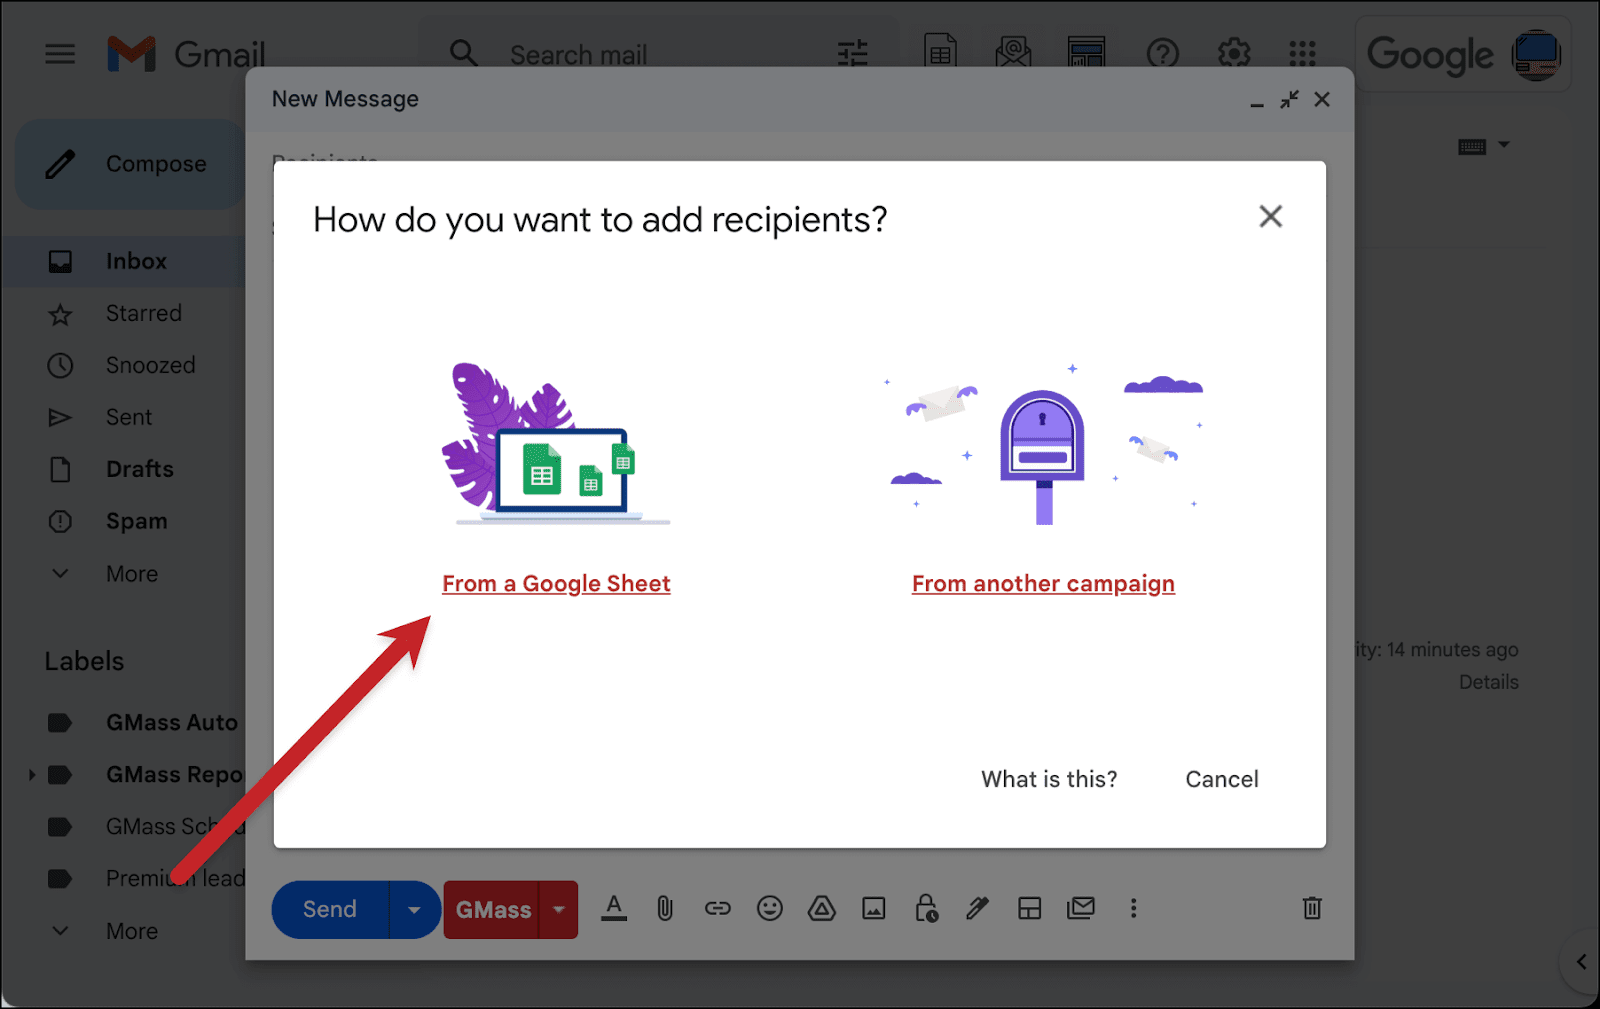
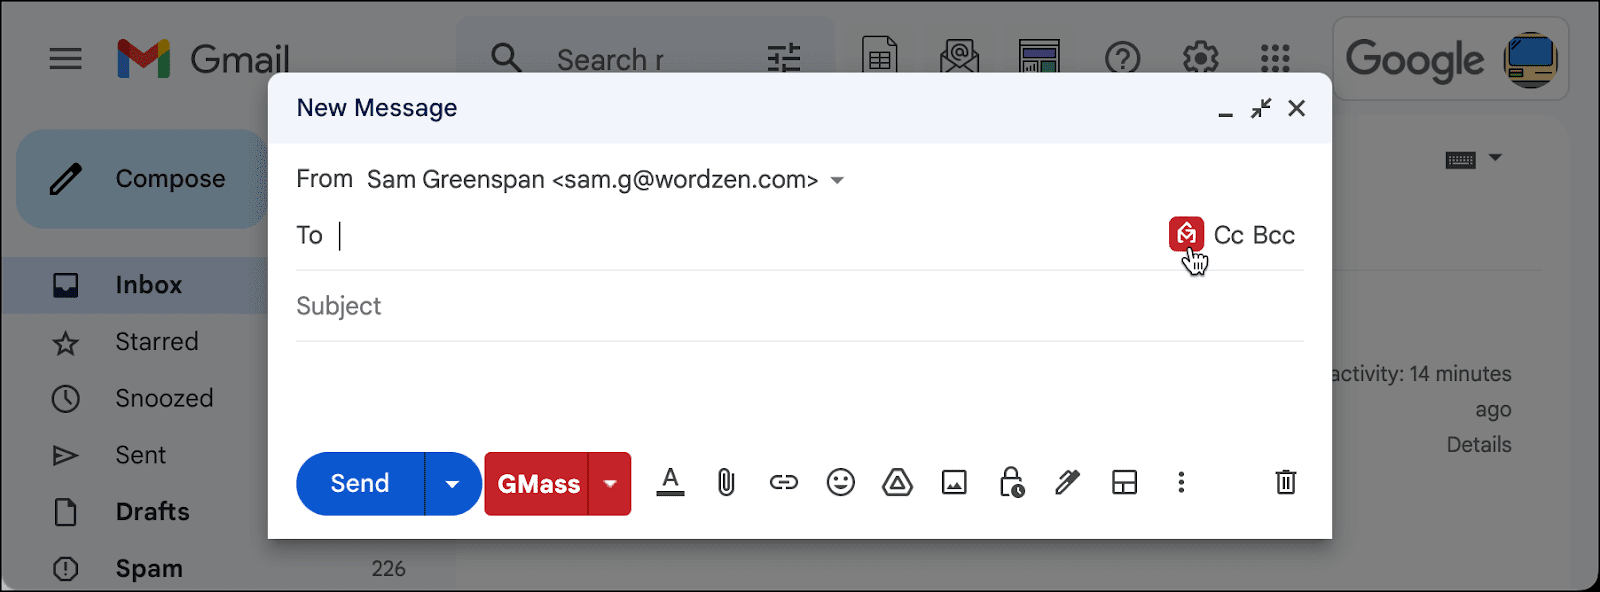
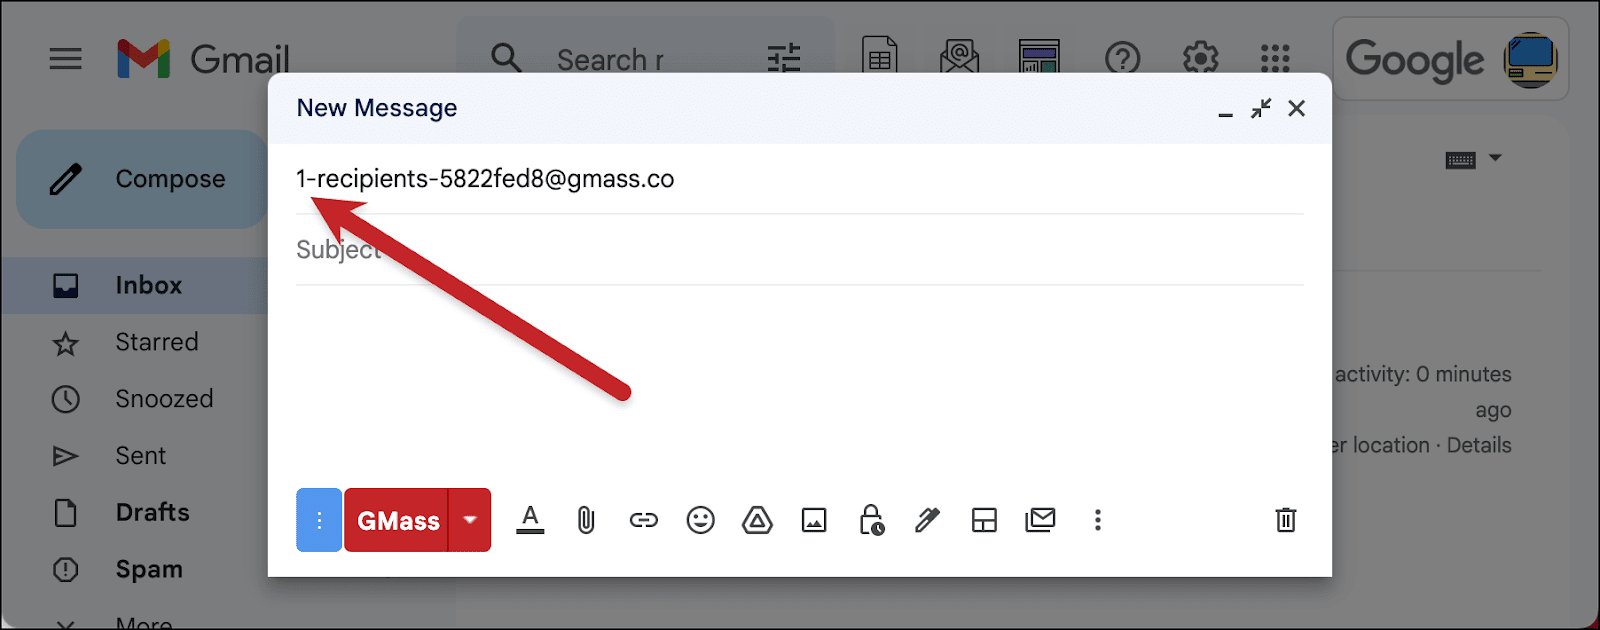
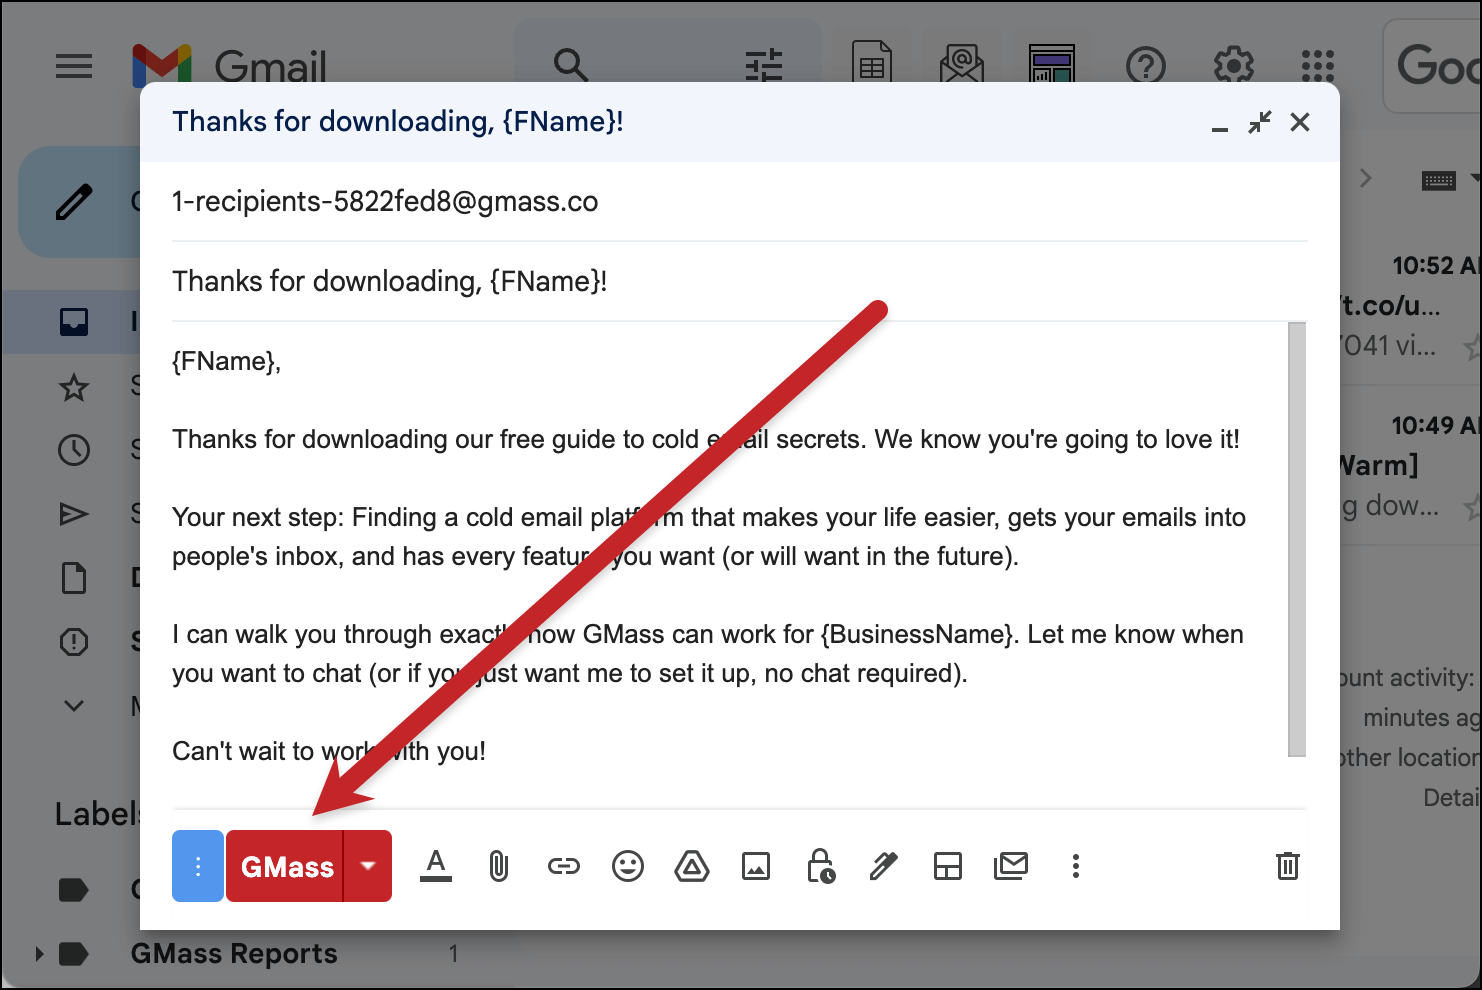
Now head into Gmail and open a new compose window. Click the GMass icon that appears on the right side of the To field.

Choose From a Google Sheet in the connection options box.
Open the Optional Settings and check Update Sheet with reporting data. That instructs GMass to write open, click, reply, and bounce results back to your Google Sheet. And without GMass doing that, we wouldn’t be able to pull off this dynamic segmentation technique.
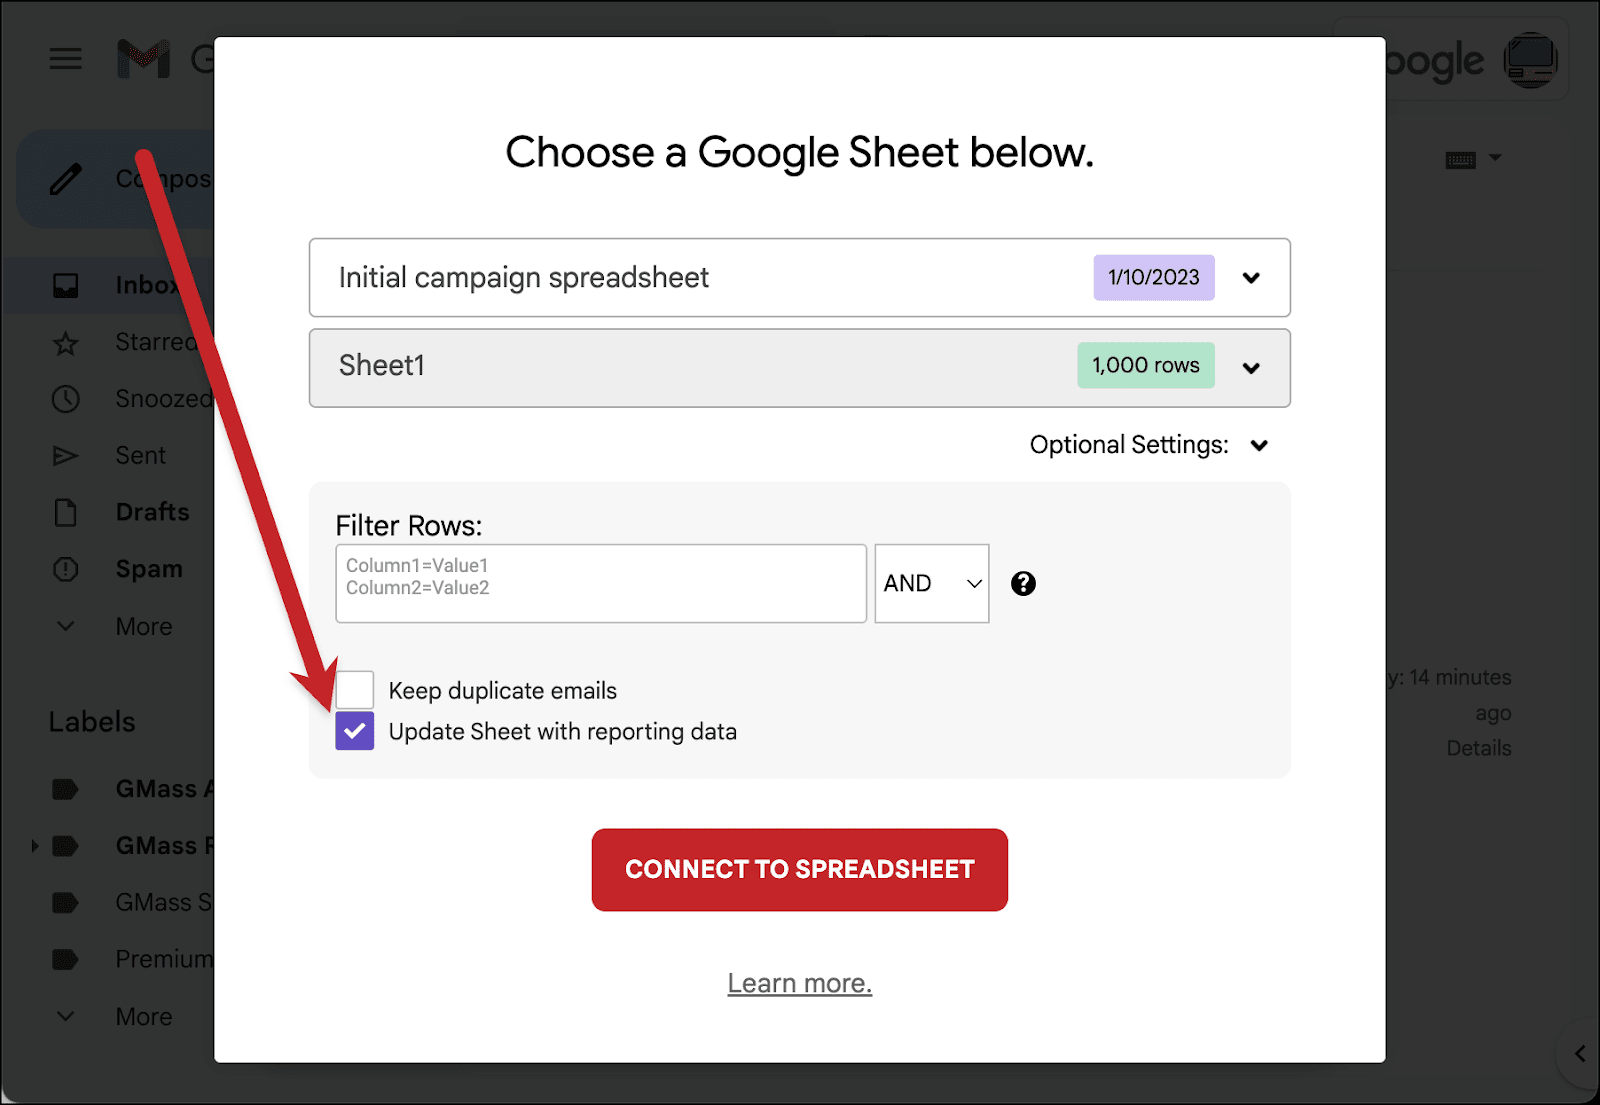
Click the Connect to Spreadsheet button.
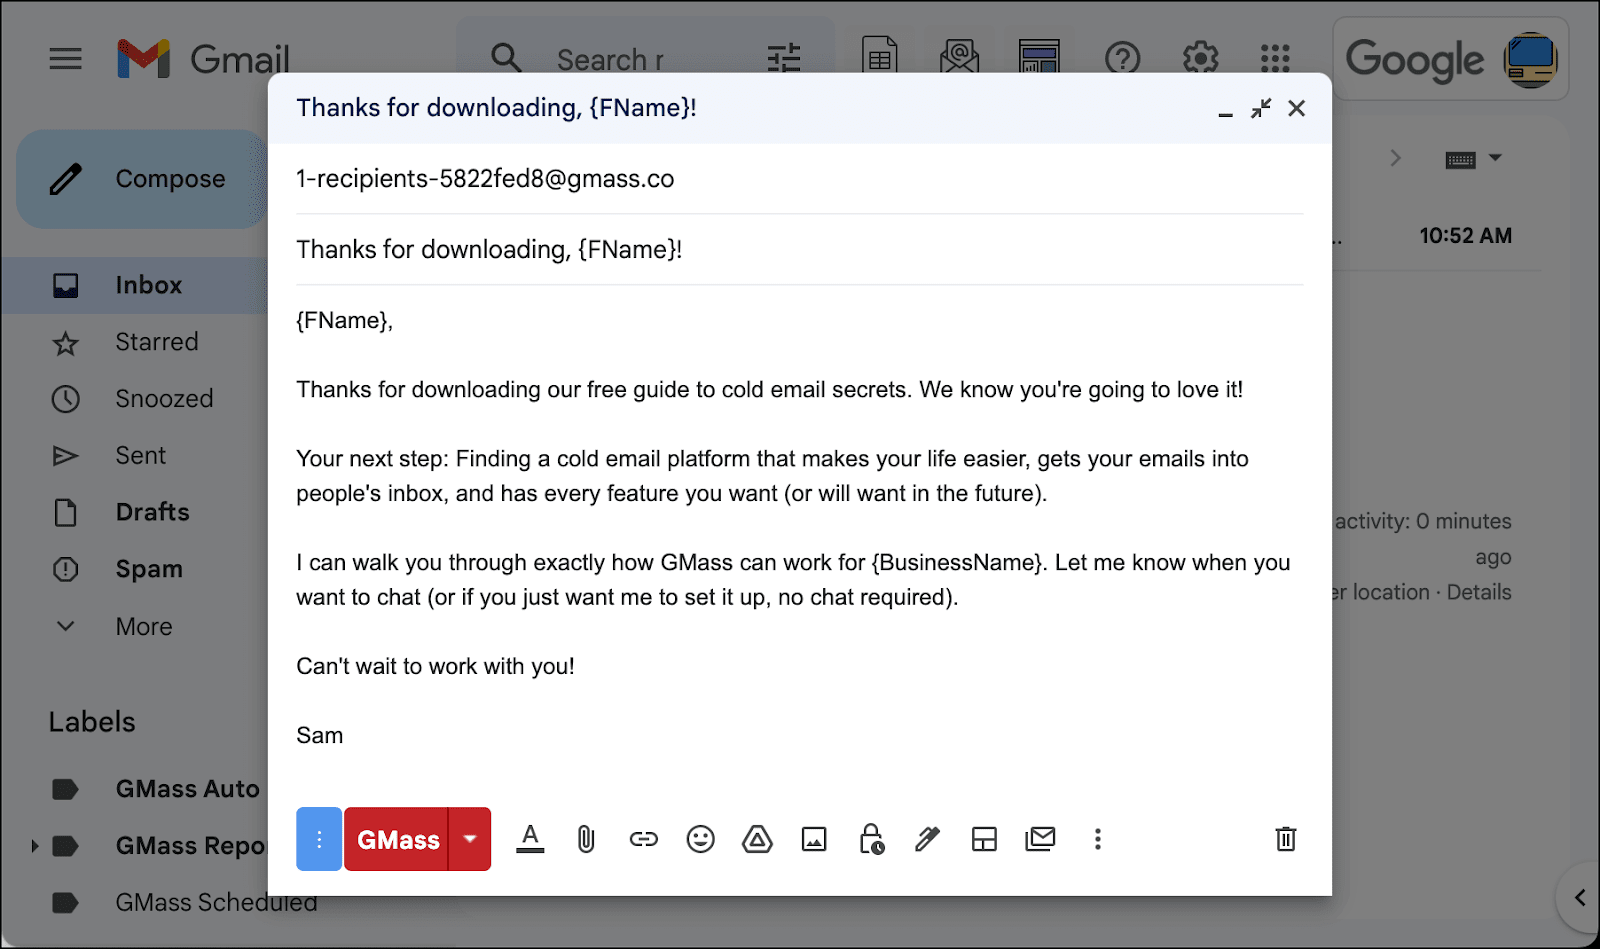
Create your initial campaign
Now you can create your initial campaign. Compose your email as normal. You can use any GMass features here, including auto follow-ups.
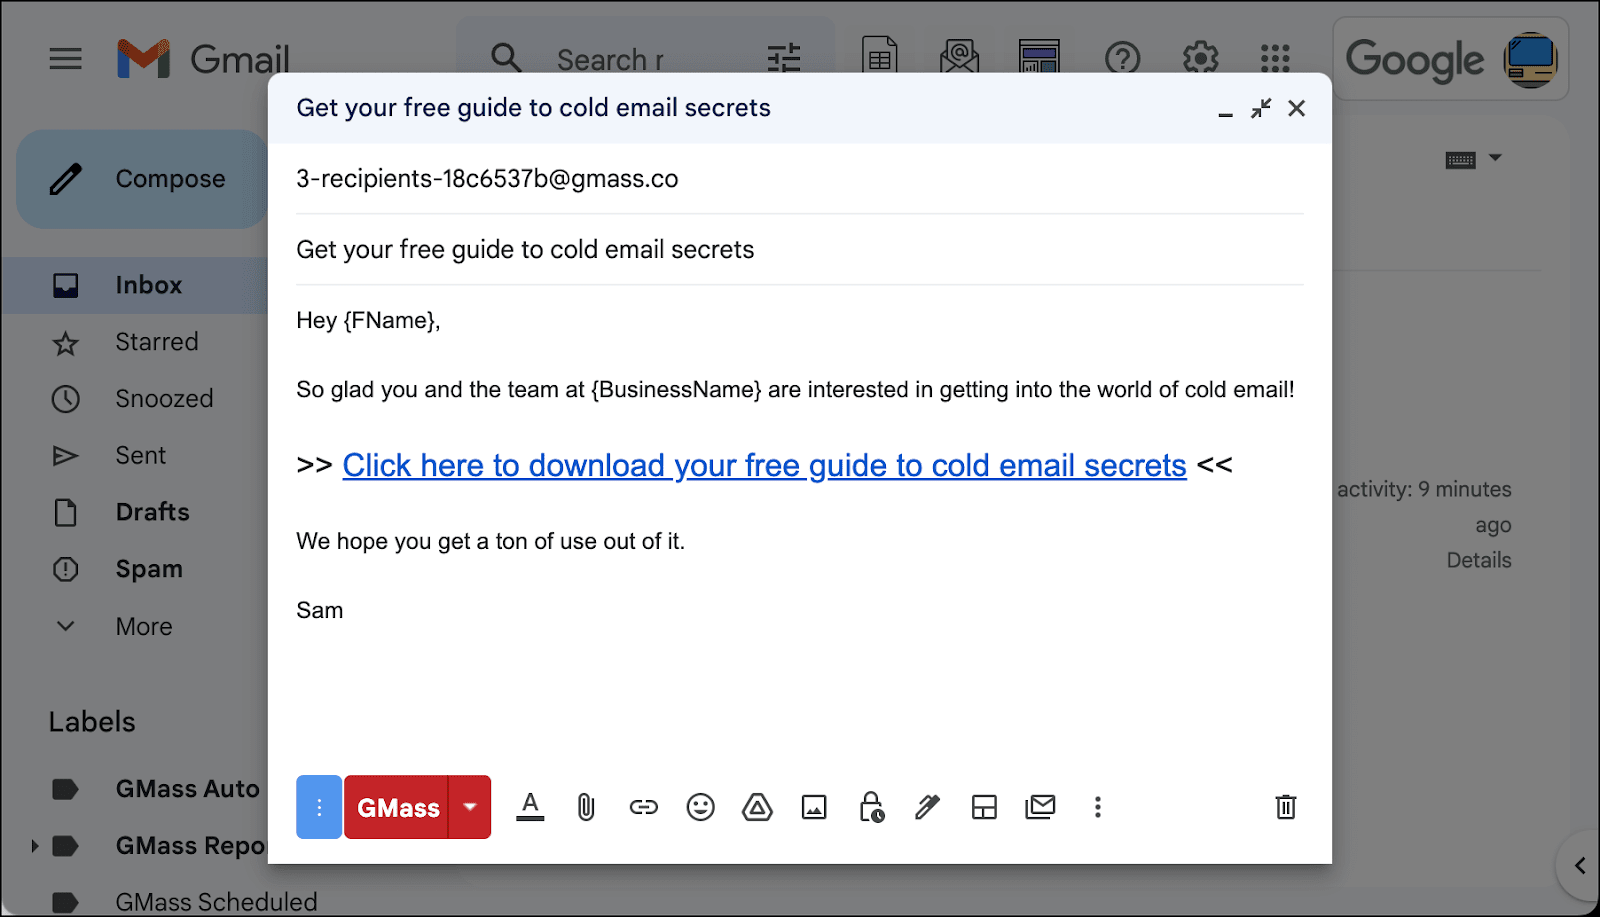
Note: If you’re going to segment off clicks, like I did, make sure you set up your link as hyperlinked text (e.g., click here to download) and not as a standalone (e.g., https://mysite.com/files/secrets.pdf). As a deliverability measure, click tracking is only available on hyperlinked text — Google doesn’t like it when you show a hyperlink but have it link to a different destination like a click tracker.
Now open the GMass settings. If you’re planning to segment on opens or clicks, make sure open tracking and/or click tracking are on, respectively.
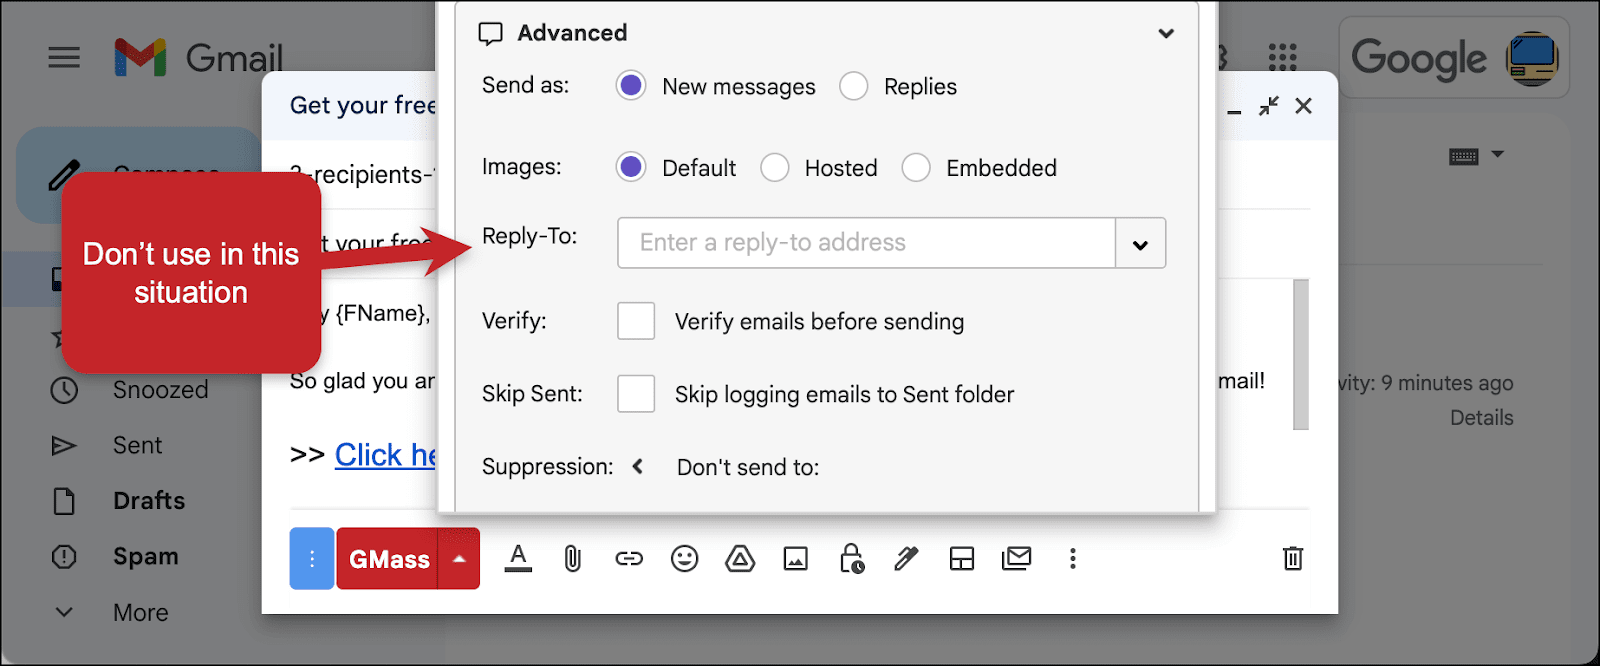
If you’re segmenting on replies, you won’t need to turn anything on. However, make sure you’re not using a different Reply-To address for the campaign. When you use a different Reply-To address, GMass (by definition) can’t track campaign replies.
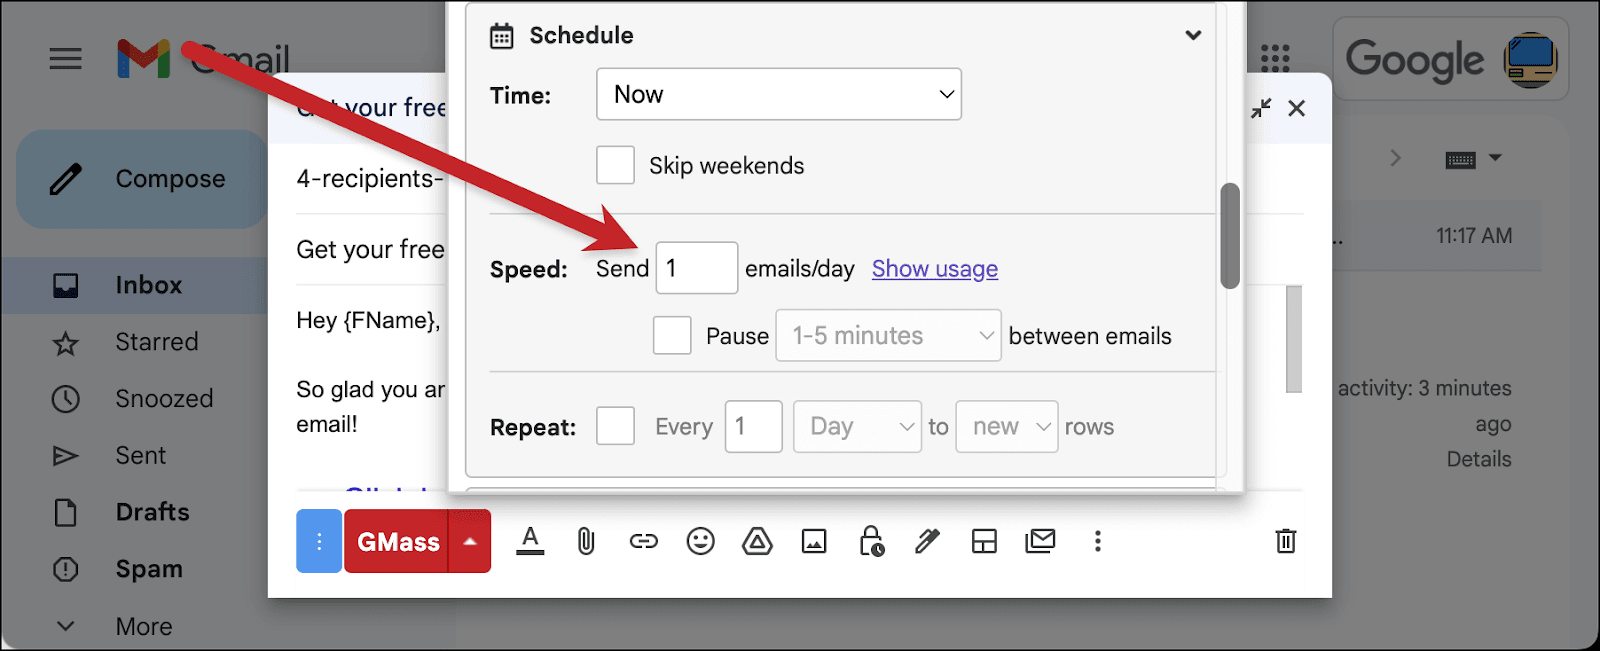
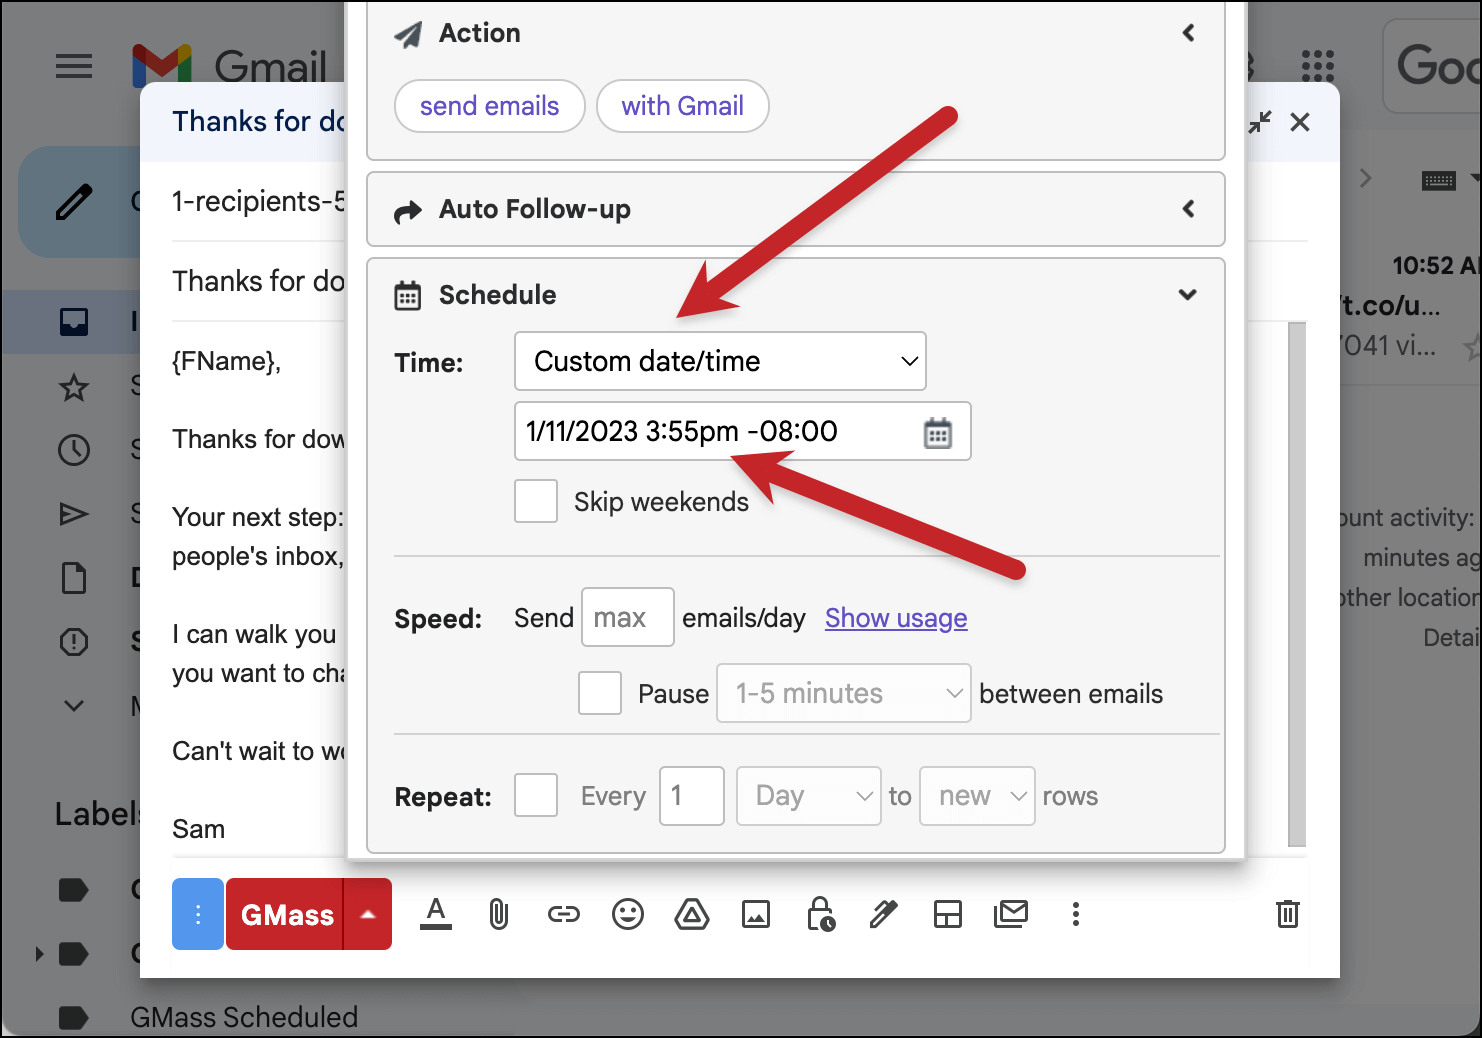
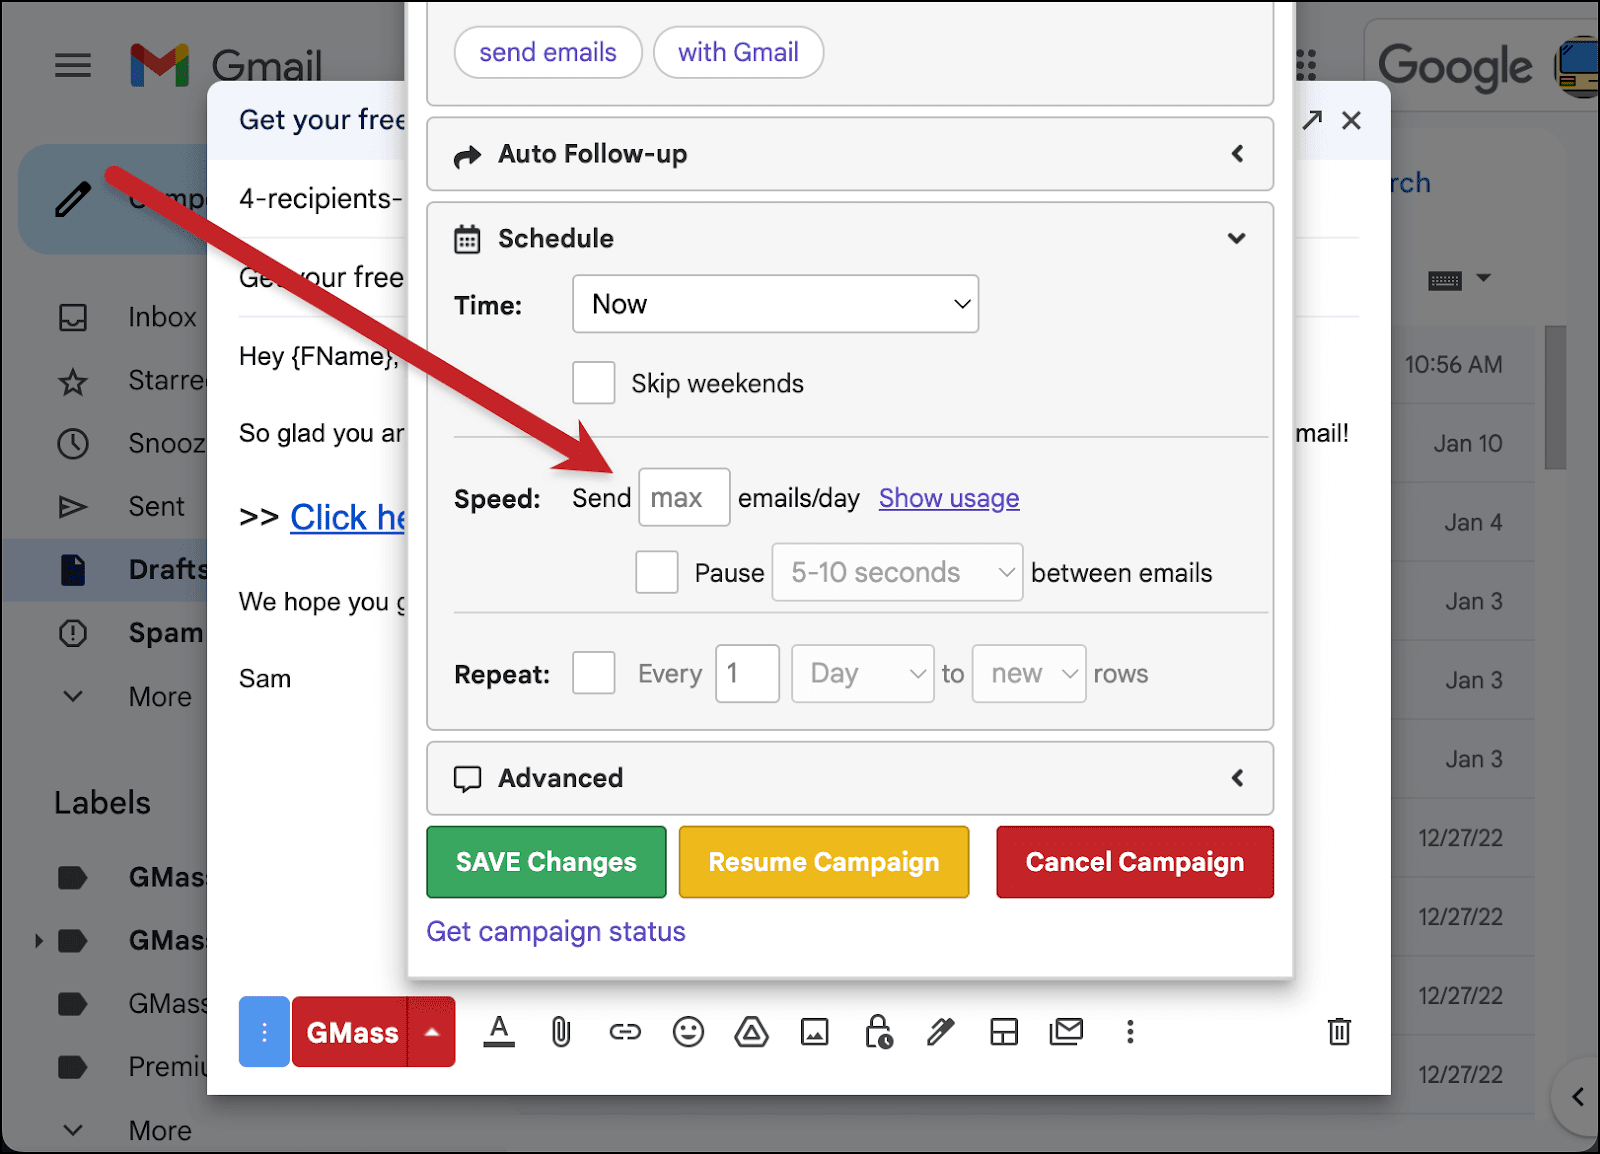
We’re also going to initially create a huge sending delay. Why? We’ll use that to give us a chance to set up our Google Apps script. (I’ll explain more when we get to that step.)
We’ll tell GMass to send 1 email/day. Don’t worry, we’ll change this later. It’s just making sure only one email goes out when we initially set this campaign live — the email to you, since you made your own address the first one on the Google Sheet.
You can now add any other settings you want to the campaign (A/B testing, auto follow-ups, and so on).
And once everything looks good, hit the red GMass button to start the campaign. Remember: Since we’ve capped it to one email a day (for now), it will only send to the first email on the Google Sheet… your email address.
Step 2: Pause Your Initial Campaign to Set Up Your Recurring Segments
Our next step is to pause our campaign to set up a Google Apps Script. Google Apps Scripts are custom scripts you write to perform functions on Google Sheets (or other Google Apps) that aren’t already built in.
Pausing the initial campaign and interacting with its first email
Once you receive the email from your campaign at your email address, it’s time to pause your initial campaign. (We’ll keep it paused while we set everything else up.)
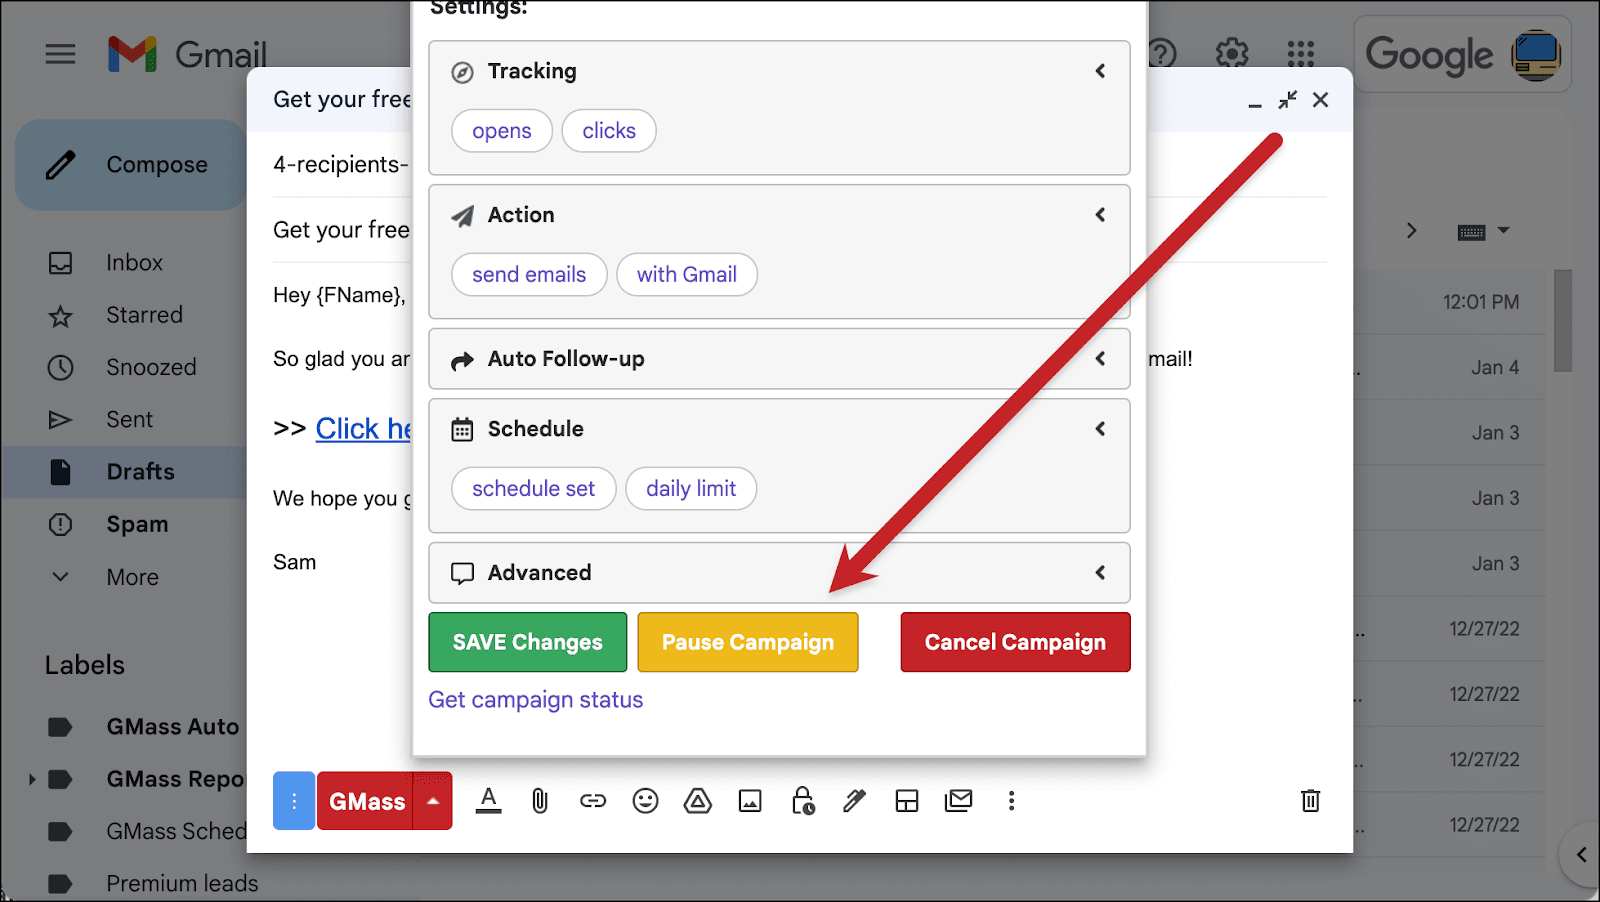
Open the draft of your campaign and go into the GMass settings. Then click the yellow Pause Campaign button.
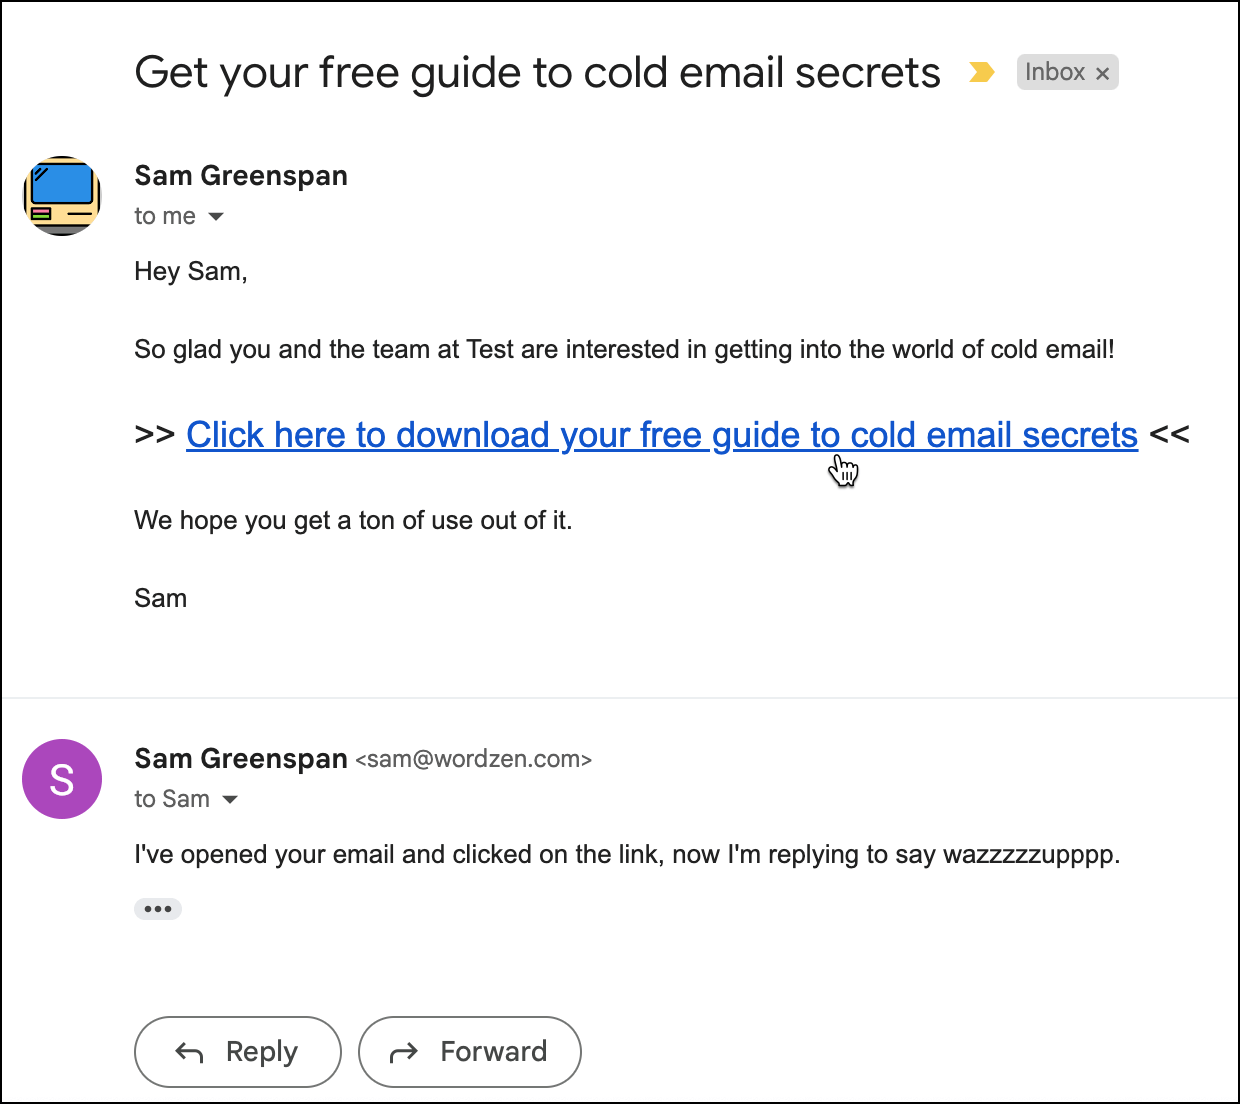
Now you need to open, click on, and reply to the email you sent yourself in order to get GMass to add those columns to your Google Sheet.
Before you do this, if you’re using GMass’s Tracker Blocker to prevent yourself from triggering open pixels, make sure it’s turned Off. Because today, we actually do want to trigger our own open pixel.
Now open the campaign email you received. Then click on the link. Then reply to your email.
Setting up a Google Apps script that spots when campaign data is added
Now you’ll need to keep an eye on your Google Sheet to see when GMass adds the columns for opens, clicks, and replies. It can sometimes take a little bit. That’s why we’ve paused the campaign. But be patient, it will update.
It’s important for us to do this step so we have our data columns in place before building out the rest of our automation. GMass adds the columns in the order the open, click, and reply data is processed and verified.
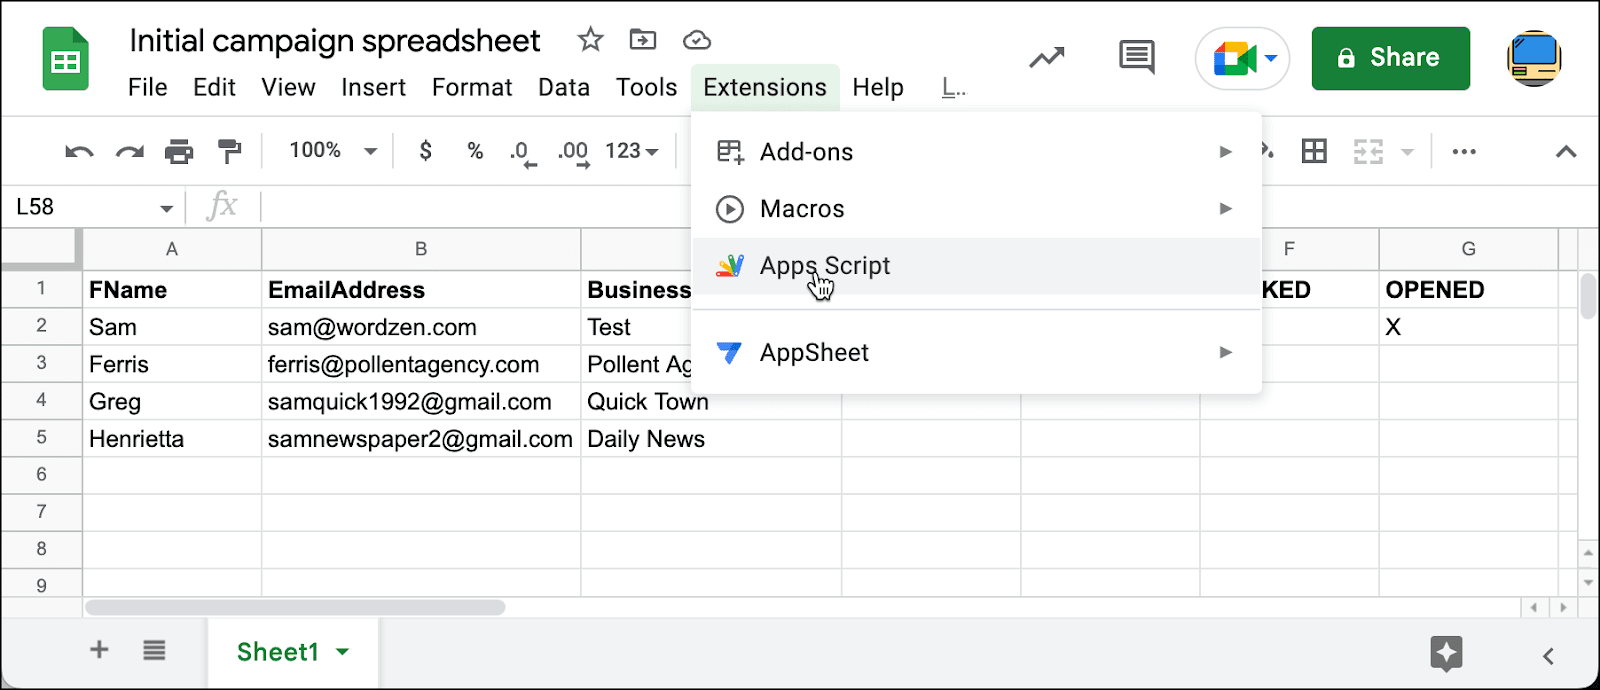
Click on the Extensions menu in Google Sheets and choose Apps Script.
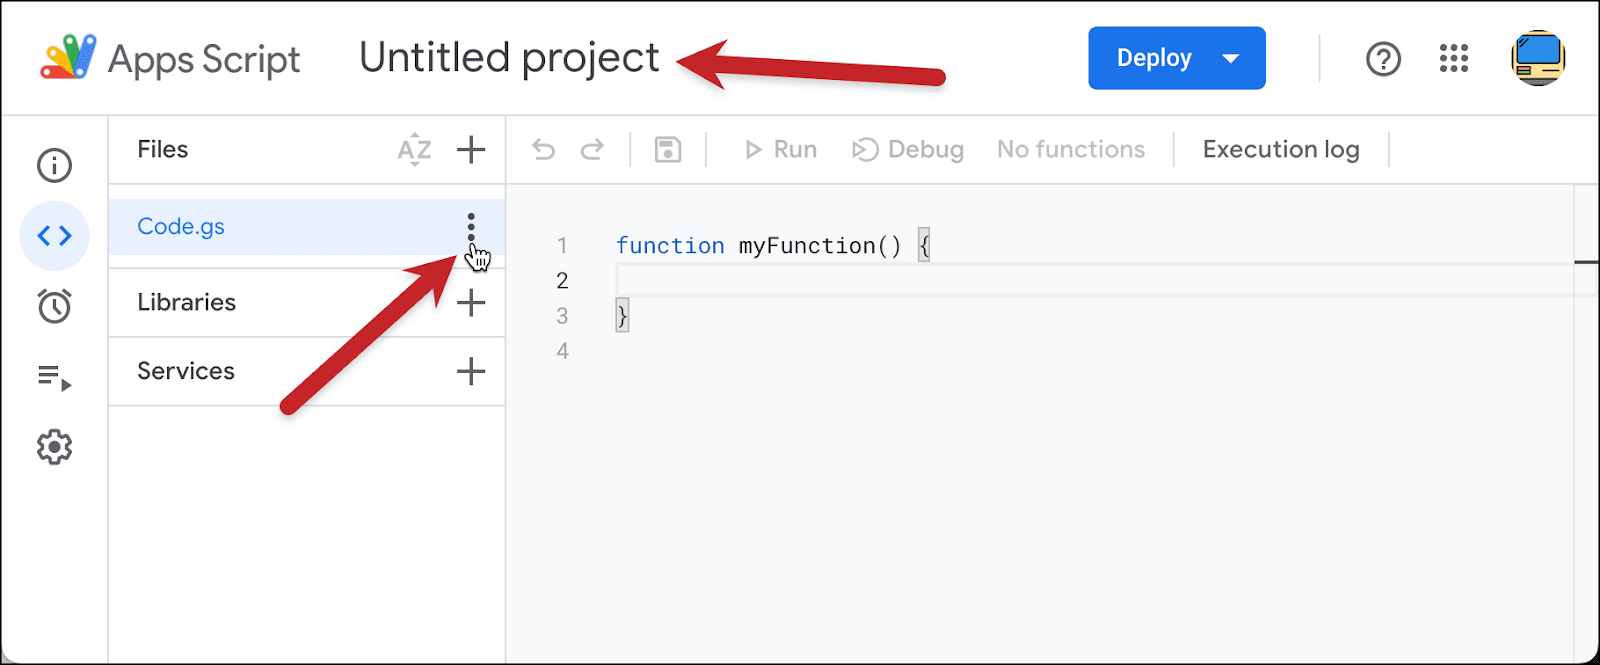
First, you can rename the project by clicking on the Untitled project title. Optionally, you can also change the file name from Code.gs to something more descriptive. Neither of these things is necessary but could help you keep everything straight when you revisit this months down the road.
I am going to change “Untitled project” to “Timestamp function” and I’m going to change “Code.gs” to “changetrigger.gs”.
Now delete the everything in the coding area (function myFunction() { }) and replace it with the following. This Google Apps Script checks your Google Sheet for new “X” marks in the CLICKED column in rows where there aren’t already dates added in the DateClicked column.
See the Pen
Datestamp on click by Sam G (@samgmass1)
on CodePen.

Click the floppy disk icon above the coding area to save.
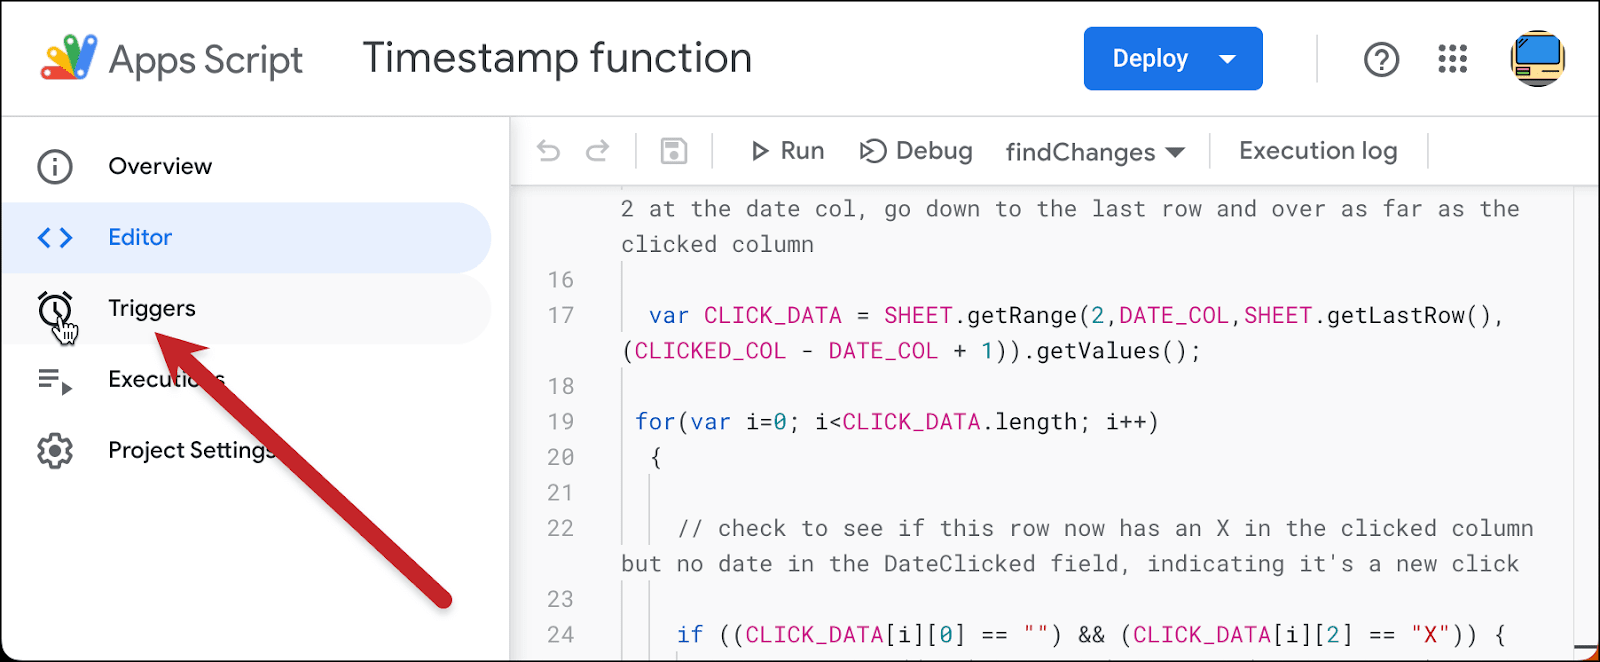
Next you need to create a Google Apps Script trigger to run this function. Click the stopwatch on the sidebar to open the triggers.
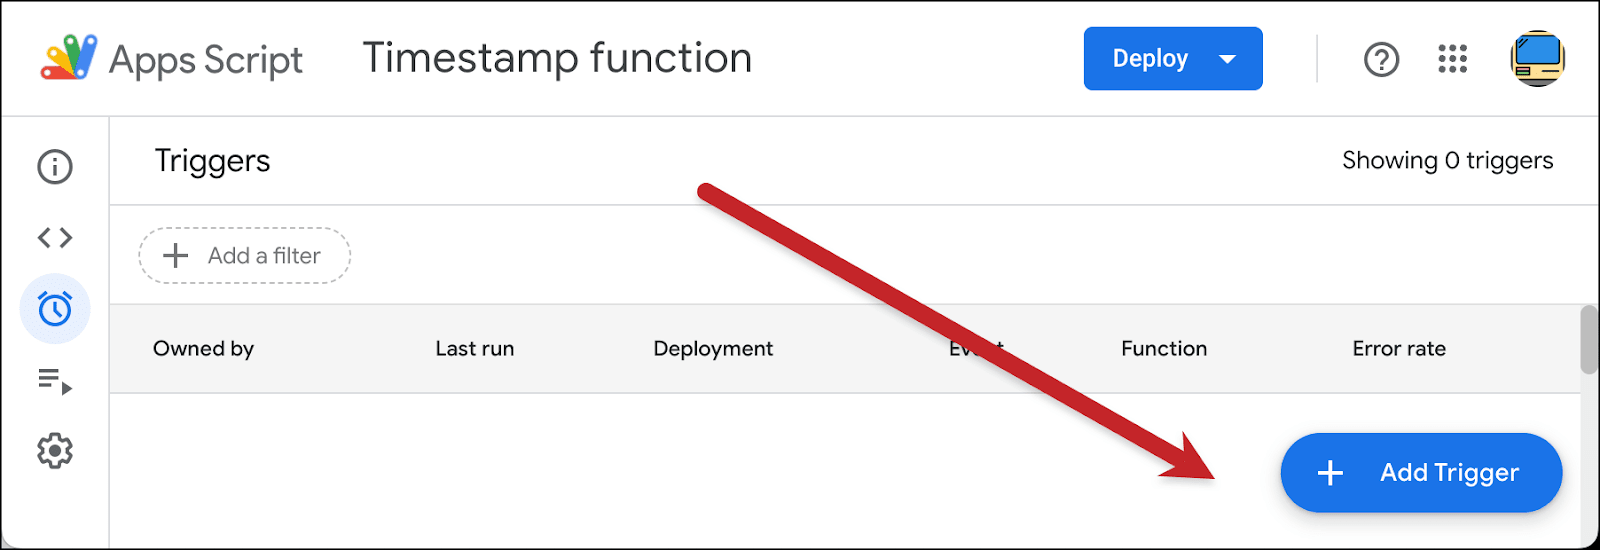
Click the blue + Add Trigger button in the bottom right corner.
In the first dropdown, choose the function we just made (assuming you didn’t change anything, it’s called findChanges).
Leave the second dropdown as Head.
Leave the third dropdown as From spreadsheet.
And for the fourth dropdown, select event type as On change.
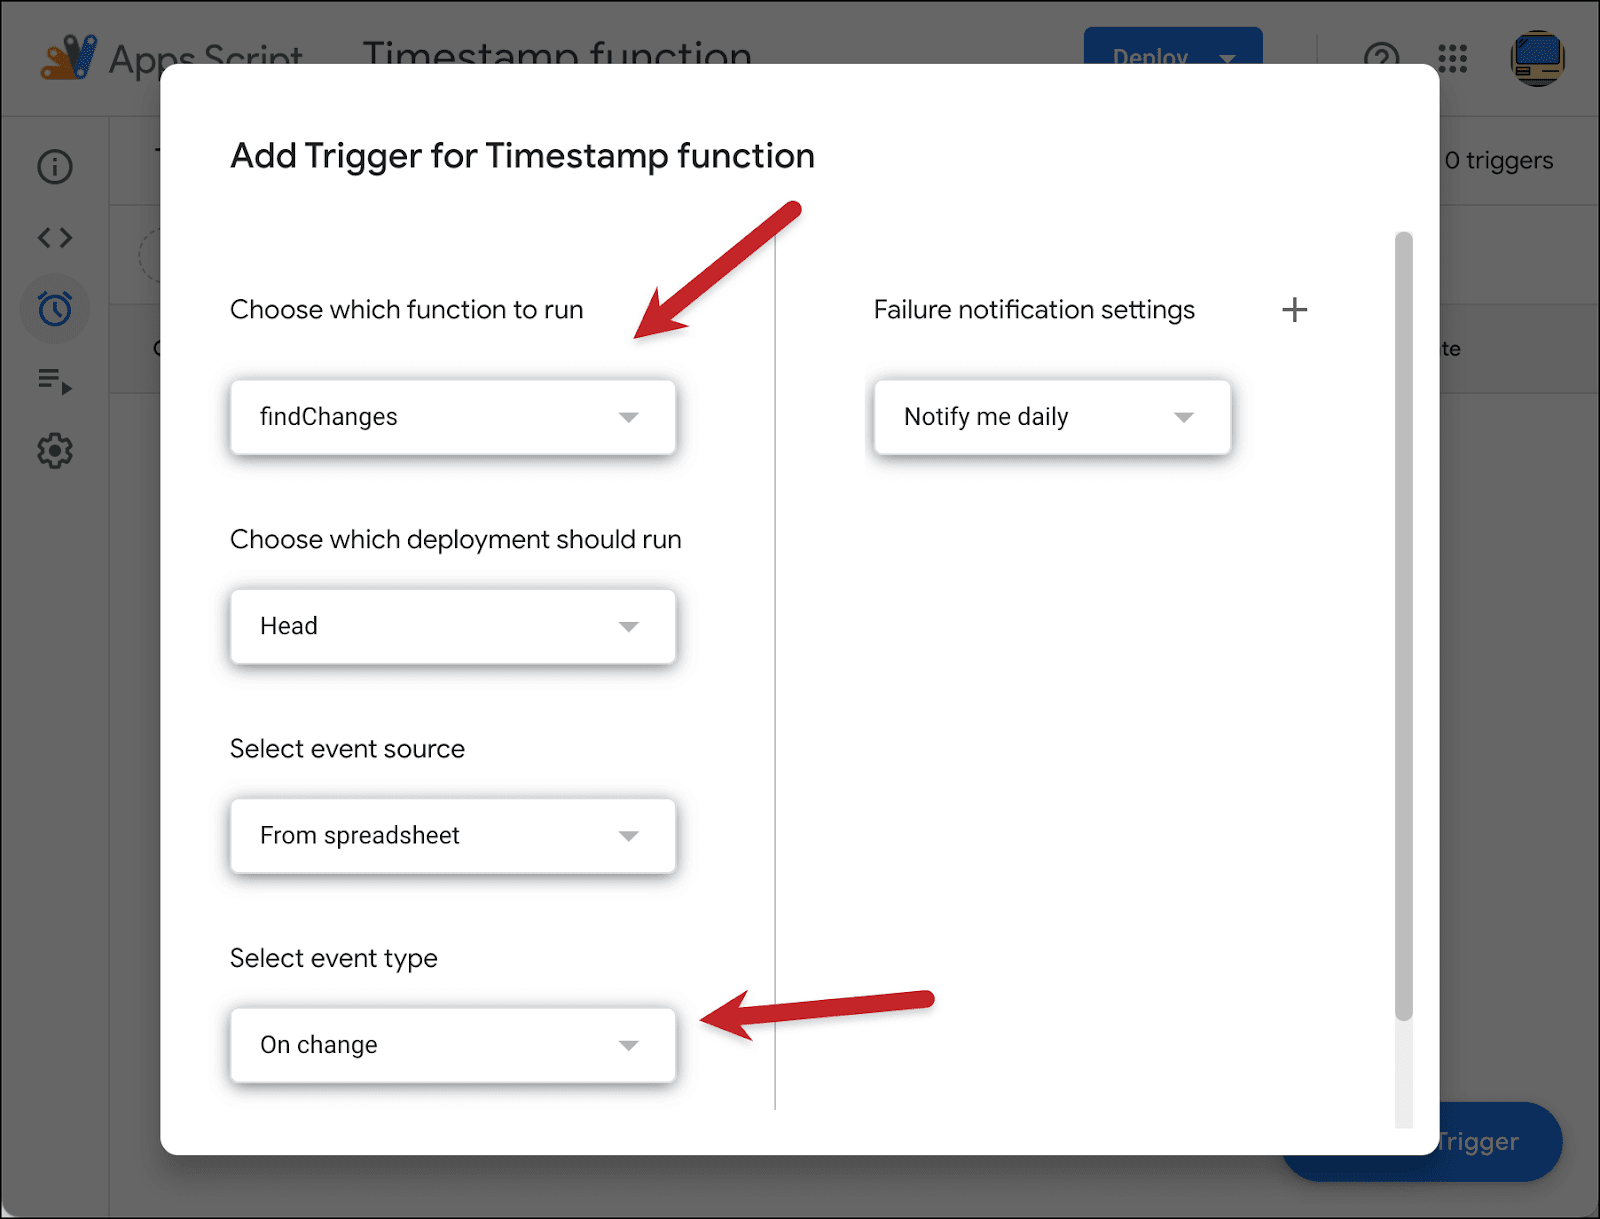
Then click the blue Save button at the bottom.
Your Google Apps Script is all set. Now, whenever there’s a change in the spreadsheet, Google will check for any new X’s in the CLICKED column. And if it finds them, it will add today’s date in the DateClicked column for that row.
Time to test it. Go to your Google Sheet, delete the X in the CLICKED column in the row with your email, then type in an X. A moment or two later, the DateClicked column will magically fill in.
Step 3: Creating the Recurring Automation
We’re now ready to make our recurring segmented campaign that automatically goes out to someone after they’ve clicked on the email.
Connecting to the new campaign using a filter
Go back to Gmail and open a new compose window.
Connect to the same Google Sheet you’ve been using by clicking the GMass icon in the To field.
Once again, connect from a Google Sheet. (Yes, even though we’re basing this on another campaign, you’ll still click the From a Google Sheet option in this case.)

But the connection settings are different this time.
You need to add to the Filter Rows box. We’re creating a filter so every time this recurring campaign runs, it’s checking for today’s date.
So add the following to the Filter Rows box: DateClicked = CurrentDate
That’s telling GMass to only send each day to rows where the date in DateClicked matches the current date (in GMT).
Also, uncheck Update Sheet with reporting data. We don’t want this data conflicting with the data we’re already adding to the spreadsheet. (You’ll still be able to see the analytics for this recurring campaign in the other spots on GMass, like the web-based report and GMass dashboard.)
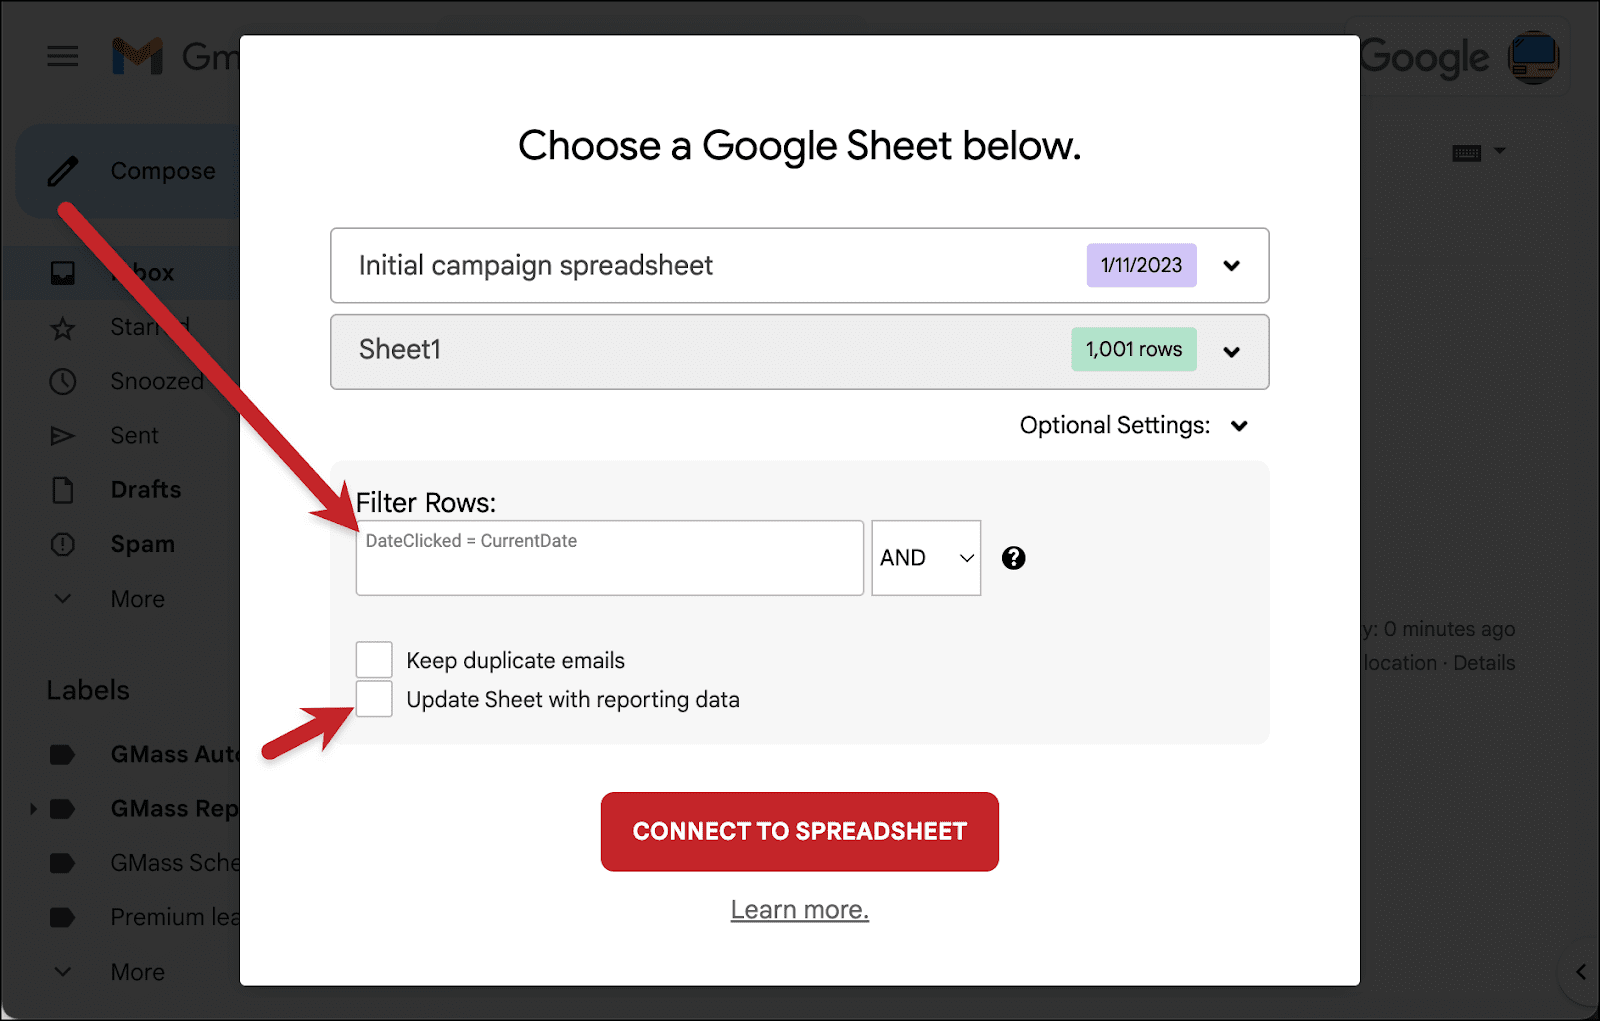
Click Connect to Spreadsheet. Since you ran the Google Apps Script in the previous step and no one else has clicked on your initial campaign (because you paused it after it went to you), GMass should find only ONE person who currently matches the filter: You.
Now you can compose your email. Remember, you can still use all the mail merge tags here as well.
Setting up the time to send and recurrence
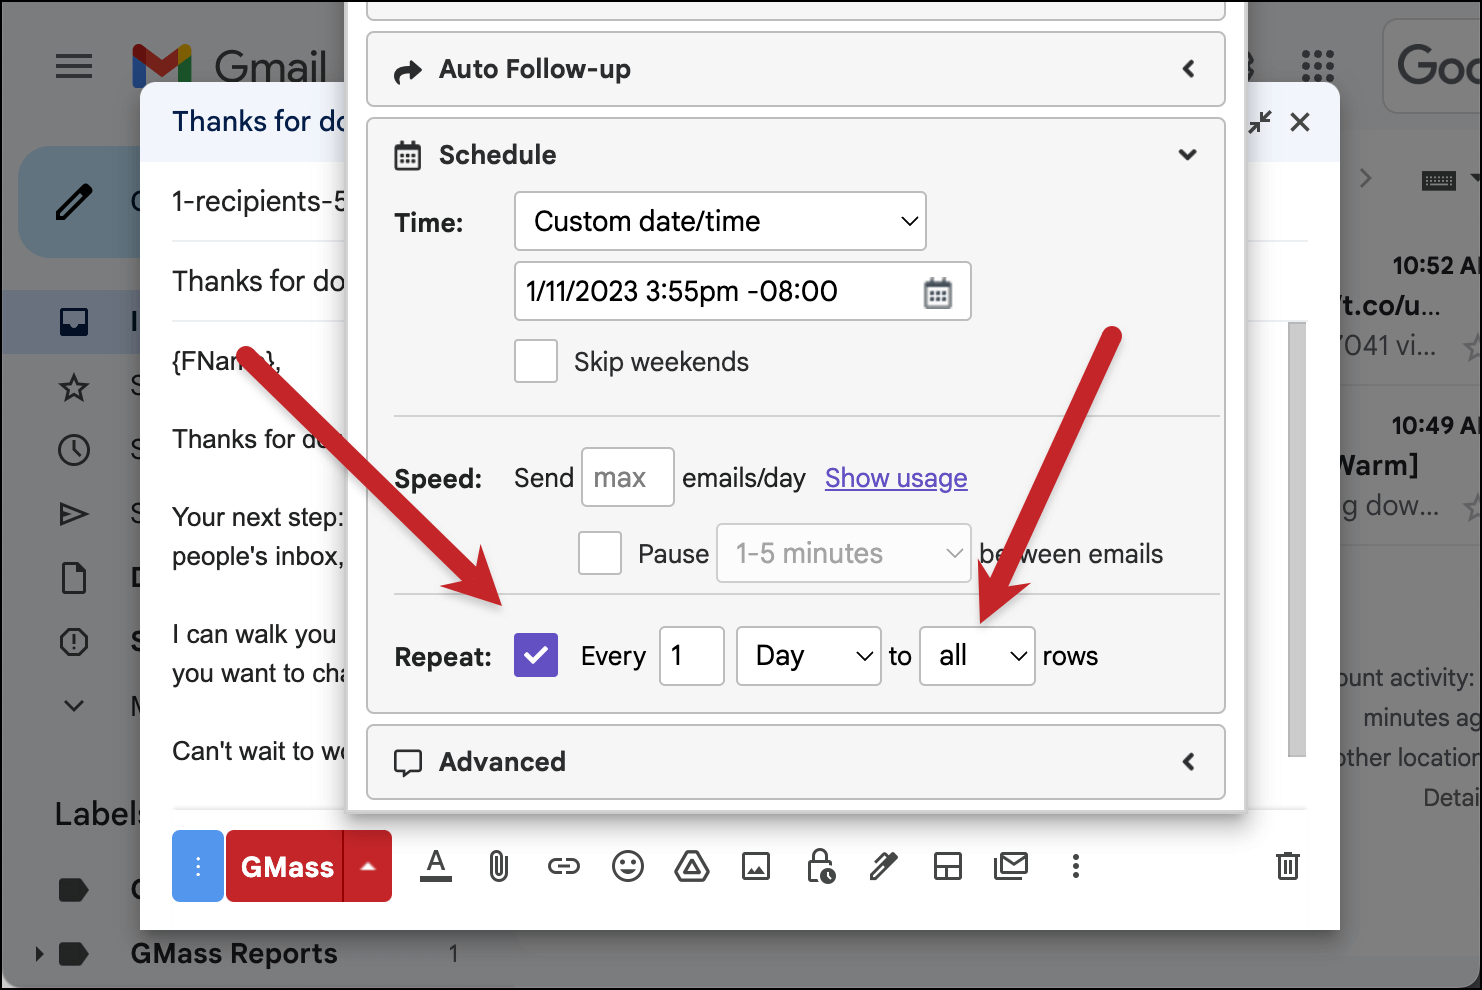
Open the GMass settings for this campaign and go to the Schedule section.
I want this email to go out once a day to all the people who clicked on that day. And I want it to go out right before the end of the day in GMT. (I’m not worried about some people getting it in the evenings or even middle of the night. I’m confident they’ll see it in their inbox.)
So I’ll schedule the Time for Custom date/time and choose to send at 11:55 P.M. GMT. Based on my time zone, that’s eight hours ahead.
Now check the box next to Repeat. We’re going to have this campaign recur daily to All rows.
Why all rows? Because we want GMass to check the entire sheet once a day for new clickers. But the campaign won’t actually go out to all rows every day, thanks to the filter we used when we connected the sheet. The campaign will only go out to people whose DateClicked is that day’s date.
Tweak any other settings, then set the recurrence live
You’re now good to go. This campaign will automatically go out daily to anyone who clicked on your initial email that day.
You can now tweak any other settings for this campaign that you want — including adding an auto follow-up sequence.
When everything is set, hit the red GMass button to set the recurring campaign live.
As the one and only person who clicked on the initial campaign, you should receive the new campaign at your time zone equivalent of five minutes to midnight GMT.
Step 4: Unpause and Speed Up the Initial Campaign
Last thing to do! Now that your recurring segmented campaign is squared away you can start sending out your initial campaign again.
Go to the Drafts folder in Gmail and find your initial campaign.
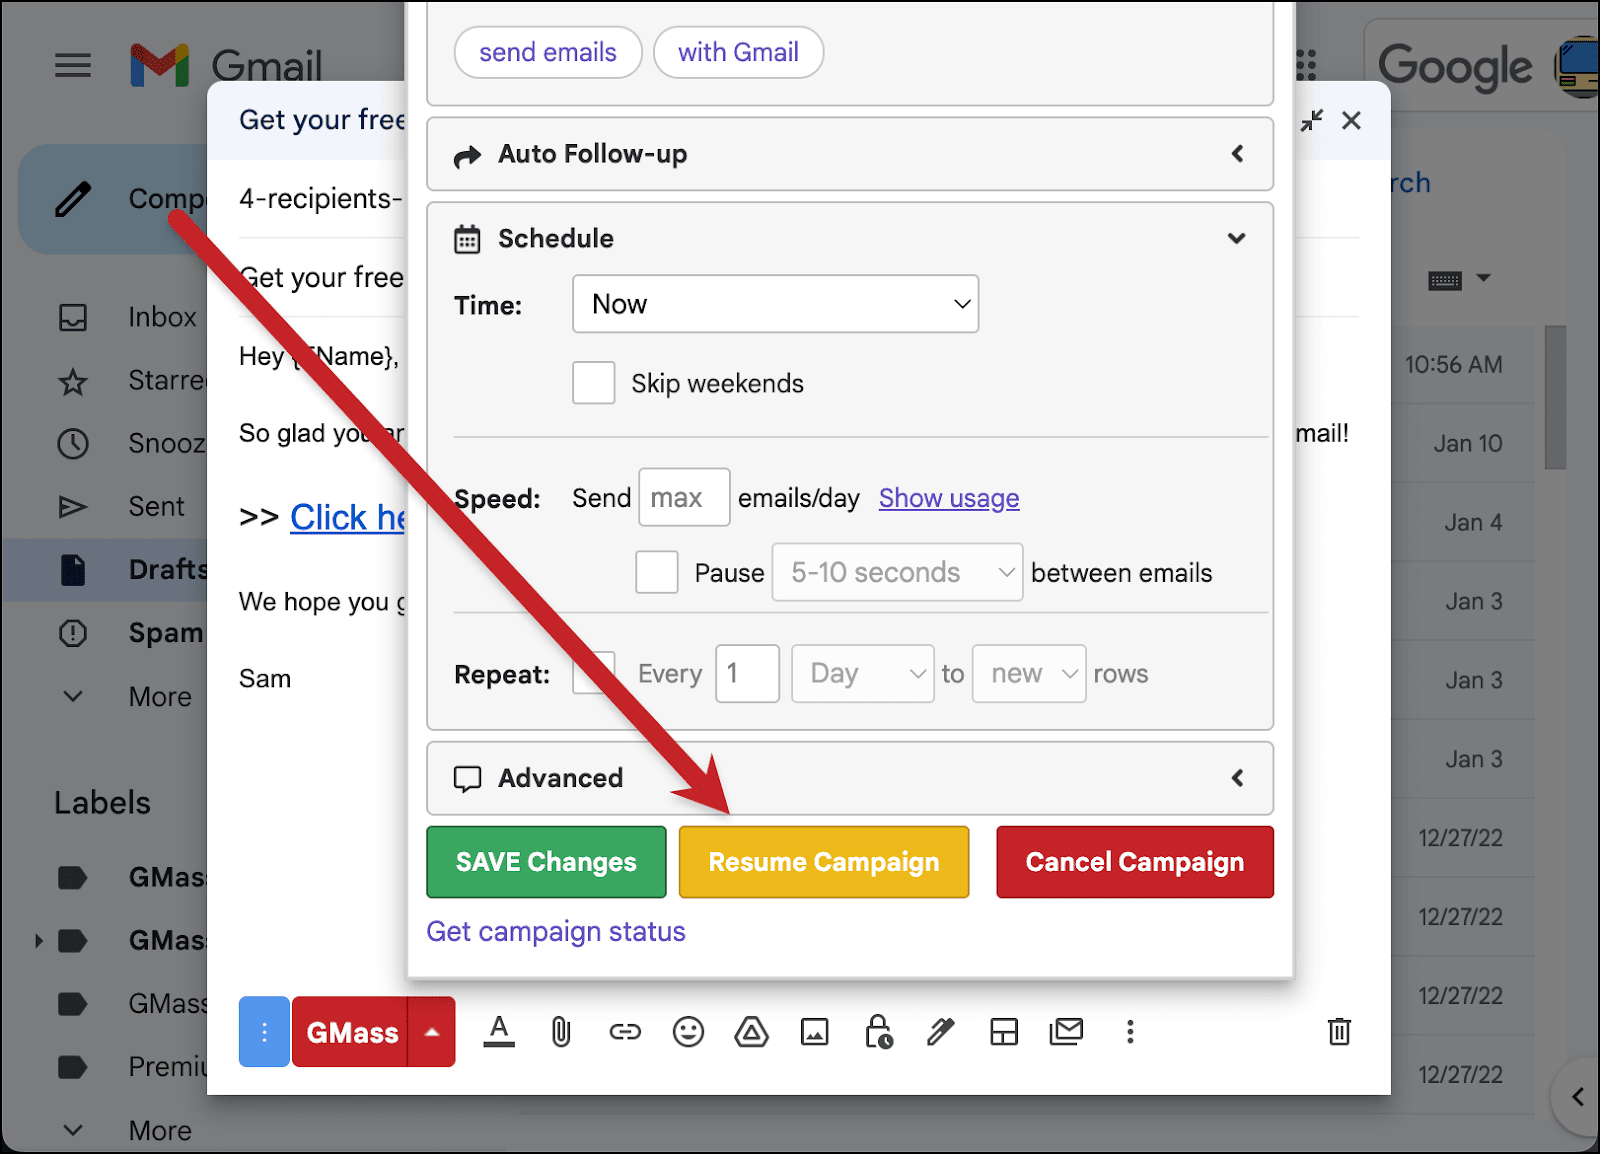
Open it, then open its GMass settings. Go to the Schedule section and delete the “1” in the Speed section. That will replace the 1 with “Max” — meaning the campaign is no longer capped and GMass will send it to everyone on the Sheet.
And finally… it’s time to unpause the campaign. Click the yellow Resume Campaign button to get it going again.
Your campaign will now go out to everyone else. And when those people click on it, later that day, they’ll each automatically receive your recurring segmented campaign.
Auto-Send Campaigns After Action: Modifications and Possibilities
As you’ve now experienced first-hand, setting up recurring segmented campaigns can get pretty involved.
However, my hope is that with this guide, you’ll understand the method to pull this off (and the rationale behind everything I did) — and you can modify the setup and script to meet your needs.
For instance, you could set up a second recurring segmented campaign based on replies. Just add a few more lines to the Google Apps Script to also check for new X’s in the REPLIED column.
You could even send to everyone who opened but didn’t click or reply by a certain date.
You should be able to modify the script and the campaign settings to do whatever you need to do.
As I mentioned at the beginning of this guide, this idea came from GMass’s Facebook group. If you want to join the community to talk email marketing and cold email strategy — and ask about new GMass techniques I just might turn into guides like this — you should definitely apply to join.
And if you’re not using GMass, you can join the 400,000+ others who currently are by downloading the Chrome extension from the Chrome Web Store. It’s free to start your trial — no credit card required! — and you can send up to 50 emails a day while you’re getting to know GMass.
Only GMass packs every email app into one tool — and brings it all into Gmail for you. Better emails. Tons of power. Easy to use.
TRY GMASS FOR FREE
Download Chrome extension - 30 second install!
No credit card required
Hi, the CurrentDate is not working, is there any alternative to it.
Meg, I just tested and CurrentDate worked for me. If you’re still having trouble with this, I recommend filing a support ticket to figure out why it’s not working right for you!