
One of the most common questions we get at GMass is: Can I send a campaign where the emails go out to my recipients in their own time zone?
After all, it’s nice and easy to send a campaign in your time zone (or one specific time zone you prefer). What about the recipients’ time zones?
First the bad news: There’s no native way to do this, mainly because there’s no reliable way to figure out someone’s time zone until they’ve emailed you (then their date header tells the story).
Now the good news: If you’ve done any location-based enrichment on your contacts and/or you actually know their time zone, then yes, you can use the instructions in this article to send to them based on that time zone.
I’m going to walk you through the step-by-step process for emailing your recipients using personalized send times.
The process might seem a little tricky on paper — and it isn’t exactly super short — but it’s mostly cut-and-paste. So don’t be intimidated by things like “Apps Script” and more advanced GMass techniques like filtering and recurrence. I’ll get you there.
Sending in Recipient’s Time Zone: Table of Contents
- Step 1: Choose Your Base Time Zone
- Step 2: Preparing your Google Sheet of Contacts
- Step 3: Create Your GMass Campaign
- Step 4: Setting Up the Google Apps Script
- Sending in Each Recipient’s Time Zone: Next Steps
Step 1: Choose Your Base Time Zone
To send in multiple time zones, first we need to get all our systems agreeing on one base time zone. Those systems are:
- GMass
- Google Sheets
I’m going to go with my home time zone, Pacific, for my examples.
Setting the time zone in GMass
The first place we want to set up the base time zone is GMass.
Head to your GMass dashboard, open the Settings (that’s the gear icon in the top right), and go to the Time Zone section. Choose your desired base time zone there. (Again, for these examples I’ve picked my personal base timezone of U.S. Pacific. You can pick whatever you want.)
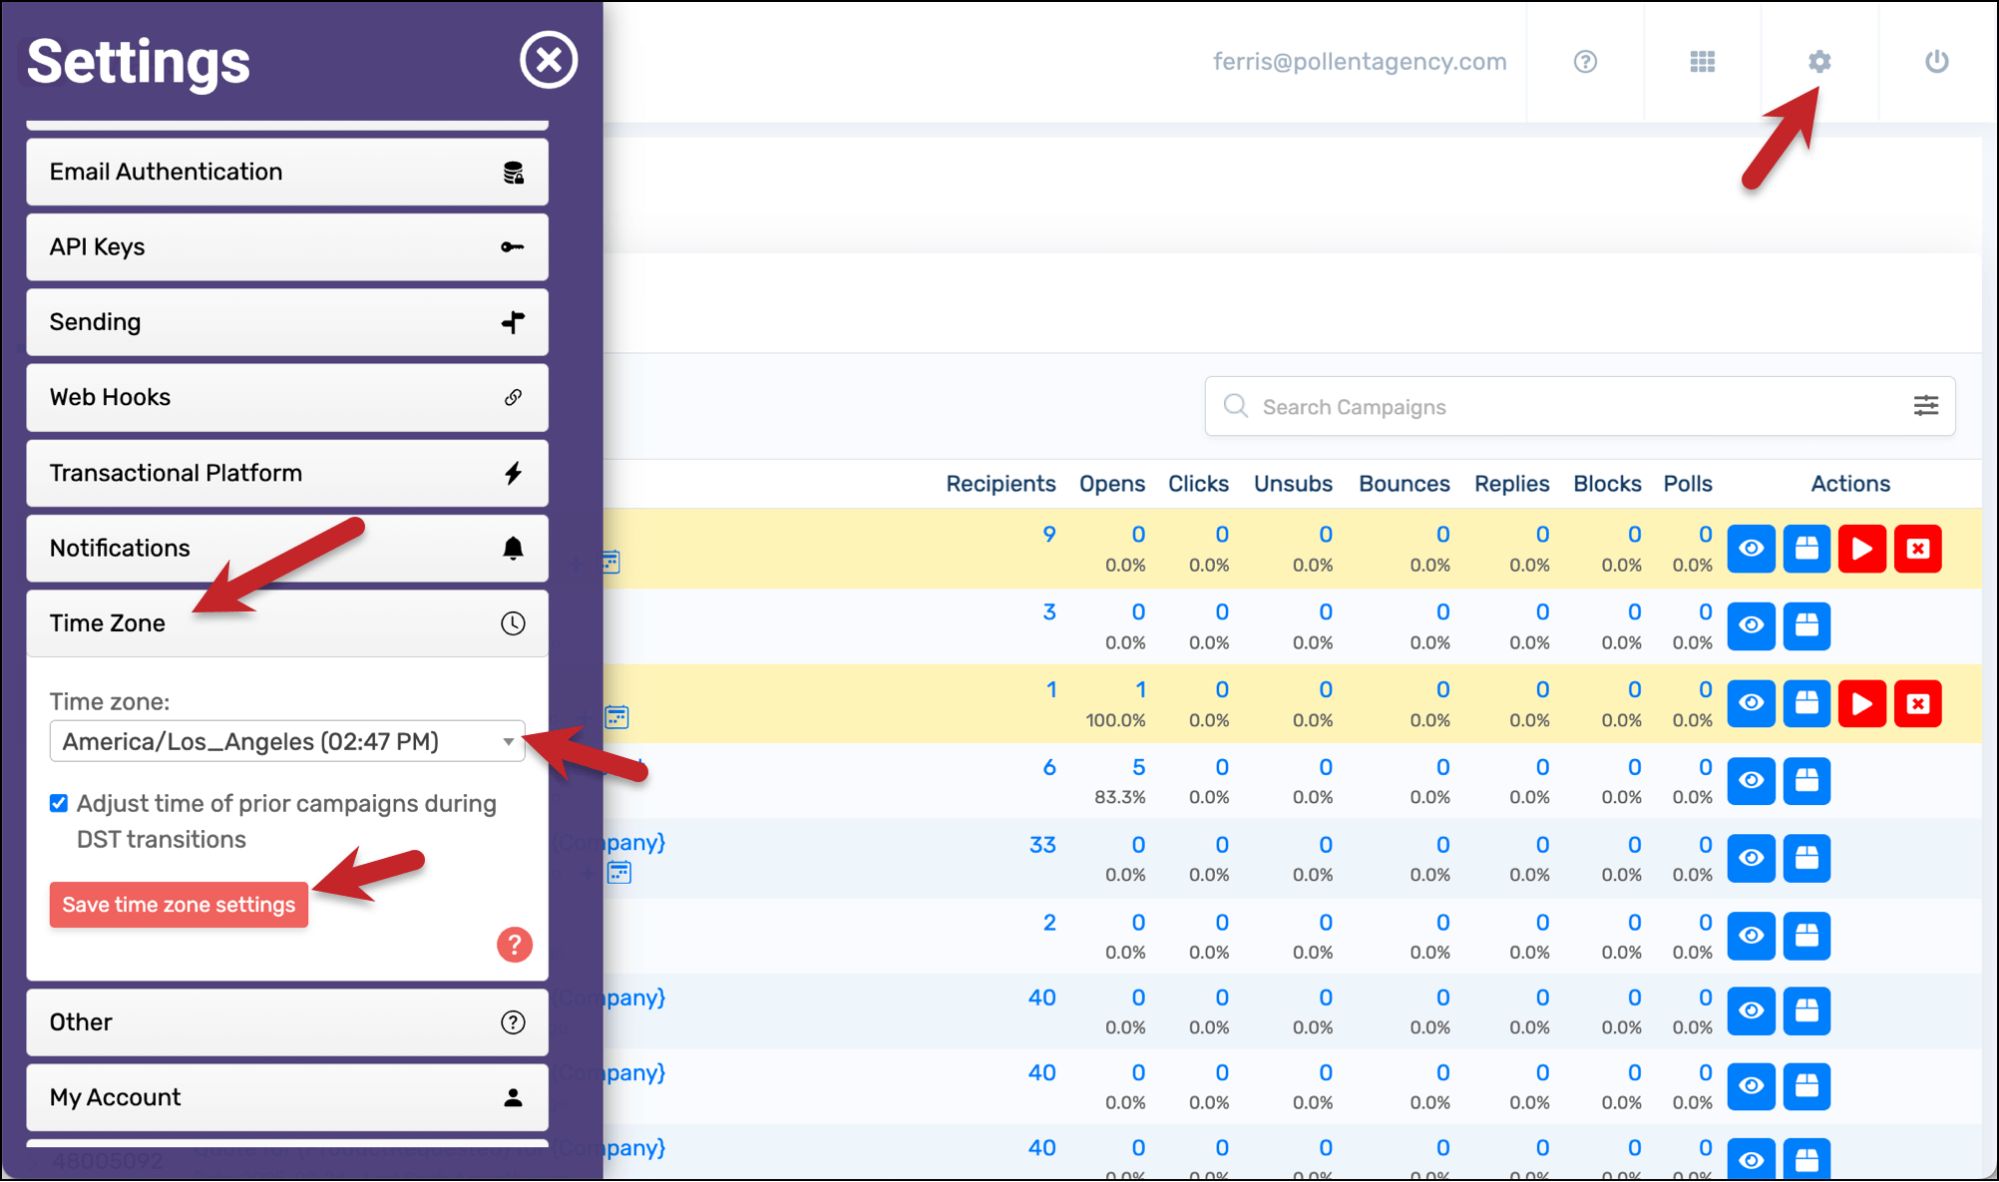
Click the Save time zone setting button.
Then you can exit the GMass dashboard.
Step 2: Preparing your Google Sheet of Contacts
Now we’re going to set up your Google Sheet.
Prepare your Google Sheet of contacts for your campaign as you normally would. And then we’ll do a few extra things…
Setting the Google Sheet time zone
First, let’s set the proper time zone in your Google Sheet.
In Sheets, go to File > Settings and choose your time zone from the dropdown box. Match the time zone you chose in GMass.
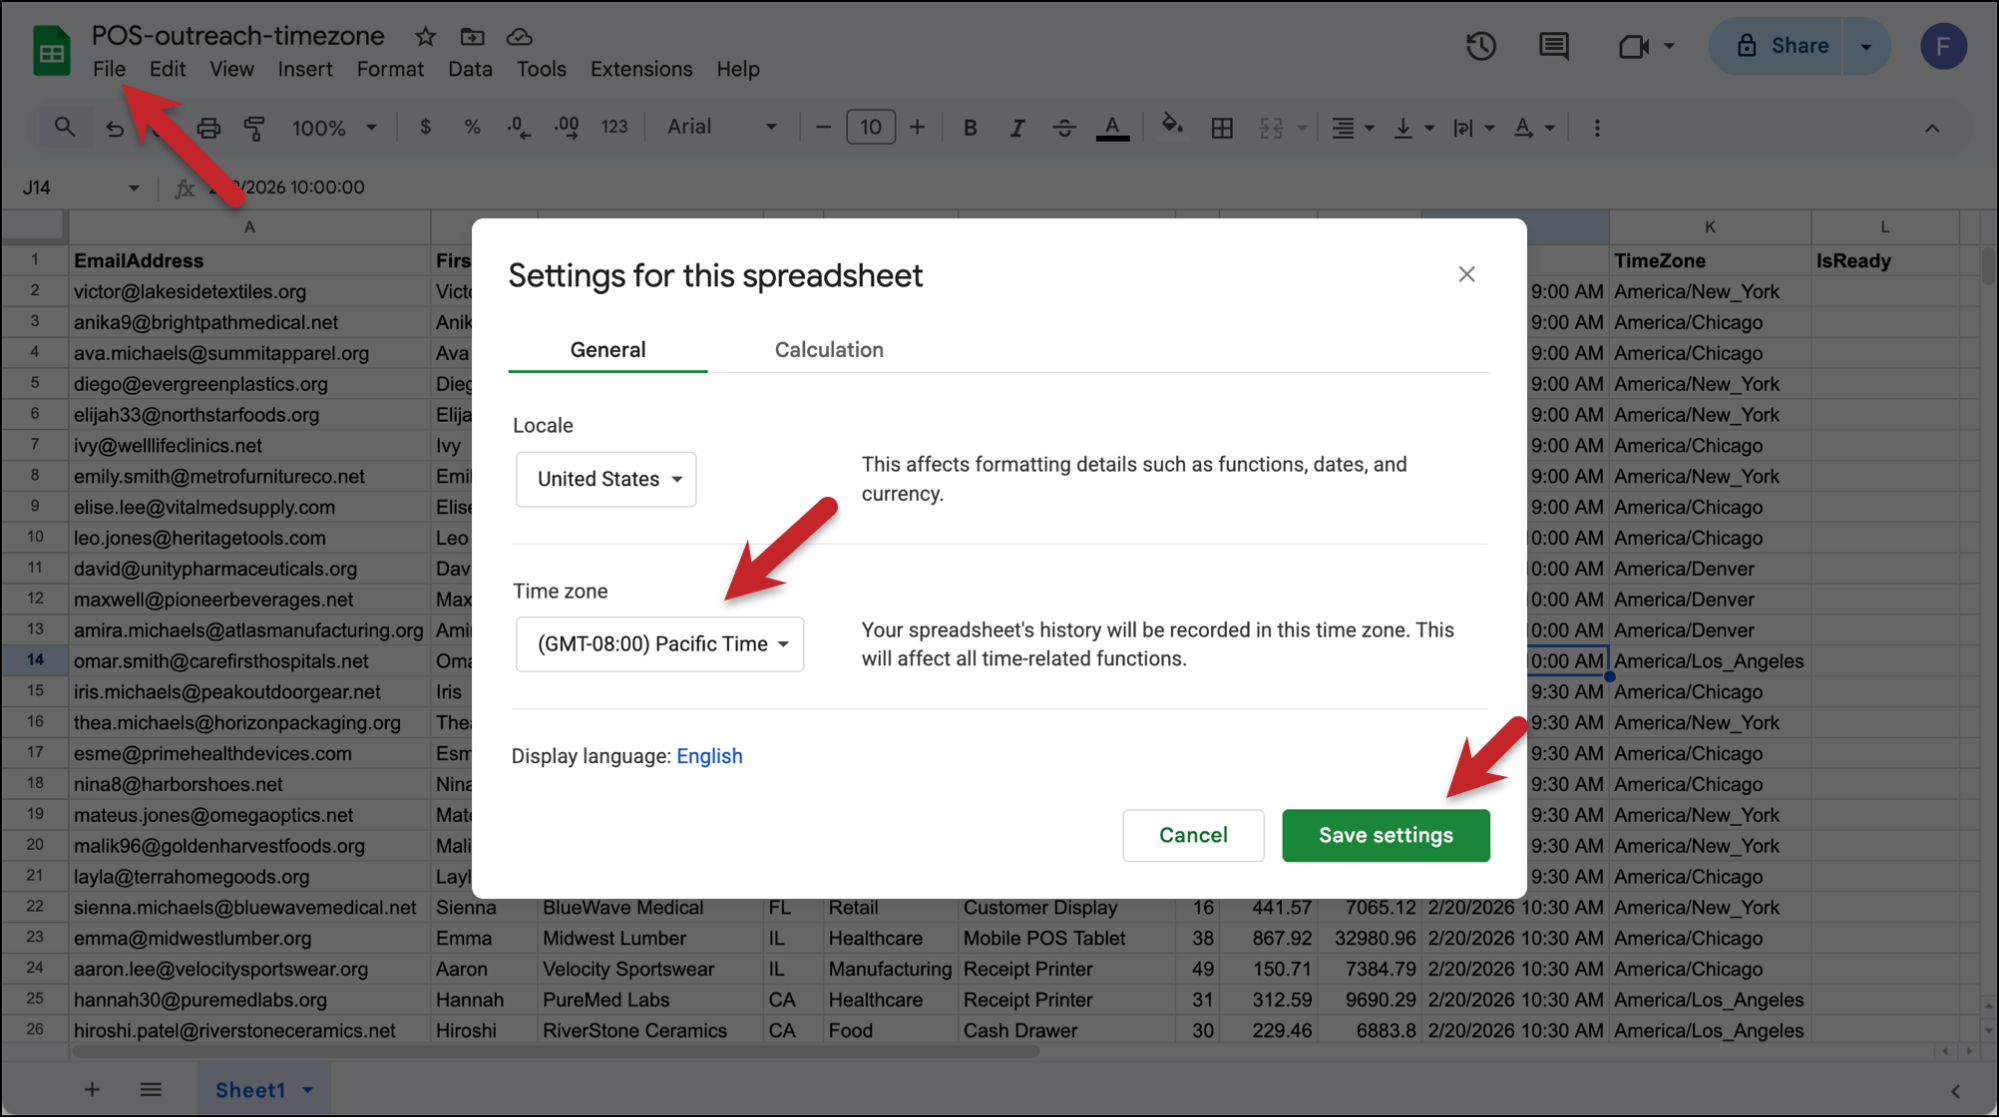
Click the Save settings button to lock in the time zone.
Adding time zone info to your Google Sheet
We’re going to add three extra columns to our Google Sheet called SendDate, TimeZone, and IsReady.
⚠️Important: Make sure you use those EXACT names in row 1 of your Google Sheet, including the capitalization, with no spaces before or after. The script we’ll use later is looking for columns with those exact headers.

SendDate
SendDate is the date and time we want to send to each individual.
Since I don’t want you to have to do mental math, this is the date/time for the recipient — so if you put 9 AM here, their email will go out at 9 AM in their own time zone.
(Yes, even though we set the Google Sheet’s timezone so Sheets is “adding” that timezone to this date/time, our process will eventually strip that out and use the individual time zone you specify in the TimeZone column.)
TimeZone
TimeZone is each recipient’s timezone in IANA format.
I debated a LOT over the most user-friendly way to handle time zones and I picked this — because I find that offsets (like +8:00 and such) are even more confusing. Also, the IANA formats can handle daylight saving time switches.
Enter the IANA timezone string for each recipient in this field. Some common options:
- U.S. Eastern –
America/New_York - U.S. Central –
America/Chicago - U.S. Mountain –
America/Denver - U.S. Pacific –
America/Los_Angeles - U.K. –
Europe/London - Central Europe –
Europe/Berlin - India –
Asia/Kolkata - Australia Eastern –
Australia/Sydney - Japan –
Asia/Tokyo
Need to find others? Check out Wikipedia’s IANA list.
Note: If you leave the TimeZone column blank, it will default to your Google Sheet’s timezone.
IsReady
IsReady is a column that will automatically fill in with the word “Yes” when the recipient’s date/time happens. Just leave it blank.
Step 3: Create Your GMass Campaign
Now head over to Gmail to create your GMass campaign.
Connecting and filtering your Google Sheet
Click the sheet icon next to the Gmail search bar to connect to your Google Sheet and select it from the dropdown.
Now we need to add a GMass filter so the campaign only goes out when someone has a “Yes” in the IsReady column.
So in the Filter Rows box, type IsReady=Yes.
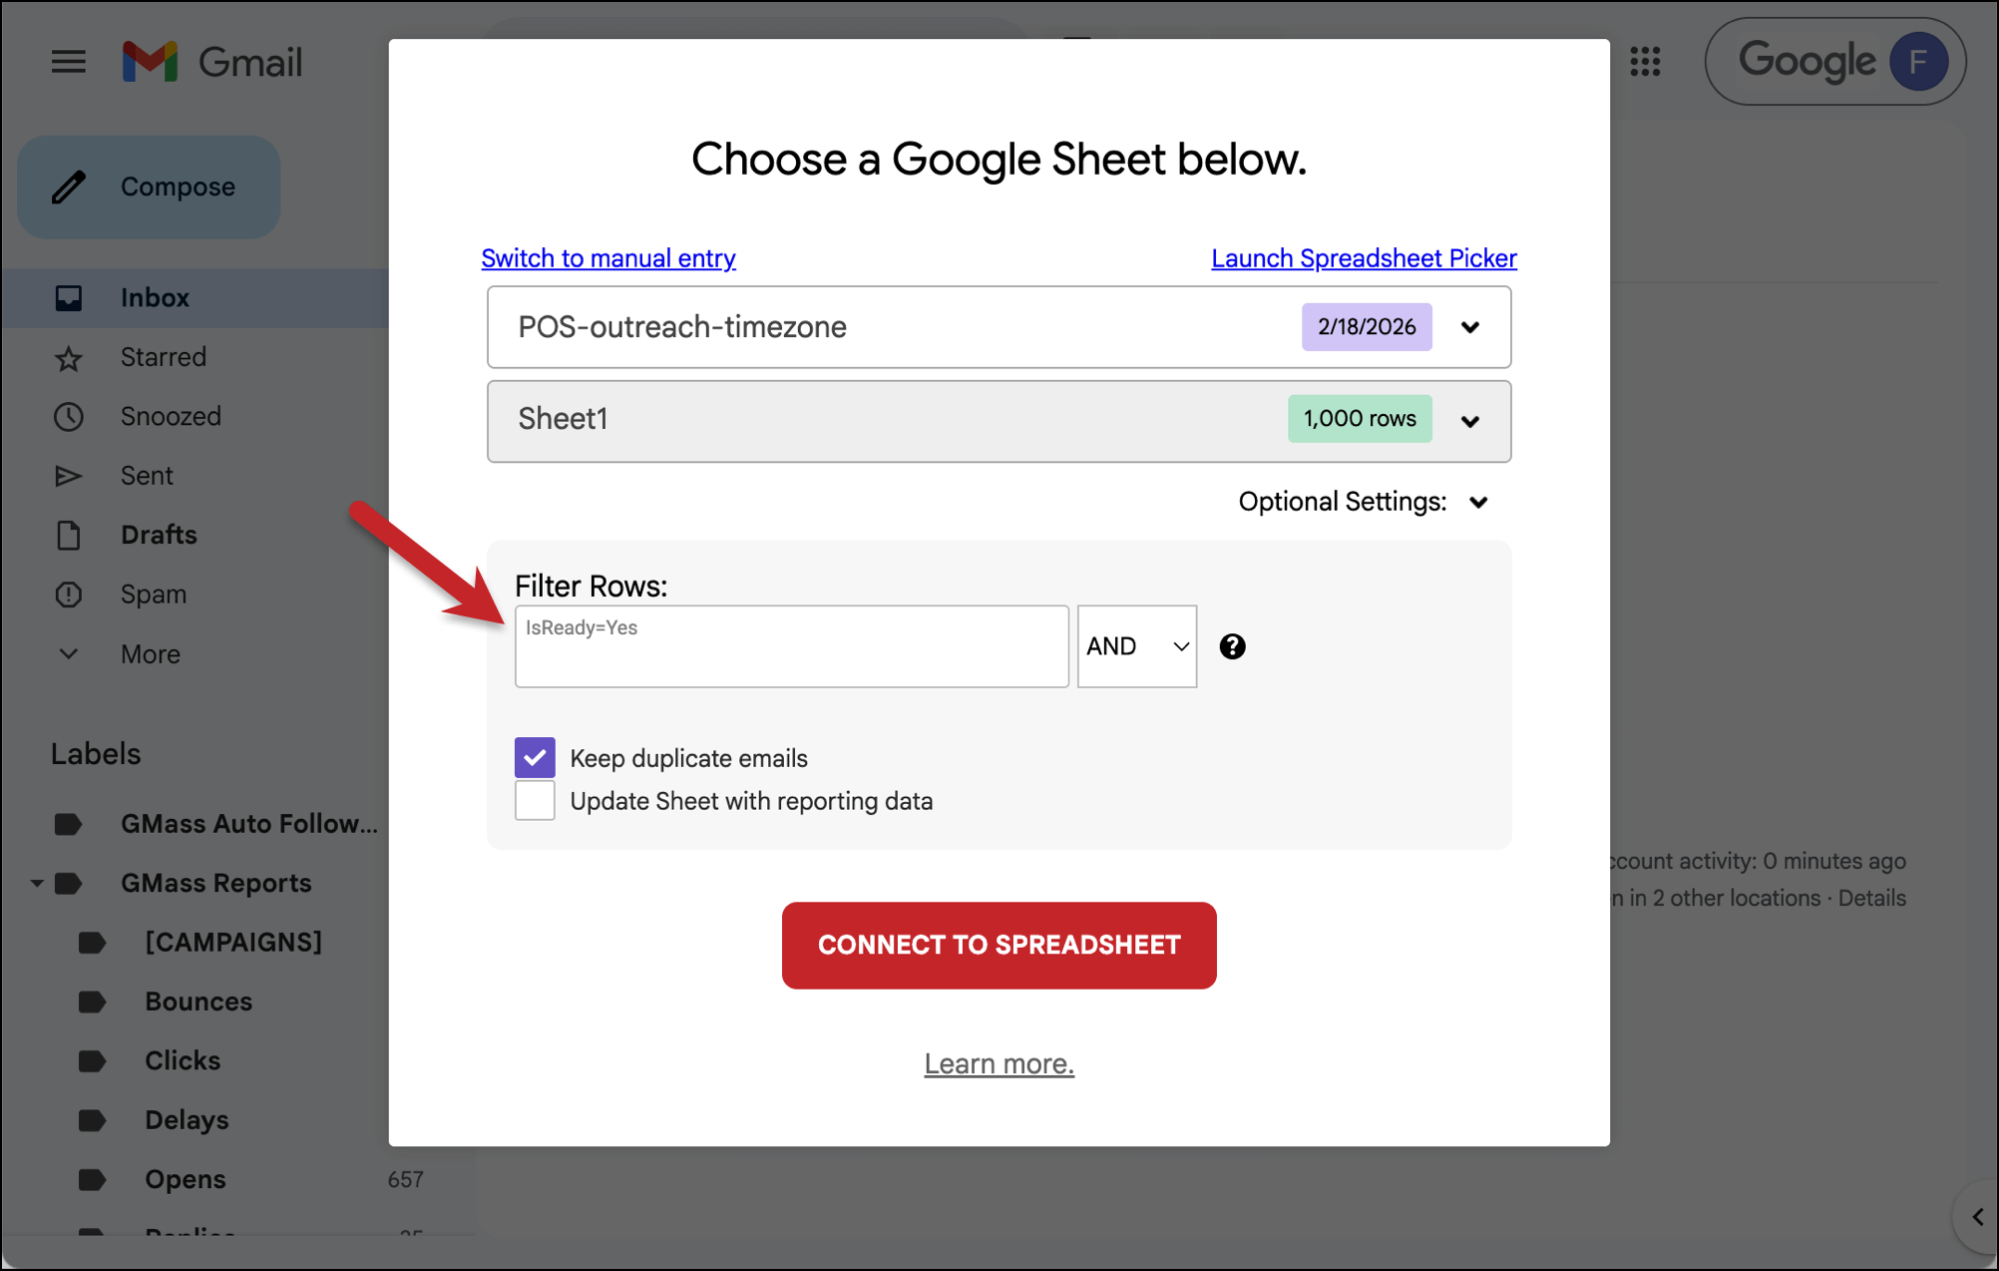
Now click the Connect to Spreadsheet button.
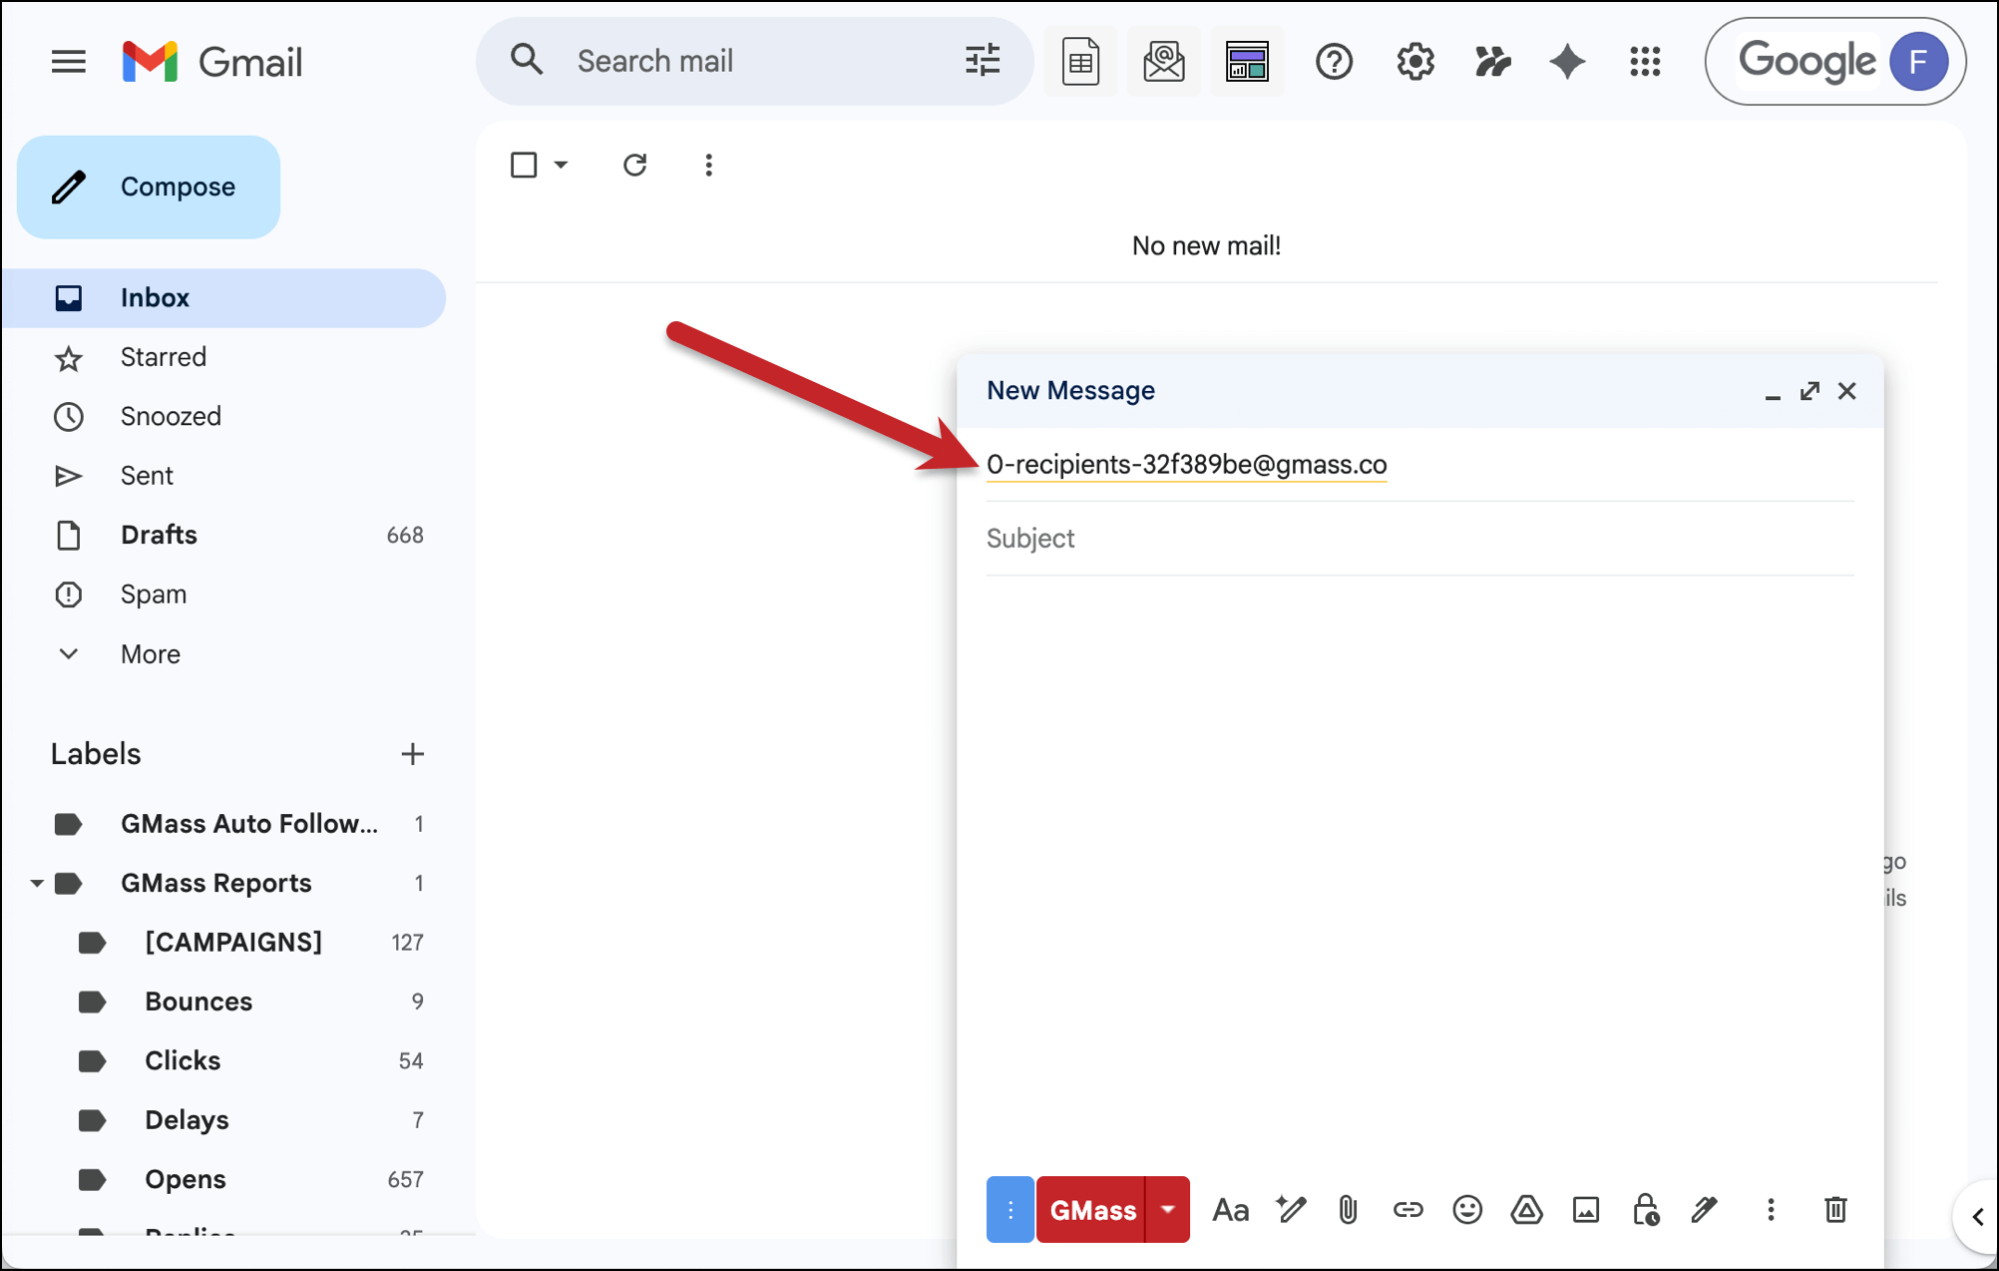
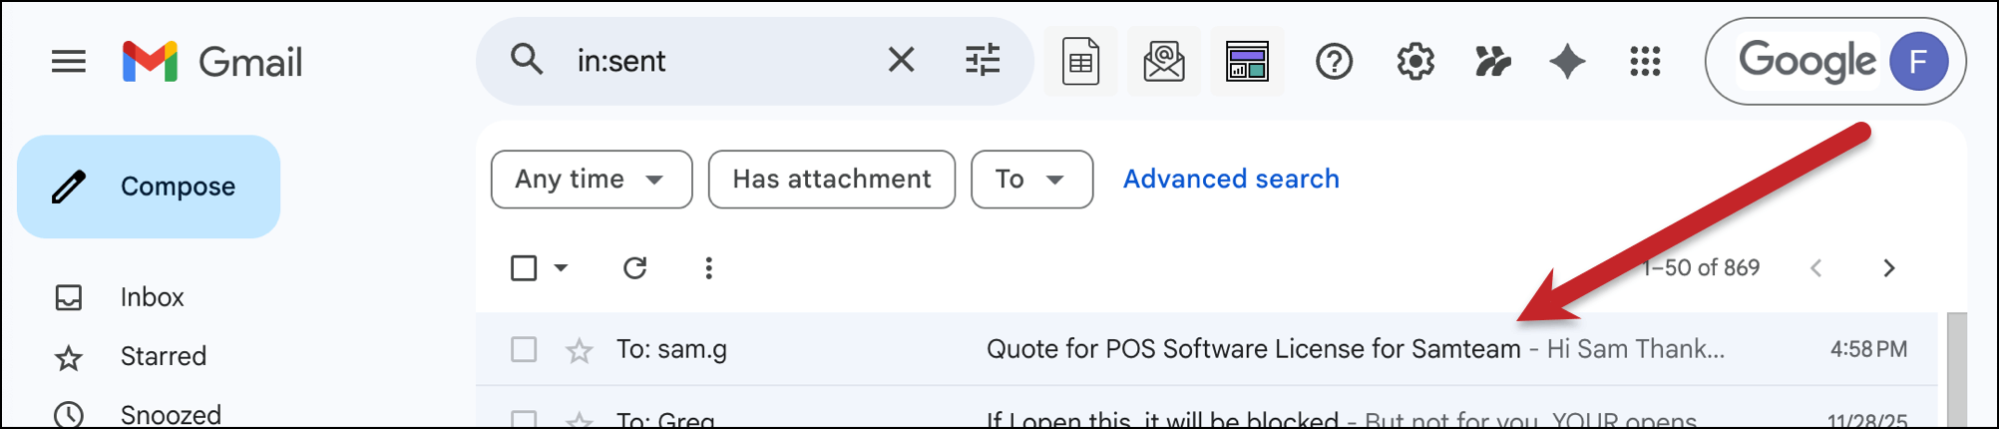
If none of your recipient’s send times have occurred yet, it will say “0-recipients” in the alias email address. That’s ok. The campaign will go out to each of them when it’s supposed to.
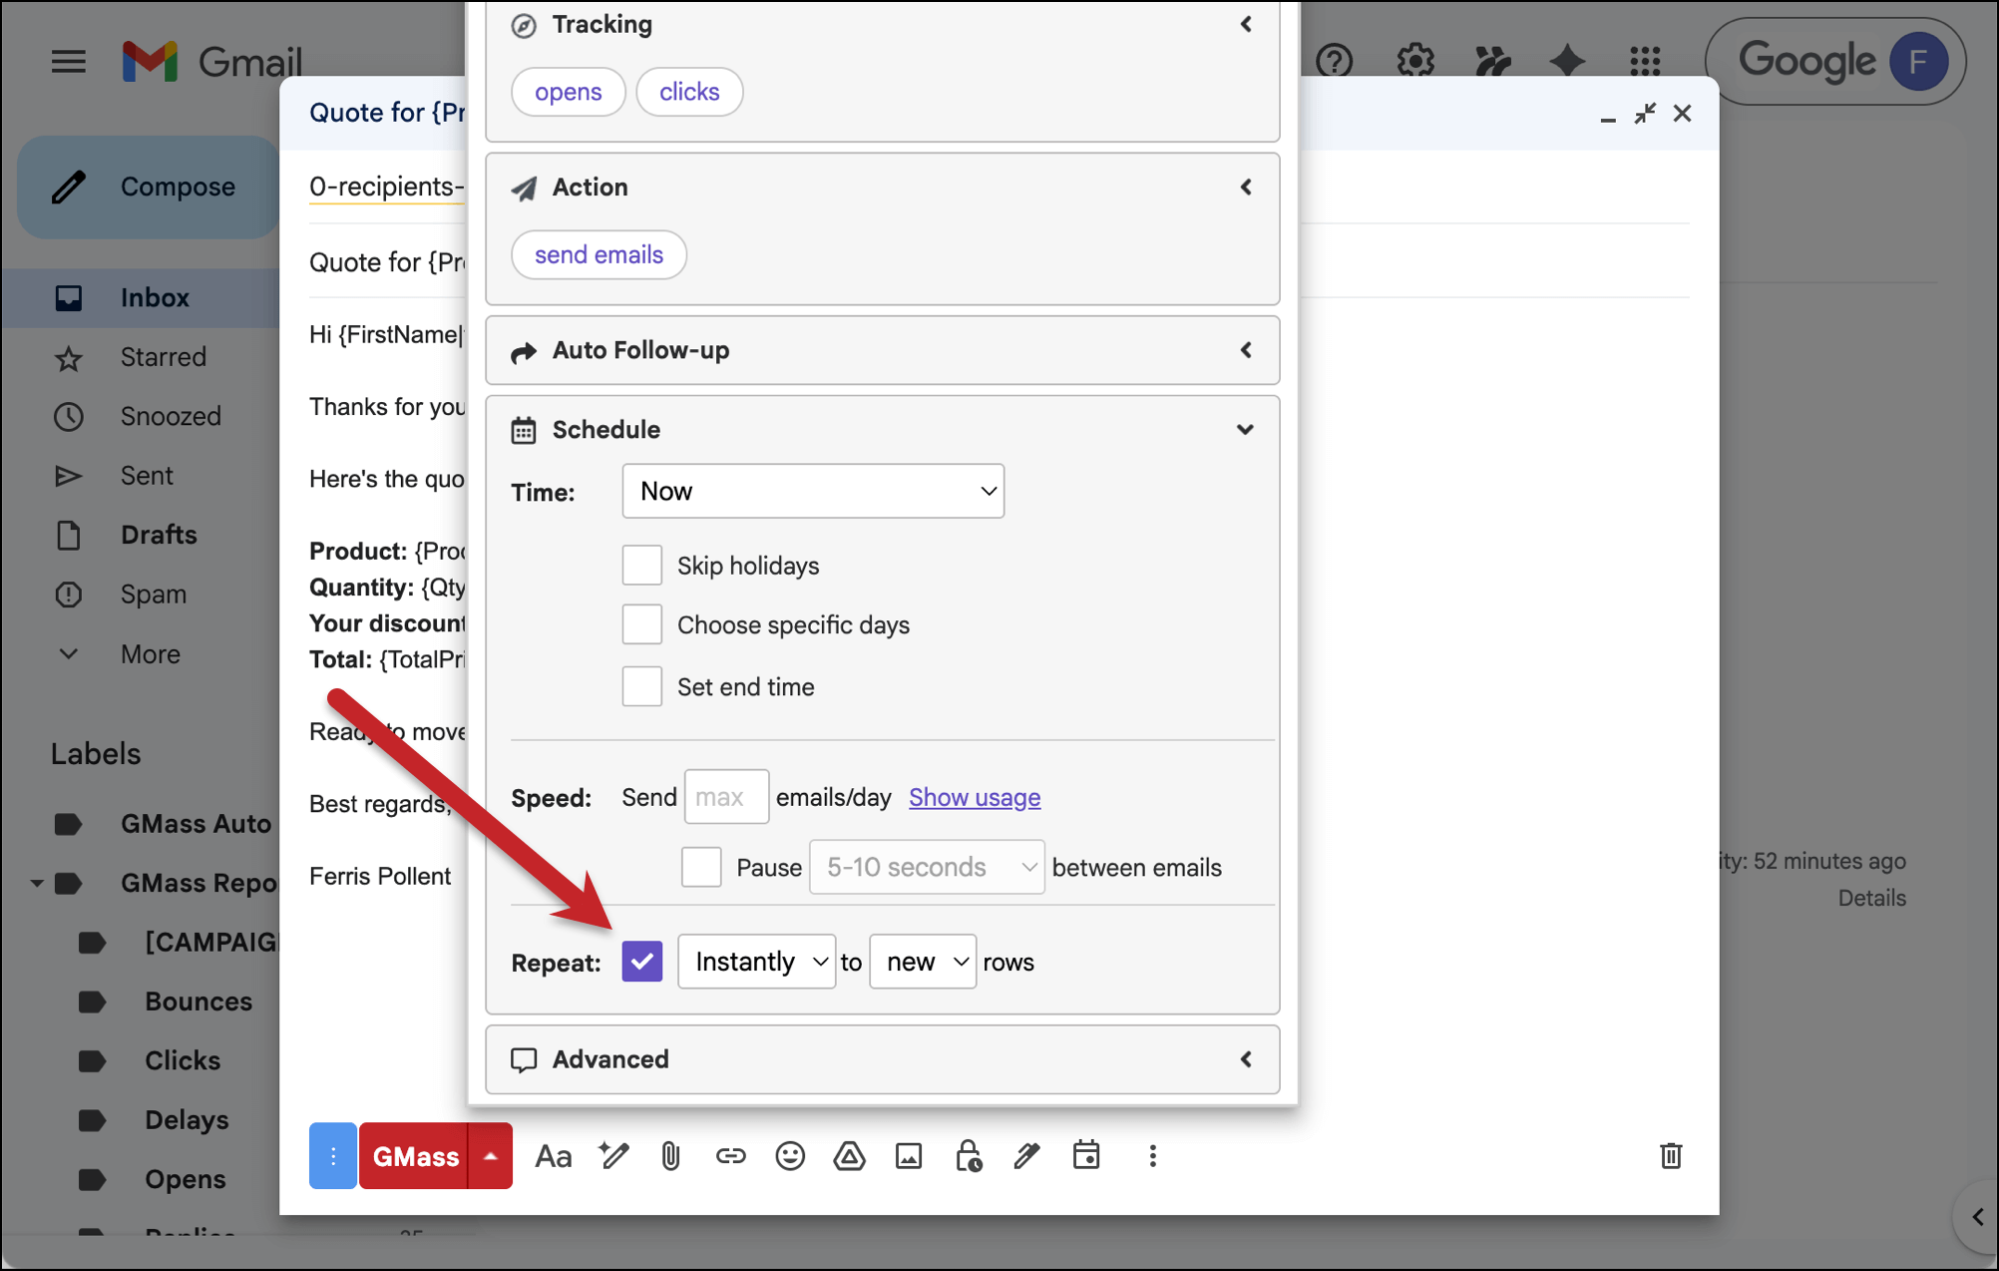
Adding recurrence to the campaign
Compose your campaign (including any follow-ups or other settings you want to use).
Then go into the GMass settings and into the Schedule section to set up the recurring campaign.
Check the box next to Repeat and choose Instantly from the “Day” dropdown. And leave the second dropdown as New.
Once everything else is all set for your campaign, click the GMass button to initiate it.
And then, copy the Campaign ID from the dialogue box that appears.
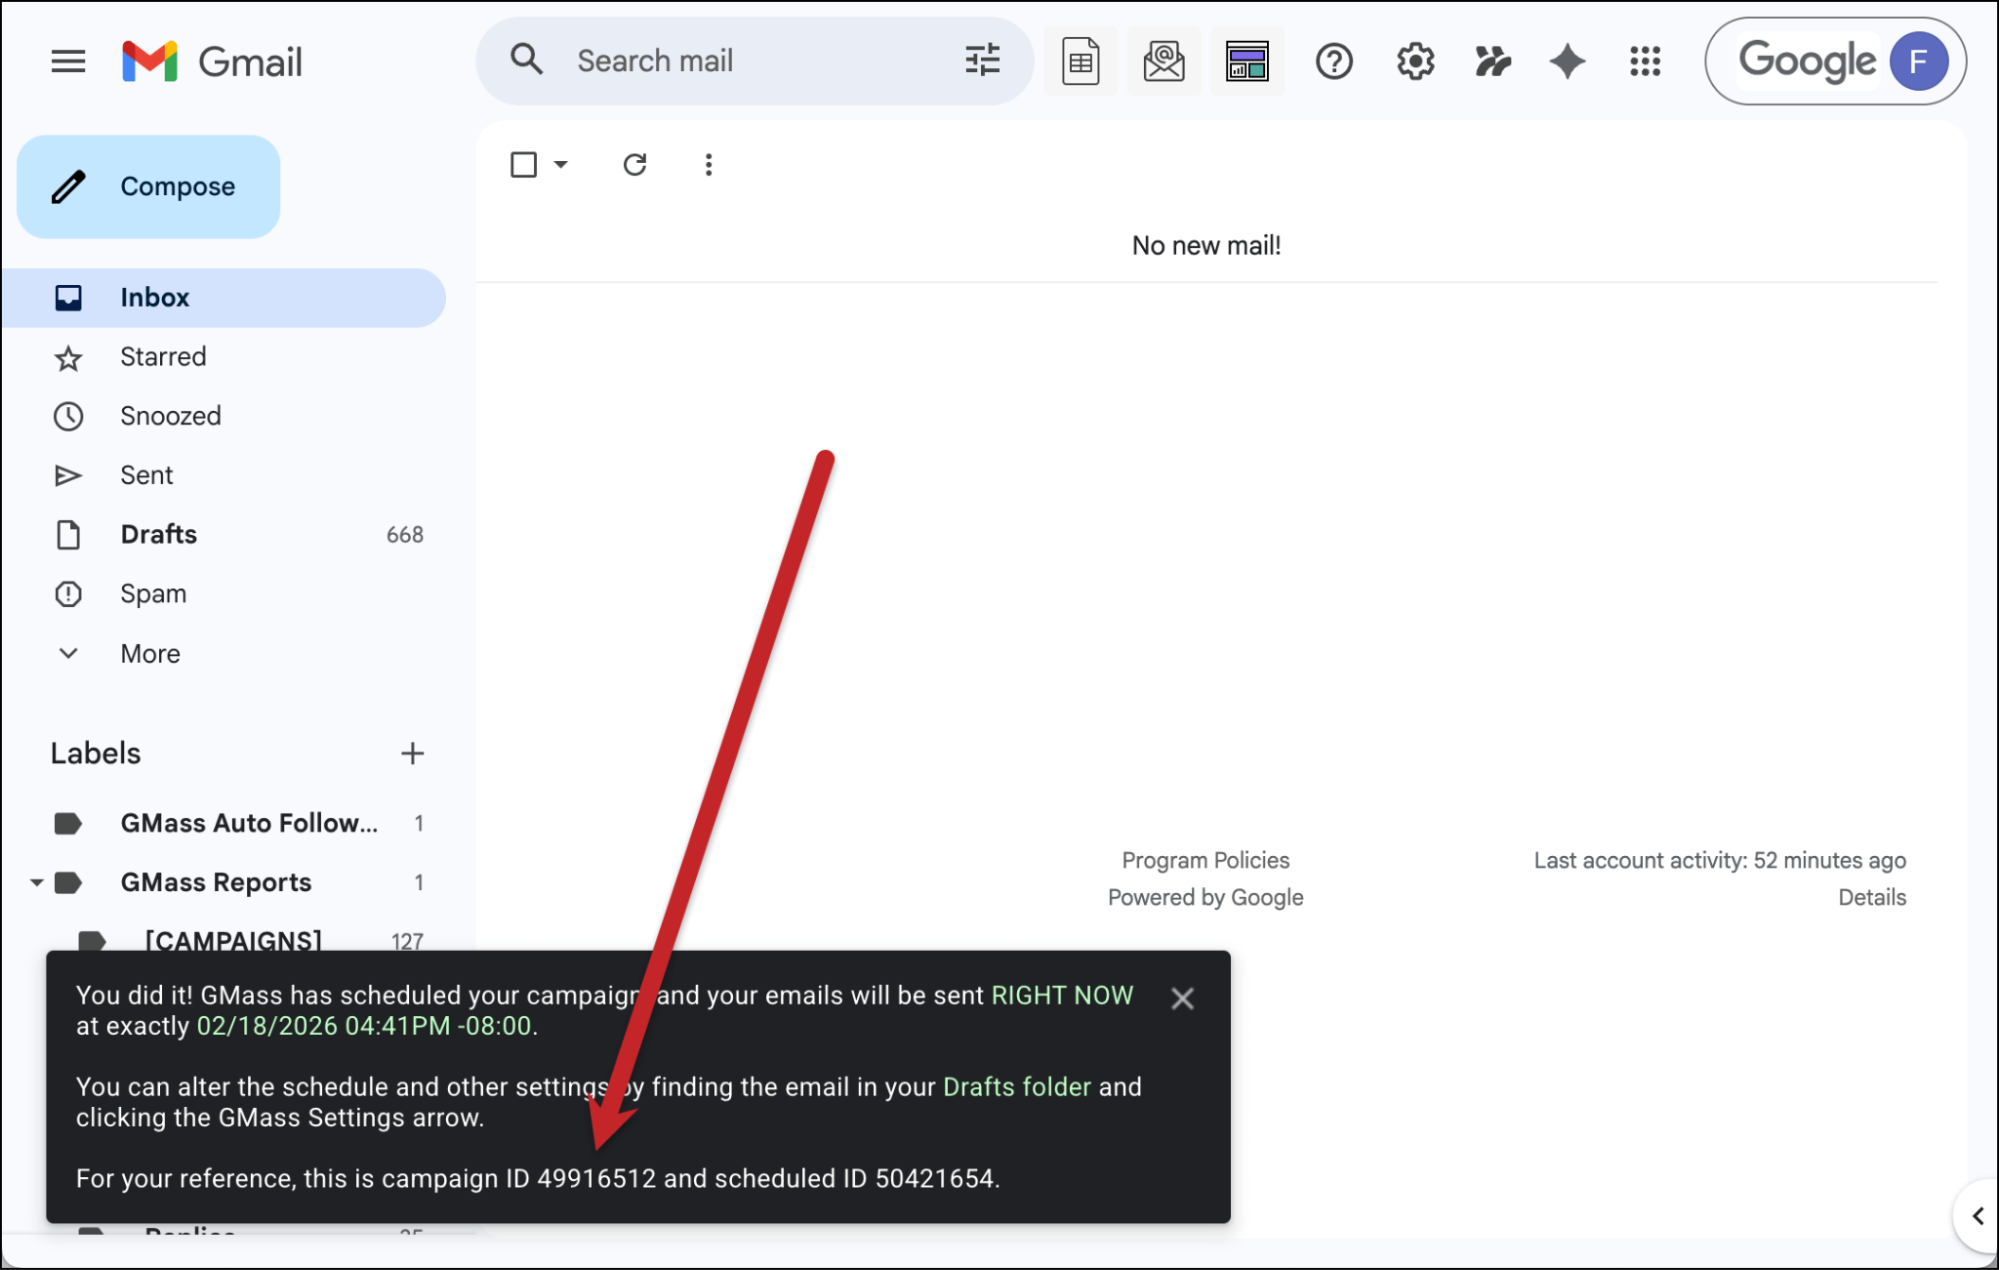
(If you don’t grab the campaign ID from there, you’ll be able to retrieve it in several other places, like the campaign confirmation email GMass sends, the GMass dashboard, or this campaign’s web-based report.)
Step 4: Setting Up the Google Apps Script
Now it’s time to set up a Google Apps Script to tie this whole process together.
Head back to your Google Sheet of contacts.
Go to Extensions > Apps Script.

Creating the Apps Script
You can give your Apps Script a name (I named mine “Time Zone Send”; the name is for your reference only).
Then delete the function myFunction () { } that’s in the window and paste in the following script.
See the Pen
Time Zone Script by Sam G (@samgmass1)
on CodePen.
Now add in your Campaign ID (which you copied in the previous step) into the spot where it says YOUR-ID-GOES-HERE and click the Save icon.
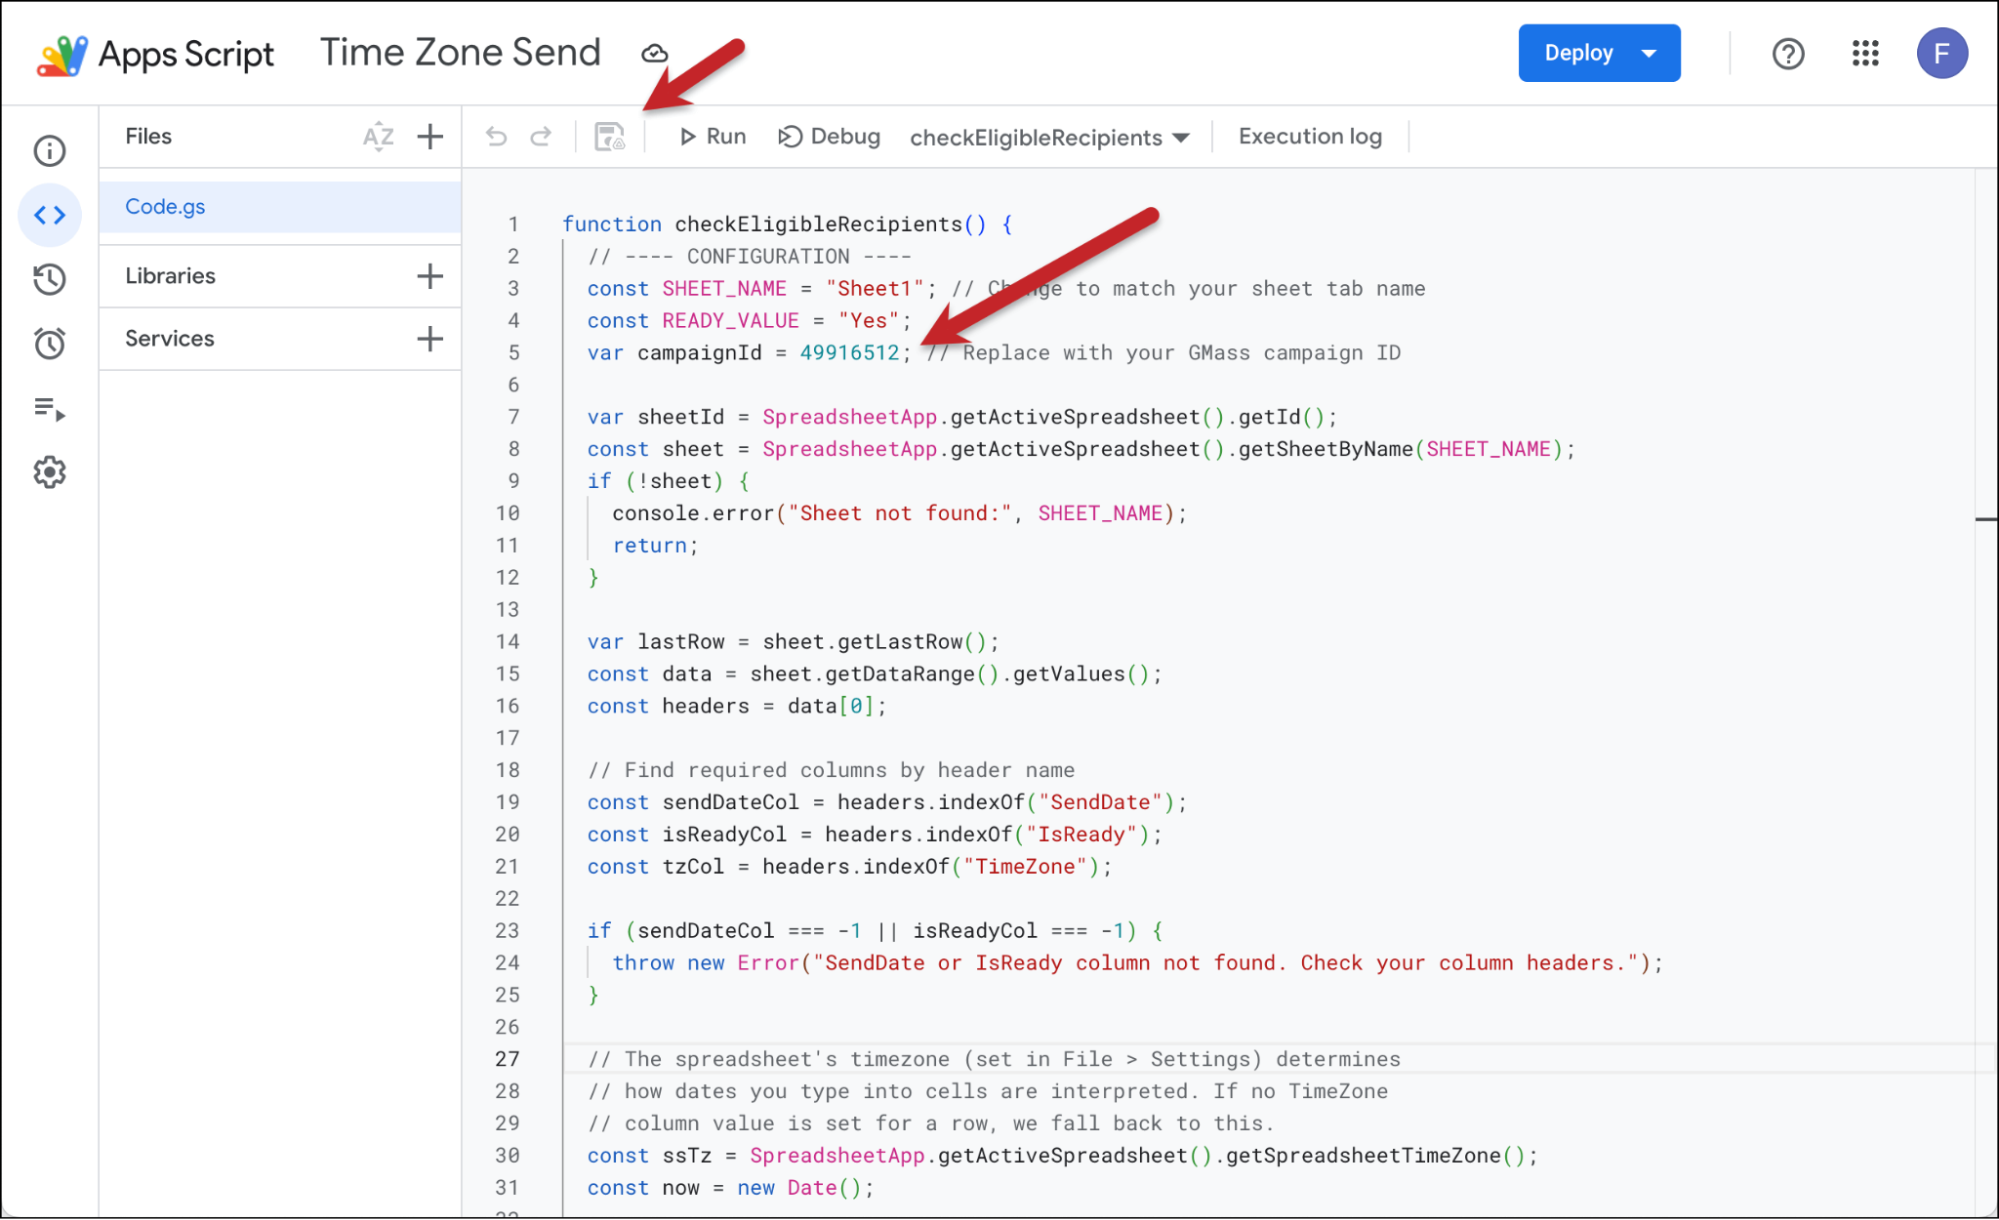
Here’s what this Apps Script does. It looks through the SendDate column and the TimeZone column, then it compares each of those date/times to the present date/time. (Don’t worry, it’s accounting for time zone differences.)
If a person’s send date/time is now or has passed in their time zone, the script updates the IsReady column for that person to Yes. And GMass sees that Yes and sends out that recipient’s email.
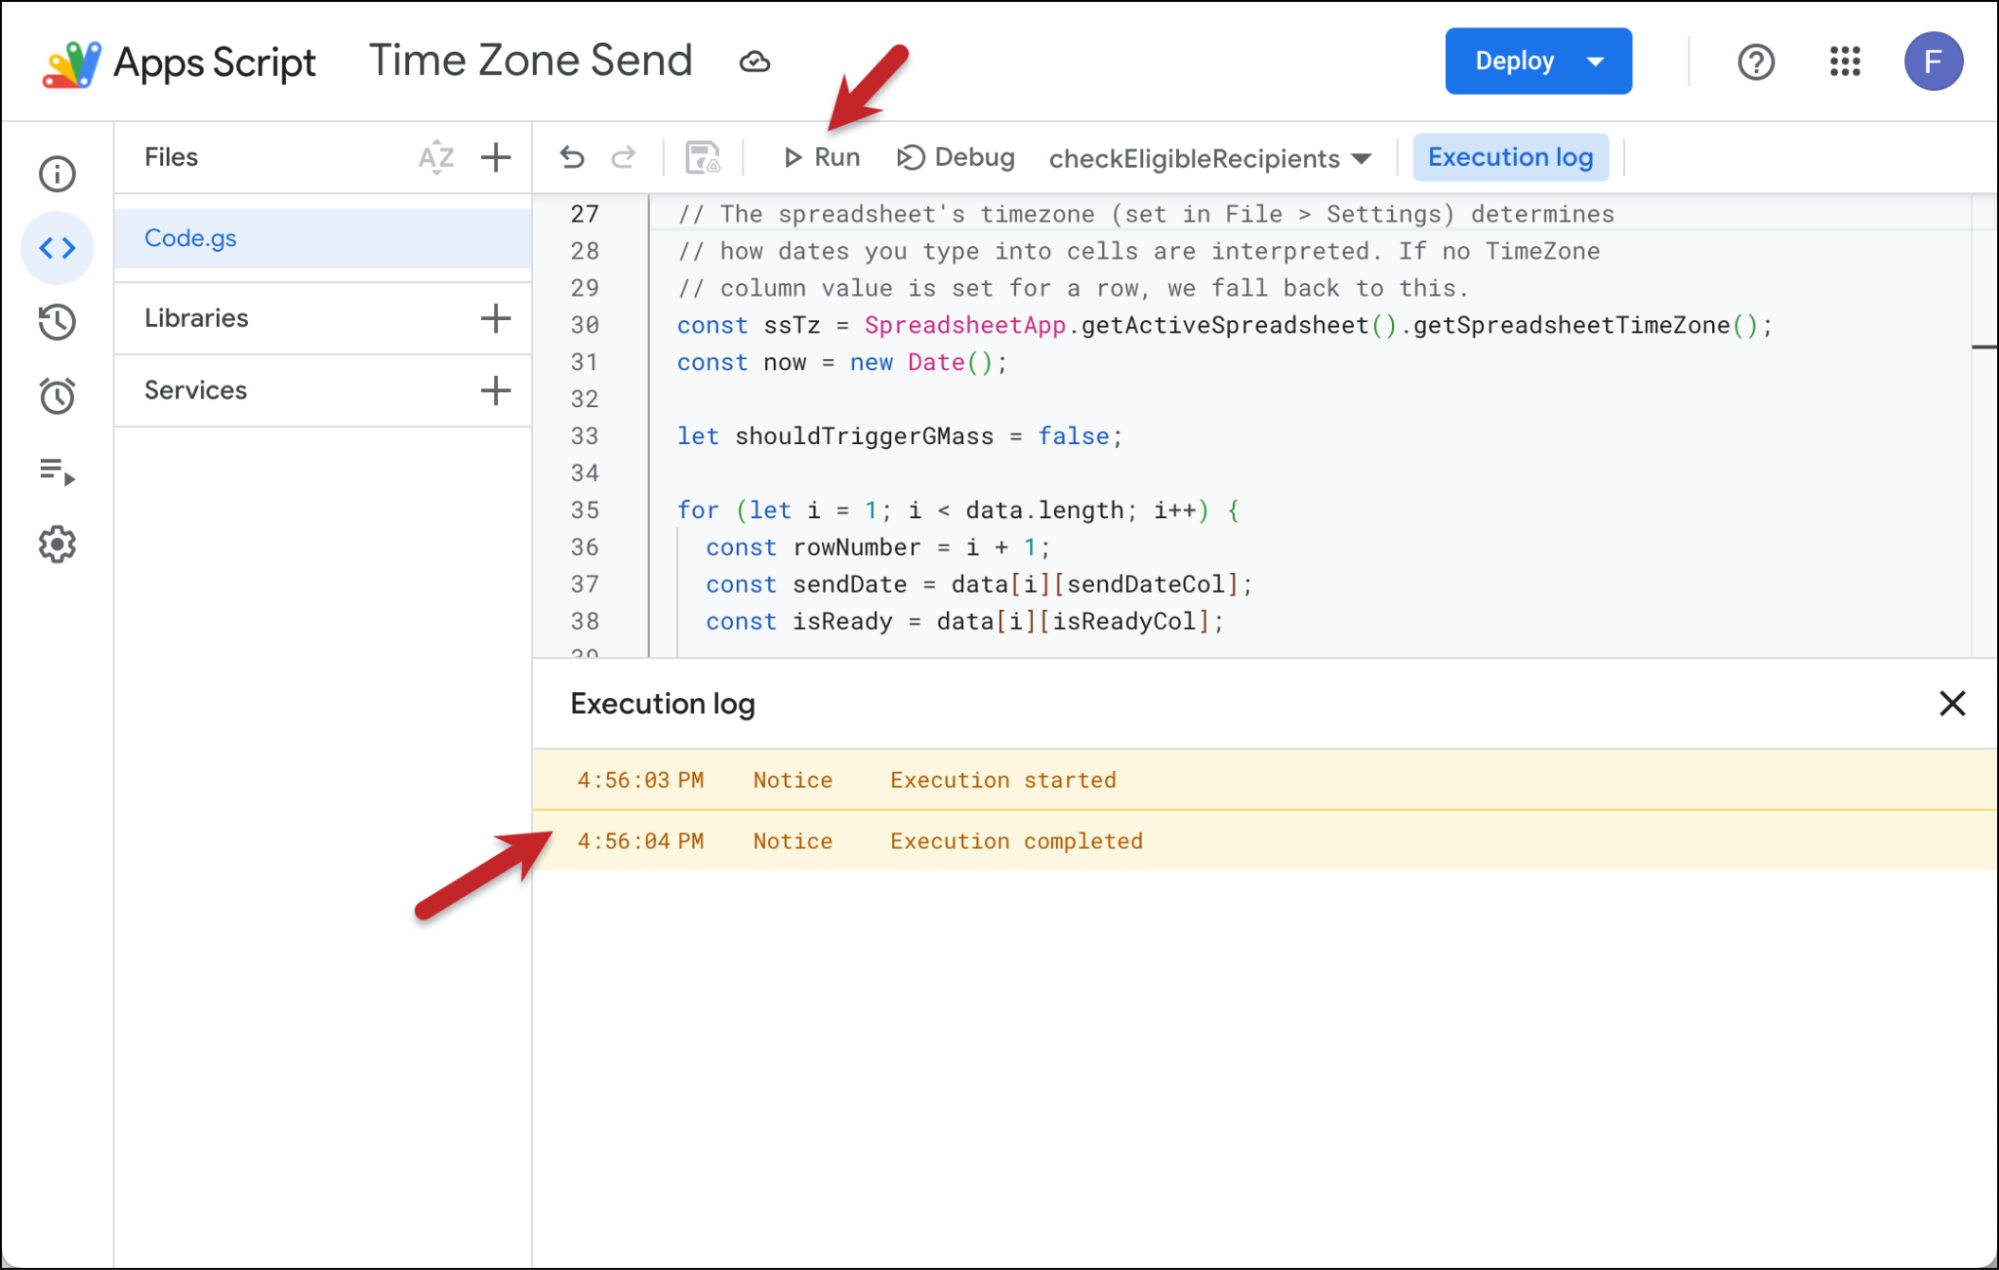
Testing the Apps Script
Now you can test the Apps Script. Hit the Run button in the top bar to test it out. (You may have to give the script some permissions; don’t worry, it’s all safe.)
Assuming we still haven’t gotten to any recipient’s date/time to send, nothing will happen.
But look what happens after I added a new row at the end of the spreadsheet with my own email address. I set the date and time to right now… but I added a few hours and then set the time zone in that column to Eastern time.
Then I ran my script again.
About 30 seconds later (after everything has had time to work through the pipes), that email went out.
That shows me the script is working as intended (it knew that 7:58 PM Eastern time was now).
Automating the Apps Script
You don’t have to click Run every time you want to process your campaign.
You want the Apps Script to regularly check to see if we’ve hit someone’s date/time and then add the “Yes” to their IsReady column so GMass can send out their email.
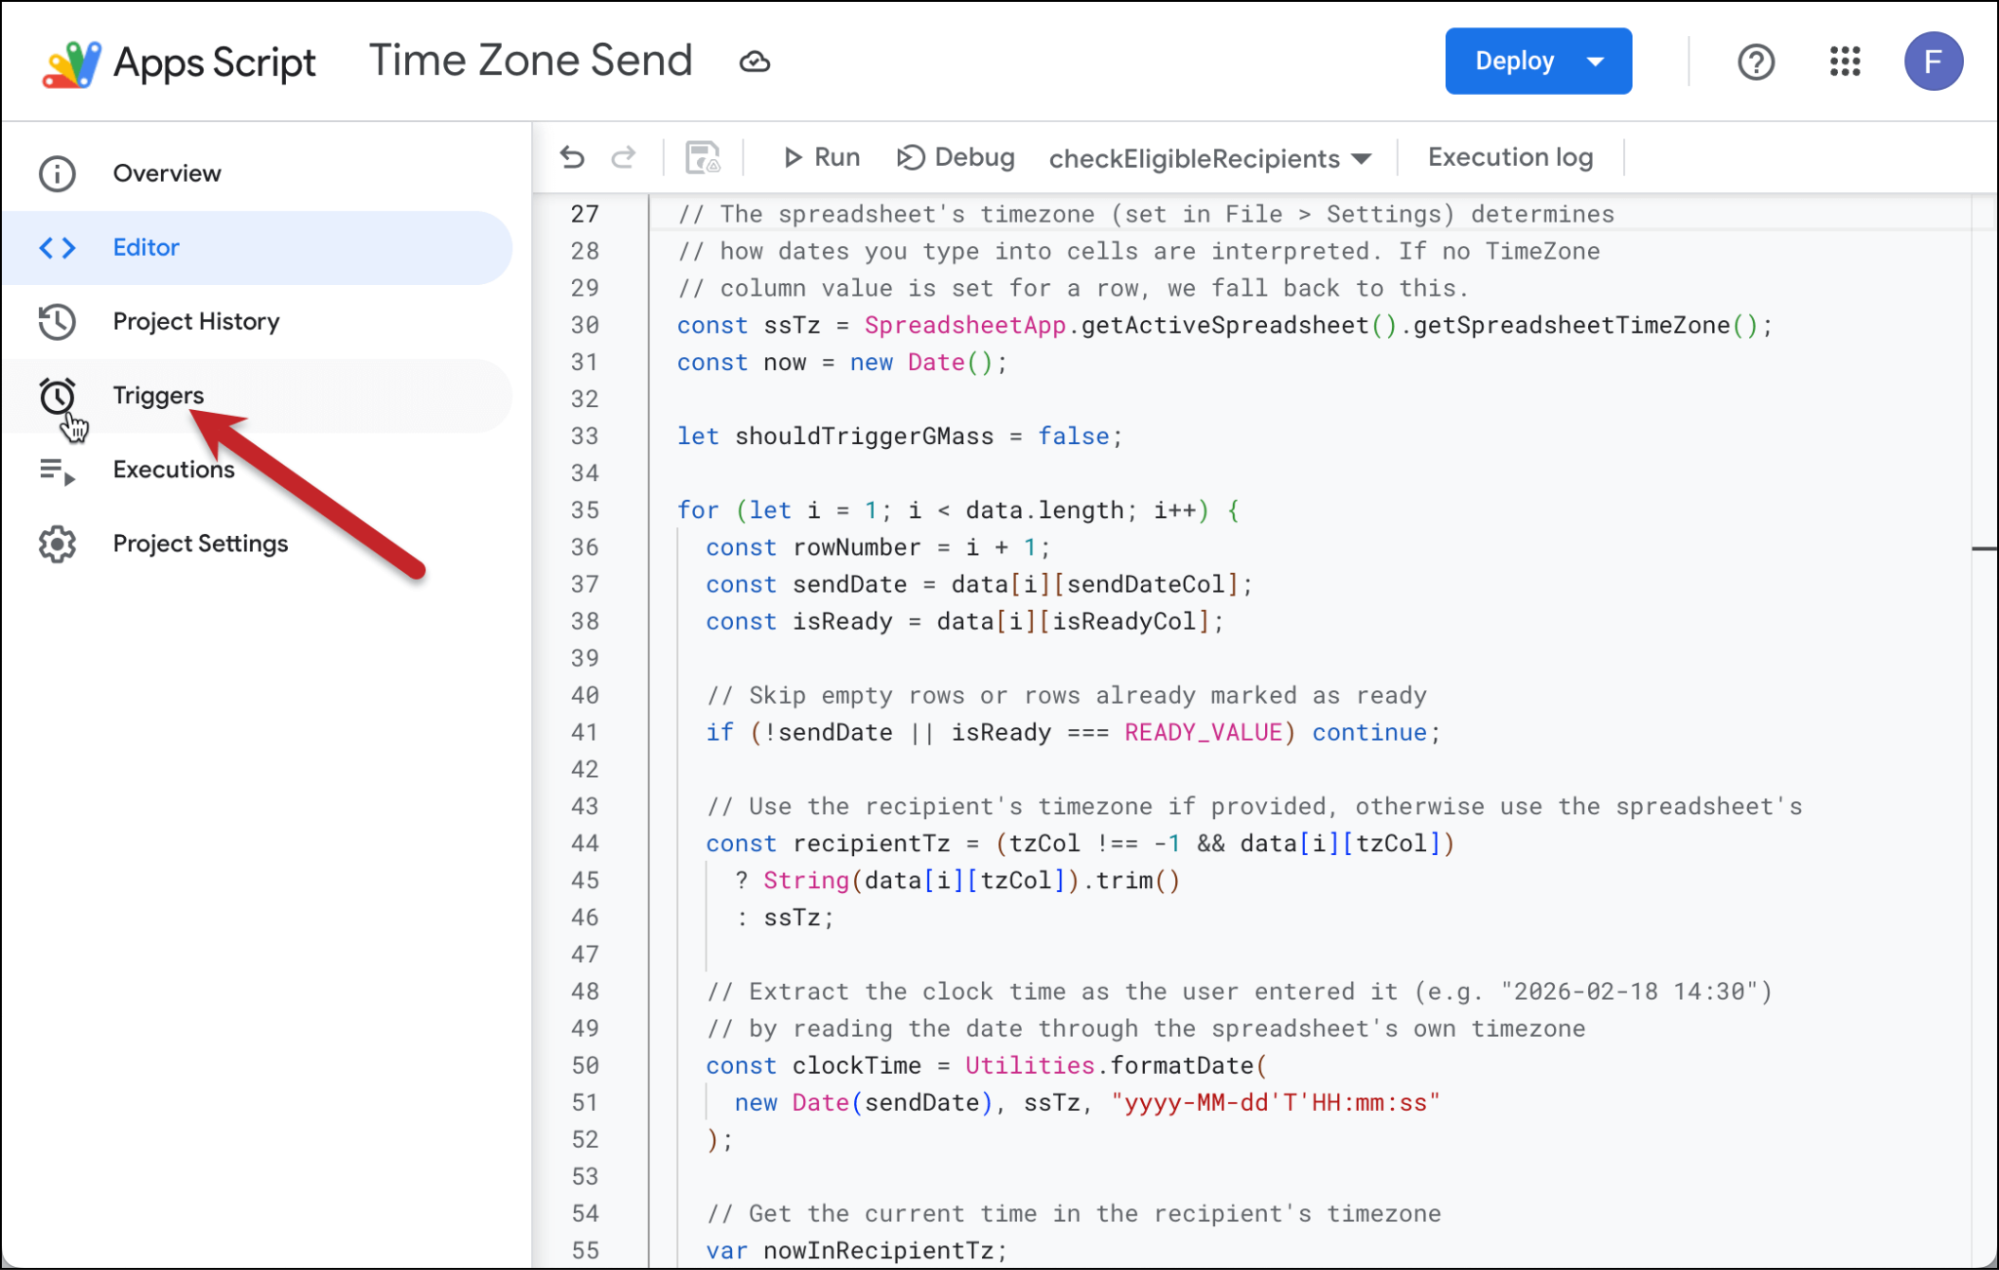
Click on the stopwatch icon on the left sidebar in the Apps Script window to bring up the Triggers menu.
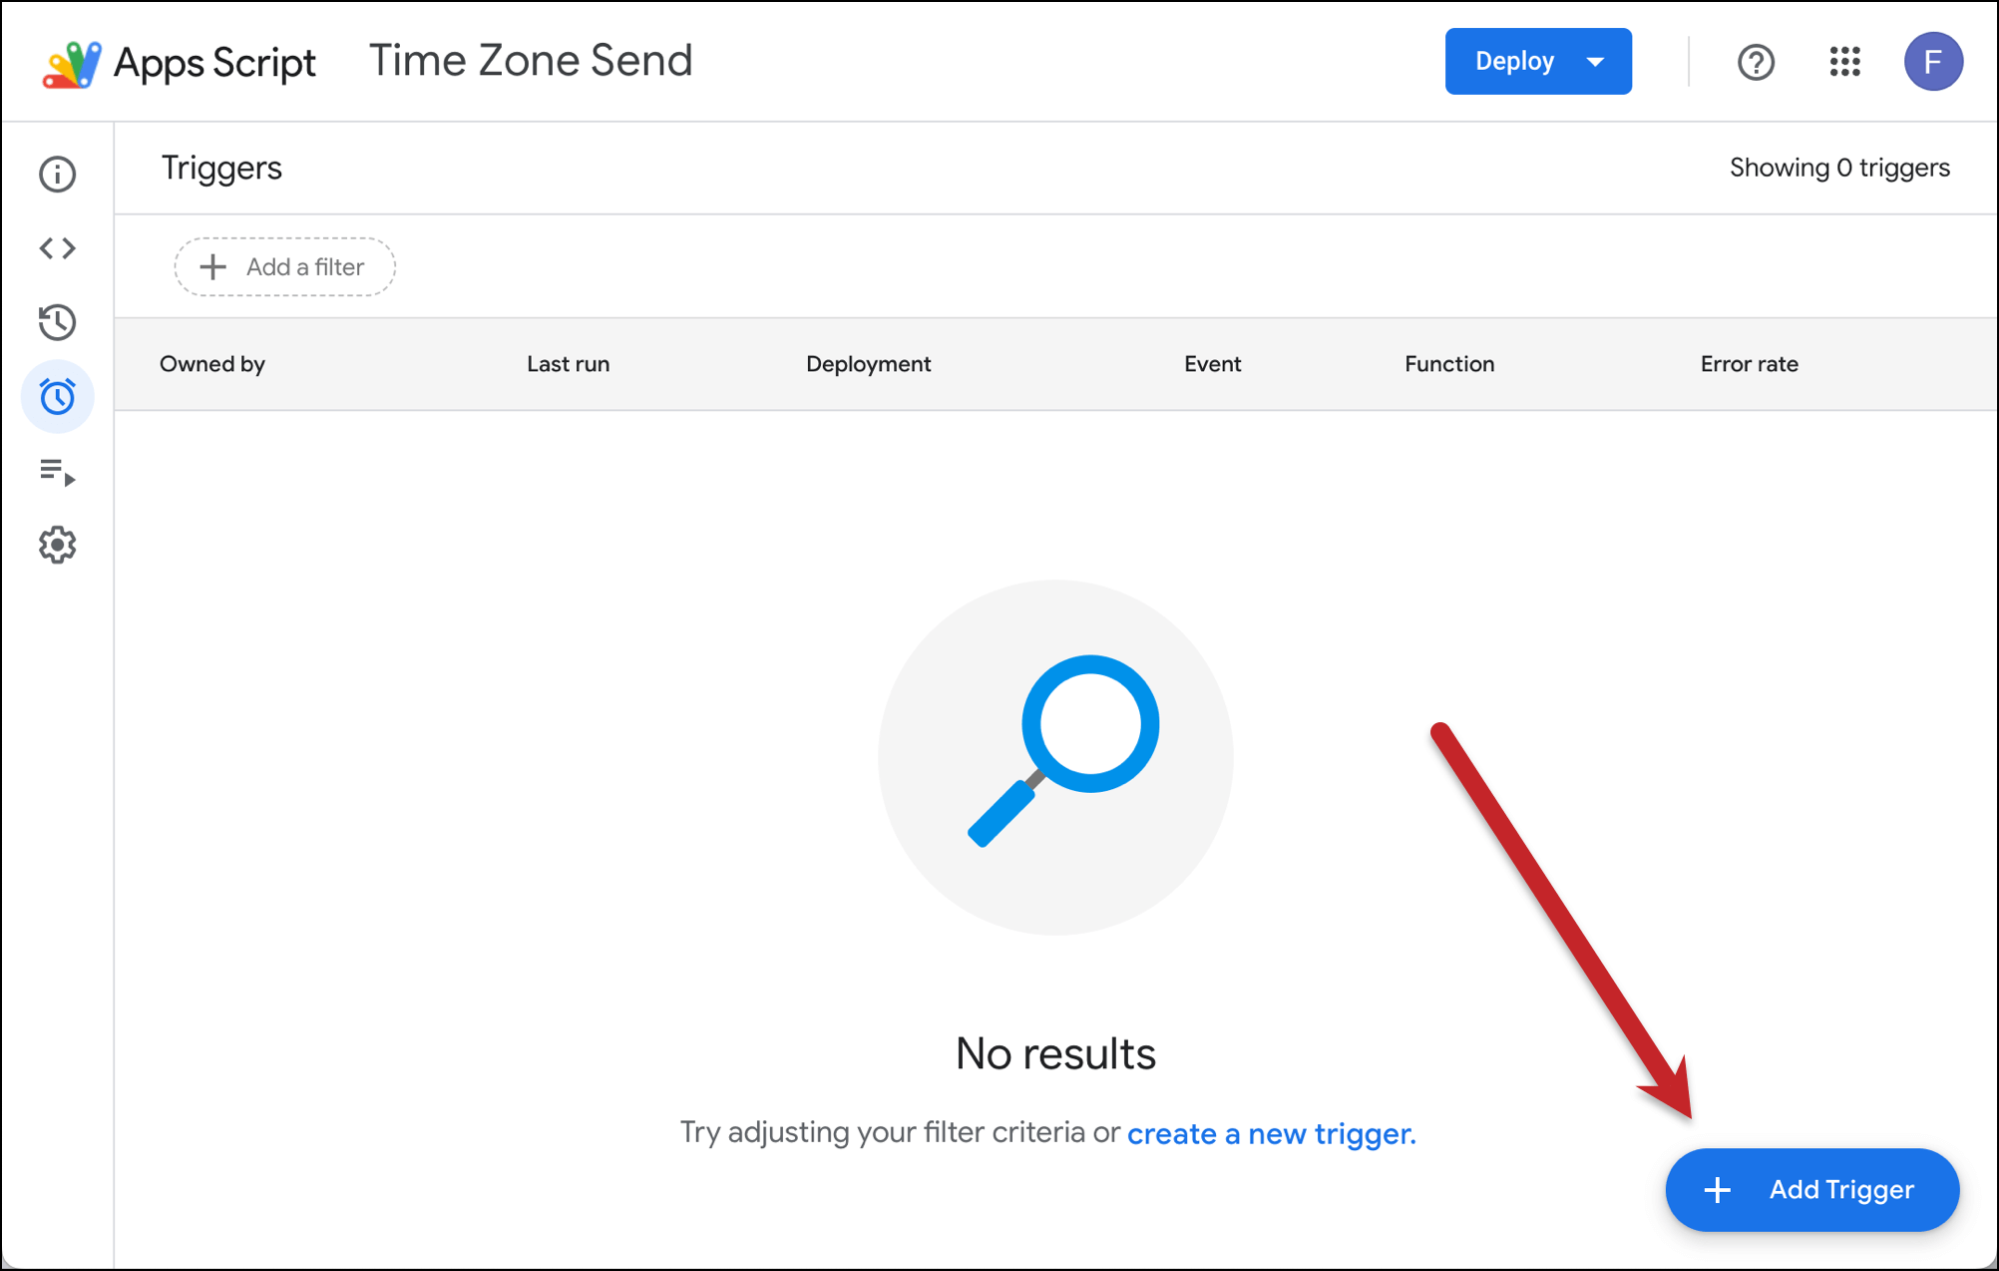
Now click the + Add Trigger button in the bottom right corner.
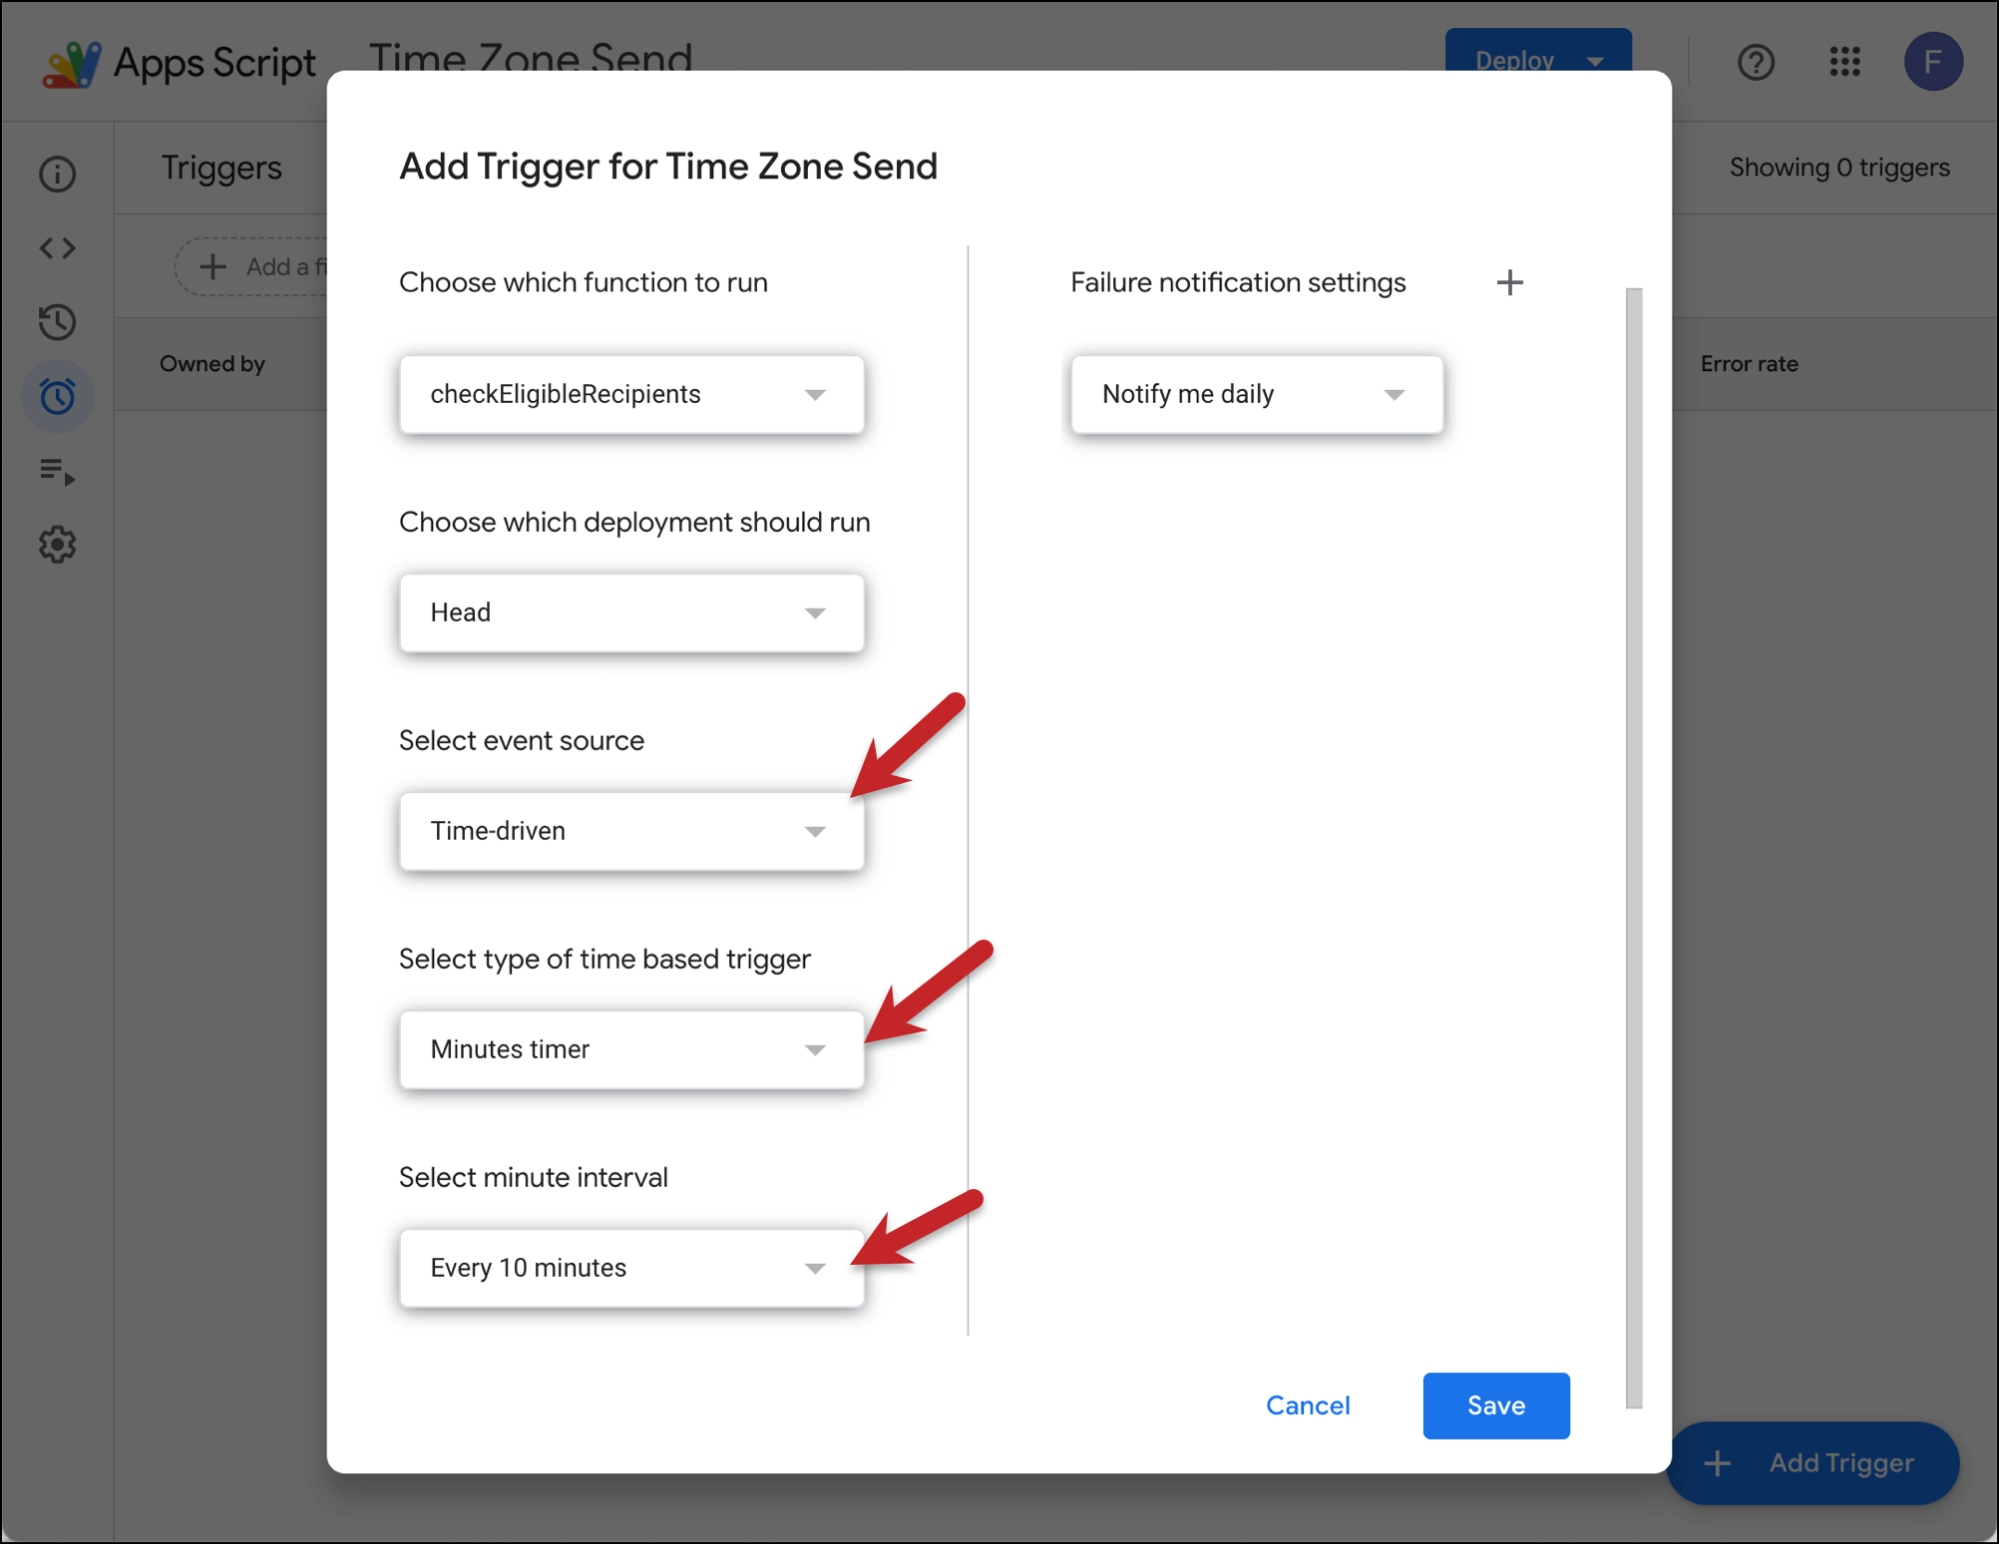
Here’s what you should select.
- Choose which function to run – this will be automatically filled in
- Choose which deployment should run – Head
- Select event source – Time-driven
- Select type of time based trigger – Minutes timer
- Select minute interval – Every 10 minutes
- Failure notification settings – Notify me daily
This means the Apps Script will run every 10 minutes looking for the correct time zone. You can go on an even faster increment if you want (like every five minutes, or even every minute).
Then click Save.
And that’s it. Your automation will now run and will send to each recipient on the day and time you’ve selected in their designated time zone.
Sending in Each Recipient’s Time Zone: Next Steps
The process above is somewhat lengthy — but once you’ve done it once, it will be a whole lot easier to do again in the future.
And it can be a really worthwhile use of your time, since sending to recipients in their time zones means you have way more control over exactly when they receive your message.
The process I’ve described here will work on all paid GMass plans.
Not a GMass subscriber yet? Come join the 400,000+ people who use GMass to send all sorts of campaigns — and who’ve given GMass an average of 4.8 out of 5 stars across 10,000+ reviews.
Email marketing, cold email, and mail merge all in one tool — that works inside Gmail
TRY GMASS FOR FREE
Download Chrome extension - 30 second install!
No credit card required