Want to learn how to schedule an email in Outlook?
The perfect time to send an email is when a recipient is just about to check their inbox. However, you may not always be online when your recipients usually check their emails.
That’s why most people schedule their emails in advance, to go at a specified time — to ensure that it’s always opened and gets a response.
In this article, I’ll show you how to schedule an email in Outlook and how you can set a standard delay for all of your outgoing emails. Additionally, I’ll discuss some limitations of the Outlook app and highlight a better email alternative.
This Article Contains:
(Click on the links below to jump to a section of your choice)
- How to Schedule an Email in Outlook (Step-by-Step Guide)
- How to Delay the Sending of All Emails in Outlook (Step-by-Step Guide)
- Why You Should Use Gmail Instead of Outlook
- How to Schedule an Email in Gmail (Step-by-Step Guide)
- How to Schedule Email Campaigns Using GMass (Step-by-Step Guide)
Let’s jump in.
How to Schedule an Email in Outlook (Step-by-Step Guide)
Knowing how to use the Outlook app to schedule emails for a later time can help you plan outgoing emails days in advance. It could also increase your response rate as your emails reach the recipient’s inbox just when they’re about to check their mail.
Let’s take a step-by-step look at how you can schedule an email message in the Outlook client.
Note: This guide is only meant for the Outlook desktop app as you can’t schedule emails in any of the mobile versions like the iOS and Android Outlook apps.
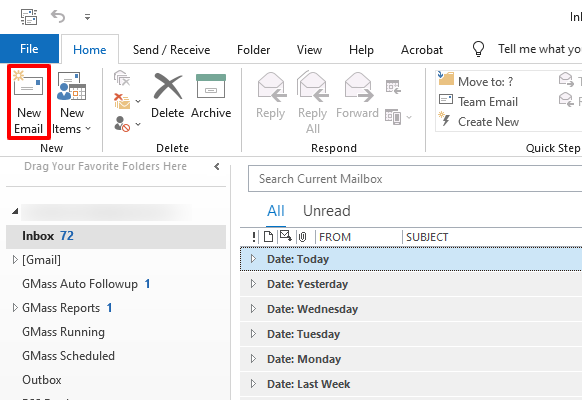
Step 1
Open Outlook and click on New Email.
Alternatively, you can press Ctrl + N to open a new email.
Step 2
In the new email window, click on the Options tab.
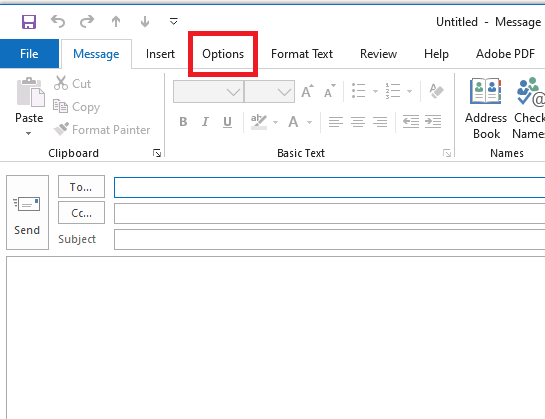
Then, select Delay Delivery.

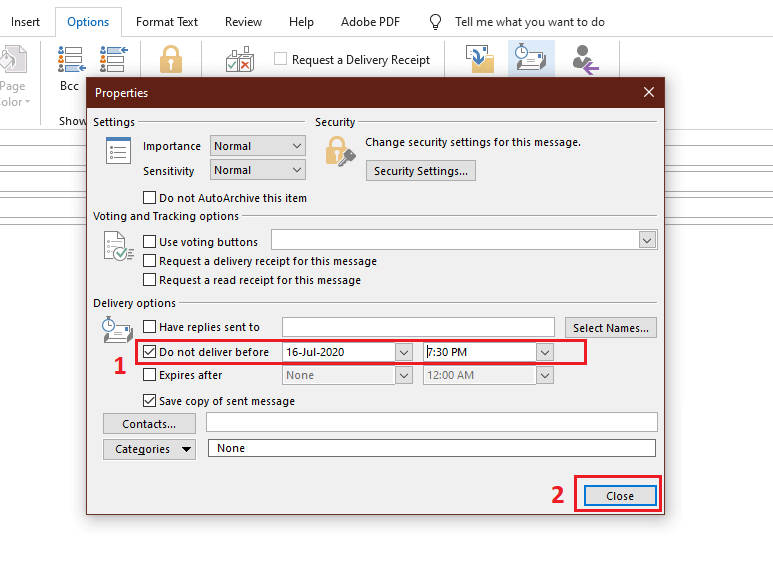
Step 3
In the dialog box that opens, select the specific time and date you want to send the message. Then, click on the Close button.
Step 4
Compose your new message in the message window, add the recipient’s email address and click the Send button.

That’s how you can schedule a single message in Microsoft Outlook.
You can always find your scheduled emails in your Outbox folder. If you want to reschedule your mail, click on the message, go to Delay Delivery, make the necessary changes to the delayed message, and click Close.
But what if you have a change of mind and want to send your email right away?
Don’t worry!
Just follow these simple steps to remove the email delay and send your message right away.
How to Remove the Email Delay and Send Emails Immediately
Sometimes you may not want to delay your email, but send it immediately.Here’s what you need to do to remove the delay in an email and send out your message in the Outlook desktop app:
Step 1
Open Outlook and go to your Outbox folder.
Then, click on one of the scheduled emails.

Step 2
When the new window opens, select the Options tab.

Then, click on Delay Delivery, which is in the More Options group.

Step 3
Once the new window opens, uncheck the Do not deliver before check box to remove the scheduled time and click on the Close button to close the window.
Step 4
Click on the Send button to send out your message instantly.

You can check your Outbox to see if your email’s been sent. If the message is not in your Outbox, then it’s on the way to your recipient’s inbox.

Note: You can also schedule emails in the Outlook web app, but the mobile versions currently don’t support email scheduling.
Now that I’ve covered how you can schedule a single email in Outlook let’s see how you can delay all outgoing emails.
How to Delay the Sending of All Emails in Outlook (Step-by-Step Guide)
Scheduling individual emails can help you easily plan your outgoing emails.
But what if you always want to send out delayed emails?
You may have a habit of noticing errors in your message after you press the send button (and then sending an apology-and-correction email), or you may have previously sent an email you regretted afterward.
In these cases, it’s safer to set up an Outlook delay delivery for all your emails.
Adding a delayed delivery option to all your emails can help you increase delivery time and avoid the embarrassment of sending a message with mistakes to a recipient’s inbox. Additionally, it gives you time to edit an e mail message you made the mistake of sending.
Let’s take a look at how to set up Outlook delay delivery for all outgoing emails:
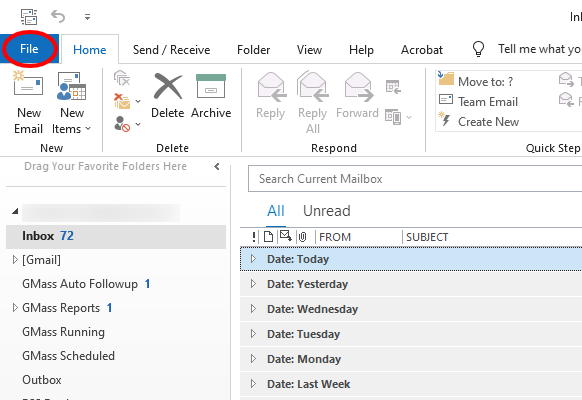
Step 1
Open Outlook and click on the File tab.
Step 2
In the Info section of the File tab, click Manage Rules & Alerts, which is next to the Rules and Alerts heading.

Step 3
In the dialog box that appears, select the Email Rules tab and then click on New Rule.

Step 4
In the Rules Wizard that pops up, select Apply rule on messages I send under the Start from a blank rule section.
Then, click on Next.

Step 5
When you complete the Start from a blank rule section and click on Next, a new properties window will appear.
In the Select conditions list, click on the checkboxes you want to apply to outgoing emails. If you want to defer delivery of all your outgoing emails, clear all the checkboxes and select Next.

If you didn’t select any of the checkboxes, you’d have to click Yes on the new window to apply the rule for each outgoing message.

Step 6
In the Select action list, select the check box that says defer delivery by a number of minutes. Then, in the box at the bottom, click on a number of.

Step 7
In the dialog box that appears, choose the number of minutes you want your emails to be delayed. The maximum delay limit is 120 minutes.
Once you’re done setting the delay for the email delivery option, click OK.

Then, click Next in the Rules Wizard.

Step 8
Now, if you want to add any exceptions to the delayed message rule, select them. Then, click Next.

Step 9
Give your email rule an appropriate name in the rule description box. Then, check the Turn on this rule check box if it isn’t already selected.
Once you’re done, click Finish.

Step 10
Click on Apply, then select OK to close the wizard.

Now, whenever you send an email, it will automatically be delayed for the number of minutes you chose. You can find those delayed emails in your Outbox, as I’d mentioned earlier.
Now that I’ve covered how to schedule emails in Outlook let’s look at why another email client like Gmail would be a better alternative.
Why You Should Use Gmail Instead of Outlook
Sure, you can use the Outlook email client to schedule your emails to go at a particular time and even delay all of your outgoing email.
However, that hardly makes it the best email client available.
For starters, look at all those steps you have to go through to schedule an e mail message!
Here are two key reasons Gmail is a much better option than Outlook and even other mail clients like Apple Mail:
1. Gmail Offers a Streamlined Interface and Better Functionality
If Gmail is popular for one thing, it’s the clean interface it offers.
Outlook has tried to offer a clean interface with its recent updates, but just like its other competitors, such as Apple Mail, it doesn’t get anywhere near Gmail’s streamlined look and even lacks some handy features.
In addition to boasting a simple interface and providing great security for your emails, Gmail also uses AI to power useful features like smart compose. This isn’t something you can expect to find in Outlook.
2. With Gmail, You Get Access to Way More Extensions
Microsoft Outlook is a part of Microsoft’s Office 365 app suite, including other tools like Microsoft Teams (a video conferencing tool) and Microsoft Exchange Server (a mail server).
If you need any extra functionality, you’ll have to turn to an app in Office 365 or other paid email management tools like the MAPILab toolbox.
But even after using paid add-ons like the MAPILab toolbox, your options will be limited.
Gmail, on the other hand, was designed to exist as a standalone tool until Google Workspace was introduced. So it comes with tons of extensions that can help boost your email productivity and email engagement.
GMass is one such extension, and it’s perfect for anyone looking to schedule emails and send email campaigns from their Gmail account.
Wait, what is GMass?

GMass is a powerful email campaign tool used by employees of tech giants like Twitter, Uber, Google, and LinkedIn. As GMass works inside of Gmail, you won’t have to worry about learning a new interface.
SMBs, solopreneurs, institutions, and individuals can also use GMass to send bulk emails to a target audience.
With GMass, you can:
- Schedule emails and bulk emails from your inbox.
- Send massive email campaigns straight from your inbox.
- Auto-customize each message in an email outreach campaign to boost engagement rates.
- Track how email users interact with emails using core email stats.
- Easily automate follow-up emails.
- Set up custom tracking domains easily.
The best part?
Anyone can get started with GMass. All you have to do is download the Chrome extension, and you can dive right in!
Now that we know what makes Gmail a better email client than the Outlook client let’s take a look at how you can schedule an email to send later in Gmail.
How to Schedule an Email in Gmail (Step-by-Step Guide)
Here are the steps to schedule an email in Gmail:
Step 1
Log in to Gmail and click on Compose.

Step 2
Start composing your message in the message window, but once you’re done with the email body, do not click Send.
Instead, click on the downward-facing arrow icon next to it.
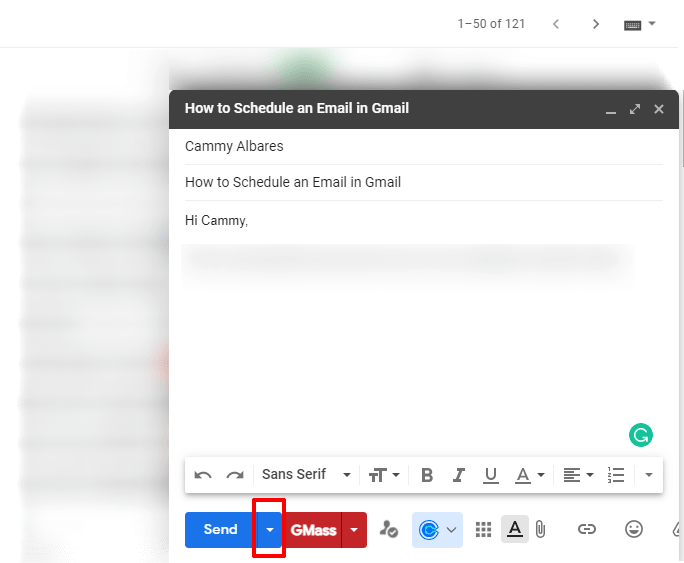
Then, click on Schedule send.

Step 3
Choose a specific time to send your email draft. You can choose from a list of scheduled time slots or click on Pick date & time, which leads you to a calendar to pick a send time.

That’s all you have to do to schedule a message in Gmail.
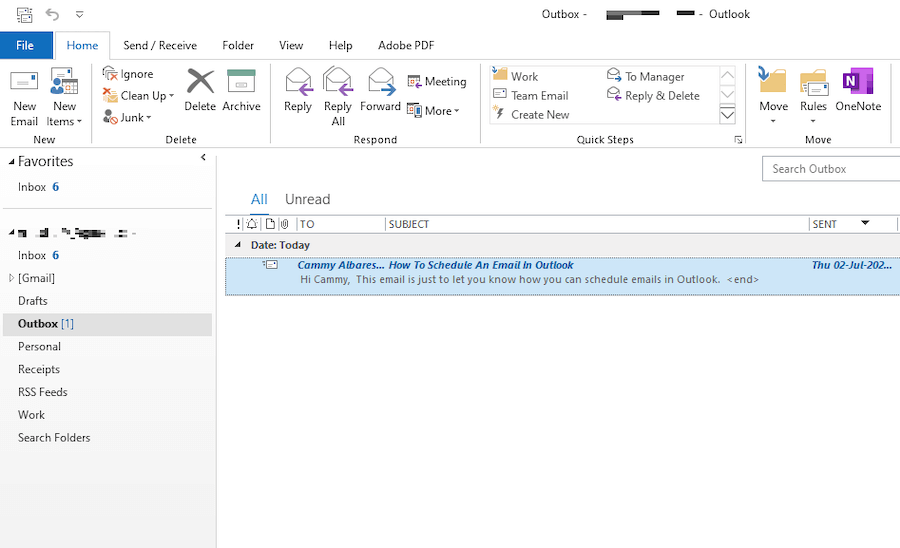
You can find all your scheduled emails in the Scheduled message folder in the left sidebar.

This is what an email looks like in the Scheduled message folder.

Looking for a more thorough guide to scheduling emails in Gmail?
Check out my 2021 guide to scheduling emails in Gmail.
Now let’s take a look at how you can use GMass to schedule emails in Gmail better.
How to Schedule Email Campaigns Using GMass (Step-by-Step Guide)
GMass is an excellent extension to Gmail that functions as an email scheduler and marketing tool, helping you send personalized email campaigns to an extensive email list.
Here’s how you can use GMass’ scheduler feature to schedule email campaigns in Gmail:
Step 1
Make sure you have the latest Chrome browser version, along with the GMass extension, installed.
Then, log in to Gmail and click on Compose to type your new message.

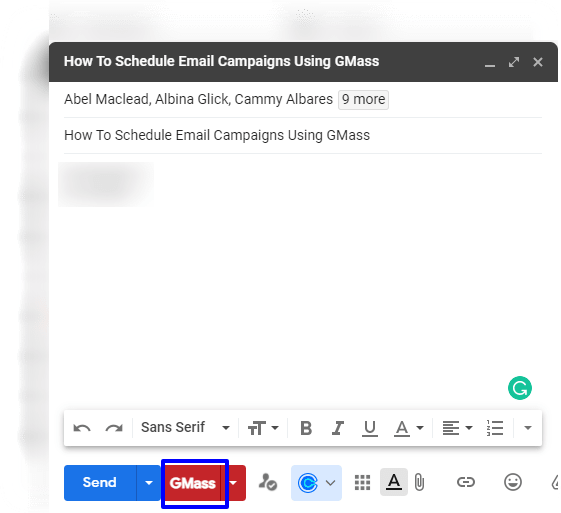
Step 2
Once you’ve typed your email, click on the downward arrow button next to the GMass button to open GMass settings.

Step 3
When the dialog window opens, select the Schedule tab.
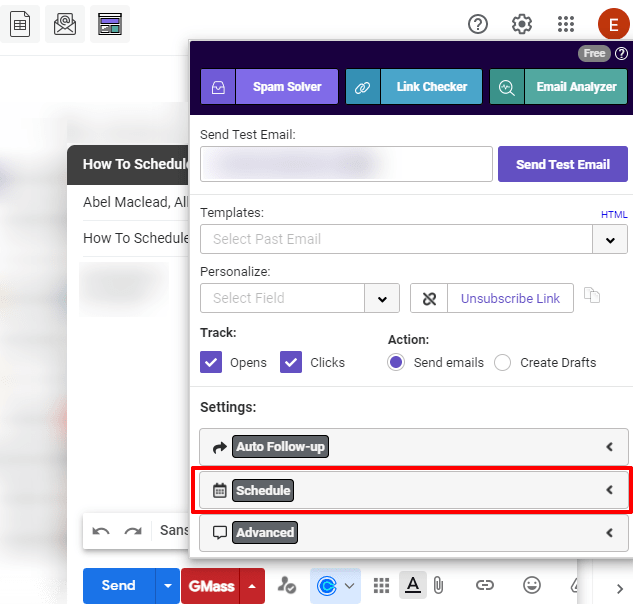
Step 4
Here, you can customize almost all the scheduling options of your email.
You can decide:
- The specific time & date you want to send your email.
- Set a limit on the number of emails sent per day.
- The time interval between each message in cold email campaigns to ensure a high deliverability rate.
- What to do with recurring emails — you can decide between a set number of hours, days, or months.
- Whether to stop sending emails during the weekend.

This is what the Schedule tab looks like once you’re done with the scheduling settings.

Step 5
Once you’re done with scheduling emails, hit the GMass button, and your message will be scheduled for that specific time and date.
You can find your scheduled GMass campaigns in your Drafts folder.

FYI, this is what scheduled GMass emails in your Drafts folder look like.

And that’s how easy it is to schedule email sending in GMass!
Wrapping Up
Microsoft Outlook is a great tool to schedule marketing emails. You can choose to schedule a single outgoing message or set a delay on all your outgoing mails.
However, it struggles to keep up with what’s offered by an email client like Gmail.
Not only does Gmail allow you to schedule emails easily, but it also offers you great functionality and a cleaner interface.
And when it comes to Gmail extensions, there’s nothing as powerful as GMass. It offers a wide variety of features for all your email scheduling and mass email sending needs — even helping you manage recurring emails.
Why not give GMass a try today to skyrocket your email productivity?
Email marketing. Cold email. Mail merge. Avoid the spam folder. Easy to learn and use. All inside Gmail.
TRY GMASS FOR FREE
Download Chrome extension - 30 second install!
No credit card required

Ajay is the founder of GMass and has been developing email sending software for 20 years.