
<img height="1" width="1" style="display:none" src="https://www.facebook.com/tr?id=1822615684631785&amp;ev=PageView&amp;noscript=1"/>

Want to set up Office 365 SMTP settings for your email account?

In this article, I’ll cover everything you need to know about your Office 365 SMTP settings.

But first, let me clear something up:
Since Office 365 is a suite of tools, you’ll use Microsoft Outlook — the email client in MS Office — to edit your account settings.

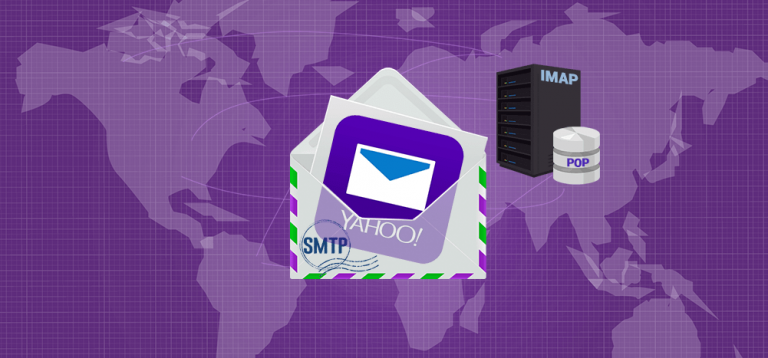
In addition to teaching you how to set up the SMTP server on Outlook.com, I’ll also tell you how you can set up POP and IMAP too. If you aren’t familiar with these protocols, I’ll also give you a quick overview of SMTP, IMAP, and POP.

This Article Contains:

(Click on the links below to jump to a section of your choice.)

Just want the SMTP setting to configure email in Microsoft Office without any of the additional details?
Here they are:

Office 365 SMTP Settings

These are the settings for the SMTP AUTH client submission method.

SMTP server: smtp.office365.com

Port Number: 587

Encryption method: STARTTLS

Username: Your Office 365 email address

Password: Your Office 365 password

Once you set up these SMTP server settings, you’ll be good to go.

For the rest of us, let’s get started!

How To Set Up SMTP in Microsoft Outlook

Let’s now see how you can set up the SMTP setting for the Microsoft Office 365 mail server.

First, you’ll need an Office 365 or Exchange Online plan.

Once that’s covered, there are several ways to configure your account settings to ensure your mail flow through your personal Office 365 mailbox or even a shared mailbox.

You can:

  • Use direct send: This method involves setting your MX endpoint as the server. You’ll have to find your MX record from the Admin Center.
  • Use SMTP client submission, aka SMTP AUTH or SMTP authentication (that’s what we’ll be covering)
  • Use a dedicated relay (SMTP connector) that’s configured with your public IP address to send emails through the Office 365 SMTP relay.

Note: If you’re confused about what SMTP is, feel free to skip ahead to the section where I’ve explained it. After you’ve got that background, you can come back here to set things up in your Outlook application.

Why Use The SMTP Client Method?

The SMTP client submission (authentication) method is the best to use with the Microsoft Outlook application.

Here are the problems with the other two methods:

  • While the Direct Send method has higher sending limits, it only supports internal email communication — you can’t use it for contacts outside your organization.
  • If you use a line-of-business (LOB application), it must feature a static IP address to authenticate Office365 through the relay server method.

Here’s why the SMTP AUTH client submission method is better:
Unlike Direct Send, the SMTP AUTH mail configuration allows you to send mail to people inside and outside your organization.

Additionally, by using the SMTP authentication method, your IP address doesn’t need to be static like it would with the relay server method — giving you a lot more functionality!

If you’re handling an organization’s email, you can even change the SMTP AUTH settings for individual mailboxes from the Exchange Admin Center. You can access the Admin Center from right inside Office 365.

How to Set Up Office 365 SMTP Settings Using the SMTP Client Submission Method

Once you log in to the Microsoft Outlook mail app, use the toolbar and navigate to File > Account Settings > Server Settings.

Then, click on Outgoing Mail to set up your SMTP Outgoing Server settings.

click-on-outgoing-mail

Office 365 SMTP Settings

SMTP server address: smtp.office365.com

Port Number: 587

Encryption method: STARTTLS

Username: Your Office 365 email address

Password: Your Office 365 app password

Remember not to use a custom IP address as the mail server as they aren’t supported by Office 365; stick with the given DNS name.

If your SMTP client doesn’t connect to the given DNS, you might get an error about the Exchange Online Server.
If you run into this problem, ensure your server name is set as smtp.office365.com and not a regional Exchange Online Server server like smtp-apacnorth.outlook.com.

And if Port 587 isn’t available, you can also use Port 25 — but ensure that your ISP or firewall hasn’t blocked the port you’re planning to use.

Back to Contents

How To Set Up POP & IMAP in Microsoft Outlook

Just setting up your SMTP mail settings isn’t enough to receive incoming emails in your mail client.

Why?
Your SMTP settings only deal with outgoing mail flow — not the emails you receive!
(more on this later in the article)

To receive an email, your IT admin needs to set up your POP or IMAP server settings.

But if you don’t want to ask your network admin to set up POP or IMAP server settings, here’s what you need to do in MS Office:

Open the Microsoft Office Outlook App and from the toolbar, go to  File > Account Settings > Server Settings.
Then, set up POP and IMAP settings. Don’t forget to set up SSL or TLS encryption.

Here are the mail settings you need:

1. IMAP Server Settings

server-settings

Server name: outlook.office365.com

Port Number: 993

Encryption: SSL/TLS

2. POP Server Settings

Server name: outlook.office365.com

Port Number: 995

Encryption: SSL/TLS

That’s all you need to do to set up your POP Settings and IMAP settings!

Back to Contents

SMTP, POP, IMAP Basics

Now that we’ve gone over how to set up Office365 SMTP, POP and IMAP settings, let’s explore more about these email protocols.

Wait… what’s a protocol?
A protocol is a method of exchanging communication/information between email accounts.

Here’s a quick overview of SMTP, POP, and IMAP:

1. What is SMTP?

A Simple Mail Transfer Protocol (SMTP) is used to send emails from one server (like the Office 365 SMTP server) to another. Most email providers use an outgoing mail server with SMTP to send emails over the internet.

SMTP works with a Mail Transfer Agent (SMTP relay) to send your emails to the right mailbox and computer. An SMTP relay guarantees that an email you send arrives in the recipient’s mailbox.

Think of it this way:
SMTP is like the postal service. It’s what you use to send your messages to every external recipient.

Only this time, you won’t have to worry about finding envelopes or stamps!

2. How Does SMTP Work?

SMTP uses a set of codes and commands that simplify the process of sending emails among email servers.

When you send out an email through an SMTP email system, it’s transferred through several SMTP relay systems and computers before it reaches its destination (a recipient’s mailbox).

It’s basically like your mail getting sorted through multiple post offices and postal workers before it finally ends up in the hands of your recipient!

However, as SMTP only transmits text, you can’t use it to send attachments.

To overcome this, Multipurpose Internet Mail Extensions (MIME) encode all non-text data into a text format before sending them through an SMTP relay server.

Tons of email services like SMTP.com and Mailjet offer their own SMTP service to customers — these help people send emails without having to set up an SMTP server manually.

3. What are POP and IMAP?

When it comes to configuring emails, you need more than SMTP systems alone.
Remember, your Office 365 SMTP server is only used to send emails.

POP3 and IMAP are two incoming server protocols used to receive emails.

Here’s how the IMAP protocol and POP3 protocol work:

A. POP3

Post Office Protocol 3 (POP3) is an email protocol that is widely used to receive email.

In POP3, your emails are downloaded from the server and stored locally on your device.
This way, you can access your emails even if you’re offline — you only need to be online to download them!

B. IMAP

Internet Message Access Protocol (IMAP) is the most commonly used protocol for receiving email. The IMAP protocol saves all emails onto its servers instead of downloading them to your local storage.

Whenever you want to check your email, your mail client contacts the server and loads the email regardless of the device’s IP address. With IMAP, you can check your emails from anywhere, with any device, on any IP address.

The difference between the  IMAP protocol and POP3 is that POP3 downloads your emails from the server for permanent local storage. IMAP, however, simply leaves them in the server and just caches them locally — sort of like cloud storage.

As there’s no permanent downloading and local storage involved, IMAP is faster and more efficient than POP3.

C. POP and IMAP vs. SMTP

POP, IMAP, SMTP — all this sounds super confusing!

But it’s very simple: SMTP is used as a protocol to send outgoing emails, while IMAP and POP are both protocols used to fetch incoming mail.

Back to Contents

Wrapping Up

Setting up SMTP settings in Outlook is an essential process that’ll help you send out emails to internal and external recipients.

And the easiest way to do it is through the client SMTP submission method.

You can follow the steps I covered above to easily set up SMTP as well as POP and IMAP settings to send and receive emails from your business domain.

Ready to send better emails and save a ton of time?


GMass is the only tool for marketing emails, cold emails, and mail merge — all inside Gmail. Tons of power but easy to learn and use.


TRY GMASS FOR FREE

Download Chrome extension - 30 second install!
No credit card required
Love what you're reading? Get the latest email strategy and tips & stay in touch.


Microsoft Outlook’s SMTP settings let you configure the email client of your choice (Gmail, Yahoo, Thunderbird, etc.) to send emails from your Outlook address.

Alternatively, you can configure your Outlook account’s SMTP and POP or IMAP settings to send and receive emails using a non-Outlook email address.

In this article, I’ll go over the SMTP settings for Outlook and walk you through the process of setting up your Outlook SMTP as well as IMAP and POP server settings.

Finally, I’ll mention the disadvantages of using a Microsoft Outlook SMTP server and highlight a better alternative to Microsoft Outlook to streamline your email sending activities.

This Article Contains:

(Click on links to jump to specific sections)

Let’s get started.

Outlook SMTP Settings

When you need to add your Outlook.com account (or Microsoft account / Hotmail account / Live.com account / MSN account) to another mail app (like Gmail), you’ll need to use the following SMTP settings:

  • SMTP Server Name: smtp.office365.com
  • SMTP Port Number: 587
  • SMTP Encryption Method: STARTTLS

Once you add these SMTP settings, you should be able to use another mail app to send emails from your Outlook account.

But how do you receive incoming emails?
To receive incoming emails, you’ll need to configure the IMAP settings or POP settings of the mail app you’ll be using.

Here are the IMAP settings for Outlook:

  • IMAP Server Name: outlook.office365.com
  • IMAP Port: 993
  • IMAP Encryption Method: TLS

And here are the POP settings for Outlook:

  • POP Server Name: outlook.office365.com
  • POP Port: 995
  • POP Encryption Method: TLS

However, to use POP, you’ll need to enable its access in Outlook.

How to Enable POP Access in Outlook

1. Launch the Outlook mail app (web version), and sign in with your account credentials.

2. Click on the Settings icon on the top of your toolbar in the Inbox window.

click-on-settings

3. From the dropdown menu, click on View all Outlook Settings.

view-all-outlook-settings

4. In the Settings window, click on Mail and then Sync Mail.

sync-email

5. Choose the Yes radio button under POP options, and then click Save.

yes-pop-options

Note: Ensure your internet service provider hasn’t blocked the SMTP, IMAP, and POP port numbers.

Go back to Contents

Now that you know how to configure another mail app to send emails from your Outlook address, I’ll show you how to send emails from another mail app account using Outlook:

How to Set Up SMTP Server Settings in Microsoft Outlook

Generally, there are three ways to set up email settings in your Outlook account:

  • Using direct send.
  • Using the SMTP authentication method (this is what I’ll talk about).
  • Using a dedicated relay to send your emails through the Outlook SMTP relay.

Note: If you want to know what SMTP is first, click here to jump down to that section. After you’ve understood what it is, you can come back here to learn how to set it up.

Why Should You Use the SMTP Client Method?

Because it’s the best method to use!

Here’s why you shouldn’t use the direct send method or dedicated relay method: 

  • Direct send only supports communication within your organization. As a result, you can’t use it to communicate with people outside your business.
  • If your company uses a line-of-business (LOB) tool, you need a static IP address to authenticate the Outlook mail app with the relay server method.

And here’s why you should use the SMTP client submission method: 

Unlike direct send, the SMTP authentication (SMTP AUTH) submission method lets you email anyone with a full email address inside or outside your organization.

Besides, you don’t need to worry about having a static IP address for your LOB app with SMTP authentication

How to Set Up the SMTP Server in Outlook

1. Launch the Outlook desktop mail app, and sign in with your username and app password.

launch-outlook

2. Click on the File menu, then select Info and click on Account Settings.

click-on-file

3. From the Account Settings dropdown menu, select Manage Profiles, and a Mail Setup window will appear.

manage-profiles

4. Next, click on the Email Accounts button within the Mail Setup window.

email-settings

5. Select your e mail account and click Change.

change

6. In the Change Account window that appears, click on More Settings.

more-settings

Note: I’m using a Gmail account here. That’s why the “Incoming mail Server” says imap.gmail.com and the “Outgoing mail Server” says smtp.gmail.com.

7. From the Internet Email Settings window, select the Outgoing Server tab.

more-settings

8. Under the Outgoing Server tab, tick the checkbox that says “My outgoing server (SMTP) requires authentication” and click the Log on using radio button.

Insert the username (the email address from which you send the email) and password into their respective fields. Moreover, ensure that the “Require Secure Password Authentication” box is unchecked.

internet-email-settings

Note: Outlook.com doesn’t require Secure Password Authentication (SPA). SPA is a proprietary Microsoft protocol used to authenticate Microsoft mail clients with servers. But don’t worry, since you’re using Outlook, it won’t be an issue for you!

9. Next, click on the Advanced tab.

advance-tab

In the Advanced tab, choose the SSL/TSL encrypted connection from under the “Use the following type of encrypted connection” dropdown list and click OK.

That’s it — you’ve completed the configuration of your SMTP settings to send emails from a non-Outlook account through Outlook!

Go back to Contents

Now, let’s go over managing the configuration of your IMAP and POP server settings:

How to Set Up IMAP and POP Server Settings in Microsoft Outlook

You can set up your SMTP settings to send outgoing emails, but that isn’t enough to fetch incoming emails.

To do that, you need to set up an incoming mail server using:

Let’s jump right into it.

A. How to Set Up the Incoming Server Settings with IMAP

1. Launch the Outlook mail app on your desktop.

2. Click on the File menu, then select Info, and click on Add Account.

add-account

3. In the Outlook login window that opens, tick the checkbox that says “Let me set up my account manually” and click Connect.

connect

4. From the Advanced setup window that appears, choose the IMAP account type.

office-365-imap

Your account will get added to Microsoft Outlook.

account-added

B.  How to Set Up the Incoming Server Settings with POP

1. Launch Outlook on your desktop.

2. Click the File menu, select Info, and click on Add Account.

3. In the Outlook login window that opens, tick the checkbox that says “Let me set up my account manually” and click Connect.

4. From the Advanced setup window that appears, choose the POP account type.

office-365-pop

5. Type in the credentials in the Internet Email window that opens, and click OK.

click-ok

6. In the POP Account Settings window that appears, verify that the POP port number is 995 and the encryption method used is SSL/TLS.

Once you’ve verified these server information fields, click Next.

pop-settings

Note: I’m using a Gmail account here. That’s why the “Incoming mail Server” says pop.gmail.com, and the “Outgoing mail Server” says smtp.gmail.com.

Your account should be set up and ready to use.

Note: Keep in mind that you may need to be assigned permissions before performing some of the abovementioned steps. To know what permissions you may need, check out the entries under “POP3 Settings” and “IMAP4 Settings” in mobile devices and clients permissions.

Go back to Contents

Now that you know how to set up a mail server using SMTP, POP, and IMAP, I’ll answer some FAQs related to the SMTP, IMAP, and POP email protocols:

5 Email Setting FAQs

Here are answers to five commonly asked questions about the SMTP, IMAP, and POP protocols:

1. What Is SMTP?

The Simple Mail Transfer Protocol (SMTP) is used to send emails from one email server to another. SMTP is used by most e mail account servers to exchange email messages.

SMTP uses a “store and forward” process that helps you move emails from one mail server to another.

It works with a Mail Transfer Agent (MTA) — also known as an SMTP relay — to send your outgoing mail to the right inbox. Using an SMTP relay guarantees that your mail is delivered to the recipients’ inbox.

It’s a lot like the postal service using their postal networks to deliver your mail to the right person.

2. How Does SMTP Handle Email?

SMTP utilizes codes and commands to simplify sending emails across servers. SMTP relay servers transfer outgoing mail across several computer systems before it reaches a recipient’s inbox.

This is similar to a letter going through multiple post offices and agents before getting delivered.

However, SMTP can’t send attachments. It can only transmit text.

You can overcome this through Multipurpose Internet Mail Extensions (MIME), which encodes all non-text data in an internet e-mail to text before sending it through SMTP.

Want to learn more about SMTP?
Read my ultimate guide to SMTP for everything you need to know.

3. What Is POP?

Post Office Protocol (POP) is a protocol widely used to receive incoming mail. There have been several versions of POP, the latest being the POP3 server. This protocol downloads email onto a local device whenever you want to check email.

This way, granting POP access to your mail client lets you check your mail even when you’re offline!

4. What Is IMAP?

The Internet Message Access Protocol (IMAP) is the most commonly used protocol for receiving incoming mail.

Unlike a POP3 server, where you have to download an email to your local storage, IMAP saves all emails on its email servers. And so whenever you need to check email, your mail client contacts the server and lets you check your email.

This makes the IMAP protocol quicker and more efficient than using the POP3 protocol.

5. How Is POP/IMAP Different from SMTP?

Are all these protocols confusing you?
Don’t worry — it’s all very simple.

The POP protocol and IMAP protocol help you set up an incoming mail server to receive incoming emails. On the flip side, SMTP is a protocol that allows you to send outgoing emails.

Go back to Contents

Now that we’ve gone over the basics of SMTP, IMAP, and POP, I’ll explain why you should choose an alternative email client to Outlook:

Why Outlook Isn’t the Best Email Client + A Great Alternative

While you can set up your SMTP settings to use Outlook as your email provider, it’s not the best mail client out there.

Here’s why Gmail is a much better mail client than Outlook:

1. Gmail Offers More Functionality and a Cleaner Interface

Gmail is renowned for its user-friendly interface.

While Outlook tries to offer a similar interface, it’s far from the streamlined look of Google Gmail and even lacks some useful features.

While Gmail provides a secure connection for your emails, it also has tons of AI-powered features like smart compose — something you won’t find in Outlook.

2. Gmail Offers a Ton of Powerful Extensions

Microsoft Outlook works best when paired with the other Office 365 applications. This means that if you need extra features from Outlook, you’ll have to turn to one of the Office 365 apps. And while some of those are helpful, it’s still a very limited selection!

However, Gmail features a ton of functional extensions to increase your email productivity.

One such extension is GMass.

It’s the perfect email extension for anyone looking to send bulk emails from their Gmail account.

What Is GMass?

gmass

GMass is a powerful bulk email tool and email marketing automation platform used by employees in tech giants like Twitter, Google, Uber, and LinkedIn. It’s also used by solopreneurs, small business owners, sales professionals, casual email senders, and so on.

Essentially, anyone can use GMass!

And the best part?
GMass works right inside Gmail, which means you don’t have to familiarize yourself with yet another tool.

To get started with GMass, just download the Chrome extension, and sign up for free with your Gmail account.

With GMass in your toolkit, you can:

  • Automatically personalize your outgoing emails at scale, including their subject lines, paragraphs, attachments, images, and more.
  • A/B test your email outreach campaigns to see which campaign will get you the most positive responses.
  • Set up workflows to keep sending automatic follow-up emails till your recipient opens, replies, or clicks on a link inside your Gmail. Additionally, you can adjust the frequency and number of follow-ups to send.
  • Send behavior-based email campaigns that are automatically customized to how a recipient responded to your previous emails.
  • Use the Email List Builder feature to create a mailing list effortlessly from your inbox.
  • Analyze how your email deliverability and engagement metrics through detailed analytics reports to identify any opportunities for improvement.
  • Schedule your bulk emails to go out at optimal times so that they reach the recipient’s inbox when there’s the highest chance of engagement.
  • Create and send drip campaigns to your recipients to improve your engagement rates.
  • Access powerful bulk emailing and automation features on your Android device (smartphone, tab, etc.) using the GMass add-on for the Gmail app.

Go back to Contents

I’ll now explain the steps involved in the configuration of SMTP settings in GMass:

How to configure your SMTP Settings in GMass

You can always use Gmail’s SMTP servers for your emails.

But why do that when you can set up your own SMTP outgoing mail server on GMass?
This will even let you send unlimited mass emails to recipients!

Here’s how you can set it up:

1. Choosing How to Set Up the SMTP Server

You can set up SMTP settings in GMass using three different methods:

A. Use the GMass SMTP Server

If the emails you send are either:

  • Non-commercial.
  • Completely organically developed.

You can easily set up SMTP through GMass’s own SendGrid account. You can contact the GMass team to request this service.

B. Set Up Your Own SMTP Account

If you feel like you need your own SMTP account, or if your emails don’t fit the criteria above — don’t worry!

You can easily set up your own SMTP account with third-party providers like SendGrid. Then, just tweak the account setting to your liking and set it up with GMass.

Read my reviews of popular SMTP services:

C. Set Up a Private SMTP Outgoing Mail Server

If you have the technical knowledge, you can set up custom SMTP server settings for your business. However, setting up your own server can be time-consuming and requires advanced technical knowledge.

If you’re an expert-level developer, you’ll want to read my technical review of popular SMTP services.

2. Setting Up Your SMTP Account

Here’s how GMass connects to SMTP servers:

Step 1

GMass connects to your server without TLS/SSL. You can decide on the port number — most SMTP service providers will allow you to connect to port number 25 or 2525.

Note: Ensure your internet service provider hasn’t blocked the port number.

Step 2

Ensure the “track email opens and clicks” option is turned off. This is required because GMass does all the email tracking for you.

Ensure that the outgoing mail server (SMTP) doesn’t alter the emails in any way but just lets them pass through.

Step 3

Look for any email send quota restrictions in your SMTP account setup. If there are any, ensure that you remove them or that they don’t limit your general or cold email campaigns.

Step 4

In this step, you’ll have to check which RETURN-PATH address your server is using. This address is also called a MAIL-FROM address or an Envelope Form.

Depending on your SMTP provider, you’ll have to verify your domain name — because the same domain name is used in the MAIL-FROM address and the “from” address.

This may require you to alter your DMARC, DKIM, and SPF records.

Step 5

Make sure you turn on Bounce notifications. Don’t forget to set your bounce notifications to go to the “From” address.

This helps GMass to process the email bounces and show them to you when required.

3. Setting Up GMass to Send Emails through the SMTP Server

This is the last stage in configuring GMass with an external server.

Here’s how you can do it:

Step 1

Reload Gmail to make sure you have the latest GMass version. Install the Chrome extension if you don’t have GMass already. Then, click on the Compose window.

Step 2

Insert smtp@gmass.co as the “To” field of the new email message.

Step 3

Insert the word “set” as the subject and wait for this form to load in the message area.

Step 4

Enter the relevant details after the colons. If your SMTP server requires no authentication, set the User name to “noauth” and leave the password field blank.

Step 5

Click the GMass button.

After you complete these steps, GMass will try to send a test message to your inbox. If the email is successful, the SMTP email message server will be set for your Gmail account.

Then, you’re ready to send out emails on GMass through your external SMTP server!

Go back to Contents

Final Thoughts

Configuring your Outlook SMTP settings doesn’t have to be complicated.

Just follow the instructions I have outlined above, and you’ll have your Outlook mail server settings up and running in no time!

But remember, Outlook may not be the ideal email client for you — it lacks some functionality, supports limited extensions, and boxes you into the Microsoft 365 Suite.

Instead of using a limited mail app like Microsoft Outlook, you can easily handle your emails through Gmail and GMass instead.

With GMass, you can automatically personalize your emails, automate your email follow-ups, perform A/B testing, access powerful email capabilities on your Android device, and do so much more.

Why not try GMass today and take your email performance to the next level?

See why 99% of users say they’ve had their best deliverability ever with GMass


Email marketing, cold email, and mail merge all in one tool — that works inside Gmail


TRY GMASS FOR FREE

Download Chrome extension - 30 second install!
No credit card required
Love what you're reading? Get the latest email strategy and tips & stay in touch.


What 99% of users need to do is send a personalized email to a few hundred people where each of those few hundred people get their own email, using only their email address in the To line and having the message addressed to them by their first name (e.g., “Dear John,”).

There are certain situations, however, where you may want each of your emails to go to two people instead of one, such as when a school is emailing both parents of a child. The school might want to send one email to both parents rather than two individual emails. I recently worked with a cold emailer who was emailing the athletic departments at schools and who wanted each email to go to both the Head Coach and the Athletic Director of each school. The goal behind sending one email to two people, rather than two emails to two people, is so that each of the two people know that you’ve also emailed the other person, and so that a Reply All by either of the two would go to all three parties.

Two addresses on one mass email

This can be easily accomplished by having one person’s address in the To line and the other person’s address in the Cc line.

To send a mail merge like this, you’ll need:

  • A Google Sheet containing your email list
  • Your Gmail account
  • GMass installed and ready to go

Format your Google Sheet

Your spreadsheet should have at least two columns containing email addresses, since each email will go to two people, and you can think of each row of your spreadsheet as one email that will go out. The primary column, the address that will go in the To line can be named anything you like, such as “email,” “emailaddress,” or whatever you like. The second column, however, should be named “cc” or “Cc” (it’s case insensitive). That is a special keyword for a column that will instruct GMass to include the address in that column in the Cc line of every sent email.

Here’s an example spreadsheet:

Google Sheet for Two Email Addresses Per Mass Email

Now just merge as normal

Now send your mail merge just like you normally would. Click the “spreadsheet” icon button, choose your Sheet, wait for the Compose to launch, and then type your Subject/Message. We know your spreadsheet has two columns, one for each of the two email addresses each email will be sent to; but if it also has two other columns for both people’s names, you can begin each email with “Dear {Parent1First} and {Parent2First},” for example.

Personalize recipient 1 and recipient 2

If you’ve never done a Gmail mail merge with GMass, watch this 45-second video.

Need to send each email to 3+ people instead of two?

Just like you’re using the Cc line for the second email, you can use the Bcc line for the third email. Of course, by doing this, the recipients in the To and Cc won’t see that a third person is receiving the email, since that’s the nature of Bcc, but you can address that in your message as well.

Here’s what your spreadsheet should look like, with a column for the primary recipient named anything you like, a column named Cc for the second recipient, and a Bcc column for the third recipient.

Google Sheet for Three Email Addresses Per Mass Email

Now when composing your mail merge, you’ll do exactly what you did when you sent to two people per row. The only difference this time is that your spreadsheet contains a “Bcc” column.

Each sent email will then have the primary address in the To line, the “Cc” column in your spreadsheet will be in the Cc line of the email, and the “Bcc” column in your spreadsheet will be in the Bcc line of the email. So now, you’ve sent a personalized mail merge, where each email has been sent to THREE people.

You can also use this technique to send emails to four people, five people, or more. Just put multiple addresses in the Cc and/or Bcc columns, separated by commas or any other non-email character. Here’s how your spreadsheet might look:

Prepare your Google Sheet with CC and BCC fields

But why can’t all two, three, or more addresses be in the To line?

Because GMass was designed around having one single address in the To line. The Cc and Bcc techniques are “tricks” that allow you to accomplish sending to two or three people per email. It’s possible that someday we’ll change this and allow you to truly merge with multiple addresses in the To line, but that presents complexities, like, how do we track an email “open” rates? (What if everyone opens it? What if only one person opens it?) Using the Cc/Bcc technique, there is one open tracking pixel for the whole email, so if any of the three recipients open it, the email will be counted as “opened” and be attributed to the primary recipient in the To line.

Conclusion

That’s all there is to it. This technique has actually been possible since 2016, when we launched the Cc/Bcc merge feature, but more and more users have been asking how to send a merge to 2+ at once, so now, you have a complete guide!

Ready to send better emails and save a ton of time?


GMass is the only tool for marketing emails, cold emails, and mail merge — all inside Gmail. Tons of power but easy to learn and use.


TRY GMASS FOR FREE

Download Chrome extension - 30 second install!
No credit card required
Love what you're reading? Get the latest email strategy and tips & stay in touch.


Here’s the problem — you’re hosting a Windows server running IIS on AWS, and your web app is getting hammered with requests that look like this:

 https://www.mywebsite.com/?q=%23Hcker%3Cbody%20oninput%3Djavascript%3Aalert(1)%3EHcker

These are clearly malicious. You want to block the IP easily and programatically. My website fields thousands of requests just like this daily, ever since we made it onto HackerOne’s list of apps using Google APIs that have more than 50,000 active users.

You have a few options, but I argue you only have one good option.

Various options to block an IP in AWS

  1. You might think to use AWS Security Groups, but you’ll quickly realize that Inbound Rules in AWS Security Groups can only be used to whitelist traffic, not block traffic.
  2. When you dig further into what AWS offers, you’ll come across the ability to block individual IPs, and even ranges of IPs, using a Network ACL (Network Access Control List). Specifically, you can set ALLOW and DENY rules. That’s actually a decent solution, but there are two issues: 1) If you want to do this programmatically, you’ll need to learn the AWS Network ACL API; and 2) You are limited to 20 total rules, including Inbound and Outbound. So if you have 1 Outbound rule, which is normal, and 1 default Inbound rule, you’re left with only 18 IPs or ranges that can be blocked.block IP addresses in AWS
  3. If you dig even further into what AWS offers, you’ll find that you can integrate your own third-party firewall into your EC2 environment, but this solution will be complex and expensive.
  4. If you’re using Windows Firewall, then you can block an IP address using Windows Firewall, and you can even programmatically block IPs using the Windows Firewall API. This is like a decent option, but one I’ve never tried before. The AWS documentation encourages users to use Security Groups instead of Windows Firewall, so ever since I set up Security Groups, I have disabled Windows Firewall on my production servers.
  5. After exhausting your native AWS options, you’ll start to look at what kind of blocking IIS can do natively. You’ll come across Dynamic IP restrictions, but if your web app is even close to as complex as mine, you’ll note a few things lacking.

Why IIS’s Dynamic IP Restrictions Kind of Sucks

  • It’s great to be able to stop IPs that send too many requests at once, but if you have any kind of busy web app, this will lead to false positives. What about images? Let’s say you have a page with 200 images, each of which will be a unique request. The user might get blocked after requesting this page even if you have this set to a reasonable threshold like 100.
  • Most malicious attacks involve a query string. It would be nice to apply these rules just to requests that have a query string, but no such option exists.

What is the easiest and the best solution?

My preferred method of blocking IPs is by using the IP Address and Domain Restrictions function of IIS. It requires you to install the IP and Domain Restrictions module from Server Manager, but once installed, blocking an IP is as easy as:

  1. Use the IIS user interface to navigate to the IP Address and Domain Restrictions section to block an IP address. This can be done both on the individual site level by navigating to a specific site, or on a server-wide level by navigating up a few levels to the entire server.
  2. Add an ipSecurity item to a website’s web.config file, which is the same as adding the IP to an individual site in IIS.
  3. Add an ipSecurity item to the server’s ApplicationHost.config file, which is the same as adding the IP to the whole server in IIS. This file is found under c:\windows\system32\inetsrv\config.
  4. Use the Microsoft.Web.Administration API to add new IPs easily to the block list, which essentially writes new IP addresses to ApplicationHost.config.

Using the IIS API to block IPs server-wide

To programmatically block IP addresses in IIS, use the Microsoft.Web.Administration API. However, don’t install the Nuget package, as programmer Lex Li explains. Instead, reference the DLL that’s already part of your Windows OS.

Here’s the C# code I use personally:

        public void IISBlockSingleIP(string ipAddress)
        {
            IPAddress ip;
            bool IsIPValid = IPAddress.TryParse(ipAddress, out ip);
            //IT'S VERY IMPORTANT THAT YOU VALIDATE THE IP, BECAUSE THE API WILL ACCEPT ANY TEXT AND ADD IT TO ApplicationHost.CONFIG
            //AND THIS WILL CORRUPT ApplicationHost.CONFIG AND TAKE DOWN EVERY WEBSITE ON YOUR SERVER
            if (IsIPValid)
            {

                using (ServerManager serverManager = new ServerManager())
                {
                    Configuration config = serverManager.GetApplicationHostConfiguration();

                    ConfigurationSection ipSecuritySection = config.GetSection("system.webServer/security/ipSecurity");

                    ConfigurationElementCollection ipSecurity = ipSecuritySection.GetCollection();

                    var addElement = ipSecurity.CreateElement("add");
                    addElement.SetAttributeValue("ipAddress", ipAddress);
                    addElement.SetAttributeValue("allowed", "false");
                    ipSecurity.Add(addElement);

                    serverManager.CommitChanges();
                }
            }

        }

As I’ve noted in the comments, it’s critically important to validate every IP before committing it to ApplicationHost.config, because the API will accept any junk text and add it as a DENY rule — and if a non-IP makes it in there, it will bring your whole server down.

Validate each IP address
This will bring your server down.

Again, all this code does is add a line to the ipSecurity section of ApplicationHost.config. So technically, you could manipulate the file yourself, without the Microsoft API, but since this is just a few lines of code, it’s much easier than risking corrupting the file with malformed XML.

Why bother with blocking an IP programmatically when you can just as easily do it manually through the IIS interface?

I block IPs almost weekly because they’re pounding my server with malicious requests. I detect these requests in the Application_BeginRequest method of my Global.asax file, and then I send myself an email when an IP meets certain criteria. That email then contains a link which calls the above-referenced code. So blocking an IP for me is as easy as getting an email notification and clicking a link. It’s much easier than RDPing into my web server, launching the IIS Administration tool, navigating to the right area, and adding the IP through the UI.

Why not just keep the bad IPs in a database table and check against that table from Application_BeginRequest?

That is a great idea, and also something I do, but it turns out that not every request goes through Application_BeginRequest. A malicious request like the one in red above would not go through Application_BeginRequest. A user flooding your server with these requests can easily affect server performance if the requests are allowed through, which is why I’ve outlined additional steps.

What actually happens when you block an IP?

Now that your IP is added to the block list in applicationHost.config, what does a hacker from that IP see when accessing your website? Unfortunately blocking via applicationHost.config does not block the hacker’s attempt at connecting at all. It still lets the hacker content but the hacker will see this in his web browser:

AWS hacker error message

Another thing to note is that “dangerous” requests don’t go down the same pipeline that normal requests do, and therefore “dangerous” requests circumvent the IP blocking in applicationHost.config altogether. A dangerous request will still be responded to with this IIS error:

System.Web.HttpException (0x80004005): A potentially dangerous Request.Path value
was detected from the client (<). at System.Web.HttpRequest.ValidateInputIfRequiredByConfig() at
System.Web.HttpApplication.PipelineStepManager.ValidateHelper(HttpContext context)

As an example, here’s a “dangerous” request you can try now on the GMass website: http://www.gmass.co/booya/build_now%3Csvg/onload=alert(1337)%3E

So, even if your IP was blocked, you would still be able to access that dangerous URL and you would still get the same message.

Ready to transform Gmail into an email marketing/cold email/mail merge tool?


Only GMass packs every email app into one tool — and brings it all into Gmail for you. Better emails. Tons of power. Easy to use.


TRY GMASS FOR FREE

Download Chrome extension - 30 second install!
No credit card required
Love what you're reading? Get the latest email strategy and tips & stay in touch.


I’m an email expert. Here’s what I think.

Every couple of years, a new-fangled email service launches and generates a lot of buzz on Twitter and in the tech press. The latest app is called Hey, made by Basecamp, which is based in Chicago, where I lived for 15 years. If you follow the email ecosystem, you might be familiar with Superhuman, another email software startup that has garnered a lot of attention over the last few years for also re-inventing the email experience.

The skinny on Hey

  • It’s a web-based email system.
  • It only works with @hey.com email addresses. The company has started onboarding companies who want to move their team’s email to Hey, but it’s not widely available yet.
  • It’s invite-only for now.
  • It costs $99/yr or more if you want a two or three-letter username @hey.com.
  • About 100,000 people have requested access, according to Jason Fried.
  • It has some neat features like blocking open-tracking pixels by default (bad for guys like me) and being able to see all of your attachments sent from everyone in one place. Its screener makes you apply a Yes/No to everyone that’s emailing you for the first time, which then determines where future emails are routed. It features an “Imbox” instead of an Inbox, and although plenty of people are annoyed by this, Jason Fried and company insist that itsnotatypo.com.

Will Hey become wildly popular, displacing Gmail as the #1 email service for entrepreneurs and startups?

I doubt it. Hey will likely succeed as a niche email tool and a moneymaker for Basecamp, Inc., but it’s unlikely to be a dominant force in the consumer or business email market.

People love to hate email, so whenever a new email app arrives onto the scene, it feels exciting. I tried Superhuman last year but quickly switched back to Gmail. I’m a special case, though, because I use Gmail in a way that nobody else in the world uses it — I use it to manage every aspect of my company. Every time a new user signs up for GMass, a notification goes into a special Label. Every time a user launches a campaign, a notification goes into a special Label. Why do I do this? So that when I’m handling a support issue for a user, I can search for any user by their email, inside my Gmail account, and immediately pull up a history of everything they’ve done. Gmail’s exceptional search capabilities make this all possible.

Additionally, once I was turned onto Gmail’s keyboard shortcuts, the productivity advantage of Superhuman disappeared.

The biggest drawback of using any email client outside of Gmail is that it will never have the vast ecosystem of third-party developers building added functionality for it. There are already hints that Hey will be a mostly closed ecosystem, given that you can neither relay email via SMTP to a hey.com address or retrieve your hey.com messages over POP or IMAP. Perhaps there will eventually be an API. Still, unless alternative solutions like Hey and Superhuman are willing to natively add demographic information to contacts, help you turn emails into to-do items, and tell you how to write a message to a particular person, they’ll never be able to compete on features. Other Gmail extensions add email tracking and auto follow-ups, both of which are useful to a sender of emails.

Since Hey is decidedly anti-spying, it would create quite the kerfuffle if it were to add pixel-based open tracking to the service as a user of Hey but then tout the blocking of said pixels on the receiving end as a feature and more-so a product mantra. Superhuman fell victim to this when a blogger “discovered” that by default it includes the tracking pixel in all sent emails, although I never understood why this was such a big deal. If I’m a user of any email client, I’d love to know when my emails are opened.

For some reason, privacy advocates get far more riled up over marketers knowing you’ve opened an email than knowing every move you make on every website, which is fairly commonplace if you’ve ever logged into a website or if you’ve ever clicked on a Facebook ad and then browsed the advertiser’s site.

Additionally, Gmail already natively includes scheduling, snoozing, and smart text suggestions, not to mention the best email search function on the planet. Given that Gmail is made by Google, and Google’s almost-trillion-dollar business is based mostly on its ability to accurately dole out search results faster than you can compose your next thought, it’s unlikely that any alternative email service will be able to provide a search function that’s better than Gmail’s native search function.

About that Screener

Hey’s primary method for sorting out email that you want from email that you don’t want is the Screener, a place where all first time emailers end up, and you, as the user, have to choose YES or NO to each sender. It’s a simple way of deciding what’s spam and what’s not.

There’s one major problem with this approach. It requires a LOT of manual work. In the beginning, as @hey.com addresses are new, users won’t mind this. In fact, on Twitter, new Hey users delight at getting new email just like they did when email first became commonplace in the late 90s with AOL Mail. Over time though, as you use your new @hey.com address more and more, working your way through the Screener will become as tiresome as trying to achieve Inbox Zero with a “regular” email platform.

Here is where Gmail is far superior. Most people have never heard of TensorFlow, an open source machine learning AI platform developed by Google that Gmail is now using to block spam. Can Hey match this? Possibly, but as smart as Basecamp’s engineers are, the kind of computer science expertise required to build AI-based systems goes far beyond being able to create beautiful UIs for project management systems and email platforms.

How about Hey vs. G Suite and Docs, Sheets, Calendar, YouTube, and more?

If you host your company’s email on G Suite, then you’re probably also using Google’s Calendar, Google Docs, and a bunch of other Google services like YouTube and Meet are likely tied to your G Suite account address. Fortunately for these users, it is possible to switch to Hey for email, but keep the rest of your G Suite services. This is due to the nature of how email works, and the magical DNS MX record that controls it all. If my domain, mywidgets.com, wants to use Hey for email but keep my G Suite services alive, all I have to do is change the MX record for mywidgets.com to point to Hey, and now I can host all of my @mywidgets.com email accounts at Hey but still log into all of my  G Suite services using the same @mywidgets.com accounts created on G Suite. The only difference is that email messages sent to @mywidgets.com will no longer appear in Gmail.

The drawback of this hybrid approach is that you’ll be forced to pay the monthly fee for G Suite and for Hey, and that “double” cost is unlikely to be palatable to most businesses. The only sustainable solution to this would be if Google uncoupled the Gmail service from the rest of the G Suite services, and that’s just not going to happen.

The key difference between Hey and Superhuman

Hey is both an email client, via its web-based app, and an email hosting service. As a user of hey, you have an @hey.com email address which you then manage through the Hey website or app.

Superhuman is only an email client. It works on top of other services like Gmail. With Superhuman, you keep your @gmail.com or G Suite account, and you use Superhuman to send and receive emails from those same addresses. With Superhuman, you can also use the Gmail app or web-based client to send/receive. With Hey, you are locked into the Hey website or app to manage your @hey.com address.

The advantage of Hey’s approach is they can offer users a new beginning, with a new email address, for people that are sick of the volume of email they receive at their current address. Of course, you can also solve that problem by creating a new @gmail.com address — but you’re not likely to get tom@gmail.com, whereas you probably can get tom@hey.com for a price.

The disadvantage of Hey’s approach is that new beginnings are not easy. Because you can’t just slip Hey’s email client over your existing email client, it’s not nearly as easy to switch to it. Establishing a new email address that will become your primary email address is hard. You have to inform everyone you’re in touch with that you have a new email address, hope they update their contacts, and further hope they never reply to an old thread with your old email address. You could forward your old email address to your new @hey.com address, but that’s clunky and can break threads.

How desirable is having a hey.com email address?

For me, the litmus test of an awesome email address is whether I can utter my email address to a customer service rep over the phone without any ambiguity as to its spelling.

Let’s say I had the account me@hey.com (I don’t), and I say over the phone, “My email is me at hey dot com.” That’s still ambiguous. Is it “hey” dot com, or is it “hay” dot com?

“Sorry, was that ‘hey’ or ‘hi’?” I foresee someone asking.

The only way for this issue to become moot would be if the Hey email service became as ubiquitous as Gmail or Yahoo Mail, and even if that happens, it will take time.

Hey’s battle with Apple

Hey is currently in a fight with Apple because Apple is refusing to publish the latest version of the Hey app unless they include in-app purchase functionality in the app (see update below). As a subscription service, Hey charges a minimum of $99/yr, and Apple is arguing that the app must offer in-app purchases to be compliant with App store policies, and so that Apple can take its 30% cut.

It’s hard to feel bad for Hey, though, because although I believe them when they say this isn’t a PR stunt, the amount of publicity this battle is generating is insane. Every tech site you can think of is covering the story from TechCrunch to The Verge to protocol. Furthermore, Superhuman had the same issue, did comply with Apple’s requirements, and is happy with the results.

I, too, have struggled with similar issues with both the Chrome extension store and the Gmail Add-on Marketplace, the two app marketplaces relevant to my business. I’ve argued that my app should be allowed to do X and look like Y, only to be told No, even when other apps did the same thing. I’ve managed to prevail over Google by using sound logic and persistence. At least with Hey’s fight against Apple over the App Store policies, there’s a point of contact and guaranteed communication with the app review team. That’s far more than a Chrome extension developer gets. Finding out why your extension has suddenly been delisted is like wandering around a pitch dark room with no walls.

I predict that Hey’s place in the App Store will eventually be settled one way or another, even if they succumb to the Apple tax, but I doubt the way they’re flaming Apple all over social media is helping their cause. Apple is too big to be swayed by a few haters, and even though there might be 5,000 haters siding with Hey, that won’t be enough.

UPDATE: Apparently, over the weekend, Apple did capitulate and approved the version of the app with the bug fixes, and the fight has now struck a more conciliatory tone. The folks at Basecamp are surely rejoicing, not only because their app is approved, but because they’ve just earned another round of major press coverage from every. publication. on. Earth.

Revenue Predictions for Hey

According to Jason Fried, about 100,000 people have requested invites, and supposedly after this week, all 100,000 people will have had the opportunity to sign up. I’m going to assume that 75% of the people that get an invitation code will use it and sign up. That’s pretty high, but given the high engagement of users on Twitter and the massive press coverage, it’s reasonable. Every new user also gets a few invites to hand out, so let’s say at the end of this week, a total of 80,000 people have signed up for the free trial.

For free trial SaaS products that don’t collect a credit card upfront, a 10% conversion from free to paid is typical. Hey is going to do a lot better than that, given the excitement around its launch. Let’s double that to 20%. So at the end of  the 14 days following the end of this week, I predict that 20% of 80,000 users will have signed up for the basic $99/yr service, which amounts to 16,000 paying users at about $100/yr, which equals $1.6M in Annual Recurring Revenue (ARR). Not bad.

Do I want Hey to succeed?

Somewhat. I’m a bootstrapped entrepreneur, and so are Jason Fried and David Heinemeier Hansson, the two faces of Hey, so I feel a kinship with them. I admittedly also feel threatened every time a Gmail alternative is launched because my whole career is based on people using Gmail. Whenever an alternative surfaces, my target market shrinks ever so slightly. So take this analysis with a grain of salt since I’m naturally biased against Gmail alternatives like Superhuman and Hey.

Invite-only? You’ve already lost me.

I loathe invite-only systems, but for some reason, every shiny new email product starts as invite-only. Gmail started as invite-only in 2004. Superhuman is still invite-only. And now Hey is invite-only until July. I’m immediately turned off by invite-only systems, but I recognize that I’m a rare soul. Why does invite-only bother me so much?

  • I see it as a self-indulgent attempt to drum up buzz when the actual product is not in limited supply
  • I feel like an ass explaining that I have access to something that you don’t
  • It’s usually a sign that a product hasn’t been tested enough to be released to the masses

Now some products are truly in limited supply, and so limiting access based on supply is key to survival. Like diamonds. Just kidding.

This kind of product launch reminds me too much of other life experiences where the product uses the customer to market themselves rather than the product. It’s like a bouncer forcing a line to form outside a popular nightclub when there’s actually plenty of room inside.

While I’m on my soapbox, this also annoys me. A veiled attempt at being transparent with an interesting story of how they acquired the hey.com domain name without revealing the one thing that actually matters — the price. So they had some back and forth with the seller over a period of time, and another buyer entered the picture? That’s the story of EVERY SINGLE high-value domain purchase.

What do I want to happen?

I hope that when alternative email apps like Superhuman and Hey come to market, it forces everyone else in the email ecosystem, including Gmail, to up their game. Gmail has struggled recently as an innovator. Since it implemented strict new security protocols, put in place for its third-party developers, it has essentially squashed innovation from third parties by making it cost prohibitive. What makes Gmail remarkable, and what makes it unlikely that Superhuman or Hey will ever be able to catch up, is its vast library of extensions and add-ons. Gmail itself, as evidenced by its blog, rarely adds new native features.

The future of Hey

It’s likely that Hey will eventually offer an API, just like Basecamp does, and who knows — maybe afterwards, a certain someone will write a Chrome extension for Hey to make it possible to send email campaigns through Hey. Whoa! Actually, that’s unlikely. Hey’s native feature-set seems to be fairly anti-email-marketing, and while I haven’t seen any documentation as to how many emails a single @hey.com account can send in a 24-hour period, I’m almost positive they will limit the service so that it can’t be used to send even low-volume campaigns, like Gmail and Outlook currently can.

Disclaimer: I haven’t tried Hey. It’s invite-only, and I don’t have an invite.

Ready to transform Gmail into an email marketing/cold email/mail merge tool?


Only GMass packs every email app into one tool — and brings it all into Gmail for you. Better emails. Tons of power. Easy to use.


TRY GMASS FOR FREE

Download Chrome extension - 30 second install!
No credit card required
Love what you're reading? Get the latest email strategy and tips & stay in touch.


You’re probably using Google Sheets to send most (if not all) of your campaigns in GMass. So it only makes sense that you’d want to get campaign data back into those sheets.

There are a few different methods for getting your campaign data into Google Sheets with GMass. In this article we’ll cover those methods and walk you through their pros and cons.

Method #1: GMass’s Automatic Google Sheet Updating

With GMass, you can set your Google Sheet to automatically update as your campaign sends. Opens, clicks, replies, and bounces will update columns in your Google Sheet so that you can easily see how each person has engaged with your mail merge or cold email campaign.

This is a popular feature with GMass users — in fact, we’ve even had people tell us they switched to GMass for this feature alone.

Go ahead and stare!

A Google Sheet updating live with campaign data.

You can use this data to further refine follow-up campaigns by filtering on the columns that have values equal to X.

Activating automatic Google Sheet updating for a campaign

In order for your Sheet to be updated, there are two basic steps you must follow:

  1. Check the box to update your Sheet at the time you connect to your Google Sheet inside Gmail.
  2. Grant GMass permission to write to your Google Sheet. When you first sign up for an account, GMass does not ask for the permissions necessary to write to your Sheet; at sign-up it only asks for permission to read from your Sheet. The first time you check the above-shown box, a popup will ask you to grant GMass the additional permissions:

    The first time you check the box to update a Sheet, you’ll get this popup.

If you don’t grant the necessary permissions before you launch your campaign, you will hear from us! You will eventually get an email notification requesting permission, but this will be after GMass has already tried and failed to update at least one cell in your Sheet. That email notification will look like this:

Make sure there are blank columns

If your Sheet looks like this and doesn’t have any available columns, the reporting metrics won’t be written to your Sheet.

This Sheet needs more columns for updating to work.

If your Sheet does look like this, just right-click on the right-most column to add a few more columns. You should have at least four empty columns after your last column of data. To future-proof your spreadsheet, in case we add more data to this feature (like “blocks” for example), add even more blank columns. By default, when you first create a new Sheet, columns A-Z exist, giving you a total of 26 columns. Generally, the only reason you would need to eliminate some columns entirely is to reduce the overall size of your Sheet, but that only becomes necessary if you have more than 100,000 rows of data.

GMass will write the column headings to the first row as soon as the first event takes place. For example, on the first “open,” GMass will label the column “OPENED” and mark the appropriate row with an X to indicate the open. You do not need to add the column headings; you just need to ensure there are blank columns available for use.

Once reporting events start to register on your Sheet, do not move or delete the reporting columns. Doing so could cause your other columns of data to get overwritten by Xs if GMass thinks that a column containing your actual merge data is a reporting column that we created automatically. That’s because GMass caches the structure of your Sheet and “memorizes” which columns are where in order to optimize computing resources, so if you suddenly alter the columns while it’s updating your Sheet, that will throw the process off until it caches your Sheet again during the next hour.

Troubleshooting GMass Google Sheet Updating

If your Sheet isn’t updating the way you expect:

  1. Make sure you’ve given GMass permission to edit your Google Sheets (see above).
  2. If the Sheet has been shared with your Google account by someone else, do you have EDIT permissions? If you only have READ permissions, then GMass won’t be able to update it, even if you’ve given GMass permission to update your Sheets, because the read-only permission on the shared Sheet takes precedence.
  3. Make sure you have enough blank columns to the right of your data.
  4. Make sure you checked the “Update Sheet with reporting data…” box when connecting to the Sheet. If you forget to to this and then launch a campaign, there’s currently no way to change it.

Method #2: Exporting Data to a Google Sheet

GMass’s web-based campaign reports offers a way for you to export full campaign data to a Google Sheet.

In the web-based report for your campaign, click on the download icon next to “Main Campaign Report”. Then choose “Export to Google Sheets”.

Export your full campaign report to Google Sheets

GMass will then take a moment to export to Google Sheets and let you know the name of the sheet.

Sheet export is done

Now you can check out your results in Google Sheets.

Data in Google Sheets

And if you want to merge this data with the original Google Sheet you used for your campaign, you can copy and paste it in. Just make sure both Sheets are sorted the same way so the right data goes in the right spot. (For instance, sort both by email address, then paste in the new data.)

You can also export individual stat reports to Google Sheets

Want to export the results from an individual stat to Google Sheets? You can do that in both the web-based campaign report and from the GMass dashboard reports.

In the web-based campaign report, click on the download icon in any statistic box, then choose “Export to Google Sheets”.

Export to Google Sheet from web-based report

In the dashboard, click on the number for any stat in a campaign. Then click the “Download” link at the top of the right fly-out panel. (Note: This method also works on the web-based report; when you click on stats in that report you’ll also get the right panel with the download option.)

Export from dashboard

In both cases, GMass will export your Google Sheet (and tell you the name of the Sheet file).

Exported to Google Sheet

You can now open that report in Google Sheets.

Sheets data exported

Method #3: Download Campaign Data as a CSV or Excel File, Then Import to Google Sheets

While this method doesn’t make sense — since you can just export your data directly to Google Sheets — you could download your campaign data as a CSV or Excel file, then import to Google Sheets.

If you want to use this method, go to the web-based campaign report, click the download icon in the Main Campaign Report section, then choose the CSV or Excel option.

Sheet data download options

Once GMass generates the download, right click on the file to save it.

Save file

Then head into Google Sheets. Open a blank sheet. Go to the File menu and choose Import.

Importing to Google Sheets

Choose “Upload” then pick the file on your computer. Google’s default options to “Replace spreadsheet” and “Detect automatically” are correct. Click “Import Data.”

Import options in Google Sheets

Your data is now in your Google Sheet.

Data imported successfully

Again, there’s no particularly good reason to get your data into Google Sheets this way. But it is an option.

Updating Google Sheets with Campaign Data: Pros and Cons of the Different Methods

We’ve now covered the three methods for getting your campaign data into Google Sheets. Here are the pros and cons of the methods as you’re choosing between them.

GMass automatically updating Google Sheet

Pros:

  • Requires no manual work on your part
  • Unifies your campaign into a sole Google Sheet

Cons:

  • Does not show you numbers for stats like opens and clicks, just shows an “X” whether someone opens the email once, twice, or 17 times
  • If you use one Google Sheet for multiple campaigns, this method stops making sense
  • You may not want your list spreadsheets to contain data; you want to keep the two separate

Exporting campaign reports to Google Sheets

Pros:

  • Numbers for stats like opens and clicks (so you’d see how many times someone opened)
  • Your full list information and campaign data is all in one place
  • If you’re using one Google Sheet for multiple campaigns this is a better option than updating the Sheet

Cons:

  • Requires manual work on your part to export this file, then more manual work if you want to combine it with your original campaign spreadsheet
  • You now have two Google Sheets for the campaign rather than everything unified in one spot

Exporting campaign reports as CSV or Excel file then importing to Google Sheets

Pros:

  • Only pro is if you want to edit the data in another spreadsheet app before importing to Google Sheets

Cons:

  • Adds lots and lots of unnecessary steps

Whatever you choose, we hope you’ll get a lot of benefit out of bringing your campaign reports into Google Sheets — where you can run deep analyses on your campaigns.

Ready to transform Gmail into an email marketing/cold email/mail merge tool?


Only GMass packs every email app into one tool — and brings it all into Gmail for you. Better emails. Tons of power. Easy to use.


TRY GMASS FOR FREE

Download Chrome extension - 30 second install!
No credit card required
Love what you're reading? Get the latest email strategy and tips & stay in touch.


If you’re a cold emailer using any cold email platform other than mine, you’re likely subject to limits in the hundreds of emails per day. For most people, that allowance of a few hundred emails/day is enough, since it’s quite hard to find more than even 100 targeted prospects’ email addresses per day, where your message is relevant enough to the prospect that it doesn’t seem spammy.

But, let’s say you’re just that good at finding leads and capturing email addresses. Let’s go crazy here for a second and say you’ve fine-tuned a process that brings in 5,000 new email leads per day, and every day, you want to email these 5,000 email addresses and set a follow-up sequence that sends every few days until they reply. Now you’re in deep, because not only do 5,000 new email messages need to send every day, but once the follow-up schedules start to kick in, you’ll actually be sending more than 5,000 emails/day, when you take into account the original message volume and the follow-up email volume.

So, given G Suite’s limits of 2,000 emails/day and most cold email platforms’ own limits, how can you accomplish this?

You could set up multiple G Suite accounts and eventually send 2,000 emails per day per account. However, as years of experience has shown, it doesn’t always work so smoothly, and often times G Suite caps an account’s sending volume at a level much lower than 2,000 emails/day. This can work for some users but won’t work for most.

Last year, I invented a way to integrate an SMTP service or multiple SMTP servers into a high volume cold email process such that you can send as many emails as you want through an SMTP server like SendGrid, while preserving the ability to detect replies and send follow-up emails to non-responders. We do this through a little bit of inventiveness in how we relay the emails through an SMTP and sync the data back to your G Suite account.

Recent High Volume Cold Email Campaigns

Here is a sampling of recent large cold email campaigns sent by our platform in the last few weeks. Included are the number of auto follow-up stages and the open and reply rates. Some of these were distributed in daily batches via Gmail and some were sent via a third party SMTP relay.

This cold email campaign data is updated daily.

From AddressSubjectFollow-up StagesRecipientsOpen RateRepliesDate
vishal.mittal@xxxxxx.coE__n up to ₹_____0 - E_______e C________h P_____r O____!03,289100.0%307/14/26
ahmed@xxxxxxxxx.caT___S B______S P___S14,86699.7%4007/14/26
dylan@xxxxxxxxxxxxxxx.comN__t s__p f_r y__r c_____r a_________n {____}22,68495.9%59207/16/26
kate@xxxxxxxxxxx.comIn NY f__m A____t 2 to 7. C______s on m_?13,78595.3%5207/13/26
myneco@xxxxxxxxxxxx.comY____e I______: T_e N__t 3 C___e C_____l S____r W______s22,02193.8%2807/15/26
mackenzie@xxxxxxxxxxxxx.comS_____t by R_____p is R___y f_r B____________l W__h P____d E________s f_r T____s a_d T___s22,11284.0%807/14/26
mackenzie@xxxxxxxxxxxxx.comT___________: G__r S_______s F_r A_l T___s of T_______s22,78682.5%2607/13/26
mackenzie@xxxxxxxxxxxxx.comS____r G_m A_____l & R______y S_______s f_r M_n & W___n22,84080.6%2307/10/26
alexandria.wright@xxxxxxxxxxxxxxxxxxxxxxxx.com{_____l J, S_____t L___}32,04770.7%1,44807/10/26
claudia.miller@xxxxxxxxxxxxxxxxxxxxxx.com{__________________}33,18369.7%2,21707/12/26
yuelnn0930@xxxxx.comV_________y x {____} | E_____l S____s L____s C____b 💕18,25369.3%81307/16/26
charles.cabrejos@xxxxxxx.com{____t N____, G_______s LS C_______e g___p is h____g w__h a s____g p__h to p_________p13,09466.8%2007/13/26
rachel.davis@xxxxxxxxxxxxxxxx.comF__e B___h D____n f_r P__K E__O I___________l 2__615,15765.9%9107/13/26
katierose@xxxxxxxxxxxxx.comT_e F_______e T__t T___y L____: D______r R______s C______, S___________y P_______e O__s13,02665.9%707/14/26
jakson@xxxxxxxxxxxxxxxxx.brG__a p__a o T_C F___l - M_A T___a 2_122,08365.2%2707/15/26
training@xxxxxxxxxx.comS___y in O____d & C_______e | R_________l E_______e P_______e f_r U__S22,60459.9%1107/10/26
katierose@xxxxxxxxxxxxx.comB________p I___t J__t F_r M___s A______, C__d B__w Is B______g A W____y R____l12,15358.3%607/14/26
alexandria.wright@xxxxxxxxxxxxxxxxxxxxxxxx.com{_____l J, S_____t L___}32,75258.1%1,60007/10/26
charlene.sharp@xxxxxxxxxxxx.com{_______}33,41654.7%1,86907/10/26
a.abas@xxxxxxxxxxxxxxxxxxx.com{______} H___o {__________} {___t N____, i__________n r_______g {_______} {___________} R_______g {________: M_____e f_r {__________} {___t N___} {___________} H___o {__________} {___t N____, b___f d________n r_______g {_______} {___d s____}62,68651.7%5207/13/26

Steps to sending high volume cold email:

  1. Set up your G Suite account, and connect it to GMass.
  2. Set up a SendGrid account or any other SMTP service and subscribe based on the daily volume of emails you want to send. When determining daily volume, take into account the original message plus follow-up emails that need to go out per day.
  3. Connect SendGrid, or your alternate SMTP service to GMass.
  4. When you launch your cold email campaign in GMass, set the SMTP option instead of Gmail.
  5. Configure your auto follow-ups.
  6. Hit the GMass button to launch the campaign.

What happens next?

Even though your emails are being sent by SendGrid, you’ll still see a copy of each individual email in the Sent folder of Gmail. When someone replies, the reply will still be threaded to the same conversation as the email in the Sent folder. And if someone doesn’t reply, and a follow-up email sends automatically in a few days, that follow-up will also be threaded to the same email conversation.

But wait, I’m not technical enough to set up SendGrid!

If setting up your own SMTP service is too complicated, and you don’t want to bother with the implications of DNS records, SPF, DKIM, DMARC, and all the subtleties that are recommended for deliverability, you have a couple of options:

  1. Sometimes we allow users to use our SMTP service — but typically for cold email that isn’t opt-in, we don’t.
  2. There’s a fiverr gig these days where someone will help you configure a SendGrid account for use with GMass.
  3. You sign up for SendGrid and subscribe, and then send us your credentials and we’ll link GMass to SendGrid for you.

By the way, if you’re an advanced web developer and this all sounds to easy for you, you may want to read my technical review of SendGrid to take a look under the hood and see if you want to customize your SMTP process. That review is written specifically for advanced web developers. 

How high is our volume?

When you’re shopping different cold email platforms, ask them how much email they send. Then check our real-time counter for how much email we’ve sent. We’ve sent over 1 billion emails through Gmail and G Suite accounts. Not all of them were cold email campaigns, but a lot of them were.

Ready to send better emails and save a ton of time?


GMass is the only tool for marketing emails, cold emails, and mail merge — all inside Gmail. Tons of power but easy to learn and use.


TRY GMASS FOR FREE

Download Chrome extension - 30 second install!
No credit card required
Love what you're reading? Get the latest email strategy and tips & stay in touch.


Looking to set up your Gmail SMTP settings?

In this article, I’ll detail everything you need to know about configuring your Gmail SMTP settings.

This step-by-step guide will show you how to set up SMTP settings, and I’ll even explain what SMTP is used for in Gmail. I’ll also highlight how to set up your Gmail POP and IMAP settings to help you receive incoming mails.

Gmail SMTP Settings: Table of Contents:

(Click on a link below to jump to a specific section.)

If you only want the Gmail SMTP settings without any additional information, here you go:

Gmail SMTP Settings

SMTP Server Address: smtp.gmail.com

Use Authentication: yes

Secure Connection: TLS/SSL based on your mail client/website SMTP plugin

SMTP Username: your Gmail account (xxxx@gmail.com)

SMTP Password: your Gmail password

Gmail SMTP port: 465 (SSL) or 587 (TLS)

For the rest of us, let’s get started!

⚠️ Important: Before You Configure Gmail SMTP

Gmail SMTP is useful if you want an app, website, scanner, printer, or email client to send mail through your Gmail account.

But if your goal is to send emails (in particular, larger volume emails like a mail merge, newsletter, or cold email campaign) through Gmail, Gmail SMTP settings probably aren’t what you need.

For that, you need GMass for Gmail. That’s the Chrome extension that transforms Gmail into an email sending platform and allows you to send large campaigns. (Along with things like tracking, automations, scheduling, and more.)

So if you’re trying to send a campaign from Gmail, you can skip the SMTP setup and try GMass instead.

How to Configure Gmail SMTP Settings

There are three ways you can set up Google’s SMTP server to use it for sending emails:

  • Use the Google Workspace (formerly G Suite) SMTP relay service.
  • Use Gmail’s SMTP server (This is what we’ll be covering.)
  • Use the Restricted Gmail SMTP server.

Note: If you don’t know what SMTP is, you can skip ahead to learn what it is and how it works before setting up SMTP in Gmail.

Why Should You Use the Gmail SMTP Server Method?

Gmail’s SMTP server method is the most accessible one out of the three — which is precisely why we’re covering this method.

With the Gmail SMTP service, you won’t have to worry about spending on a subscription plan.

Plus, the Google SMTP server setting won’t restrict your emails to people using your organization’s IP address. It lets you send mail to anyone within or outside your organization — you only need to set up the SMTP authentication with your Gmail inbox ID and password.

This method also provides the same level of security as the Google Workspace method.

Additionally, it lets you forward emails through a Gmail alias if you’ve set one up.

What is a Gmail Alias?

A Gmail alias is a forwarding address that lets you disguise your personal email address.

For example, info@xyz.com could be an alias for jack@gmail.com to receive queries about their business. It allows you to send Gmail messages from your business ID and even test emails to yourself. Most importantly, it helps you keep your personal Gmail address private.

We can even help you set up your Gmail alias so you don’t hurt deliverability.

When Gmail SMTP is the wrong solution

Gmail SMTP is for letting another app, website, or email client send mail through your Gmail account.

That makes sense for things like WordPress notifications, scanners, printers, Outlook, Thunderbird, and some transactional email setups.

But Gmail SMTP is (largely) not a tool for sending email campaigns through your Gmail account.

It won’t help you break Gmail’s sending limits (of up to 500/day on Gmail.com accounts and up to 2,000/day for paid Workspace accounts) or give you any deliverability bonus.

So if you’re here because you want to use Gmail SMTP to send campaigns through your Gmail account, this isn’t the right path.

For that, GMass is the answer. You can use it to send virtually unlimited emails through Gmail by using SMTP + Gmail the way you really want.

The Gmail SMTP Server Method

Note: Before configuring Google’s SMTP server, you need to follow these steps if you have two-step verification enabled on your Google email account:

a. How to Set Up App Passwords

If you use 2-step verification on your Google account and your mail client doesn’t support verification codes, you’ll have to enable App Passwords before configuring the Google SMTP server settings.

Why should you do this?
Some secure apps can be blocked from accessing your mail account due to two-step verification. An app specific password allows the blocked app or device to access your mail account.

If you don’t have two factor authentication enabled, you can skip the instructions given below.

Here’s a quick tutorial on how to create an app specific password:

1. Go to your Google Account and choose Security on the left panel.

security

2. On the Signing in to Google tab, select App Passwords.

app passwords

If you don’t see this option, it might mean that:

  1. Two-step verification is not set up for your Google account.
  2. Two-step verification is set up for security keys only.
  3. Your account is used through work, school, or another organization.
  4. You’ve turned on Advanced Protection for your account.

3. Click on Select app and pick the app you’re using.

app passwords tab

4. Click Select device and choose the device you’re using.

select device

5. Click on Generate.

generate button

6. Follow the instructions to enter the App Password.

The App Password is the 16-character code in the yellow bar on your device.

app password bar

7. Click on Done.

Note: You won’t have to remember your App Password since you’ll probably use it just once to connect your account to the app.

Setting this up just to send emails to a list? If you’re only configuring Gmail SMTP because you want to send a mail merge, outreach campaign, newsletter, or follow-up sequence, this won’t do that.

For that, you need GMass for Gmail, which turns your Gmail account into an email campaign sending platform. And it doesn’t require generating an app password like above.

b. How to Add Server Settings in Gmail

After connecting your Google account to the app, navigate to the outgoing email message server settings page on your email client, and enter the Gmail SMTP server settings below.

Here are the account settings you need to configure SMTP in Gmail:

SMTP Outgoing Mail Server: smtp.gmail.com
Use Authentication: yes
Secure Connection: TLS/SSL based on your mail client/website SMTP plugin
Gmail SMTP Username: your full Gmail address (xxxx@gmail.com)
Gmail SMTP Password: your Gmail password
Gmail SMTP port: 465 (SMTP SSL) or 587 (SMTP TLS)

Note: SMTP authentication highlights that the mail client has permission to relay emails through the Gmail server. In some cases, you’ll need to authenticate your domain name, which will help prevent your bulk emails from being labeled as suspicious emails.

The process to configure the SMTP server setting depends on your email client.
For example, if you use Microsoft Outlook, you can follow the steps I’ve covered here to configure the SMTP settings.

Go back to contents

Since SMTP is only used to send outgoing mail, you need a way to fetch incoming mail.

To receive incoming mail on your mail app, you need to set up an incoming mail message server using Gmail POP or IMAP protocols.

How to Set Up POP and IMAP Gmail Settings

Here’s how you can set up POP or IMAP settings for Gmail on your mail application:

A. Setting Up IMAP

To set up an IMAP mail message server, follow this tutorial:

1. First, log in to the Gmail Google App and click on Settings in the top right.

settings icon

2. Then, click on Settings and go to the Forwarding and POP/IMAP tab.

forwarding

3. In the IMAP Access section, click on Enable IMAP and then Save Changes.

enable imap

4. Now, log in to your third-party email client and enter these settings in the Incoming mail message server/IMAP section:

Incoming Mail Server (IMAP): imap.gmail.com
Requires SSL: Yes
Port: 993
Display Name: your name
Username: your Gmail account (xxxx@gmail.com)
Password: your Gmail password

B. Setting Up POP

Follow the tutorial below to set up a mail message server using POP:

1. Perform steps 1 and 2 as mentioned in the IMAP section above.

2. In the POP Download section, click on Enable POP for all mail or Enable POP for mail that arrives from now on.

Enable POP for all mail

3. Then, click on Save Changes.

save changes

4. Now, login to your third-party email client and enter these settings in the POP/Incoming mail message server section:

Incoming Mail Server (POP): pop.gmail.com
Requires SSL: yes
Port: 995
Server timeouts: more than 1 minute (5 minutes is recommended)
Display Name: your name
Username: your Gmail account (xxxx@gmail.com)
Password: your Gmail password

Go back to contents

Now that we’ve covered how to set up SMTP, IMAP, and POP, let’s see what these email protocols are and what they do.

SMTP, POP, and IMAP FAQs

In this FAQ section, I’ll explain what SMTP, POP, and IMAP are and answer some related FAQs.

1. What Is SMTP?

The Simple Mail Transfer Protocol (SMTP) is used to send mail from one email server to another. SMTP is what’s used by most email servers to exchange emails.

It uses a process known as store and forward, which helps you move your emails from an outgoing server to an incoming one.

The SMTP connection also works with a Mail Transfer Agent (MTA) to send emails to the right inbox. However, SMTP can’t transmit attachments — it can only send text.

You can use the Multipurpose Internet Mail Extension (MIME) protocol as a workaround for this. MIME encodes all non-text data into text before sending the email through SMTP.

2. Why Do You Need to Set Up SMTP Settings in Gmail?

SMTP settings are needed if you want to:

  • Send transactional emails directly from your website through Google’s server.
  • Set up an SMTP plugin, such as the Gmail SMTP plugin, to send WordPress emails.
  • Configure Gmail on an external client such as Microsoft Outlook or Thunderbird.

SMTP allows your website or webmail client to communicate with the Gmail Google App and ensures that your email process works the way you want.

For instance, setting up SMTP in WordPress will enable you to send emails via the Gmail API — which is more reliable than WordPress’s default PHP mailing method, which uses PHPmailer.

What is an API?
An API (Application Programming Interface) allows two applications to communicate with each other. In the above case, the Gmail API lets you send Gmail messages and transactional emails directly from your WordPress website.

3. Why Shouldn’t You Use the SMTP Relay Service and Restricted Gmail SMTP Server Methods?

The relay service method can only be used by Google Workspace users who pay for a monthly subscription.

The Restricted Gmail Server method only allows you to send emails to another Google Workspace or Gmail email address.

Read more about SMTP in my in-depth guide here. 

4. What Are POP and IMAP?

Since SMTP is only used to send outgoing emails from your client, you need a way to receive incoming emails, right?
You can set up an incoming mail message server to receive emails using POP or IMAP.

Here’s a quick look at how these two protocols work:

A. POP

The Post Office Protocol (POP) is used to receive incoming emails. Its latest version is POP3.

It’s ideal for personal computer users as it allows you to download emails to a local device whenever you want to check your mail. This way, you can check emails even when you’re offline!

B. IMAP

IMAP or the Internet Message Access Protocol is commonly used to receive incoming emails.

IMAP saves all of its emails on a server, unlike POP3.

As a result, whenever you need to check emails, your mail client contacts the server and allows you to access your email from any device with an internet connection.

And since it’s cloud-based, IMAP is considered a faster and more efficient alternative to POP3.

5. SMTP vs. POP and IMAP

Are all these protocols confusing you?
Don’t worry! It’s very simple.

POP and IMAP are protocols used to receive incoming emails, while SMTP is a protocol that helps you send outgoing emails.

5. Do you need to use Gmail SMTP settings with GMass?

No.

If you’re using GMass to send mail merges, newsletters, cold outreach campaigns, or automatic follow-up sequences from Gmail, you do not need to manually enter Gmail’s SMTP settings.

GMass works inside Gmail and sends through your connected Gmail or Google Workspace account by default. So adding Gmail’s SMTP server as a separate SMTP server inside GMass is redundant.

In other words, don’t do this…

More importantly, if you came to this article because you’re trying to send emails to a large list from Gmail using SMTP, Gmail’s SMTP isn’t the right fit.

If you are looking to use a third-party SMTP service with GMass (which allows you to break Gmail’s limits), there are plenty of SMTP options that will work great. GMass will even automatically approve you to use their in-house server.

Go back to contents

Gmail SMTP Settings: Wrapping Up

Configuring SMTP settings in your Gmail inbox doesn’t have to be complicated.

As Gmail is one of the most accessible email clients to use, you can finish its SMTP setup in no time. Just follow the instructions I’ve covered here, and you’ll be able to configure Gmail SMTP, POP, and IMAP account settings with ease.

And if you’re looking for a way to send cold emails, mail merges, and other mass emails through your Gmail account, have a look at GMass.

It’s an email marketing platform that works inside of Gmail. More than 400,000 people are using it to easily send high-level campaigns through Gmail.

It’s free to try (sending up to 50 emails per day during your trial) and there’s no credit card or even form required to try it out. You can get rolling by downloading the Chrome extension and you’ll be up and running in a matter of minutes.

See why 99% of users say they’ve had their best deliverability ever with GMass


Email marketing, cold email, and mail merge all in one tool — that works inside Gmail


TRY GMASS FOR FREE

Download Chrome extension - 30 second install!
No credit card required
Love what you're reading? Get the latest email strategy and tips & stay in touch.


It seems silly. You’re used to personalizing your cold email campaign’s Subject. You’re used to personalizing its Message. You’re used to starting off your email with “Dear {FirstName}.” The thought of personalizing the “To:” header field might sound unnecessary, because obviously only the email address of the one person who is the recipient of the message should be in the “To:” field. But should anything else be there?

For the meticulous, detail-oriented sender of cold email, the answer is a resounding “yes” — they want to ensure the recipient’s first and last name are also present in the “To” field.

Cold Email To Header: The difference with and without

Here’s the difference, visually:

unpersonalized Quora TO header
Unpersonalized TO header from Quora

vs.

personalized LinkedIn TO header
Personalized TO header from LinkedIn

Even worse is when emailers treat the email address as if it’s the same as the person’s name:

unpersonalized Wall Street Journal TO header
Unpersonalized TO header from The Wall Street Journal, where the name is the same as the email address

But this is one of those advanced cold email tactics that isn’t just about aesthetics, either.

There is some anecdotal evidence (see below) that claims that when the name appears in the To field, it has a better chance to avoid spam filters and land in the Inbox. Why? Because when you send a normal person-to-person email, the name of the recipient is usually in the To field alongside the email address.

Get the name in the To field when manually pasting addresses

If you’re manually pasting addresses into the Gmail Compose window (not using a Google Sheet as your list source), then you’ll notice that after you paste in the addresses, any addresses you already have saved as a Google Contact will automatically be converted to show the first-and-last name.

If the first/last name shows in the To field when you’re composing your campaign, then that same name/email will be used when you click the GMass button to send the individual emails to the recipients.

If the first/last name isn’t already showing in the To field after you’ve pasted in addresses, that means that the address isn’t saved as a Google Contact. But that’s not an issue, because you can manually edit the address to add the name. Double click the email address in the To field, add the name, and surround the email address with angle brackets, like so:

This is how you edit an email address in the TO field to include the person’s name.

Get the name in the To field when reading from a Google Sheet

If you’re storing your email list in a spreadsheet and then using the Google Sheet connector button to pull the list into the To field, then GMass needs to know which columns in your spreadsheet contain the first and last names in order to put this information into the To field for each recipient.

Google Sheet with First and Last name columns
Here’s a sample Google Sheet with “First” and “Last” columns, so the TO field can be personalized.

There’s no place to specify which columns contain the first and last names, so GMass attempts to auto detect it, just like we do with the email address column. Specifically, our algorithm looks for columns named any of the following:

  • first
  • last
  • first name
  • last name
  • firstname
  • lastname
  • first_name
  • last_name
  • full name
  • fullname
  • full _name

If any of the above columns are found, and a full name can be assembled using a first and last name or a “full name” column, then the name will be added to the To field alongside the email address. Hint: if your columns for the first/last names are called something else, you can easily rename the columns to fit what we’re looking for — unless, of course, some other app is also reading from the Sheet and needs the columns to be named as you have them.

Another option for personalizing the To field when pulling from a Sheet that doesn’t already have first name/last name columns is to wait until the alias address is set in the Gmail Compose window, like here:

alias address in Gmail compose window

Then click the option to “expand” the alias address into its individual addresses that shows up in the lower left corner of Gmail after the Compose window appears. Note that you can only do this if the total list is under 500 addresses. If we let you do it for any arbitrary size, then the Gmail Compose window would freeze under the pressure of parsing through say, 10,000 email addresses. (See this old gem about how many addresses the Compose window can handle.)

In any case, if you are able to use the “expand” button,  that will turn the alias address into its individual addresses, as shown here:

turn alias address into individual addresses

Now, using the technique described above, you can edit any of the lone email addresses to include their corresponding first/last names by double clicking and editing the text.

Building a list from past Gmail conversations

If you use the “build an email list” button to search for conversations in Gmail and then build an email list, you won’t have to take any extra steps to personalize the To field. That’s because our code will automatically pull the first/last names and email addresses when searching your messages, and it will use this data to personalize the To field.

Creating a behavior-based campaign

Lastly, if you’re sending to a segmented portion of a prior campaign, such as those who didn’t open a prior campaign, or those who did click a prior campaign, then if the original campaign had first/last names in the To field, so will this new segmented campaign. And again, if they didn’t, and you can expand the alias address in the Compose window to show the individual addresses, then you can edit them one by one to display the names, and GMass will respect this when sending the individual email messages.

What others say about deliverability and the “To” header

In this MailChimp article, the author claims that you can improve email deliverability by using “merge tags to personalize the ‘To’ field in your emails with your subscribers’ names.”

In this Hubspot article, the author claims that “This way, spam filters know that you do, indeed, know your recipient.”

This post by Iterable says that “Customizing an email’s To field improves deliverability by confirming to ISPs that you know the first and last name of the people to whom you’re sending.”

Are these claims accurate? We’ll do a data-driven test in the future and let you know.

More cold email To header personalization options

Now that you know how to hack the To field, did you know that you can also personalize the Subject and Message, use fallback values, send personalized attachments, include personalized links, and even personalize the Cc field? GMass can even auto detect your contacts’ first names from just their email addresses. Read all about it in our full personalization guide.

Email marketing, cold email, and mail merge inside Gmail


Send incredible emails & automations and avoid the spam folder — all in one powerful but easy-to-learn tool


TRY GMASS FOR FREE

Download Chrome extension - 30 second install!
No credit card required
Love what you're reading? Get the latest email strategy and tips & stay in touch.


Want to set up Yahoo SMTP settings for your Yahoo Mail account?

To make this process easier for you, I’ll cover what Yahoo SMTP settings are and how to use the mail server settings in an email client of your choice. I’ll also cover Yahoo’s POP and IMAP settings to help you set these up as an incoming server for your email account.

Finally, I’ll also answer some questions about SMTP, POP, and IMAP settings.

This Article Covers:

(Click on a link below to jump to a specific section)

Let’s get started.

SMTP, POP, IMAP Server Settings for Yahoo Mail Server

Here are the SMTP, POP, and IMAP server settings for Yahoo Mail:

Note: If you want to know what SMTP, POP, and IMAP are, skip to the FAQs section. You can always jump back here when you’re done.

A. Yahoo SMTP Settings (Outgoing Server Settings)

Yahoo Mail SMTP Server / Hostname: smtp.mail.yahoo.com

SMTP Port Number: 465 or 587

Encryption: TLS/SSL

SMTP Username: Your Yahoo mail address

SMTP Password: Your Yahoo mail password

B. Yahoo POP Settings (Incoming Server Settings)

Yahoo Mail POP Server / Hostname: pop.mail.yahoo.com

POP3 Port Number: 995

Encryption: TLS/SSL

C. Yahoo IMAP Settings (Incoming Server Settings)

Yahoo Mail IMAP Server / Hostname: imap.mail.yahoo.com

IMAP Port Number: 993

Encryption: TLS/SSL

Go back to contents

Now, let’s see how you can configure your Yahoo SMTP settings.

How to Set Up Your Yahoo SMTP Settings

Before we dive into the SMTP setup, let me first clarify something:

Yahoo Mail is an email provider or email service, which means that it takes care of the actual service of sending and receiving your emails.

On the other hand, an email program (also known as an email client) is the mail app or program you use to access your inbox and emails. Mozilla Thunderbird and Microsoft Outlook (formerly known as Hotmail) are two popular examples of an email program.

Usually, the SMTP setting of an email service can be added to the account settings of the mail app you’re using.

Once you add your Yahoo account to the app, enter the Yahoo SMTP server parameters to set up your outgoing server.

Here are the outgoing server settings:

  • Yahoo Mail SMTP Server / Hostname: smtp.mail.yahoo.com
  • SMTP Port Number: 465 or 587
  • Encryption: TLS/ SSL
  • SMTP Username: Your Yahoo mail address
  • SMTP Password: Your Yahoo mail password

The Yahoo SMTP server settings work with most desktop mail clients, and the same settings also apply to a mobile device mail app or a web-based email program.

But keep in mind that the exact steps to access account settings would depend upon your mail client.

For example, if you want to use the Yahoo Mail service as your email provider and Microsoft Outlook as your email client, you can follow the steps I’ve covered here (you’ll have to replace the Gmail SMTP settings with Yahoo’s SMTP settings I mentioned).

Go back to contents

Now that you’ve set up your SMTP settings, you can send emails via your Yahoo account from your preferred mail client.

But you can’t receive your Yahoo Mail account emails on your incoming server yet!

Why?
SMTP only deals with outgoing emails.

To receive emails, you need to configure the POP mail server or IMAP mail server settings for your Yahoo account.

How to Set Up POP and IMAP Settings for a Yahoo Mail Account

Similar to Yahoo’s SMTP settings, the steps to set up your POP and IMAP settings differ based on the email app you use.

For example, in Microsoft Outlook, you can follow the POP and IMAP setup steps I covered here (you’ll have to replace the Gmail POP/IMAP settings in that article with the Yahoo POP/IMAP settings.)

Here are the Yahoo settings you’ll need to input:

A. Yahoo POP Settings (Incoming Server Settings)

Yahoo Mail POP Server / Hostname: pop.mail.yahoo.com

POP3 Port Number: 995

Encryption: TLS/SSL

B. Yahoo IMAP Settings (Incoming Server Settings)

Yahoo Mail IMAP Server / Hostname: imap.mail.yahoo.com

IMAP Port Number: 993

Encryption: TLS/SSL

When you’ve configured the server setting for POP or IMAP, you can use the Yahoo incoming mail server to receive emails inside your Outlook mail app.

Go back to contents

Still have questions about SMTP, POP, and IMAP?
Read on.

SMTP, POP, and IMAP FAQs

I’ll answer some FAQs about the SMTP, POP, and IMAP protocols to clarify any doubts you may have.

1. What Is SMTP?

SMTP (Simple Mail Transfer Protocol) is a protocol used to send emails over the internet. It’s used by most email software to send outgoing mail via an outgoing mail server (SMTP server).

SMTP works with a Mail Transfer Agent (known as the SMTP relay) to ensure your emails are sent to the correct mailbox.

The protocol is used to send emails between SMTP clients (the email program you use) and SMTP mail servers (it moves from one server to the next until the destination is reached).

But what is an SMTP mail server?
Any computer running SMTP is an SMTP mail server!

They ensure that the emails take the correct route to reach the intended recipient’s email program or email application.

Note: Since SMTP works without authentication and does not use an encrypted connection, you can ensure account security by using Secure Sockets Layer (SSL) for SMTP connections.

2. How Does SMTP Work?

SMTP works with a set of codes and commands that make the entire process of sending emails much easier.

Each time you send an email to a full email address, it’s transferred via several SMTP relay systems and Yahoo servers until it reaches its final destination — which, in this case, is your recipient’s inbox.

However, SMTP can only transmit text!

So how are my attachments sent?
To help you send attachments along with your email text, the Multipurpose Internet Mail Extension (MIME) protocol is used. MIME encodes all the non-text data into the text format before it is transferred across SMTP relay servers.

3. What Are POP and IMAP?

Like SMTP, POP and IMAP are also protocols used to transfer emails across the internet.

POP is short for Post Office Protocol, and IMAP refers to Internet Message Access Protocol. These protocols are used to receive incoming mail from an incoming mail server (like the Yahoo server) to the recipient’s computer.

Let’s take a closer look at each protocol:

a. POP3

POP3 is the third version of the Post Office Protocol — which is used to receive incoming mail.

A POP server downloads incoming mail and stores it locally on your device. This way, you don’t have to be online and access the email server whenever you want to check your email.

You can configure POP3 with any computer and app to make access through multiple devices easier.

b. IMAP

Like POP3, Internet Message Access Protocol (IMAP) is another protocol used to receive emails.

How is IMAP different from POP?
The main difference between POP and IMAP is that an IMAP account stores all its mail on the email server instead of downloading your emails. While this allows easy access, you need to have a reliable internet connection to use an IMAP account effectively.

As IMAP is a form of cloud storage on your incoming mail server, it’s much faster and more efficient than POP3.

4. SMTP vs. POP vs. IMAP

Still confused about these three protocols?
Don’t worry!

Here’s a summary of what we’ve covered so far:

  • SMTP: Used for sending outgoing mail.
  • POP and IMAP: Used for receiving incoming mail — IMAP is faster than POP as it doesn’t download emails.

Regardless of whether you use a POP or IMAP account, the SMTP setting on your app remains the same for sending emails.

Go back to contents

Wrap Up

Setting up the Yahoo SMTP server and a POP server or IMAP incoming server isn’t as hard as it seems!

All you need to do is follow the steps and Yahoo mail settings I’ve covered above, and you’ll be able to set it up within seconds.

See why 99% of users say they’ve had their best deliverability ever with GMass


Email marketing, cold email, and mail merge all in one tool — that works inside Gmail


TRY GMASS FOR FREE

Download Chrome extension - 30 second install!
No credit card required
Love what you're reading? Get the latest email strategy and tips & stay in touch.


Have you ever wondered how to send multiple emails with different attachments in Gmail?

Well, you can now easily send a mass email or mail merge in Gmail with personalized attachment files.

Why would you ever need to do this? Let’s say you run a small business that needs to send PDF invoices to your customers once a month. Your billing software generates the PDF invoices, one for each of your 100 customers. Now you need to send the right invoice to the right customer. Until now, you’d have to prepare multiple emails manually — composing and sending 100 individual emails, and having to attach the right PDF to each email.

But now, you can automate all of this. Here’s a two-minute video demo:

What tools will you need to mail merge with individual attachments?

  1. All of your attachment files, ready to send
  2. A Google Sheet that lists the email addresses in one column and the file names in the other
  3. A place to host the files, such as Google Drive, Amazon S3, Dropbox, or your own web server
  4. A Gmail or Google Workspace account
  5. GMass installed and connected

Host your attachments somewhere

Your files can either be in your Google Drive or somewhere publicly accessible on the web, like your own web server, a public Dropbox folder, or a public AWS S3 bucket.

If you’re going to host your file attachments in your Google Drive, our software needs permission to access your Google Drive. It’s the one step you have to take in advance of sending any personalized attachments with your bulk emails.

You must give GMass read-only permissions to your Google Drive! By default, GMass doesn’t have permissions for this when you sign up for an account.

——————-

To allow GMass to download different attachment files from your Google Drive:

>>>>>>> FOLLOW THIS LINK <<<<<<<<

——————-

and log in with the same account that you’re using to send your mass email.

Also, note that the files don’t all have to be in the same folder; they can be spread across multiple folders as long as they’re in one single Google Drive account. Lastly, if you use Google Drive, be sure that the “Convert uploaded files…” setting is UNCHECKED:

UNCHECK convert uploaded files
(Click the Settings gear first at the top-right, then uncheck that box, then click DONE.)

If you don’t uncheck this box, then certain file types, like .txt files, won’t remain as txt files after you upload them; they’ll get converted to Google Docs and won’t be “attachable” to your personalized emails.

Set up your Google Sheet

First, set up your Google Sheet. Make sure your column headings are in the first row, and at a minimum you’ll need two columns, one for the email address, and one for the file to be attached. You can have other columns too, like FirstName, LastName, Company, and anything else you want to use to personalize your mail merge. Here’s what your spreadsheet should look like:

personalized attachment spreadsheet

The column containing the files can be named anything as long as it starts with “attachment.” Any of the following are valid column names:

  • Attachment
  • Attachment1
  • AttachmentFile
  • attachment10

It’s not case sensitive, either. If your files are hosted in Google Drive, then the column should contain just the file attachment name. If your files are hosted somewhere on the web, then the column should contain the full URL to the file. Here’s what your spreadsheet might look like if you’re hosting your files on your own web server for a mailing to multiple recipients.

personalized attachment with link to server

If you’re a spreadsheet wizard, feel free to use formulas for the attachment column as well. For example, if you’re sending monthly statements to your customers, and your billing software generates the monthly statements in the format of [CustomerNumber].pdf, and CustomerNumber is one of the column in your spreadsheet, you can set the attachment column to “=A1” + .pdf.

personalized attachment from spreadsheet formula

Finally, if you have blank cells in an “attachment” column, then it’s assumed that those recipients don’t have corresponding files, and the emails will be sent without any file attachment.

Connect to your spreadsheet, compose, and send your messages

If you’ve performed a mail merge with GMass before, the next step should be familiar. Click the Sheets connector button, choose your spreadsheet and worksheet, hit the “Connect” button, and a Gmail Compose will open. Type your message, and hit the GMass button. You don’t need to attach any files to this message. GMass will automatically detect the column in your spreadsheet containing the files to be attached and attach them to the individual emails.

personalized attachment email

The only reason you would attach a file directly to the Gmail Compose window is if you also want a separate attachment to go to all recipients. In that case, any files you attach to the Draft will be sent to all recipients, and additionally, any personalized attachments set in the spreadsheet will also be sent to separate emails.

For example, let’s say you publish a PDF newsletter monthly that you also want to send to everyone along with their personalized invoices. Then, you would attach the PDF newsletter to the Gmail Compose window, and after clicking GMass, each of the bulk personalized emails would be sent the same newsletter PDF as one attachment and an individual personalized invoice PDF as a second attachment.

Need to send personalized emails with more than one attachment?

Do you need to send more than one personalized attachment per recipient? For example, if every month, you send your customers an invoice and an account summary, and they are two different PDFs, then you can have TWO columns in your spreadsheet, for example:

  • Attachment1
  • Attachment2

GMass will notice this, and send both personalized files to each recipient.

multiple personalized attachments

Automate this to send emails with attachments every day, week, or month

Do you typically send your customers multiple messages each month?

You can set your campaign and spreadsheet up once, and then let the emails send on autopilot every day, week, or month, based on your business’ needs. Let’s say you want your email with attachments to send on the first of every month. Just schedule your initial email to send on the first of the month, and then set it to repeat MONTHLY.

automate personalized attachments

Now, on the first of every month, GMass will automatically read your spreadsheet, retrieve the files, and send the emails with their corresponding attachment. All you need to do before the first of each month is get new files in place, either to your Google Drive, or wherever you’re hosting them.

Error handling for missing files or permissions in GMass or Google

If GMass can’t retrieve the file for a particular email address, that recipient will be skipped over and you’ll get a report at the end of the campaign of all recipients who were skipped. If you intentionally don’t want certain recipients to receive any attachments with their emails, just make those cells blank under the “attachment” column — that way, they will still receive the email but without anything attached. It makes sending multiple emails with different needs quite easy.

If you’re hosting your files on Google Drive, but GMass doesn’t have permission to read from your Google Drive, then your campaign will error out with this error:

Insufficient Permission: Request had insufficient authentication scopes. [403]
Errors [
        Message[Insufficient Permission: Request had insufficient authentication scopes.] Location[ – ] Reason[insufficientPermissions] Domain[global]
]
GMass didn’t have sufficient permissions to your Gmail account to do what you wanted. If you were trying to send personalized attachments, re-connect your Gmail account and then click the RESTART link.

Using Dropbox to store files for your mail campaign

If you want to use Dropbox to store the files you want attached to your emails, then you’ll have to do some manual work — you’ll have to create public URLs for each and every single file you want to attach, even if all the files are in the same Dropbox folder. While Dropbox makes it easy to get a public link to a folder, and even a public link to a file, Dropbox does not make it easy to generate public links for say, 100 files, without going through the link creation process manually for each of the hundred links you’ll need for a campaign with multiple emails.

To generate a public link to a file, just right-click the file and choose “Copy Dropbox Link,” and then place that URL in the appropriate Google Sheet column.

how to copy dropbox link


But again, you will have to repeat that process for every single file, because there’s no pattern that you can follow to determine the links yourself. For example, if you have two files in Dropbox, doc1.pdf and doc2.pdf, and you generate public URLs to them, they will look like this:

https://www.dropbox.com/s/bz2536zash23znd/doc1.pdf?dl=0
https://www.dropbox.com/s/kjdjf91w5xuip6n/doc2.pdf?dl=0

Now let’s say you have 100 files for which you need to generate public links. While you can see the left portion of the URL includes “dropbox.com,” as expected, and the right portion includes the file name, as expected, there’s a unique identifier string inserted in the middle that prevents you from generating these URLs on your own for easy copying and pasting into a Google Sheet that controls multiple emails.

If you do go through the process of manually generating the Dropbox link for each file, then your Google Sheet will look like this:

Google Sheet with manual Dropbox URLs

BUT… those links won’t work as attachments in that form. Because those URLs actually go to Dropbox pages that display the PDF file, not the PDF file itself. And for this process to work, we need to get at the PDF itself. We’ll achieve that with Dropbox’s force download feature.

You’ll need to change the final 0 in each link to a 1.

So your links would now be:

https://www.dropbox.com/s/bz2536zash23znd/doc1.pdf?dl=1
https://www.dropbox.com/s/kjdjf91w5xuip6n/doc2.pdf?dl=1

If you’re dealing with lots of links, a find-replace will save you lots of time on this process.

Go to Edit > Find and replace or hit Command/Control+Shift+H.

Find dl=0 and replace it with dl=1. I also recommend checking Also search within links if you pasted in the Dropbox URLs and Google turned them into links. Click the Replace all button

Using Amazon S3 to store your attachments

Using S3 is a much more convenient option than Dropbox to store files for the purpose of personalized attachments, because S3 makes it easy to determine the public URL for any file. By default, an S3 bucket isn’t public, so make sure that if you create a bucket for the purpose of attaching files to multiple emails, you make your bucket public. You must UNCHECK the “Block all public access” box and then CHECK the acknowledgement box:

how to make Amazon S3 bucket public


Then, when you upload your files to a bucket, make sure you choose “Grant public read access…” to the objects:

Grant public read access to object in Amazon S3

After your files are uploaded, S3 provides you with the public URL for each file, and it’s simply the DNS name you chose for your bucket in combination with the filename:

Amazon S3 object URL

So in this case, my first two files will have the URL:

https://emailattachments.s3-us-west-2.amazonaws.com/doc1.pdf
https://emailattachments.s3-us-west-2.amazonaws.com/doc2.pdf

Note that these URLs don’t actually work, so don’t try visiting them! But, any files I upload to this bucket will have a URL in the same format, which means my Google Sheet would look like this:

Google Sheet with Amazon bucket URLs

Other mail merge tips and tricks

What else can you do to make your emails with personalized files even better?

Ready to send better emails and save a ton of time?


GMass is the only tool for marketing emails, cold emails, and mail merge — all inside Gmail. Tons of power but easy to learn and use.


TRY GMASS FOR FREE

Download Chrome extension - 30 second install!
No credit card required
Love what you're reading? Get the latest email strategy and tips & stay in touch.


If your app needs to let a user pick a file from his Google Drive, you might consider using the Google Picker API.

I recently implemented the Picker for my users because I need to let users choose a Google Sheet from their account, and in some rare cases, Google Drive access is blocked the G Suite Admin, rendering my code that lists Sheets from Google Drive useless. The Picker is an alternative that doesn’t require Drive access, and so it allows my users to pick a spreadsheet from their account, even though Google Drive access may be denied by their G Suite admin.

In implementing the Picker API, I encountered several challenges and subsequently came up with several advanced techniques that you also might find useful.

The main documentation for the Picker API is here. After you get the example provided by Google working, here are a few advanced techniques you might find useful.

Open the Picker in a popup, and return the file’s ID to the main window

In your web app, you might link to the Picker and then open it in a popup. Normally it’s just a matter of simple JavaScript to return a value from the popup to the main window, and many have written about how to do that. What if, however, you’re launching the Picker from a Chrome extension, and the Chrome extension is running on a site for which you don’t have any control, like Gmail. If you use the normal technique to retrieve the value from the popup, you’ll get this error in the Console:

SecurityError: Blocked a frame with origin "http://www.<domain>.com" from accessing a cross-origin frame.

The only known way around this is to use the window.postMessage function to pass a message from the popup to the main window, as explained here. In this case, the message is the ID of the file the user has chosen from his Google Drive, prepended by the string “spreadsheetid—” so that I know the message is from my popup.

Here’s the code from my Picker HTML:

function pickerCallback(data) {
   if (data.action == google.picker.Action.PICKED) {
   var fileId = data.docs[0].id;
   window.opener.postMessage('spreadsheetid---' + fileId, '*');
   window.close();
  }
}

And here’s the code in the parent window.

  window.addEventListener('message', function(event) {
  if (event.data.toString().includes('spreadsheetid---')) {
  SpreadsheetId = event.data.toString();
  }
});

Retrieve the file ID without access to any scopes

If you read the Google documentation for the Picker API, you might assume that to use it, you must request access to the “drives” scope.

Google’s documentation even states:

Note: For a list of valid views, refer to ViewId in the Google Picker reference. To obtain the token for any of these views, use the https://www.googleapis.com/auth/drive.file scope.

And in the sample code, we find this:

Google Picker code


After all, in order to actually do anything with the file, you need to be able to at least read the file, and the various Google Drive scopes is what makes that possible. In some cases, however, you might only care about retrieving the file ID, and in that case, you don’t need access to any scopes. This is the case for my use case, where I’m using the Picker to let a user choose a Google Sheet. Once I have the ID of the Google Sheet, then I use a scope that I’ve requested access to separately as part of the user login process, the spreadsheets.readonly scope as part of the V4 Sheets API, to read the spreadsheet data.

Use an existing OAuth token rather than requiring the user to log in every time

If you follow the Google example for getting the Picker going, you’ll notice that every time you load the picker, an OAuth login is presented to the user. And if you step through the sample code, you’ll see that this code is what triggers the login process:

    var oauthToken;

    // Use the Google API Loader script to load the google.picker script.
    function loadPicker() {
      gapi.load('auth', {'callback': onAuthApiLoad});
      gapi.load('picker', {'callback': onPickerApiLoad});
    }

    function onAuthApiLoad() {
      window.gapi.auth.authorize(
          {
            'client_id': clientId,
            'scope': scope,
            'immediate': false
          },
          handleAuthResult);
    }

    function handleAuthResult(authResult) {
      if (authResult &amp;amp;&amp;amp; !authResult.error) {
        oauthToken = authResult.access_token;
        createPicker();
      }
    }

If a user is going to be “picking” a file over and over, though, you don’t want your user to have to log in every time. In this case, you have a couple of options:

  1. You can store the token value somewhere and then use it the next time. Notice that the only important value from the Google sample above is authResult.access_token. If you store that and then set that the next time you need to load the Picker for a user, you can comment out the code in the “onAuthApiLoad” function.
  2. If you’re already generating a token value from the initial Google OAuth login to your app, then you can use that token value and never make the user log in before picking a file. Again, comment out the code in the “onAuthApiLoad” function and replace it with your own code that retrieves the token value and manually all handleAuthResult yourself, passing in the token value that you retrieved from your database or perhaps, localStorage. I’m not going to comment on the security of where you store your token values, because that’s beyond the “scope” of this article, but I’m just presenting a couple of options here for the purpose of demonstration.

List just a particular file type in the Picker

This is fairly well presented in the Google documentation, but it’s worth going over anyway. In my case, I only want spreadsheets to be displayed in the picker. So in the picker builder, I need this line of code:

var view = new google.picker.View(google.picker.ViewId.SPREADSHEETS);

Here’s the createPicker function with that filter included.

    function createPicker() {
      if (pickerApiLoaded &amp;amp;&amp;amp; oauthToken) {
        var view = new google.picker.View(google.picker.ViewId.SPREADSHEETS);
        var picker = new google.picker.PickerBuilder()
            .enableFeature(google.picker.Feature.NAV_HIDDEN)
            .setAppId(appId)
            .setOAuthToken(oauthToken)
            .addView(view)
            .addView(new google.picker.DocsUploadView())
            .setDeveloperKey(developerKey)
            .setCallback(pickerCallback)
            .build();
         picker.setVisible(true);
      }
    }

Here’s a list of other types from the documentation you can include to display different file types.

Google Picker file types

Conclusion

I hope this helps you use the Google Picker API more effectively. Also see my other insights into Google OAuth.

Ready to send better emails and save a ton of time?


GMass is the only tool for marketing emails, cold emails, and mail merge — all inside Gmail. Tons of power but easy to learn and use.


TRY GMASS FOR FREE

Download Chrome extension - 30 second install!
No credit card required
Love what you're reading? Get the latest email strategy and tips & stay in touch.


GMass