
Want to do a mail merge in Outlook?
Performing a mail merge in Microsoft Outlook helps you send personalized mass emails individually to a large mailing list.
However — you should know this going in — Outlook isn’t great for mail merge. We’re still going to tell you how to do it, but you should know going in, it’s not ideal. If you have the option to use Gmail instead, you’ll be much better off. Later in this article, I’ll give you the quick rundown of the fastest and easiest way to do a Gmail mail merge (again, since that’s going to be a better route to go if possible).
But first, I’ll walk you through the steps for how to perform a mail merge in Outlook. I’ll also cover the limitations of the mail merge Outlook process and highlight the best mail merge approach for 2023.
Mail Merge in Outlook: Table of Contents
(Click on a link to jump to a specific section.)
- What Is a Mail Merge?
- How to Perform a Mail Merge in Outlook
- Limitations of Performing Mail Merges in Outlook
- The Best Option for Mail Merges in 2023
Let’s jump right in, shall we?
What Is a Mail Merge?
A mail merge is an automated process of creating personalized mass emails by using data from a spreadsheet or database file.
Essentially, a mail merge fetches the details of multiple recipients from a source file and inserts them into your email message template.
Why should you send personalized emails?
A personalized email looks like it’s tailor-made for a particular recipient, making it feel unique and relevant. This improves your engagement rate, as around 72% of recipients will engage only with emails that are personalized to reflect their specific interests.
Performing a mail merge involves a few fundamental steps:
- Creating an email with specific placeholders for personalization (for example, {First_Name}, {Last_Name}, and so on).
- Consolidating the data that’s required to customize these placeholders into a spreadsheet or database file.
- Linking your email message with the spreadsheet or database file to perform a mail merge.
- Sending your personalized mail merge campaign.
Now that we’ve covered the basics of the mail merge process, let’s see how you can send mail merge Outlook messages:
How to Perform a Mail Merge in Outlook
To perform a mail merge in Outlook, follow these steps:
- Prepare Your Email Content in Microsoft Word
- Set Up Your Mail Merge Data in Microsoft Excel
- Link the Mailing List with the Email Message
- Preview and Finish the Mail Merge
- Send the Mail Merge Messages
Let’s go over each of these steps in detail:
Prepare Your Email Content in Microsoft Word
The first step is preparing your email’s body copy.
For this, you need to use Microsoft Word to create your merge document.
Here’s how to prepare your starting document in Word:
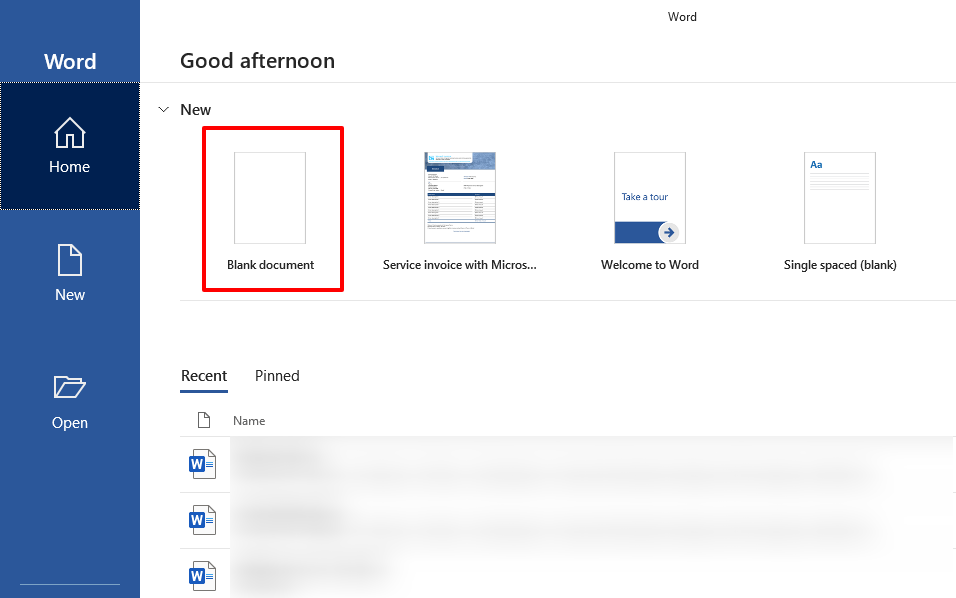
1. Open Microsoft Word and select Blank document.
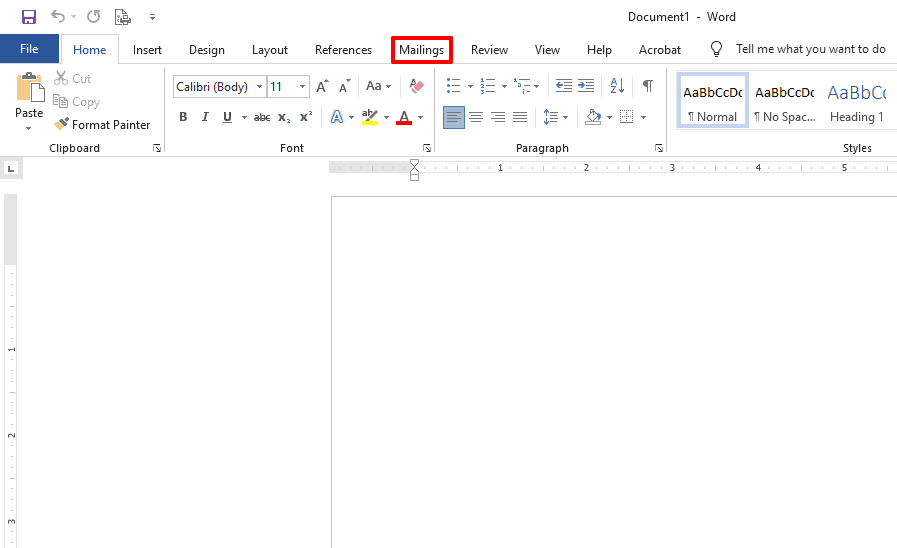
2. Click the Mailings tab in the ribbon (menu bar).
3. Click the Start Mail Merge button under the Mailings tab.
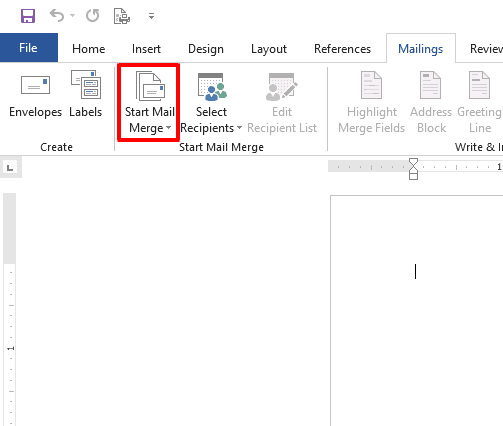
4. Select E-mail Messages from the drop-down list.

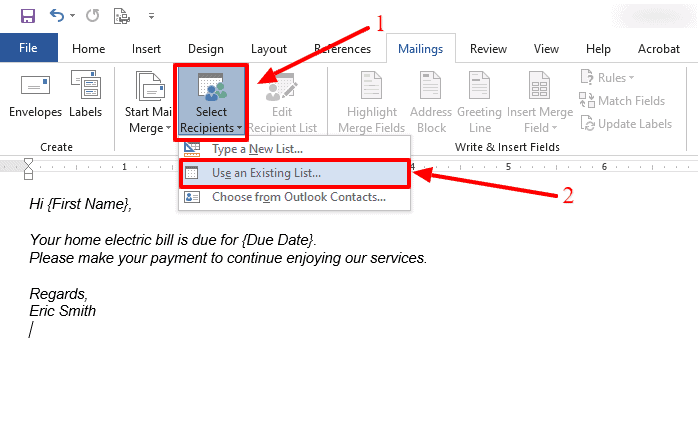
5. Type in the body of your email message in plain text format.
Leave placeholders in the email message for the parts you want to personalize, like First Name, Due Date, etc.

Note: No placeholders are required at this stage.
You don’t need to include placeholders while creating your email message body in MS Word. Instead, you can directly insert the merge fields later. However, adding placeholders at this point will help you identify where you’re supposed to insert merge fields at the end of this process.
Set Up Your Mail Merge Data in Microsoft Excel
Before you can send out personalized bulk emails, you’ll need a spreadsheet with the data for your recipient list.
How do you do that?
Create an Excel spreadsheet listing the data your mail merge might require (like First Name, Due Date, etc.) and format it suitably.
To do this:
1. Open Microsoft Excel and select Blank workbook.

2. Add column headers for the data you want to personalize in the email message — like First Name, Due Date, etc.

3. Add your data under the respective column headers.

4. Click on the File tab at the top left corner of the ribbon and select Save As.


5. Type in a suitable name for your mail merge data file and click Save.

Link The Mailing List With The Email Message
You’ve created your mail merge message in Word and consolidated your personalization data in an Excel spreadsheet.
What now?
It’s time to link your starting document and the Excel file to perform the mail merge.
To do this:
1. Open MS Word and click the “Select Recipients” button from the Mailings tab.
Then, click on Use an Existing List.
Note: Alternative to Existing List
Instead of using an existing list, you can also create a new list or choose specific contacts from your Outlook contact directory.
However, as this can be a little more complicated and time-consuming, I don’t recommend creating a new list or selecting it from the Outlook contacts folder. It’s a lot easier to just make a spreadsheet in Excel and then link it here.
2. From your computer’s File Explorer, find your mail merge data file and select it.

3. In the new dialog box that pops-up, choose the sheet that contains your data in your spreadsheet. Remember to check ‘First row of data contains column headers.’ (located at the left of the OK button.)
Then, click OK.

Note: If there’s only one sheet in the Excel spreadsheet, that sheet will be automatically highlighted in the dialog box.
Additionally, do not tick the First row of data contains headers option if you haven’t added column headers for your data in the first row. However, I recommend adding column headers to your sheet to minimize the chances of any errors occurring.
4. Select and replace each placeholder with a corresponding column header from your Excel spreadsheet by clicking on the Insert Merge Field button.
For example, we replace the placeholder {First Name} in the Word Doc with the <<First_Name>> merge field from the Excel spreadsheet.

Here’s what it’ll look like after inserting the merge field:

Preview and Finish the Mail Merge
While your mail merge document is now ready, it’s always important to preview your message to ensure everything looks all right.
Here’s how to preview your mail merge:
1. Click the Preview Results button under the Mailings tab in Word.

2. Verify that the mail merge fields are displaying correctly.

3. Click the arrows next to Preview Results to toggle between mail merge records and check for any merge field issues.

4. Click the Finish & Merge button and select Send Email Messages.

5. From the dialog box that appears, choose the column header containing email addresses for the To: field.

6. Type in the message Subject line, choose “All” for Send records and click OK.
Once you click OK, the mail merge messages will automatically get added to your Outlook Outbox.
Note: A record represents a recipient in your data file.
If you don’t want to send emails to all the records in your file, just enter the starting and ending numbers in the From: and To: fields, respectively. For example, if you want to select records from rows 30 to 75 in your Excel sheet, add those numbers here.

Mail Merge Wizard
If you’re a little confused about these steps, you can always use the Step-by-Step Mail Merge Wizard option in Start Mail Merge drop-down list in Word. It’ll guide you through each of the steps I just mentioned.
An easier option?
Just use GMass to send mail merge emails in Gmail.

Send the Mail Merge Messages
Now all that’s left is to send out those mail merge emails.
Here’s how to do that:
1. Open Outlook.
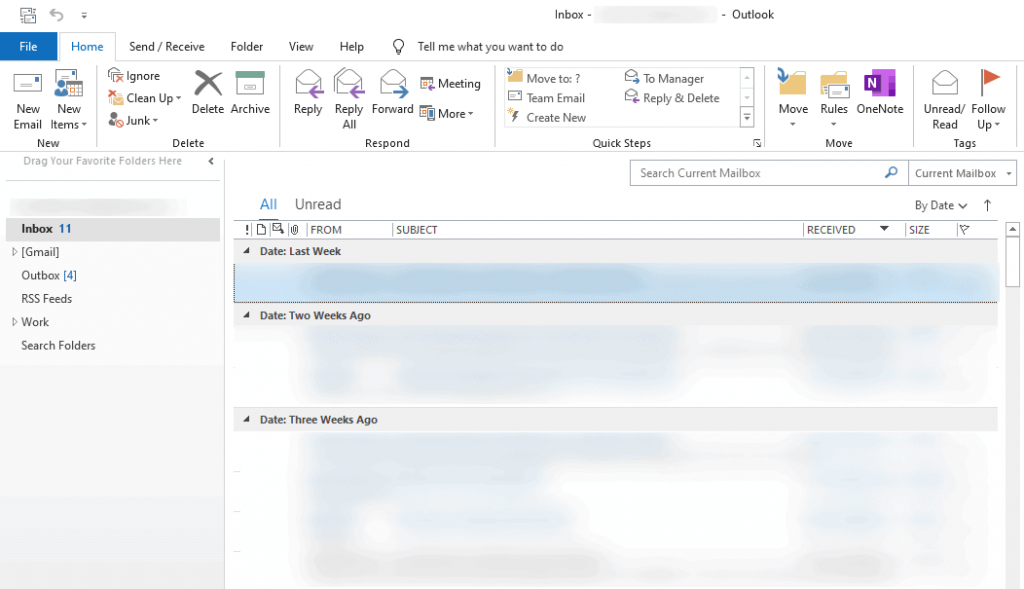
2. Click the Outbox folder from the left-hand menu, and you’ll find the personalized mail merge messages within the folder.


3. Click the Send/Receive All Folders button.

Your merged emails will now go to each person on your recipient list.
Limitations of Performing Mail Merges in Outlook
Sure, an Outlook mail merge allows you to send personalized email messages to thousands of recipients.
However, if there’s one thing that’s clear, it’s that performing mail merges in Outlook isn’t easy.
Why?
Here are some disadvantages of performing an Outlook mail merge:
- Mail merge functionality isn’t available on the Outlook web app.
- Users must toggle between three different applications (Microsoft Word, Excel, and Outlook) to send merged emails.
- You’ll need to opt-in for an Office 365 subscription (which starts at $12.50/user per month for business use) or use proprietary versions of the software ($249.99 for one computer) to use Outlook mail merge.
- You’ll need to use separate tools or add-ins to add a personalized subject line or a personalized Outlook mail merge attachment.
Not an ideal scenario for anyone looking to send out personalized mass emails, right?
But don’t worry.
You can always use Gmail’s mail merge feature instead!
Why Gmail Is a Better Mail Merge Tool than Outlook
Gmail is a much more practical alternative for mail merges and sending personalized messages.
Why?
Here are some reasons why Gmail is better than Outlook mail when it comes to performing mail merges:
1. Won’t Break the Bank
Unlike Microsoft’s Outlook, which comes with expensive pricing plans, Google offers Gmail free of cost.
To access all of Gmail’s excellent email features, you just need to create a free Google account.
2. No Desktop App Required
Remember, you can’t access Outlook’s mail merge capabilities from their web app. It’s only available on the Outlook mail desktop app.
However, Gmail lets you use mail merge directly from the web app.
This way, you don’t have to toggle between multiple desktop apps to perform a mail merge!
3. Streamlined Mail Merge Process
It’s no secret that the Outlook user-interface and mail merge process can be confusing for many users.
On the other hand, Gmail features a streamlined and uncluttered user-interface. This makes it easier for you to use the tool, even for massive mail merges.
But what about the Gmail mail merge process?
How complicated is it?
If you use GMass, it’s a piece of cake!
What’s GMass?

GMass is powerful email marketing automation software that works directly inside Gmail.
Its superior mail merge capabilities have made it a popular tool used by employees in companies like Google and Uber and social media giants like Twitter and LinkedIn.
The tool is also perfect for small businesses, startups, solopreneurs, and nonprofits and institutions like churches.
The best part?
To try out GMass for free, just download the Chrome extension and sign up with your Gmail account — no credit card required.
How to Send a Mail Merge in Gmail with GMass
With GMass, you can effortlessly create mail merge campaigns from both Excel and Google Sheets.
Just follow these steps to perform a mail merge in GMass:
1. Format your data file inside Google Sheets — add header names to your first row (like FirstName, LastName, Email, etc.) and data from the second row onward.

Note: If you’re using an Excel spreadsheet to store the data of multiple recipients, simply upload the Excel file to Google Drive, open it in Google Sheets, and follow the same steps.

2. Next, sign in to your Gmail account and open the Compose window.
Type in your message and click on the GMass button at the top right corner of the window.
Don’t worry about adding email addresses in the To field or personalization placeholders in your message. GMass will do all of that for you!

3. In the dialog box that appears, select the Google Sheets file and the corresponding sheet you want to use for the mail merge.

4. Once done, click CONNECT TO SPREADSHEET.

Then, GMass will automatically insert email addresses in the To field of your mail merge message.

5. Now, click the downward-facing arrow next to the GMass button to access the GMass Settings window. You can then auto-personalize your emails, schedule them, set follow-ups, and more.

6. To personalize your email automatically, click the Personalize drop-down list to view all column headers (spreadsheet fields) present in the Google sheet. Or you can type a left curly brace { in your email and the list of available merge tags will appear.

7. Select suitable column headers and add them as placeholders anywhere in your message body to personalize your emails.

8. Once your email message is ready, click the GMass button to send out your personalized mail merge messages.
Unlike Outlook, where you’ll have to go through several steps and multiple apps to send out merged emails, GMass helps you send out personalized mass emails directly from Gmail in just a few clicks!
For more info on mail merges, check out my guides on:
But that’s not all.
With GMass, you can also:
1. Send fully personalized emails at scale, customizing paragraphs, images, links, attachments, and more.

2. Schedule mail merge email campaigns to go out at the right time to maximize recipient engagement.

3. Access campaign reports inside your Gmail inbox folder to gauge the performance of your mail merge emails.

4. Send automated follow-up emails to boost your reply rate.

5. Save emails as templates to reuse them later.

Mail Merge in Outlook: Final Thoughts
Performing an Outlook mail merge helps you quickly send personalized mass emails.
However, you’ll need to rely on three different Microsoft applications to effectively carry out a mail merge this way — Word, Excel, and Outlook.
A far better alternative is to use Gmail for your mail merge campaigns.
And the easiest way to perform a Gmail mail merge is to use GMass.
GMass helps you effortlessly create mail merges from both Microsoft Excel and Google Sheets.
Moreover, you can personalize your mass emails, track deliverability metrics, send automated follow-ups, and do so much more.
So why not try GMass today and take your mail merge campaigns to the next level? It’s free to get started and send up to 50 emails per day during your free trial.
Email marketing. Cold email. Mail merge. Avoid the spam folder. Easy to learn and use. All inside Gmail.
TRY GMASS FOR FREE
Download Chrome extension - 30 second install!
No credit card required

Ajay is the founder of GMass and has been developing email sending software for 20 years.
Hello,
I thought this was a very useful article and tried it when setting up my outreach project.
But there’s obviously something going wrong because all the mail merge fields end up on the email looking like <> and <>.
What are the characters used to signify mail merge fields on the Word document? I had assumed they were the upper forward and back arrows.
I can’t see that this is specified in the article.
Please advise.
Thanks
Anyone trying this: before you begin, set your Outlook email to “Work Offline” if you want to control the send by going to the Outbox as stated above. (In Outlook, go to Send/Receive and click Work Offline.) Otherwise, the emails will send automatically, without pausing, from the Outbox. In my case, I own several email boxes and would have been able to set the correct “from” email address had I known this. Otherwise, this worked perfectly. (Oh also, if you want to send an HTML email, first go into File > Options in Outlook, go to Mail and uncheck “Reduce message size…” under Message format.)
Mine automatically sent! Argh! How can I stop them automatically sending next time?
Hi Ajay
This is a great article. Step by step with Screen Shots. Wonderful.
Everything worked well for me except that the emails were not going from Word to Outlook because it was not responding. I think that is a technical glitch at my end.
I also looked at some Videos. Some of them go so fast that we cannot follow what they are saying. It is always useful to see the text and screen shots and perform exactly as per the steps.
Great work. Keep it up.
Hi,
Also there is an extension for mass emailing in Outlook
Can you share the name of the extension?
Charge for Outlook
Hello, you used to write excellent, but the last few posts have been kinda boring… I miss your super writings. Past several posts are just a little out of track! come on!
Dead pent subject material , appreciate it for information .
You lost me, friend. I mean, I assume I get what youre declaring. I understand what you are saying, but you just seem to have forgotten about that there are some other people within the world who see this issue for what it really is and might not agree with you. You may possibly be turning away many of folks who might have been followers of your web site.
Hey, Could I grab this post image and make use of that on my personal blog page?
berlin… […]u Not every blog has got the facts right but this one seems to have managed t ld[…]…
You made some decent points there. I seemed on the web for the issue and located most individuals will go together with together with your website.
I am struggling with Google and GMass (which I have found really useful, using the free plan). However, Google suspended my gmail account for violating their policies when I only sent out 50 emails (with free GMass plan) to people who matched with my corgi breeding business through a 3rd party ethical breeder site. So, I’m just really confused about what I did wrong and am considering different options for automating emails if Google denies my appeal. Sigh
There couple of interesting points at some point here but I don’t determine if every one of them center to heart. There exists some validity but I will take hold opinion until I consider it further. Good post , thanks and then we want more! Added onto FeedBurner in addition
It’s laborious to find educated people on this subject, however you sound like you realize what you’re speaking about! Thanks
I don’t ordinarily comment but I gotta tell regards for the post on this perfect one : D.
Really like the breakdown of the subject above. I have not seen many solid posts on the subject but you did a excellent job.
Hiya, I’m really glad I’ve found this information. Nowadays bloggers publish only about gossips and net and this is actually frustrating. A good web site with interesting content, that’s what I need. Thanks for keeping this web-site, I will be visiting it. Do you do newsletters? Can’t find it.
Undeniably believe that which you said. Your favorite reason seemed to be on the net the simplest thing to be aware of. I say to you, I certainly get annoyed while people think about worries that they plainly don’t know about. You managed to hit the nail upon the top and defined out the whole thing without having side-effects , people could take a signal. Will probably be back to get more. Thanks
Wow! Thank you! I permanently needed to write on my website something like that. Can I implement a portion of your post to my site?
could the mail merge allow to add the cc;
An impressive share, I recently with all this onto a colleague who was simply doing little analysis for this. And hubby actually bought me breakfast since I found it for him.. smile. So let me reword that: Thnx for your treat! But yeah Thnkx for spending the time to talk about this, I find myself strongly about this and adore reading much more about this topic. Whenever possible, as you become expertise, might you mind updating your blog site with additional details? It is highly great for me. Massive thumb up just for this article!
i have try as per your guides but font show plain in email. what can i do, for apply font size and style.
When I originally commented I clicked the -Notify me when new comments are added- checkbox and after this when a comment is added I am four emails sticking with the same comment. Could there be in any manner you may eliminate me from that service? Thanks!
There seems to be an error for the instructions for the mail merge in Outlook.
The instruction follwed was: 6. Type in the message Subject line, choose “All” for Send records and click OK.
Once you click OK, the mail merge messages will automatically get added to your Outlook Outbox.
The mail merge messages aren’t added to you Outlook Outbox as the instructions state but are sent to the email recipients as soon as you click on OK. A bit of an issue if you were expecting to send them from Outlook and they’ve already gone.