
Learning how to use Gmail can help you really take advantage of all the powerful functionality Gmail offers. After all, there’s more to Gmail than just sending and receiving emails.
But what else can you do with Gmail?
You can send instant messages, organize meetings, and do so much more right from the Gmail inbox.
In this article, I’ll show you how to use Gmail on your desktop and mobile devices.
As a bonus, I’ll also mention the perfect tool to add more functionality to Gmail.
Further Reading:
- Interested in learning about Gmail features and hacks, like how to undo send emails, snooze desktop notifications, add templates, and use keyboard shortcuts? Check out my post on Gmail Tips and Tricks.
- Also, discover how to send mass emails with Google Sheets and Gmail.
This Gmail Tutorial Contains:
(Click on the links below to jump to specific sections)
- How to Use Gmail on Your Desktop
- How to Sign Up for Gmail
- How to Sign In to Gmail
- How to Compose and Send an Email in Gmail
- How to Respond to Emails in Gmail
- How to Organize Your Gmail Inbox
- How to Search for Emails in Gmail
- How to Add Signatures in Gmail
- How to Organize Meetings in Gmail
- How to Send Instant Messages in Gmail
- How to Customize the Appearance of Your Gmail Interface
- How to Use Gmail on Your Phone
- How to Add More Functionality to Gmail
Let’s get started.
How to Use Gmail on Your Desktop
Learning how to use Google’s Gmail is simple. This Gmail tutorial will cover the most important features you should know about and how to use them.
First, let’s sign up for a Gmail account.
A. How to Sign Up for Gmail
To use Google Gmail, you’ll need a Gmail account.
In case you don’t have a Google account already, here’s how you can create an email account:
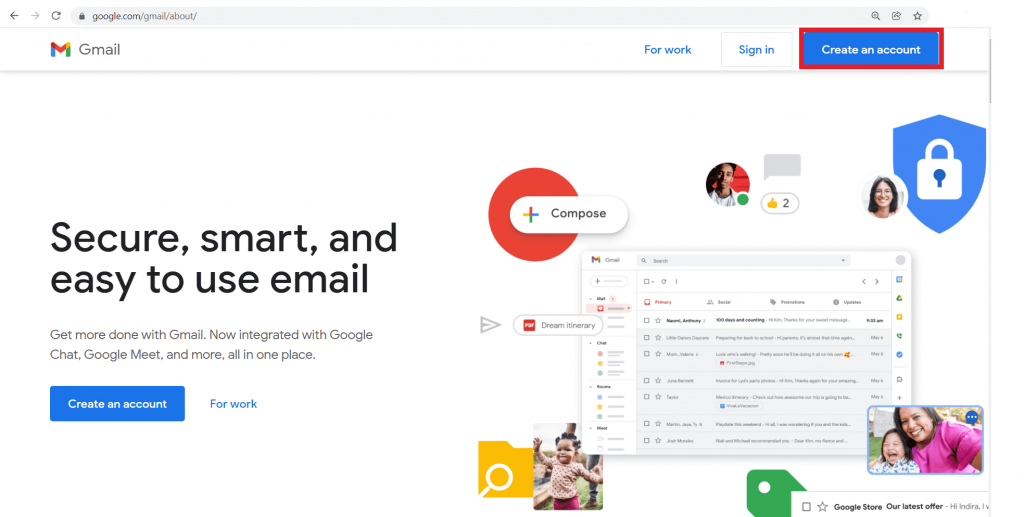
Step 1
Go to gmail.com and hit the Create an account button.
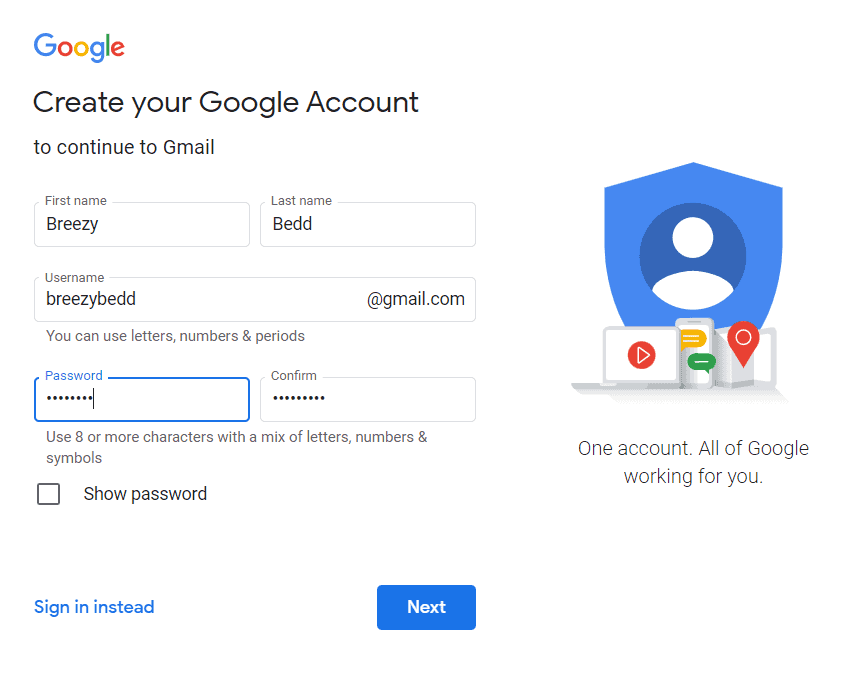
Step 2
When the sign-up form appears, enter your First name, Last name, Username, and Password.
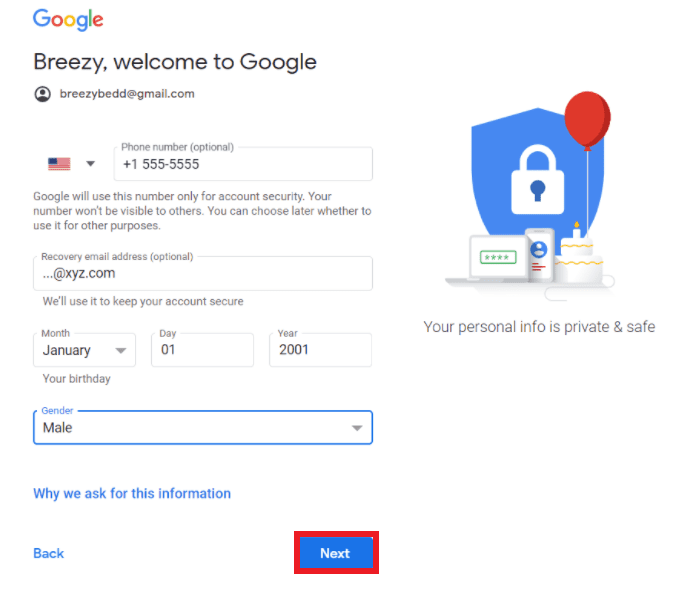
Step 3
Add Recovery number and Recovery email details for added security (optional).
Then, add your date of birth and gender.
Once you’ve entered these details, click Next.
Step 4
After you’ve reviewed Google’s Terms of Service and Privacy Policy, click on I agree.

Step 5
You’ll then be taken to the homepage of your new Gmail account.

B. How to Sign In to Gmail
Here’s how you can sign in to Gmail with your email address:
Step 1
Open Gmail and click on the Sign in button.

Step 2
Enter your email or phone number and click Next.

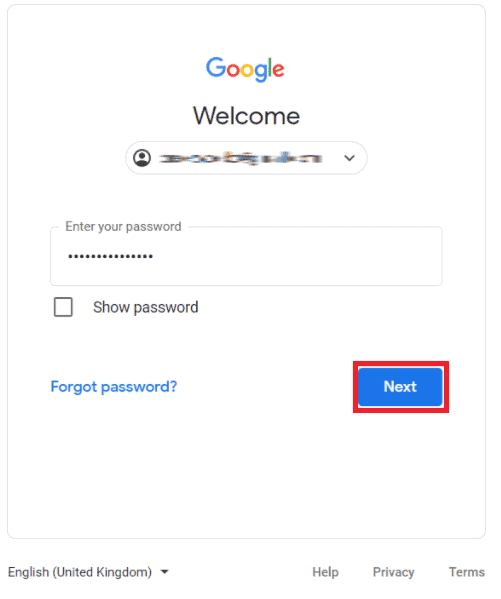
Step 3
Type in your password and hit Next to open your inbox.
Note: Once you’ve signed up for Google’s Gmail, you can use your Gmail credentials to sign in to every Google app (for example, Google Drive, Google Docs, Google Calendar, etc.).
C. How to Compose and Send an Email in Gmail
Here’s how to compose and send emails in Google Gmail:
Step 1
Log in to Gmail from your desktop and click on the Compose button on your left.

Step 2
In the New Message window, enter the recipient email IDs in the To field and add your subject line in the Subject field.

Step 3
Add Cc (carbon copy) or Bcc (blind carbon copy) recipients if you wish to send mail copies to anyone.
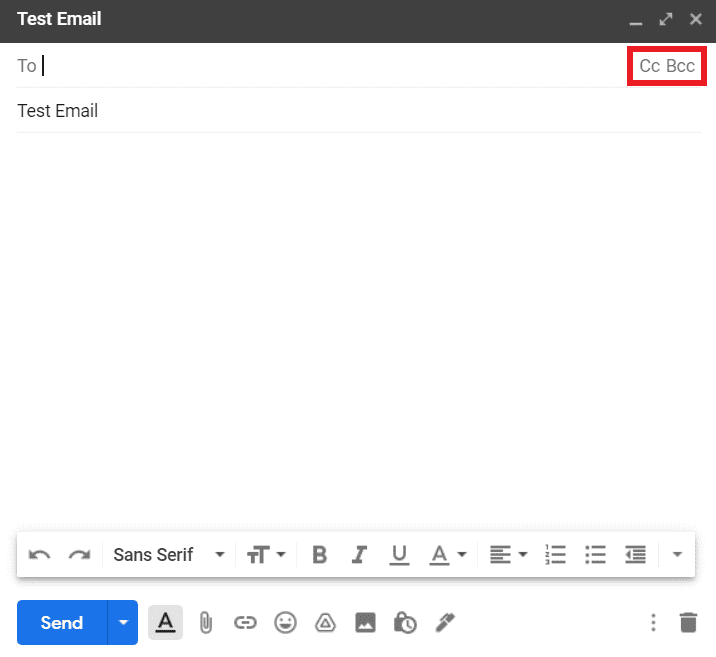
Note: The Cc and Bcc fields let you send copies of an email to multiple email recipients. While recipients in the To address field can see the Cc’d recipients, recipients in the To field won’t be able to see Bcc’d recipients.
Find out how to use Gmail’s Cc and Bcc fields properly.
Step 4
Enter your message and hit Send when done.

D. How to Respond to Emails in Gmail
When you receive a new email in the Gmail inbox, you can see the sender’s name and the subject highlighted in bold.
Here’s how you can respond to an email you’ve received in Gmail:
Step 1
Log in to Gmail and open the email message you want to respond to by clicking on it.
Step 2
Click on the Reply arrow.
![]()
Step 3
A preview pane will open with the name of the person you’re responding to in the To field.

Step 4
Type your response message and hit Send.

Note: Gmail also has an offline mode. This Gmail offline mode lets you read, respond to, and search for emails when you’re offline.
To use Gmail offline:
- Open Gmail and click on the gear icon at the top to open the Quick settings menu.
- Click on See all settings and go to the Offline tab.
- Click on the radio button next to Enable offline mail.
- Hit Save changes to start using Gmail offline.
E. How to Organize Your Gmail Inbox
If you’re like most people these days, your inbox is probably flooded with incoming messages — product notifications, newsletters, cold emails, promotions, and more. As a result, keeping your mailbox organized can be overwhelming.
Fortunately, Gmail offers numerous organizational features to help manage your emails efficiently, such as:
Here’s a quick look at some of these features:
1. Labels
The Gmail label function helps you organize your inbox better.
Unlike Microsoft Outlook, which only lets you add an email to one folder, Gmail enables you to add multiple labels to a single email. This way, an email can exist in more than one category at the same time.
I’ll show you how to:
Let’s first check out how you can create a label in Gmail.
i. How to Create a Gmail Label
Step 1
Log in to Gmail and click on Gmail Settings (gear icon) near the top right corner.
![]()
Step 2
In the Quick settings dialog box that opens, click on See all settings.

Step 3
Select the Labels tab.

Step 4
Scroll down and click on Create new label.

Step 5
In the pop-up window, enter a name for the new Gmail label and select a label (or folder) to nest it under (optional).

Step 6
Click on Create.

ii. How to Add Labels to an Email in Gmail
Here’s how simple it is to add a label to an email.
Step 1
Open the email you want to add a label to and click on the Label icon at the top.
![]()
Step 2
Enter the name of the label in the search box or select one from the label list.
You can add multiple labels to a single email by checking the boxes next to the label names.

Step 3
Click on Apply.

Step 4
The selected labels will be added to the email.

Once you’ve added the labels, you can effortlessly search for labeled emails.
I’ll show you how next.
iii. How to Find an Email with a Specific Gmail Label
Follow these steps to find an email that you’ve labeled:
Step 1
Open Gmail and scroll through the sidebar on the left until you see the required folder.
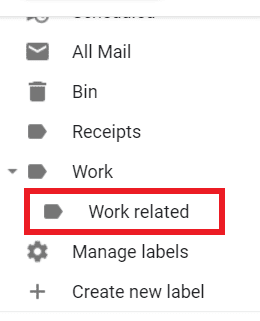
Step 2
Click on the folder to display all the emails within that specific label. Then, you can select the required email from the list.

Check out my step-by-step Gmail labels guide for more info.
2. Starred Emails
Gmail allows you to star important emails for easy organization.
I’ll show you how to star important emails and search for your starred emails.
i. How to Star Important Emails
Step1
Open Gmail and find the email you want to star.

Step 2
Click on the star icon next to the required email.
The star will turn yellow, indicating that the email has been starred.

ii. How to Search for Starred Emails
Once an email has been starred, searching for that email is simple.
Here’s how to do it:
Step 1
Open Gmail and select the Starred folder in the left side pane.

Step 2
The Starred folder will open with all your starred emails in it.

You can click on the required email to open it.
Next, I’ll show you how to filter your emails using the Gmail Filter feature.
3. Gmail Filters
Once you create Gmail filters, Gmail can automatically direct incoming messages to the different folders in your inbox.
Here’s how it’s done:
Step 1
Open Gmail and click the Show search options icon on the right of the search mail bar.
![]()
Step 2
Enter your search criteria (From, To, Has the words, Size, Date, etc.) and hit the Create filter button.

Step 3
Select what you want Gmail to do with the filtered emails from the list and click Create filter.
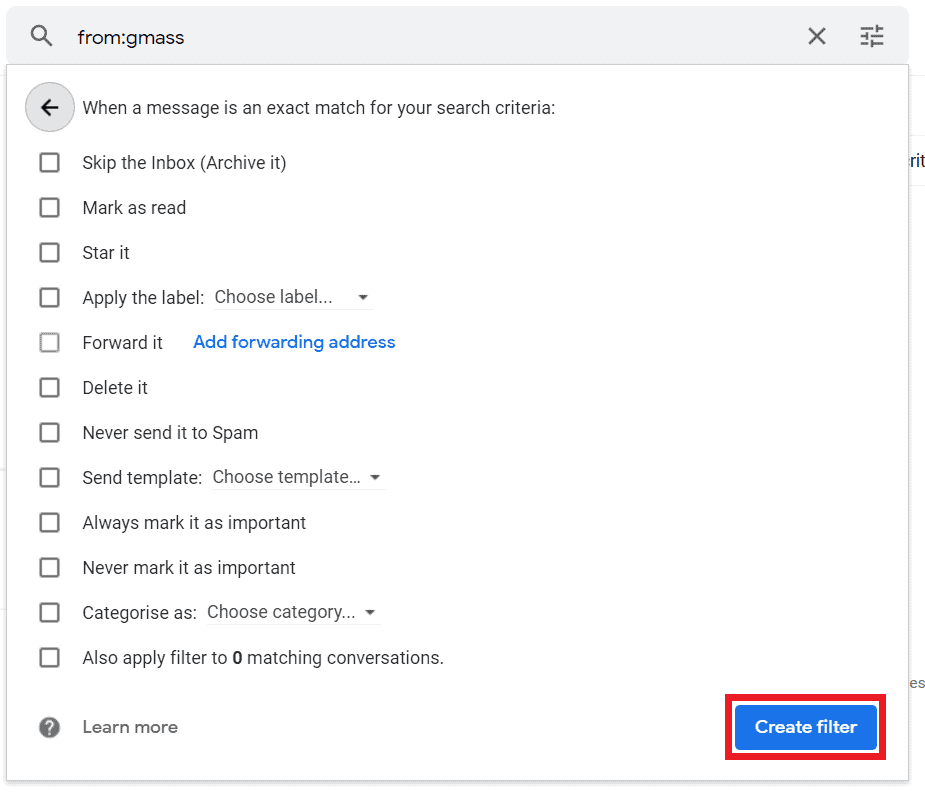
Step 4
A notification box will appear confirming that your filter has been created.

Once your Gmail filters have been created, you won’t have to sort and manage Gmail messages manually — the filter will do it for you automatically.
4. Archive Emails or Delete Emails
Do you only want to keep important emails in your inbox?
Then you can archive emails or delete unimportant emails.
Here’s how:
i. Archive Emails
Step 1
Open Gmail and select the multiple emails you want to archive by clicking on the checkbox next to each email.

Step 2
Click on the Archive icon at the top.
![]()
Step 3
A black pop-up window will appear, indicating that the selected emails have been archived.

ii. Delete Emails
Here’s how you can delete unwanted emails in Gmail:
Step 1
Open Gmail and select the emails you want to delete using the checkboxes.

Step 2
Click on the trash bin icon to delete the selected emails.
![]()
What’s the difference between archived emails and deleted emails?
Archiving emails lets you clean up your inbox by moving selected emails (archive emails) from your inbox into the All Mail folder (which you can always access from the left sidebar).
Unlike archived emails, deleted emails are moved to the Trash folder (located below the spam folder) and permanently deleted after 30 days.
Next, I’ll discuss how you can search for an email in Gmail.
F. How to Search for Emails in Gmail
If you don’t want to scroll through multiple emails to find the one you’re looking for, you can use the Gmail Search feature to find your email quickly.
I’ll show you how to search for emails by typing a search term in the search bar and using Gmail search operators.
1. How to Search for Emails by Typing a Search Term into the Search Bar
This is how you can search for a specific email using a particular search term:
Step 1
Open Gmail and type in a search term into the search bar.
For example, if you’re searching for an email about GMass, you could enter “GMass” into the search bar.

Step 2
A preview list will appear with recent emails matching your search term.
If you see the email you’re looking for, select it from the list by clicking on it or clicking on More search results to view all the emails matching your search term.

Step 3
You can then scroll through your emails and find the right one.
If your list of emails is still too long to scroll through, you can refine your search further using search operators.
I’ll show you how it’s done next.
2. How to Search for Emails Using Search Operators
To use search operators, just open Gmail and type them into the search bar.
Here are some examples of common search operators:
- When searching for an email from a specific person, use the search operator “from:” followed by their name.
For example, from:ajay — displays sent messages from Ajay. - When searching for an email you sent to a particular person, use the search operator “to:” followed by the person’s name.
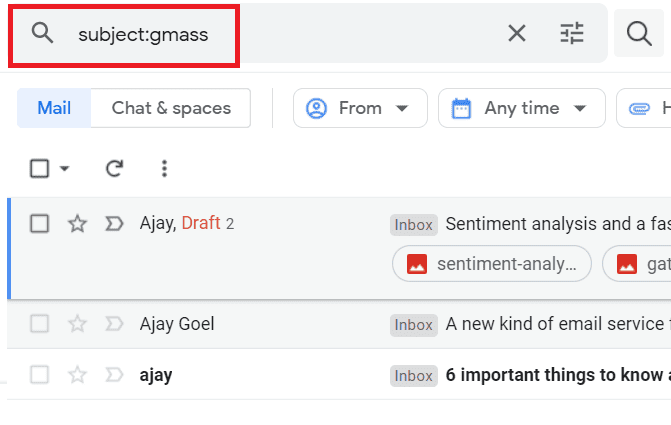
For example, to:peter — shows email messages you sent to Peter. - When searching for an email about a specific topic, you can use the operator “subject:” followed by the topic.
For example, subject:gmass — displays all emails that contain the word “gmass” in the subject line.
For more information, check out my Gmail tutorial on how to use Gmail search.
Next, I’ll tell you how you can add a signature to your emails.
G. How to Add Signatures in Gmail
It’s easy to configure your Gmail settings and add signatures.
I’ll show you how simple it is to:
1. How to Create an Email Signature
This is how you can create an email signature in Gmail.
Step 1
Open Gmail and click on the Settings icon.
![]()
Step 2
Click on See all settings.

Step 3
Under the General tab, scroll down to “Signature:” and click on Create new.

Step 4
In the pop-up window that appears, provide a name for the signature name and click Create.

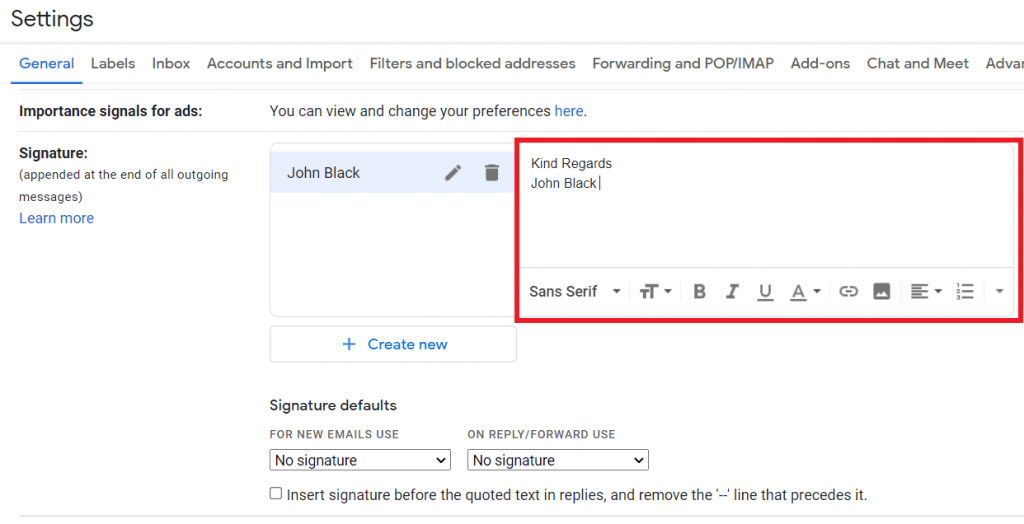
Step 5
The newly created signature will now be visible near “Signature” under the General tab.
You can now type in what you want the signature to say in the text box on the right. Moreover, you can edit the font, add attachments, links, etc.
Step 6
Scroll down to the bottom and click on Save changes.

Check out my post on how to create and add email signatures for more information.
2. How to Insert a Signature into an Email
This is how you can add a signature to an outgoing email:
Step 1
Compose your email as usual but before you hit Send, click on the pen icon at the bottom of the Compose window.
![]()
Step 2
Select the required signature from the list.

Step 3
The signature will be inserted at the bottom of your email.
You can then click Send as usual.

Now that you know how to add and insert email signatures in Gmail, I’ll show you how to edit an email signature:
3. How to Edit an Email Signature
Here’s how you can easily edit an existing signature:
Step 1
Open Gmail and click on the Settings icon.
![]()
Step 2
Click on See all settings.

Step 3
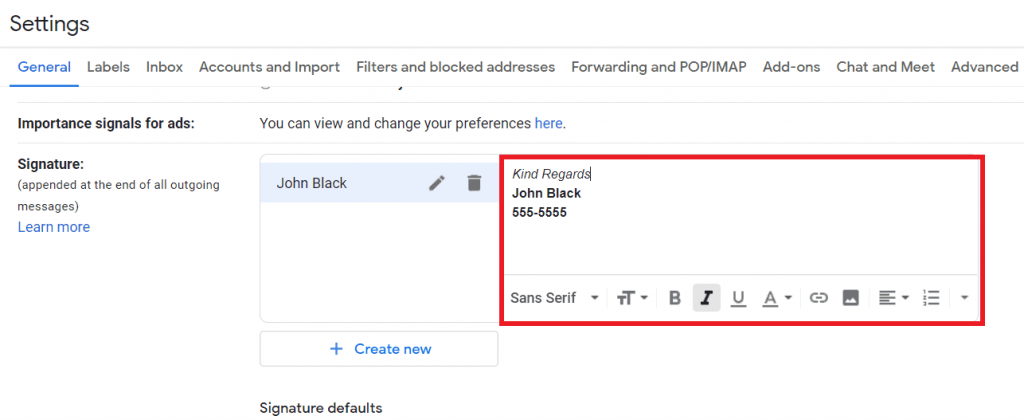
In the General tab, scroll down till you see the “Signature” section.
Make the necessary changes in the text box on the right.
Step 4
Scroll to the bottom of the page and click on Save changes.

It’s that simple!
Next, I’ll show you how you can organize your meetings in Gmail.
H. How to Organize Meetings in Gmail
Gmail lets you easily set up meetings with people through Google Meet.
I’ll cover how you can:
First, we’ll check out how to enable Google Meet inside Gmail.
1. How to Enable Google Meet in Gmail
Here’s how to enable Google Meet.
Step 1
Open Gmail and click on the Settings icon.
![]()
Step 2
Click on See all settings.

Step 3
Click on the Chat and Meet tab.

Step 4
Ensure that the radio button next to Show the Meet section in the main menu is selected.

Step 5
Click on Save Changes, and Google Meet will be enabled.

Now that you’ve enabled Google Meet, you can make video calls right within Gmail.
2. How to Make a Video Call in Gmail
Here’s how simple video calling in Gmail is:
Step 1
Open Gmail and scroll down to Meet in the left sidebar.

Step 2
Click on New meeting.

Step 3
A pop-up window will appear with a meeting link.
Click on Start now to start a meeting.

Alternatively, you can click on Send invitation to copy the meeting link or share the link with attendees via email.

3. How to Join a Video Call in Gmail
Here’s how you can join a meeting in Gmail:
Step 1
Open Gmail and scroll down to Meet in the left sidebar.

Step 2
Click on Join a meeting.

Step 3
Enter the meeting code provided by the meeting’s organizer and click Join.

Next, I’ll talk about sending instant Gmail messages:
I. How to Send Instant Messages in Gmail
By enabling Google Chat, you can chat with your Gmail contacts.
I’ll show you how to enable Google Chat and chat with contacts in Gmail.
1. How to Enable Google Chat
Here’s how you can enable Google Chat.
Step 1
Open Gmail and click on the Settings icon.
![]()
Step 2
Click on See all settings.

Step 3
Click on the Chat and Meet tab.

Step 4
Click on the radio button next to Google Chat to enable it.

2. How to Chat with Contacts in Gmail
Here’s how you can chat with contacts inside Gmail:
Step 1
Open Gmail and scroll the left sidebar until you find Chat.
Now, click on the plus icon (+).

Step 2
Type in the name of the contact or select one from the contacts listed.

Step 3
A new window will open, showing your chat history with the chosen contact. It’ll also show whether the contact is active or away.

Step 4
Type your message into the text box and click the arrow icon to send.

Note: If the person is online, they will see your message immediately. If not, they will see your message when they sign in.
J. How to Customize the Appearance of Your Gmail Interface
If you prefer a more personalized Gmail interface, you can easily change it to suit your preferences.
Here’s how:
Step 1
Open Gmail and click on the Settings icon.
Step 2
Scroll down to Theme and select your preferred theme.

Step 3
If you don’t see the theme you want, click on View all.

Step 4
A window will open with the available themes.
Choose your preferred theme and click Save.

Alternatively, click on My photos to use a picture from your device instead.

Now that you’ve seen how to use Gmail on your desktop, I’ll show you how to use Gmail on your mobile phone:
How to Use Gmail on Your Phone
Using your Android or iOS mobile phone to access your emails is the best way to check your Gmail messages while you’re on the go.
Here’s how you can install and use Gmail on your Android phone.
A. How to Use Gmail on Your Android Phone
I’ll first show you how to install the Gmail app on your Android phone and then go over how to add non-Gmail accounts to your mobile Gmail app.
1. How to Install the Gmail App on Your Android Phone
Here’s how you can easily install the Gmail app on your Android phone:
Step 1
Go to the Play Store and search for the Google app you want to install — the Gmail app.
Click Install to install the Google app.

Step 2
Open the app and sign in using your login credentials.
2. How to Add Non-Gmail Accounts to the Gmail App on Your Android Phone
Here’s how you can add non-Gmail accounts to your Gmail app on your Android phone (for more on doing additional Gmail logins for another account, check out our full guide):
Step 1
Open Gmail on your phone or tablet.
![]()
Step 2
In the top right corner, tap your profile picture.

Step 3
Tap Add another account.

Step 4
Choose the type of account you want to add.

Step 5
Follow the steps instructed on your screen to add your account.
But what if you have an iPhone?
Next, I’ll show you how to use Gmail on your iPhone, iPad, and other iOS mobile devices.
B. How to Use Gmail on Your iPhone
The Gmail interface is a little different on the iPhone and iPad when compared to the Android device. However, the basic functionalities for iOS remain the same once you’ve installed the Gmail app from the App Store.
Here’s how you can use Gmail on your iPhone or iPad:
Step 1
Go to the Apple Store and install the Gmail app.
Step 2
Open the Gmail app.
Step 3
Tap Add another account.
Step 4
Select the type of account you want to add.
Step 5
Follow the steps on the screen to add your account.
Next, I’ll show you a great way to add even more functionality to the Gmail app.
How to Add More Functionality to Gmail
Gmail is a great free email service.
However, there’ll be situations when this Google app isn’t enough for your needs.
For example, let’s say you want to send a webinar invitation to a large audience of people.
A mail service like Gmail restricts the number of emails you send to 500 emails/day. If you’re using a Google Workspace account (formerly G Suite), you can only send up to 2000 emails in a day.
But what if you need to send more than that?
Whether you have a regular Gmail account or Google Workspace (formerly G Suite) account, you can use GMass to bypass these sending limits and enhance Gmail’s functionality with ease.
What Is GMass?
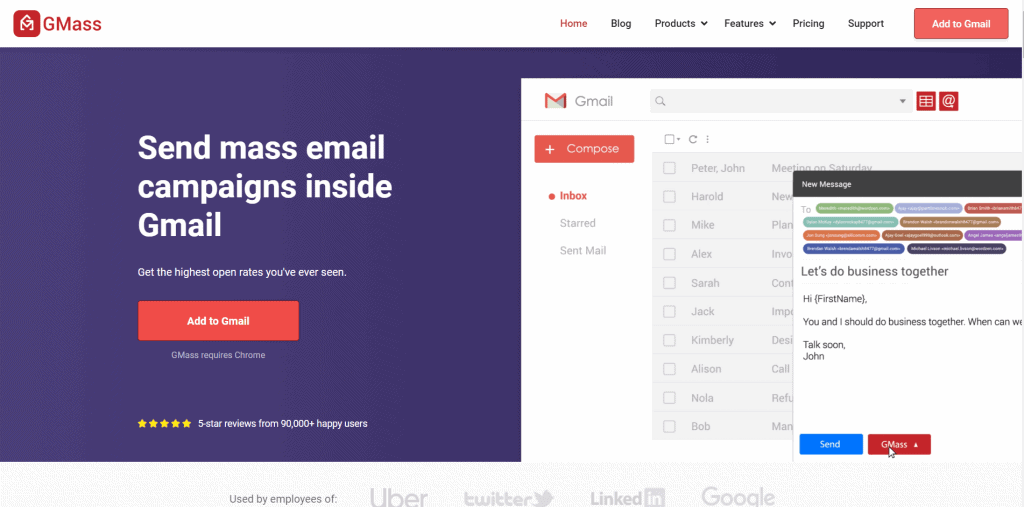
GMass is a powerful email outreach tool that works within Gmail. Its ease of use and powerful mail merge features make it a popular tool used by employees in large organizations, like Uber and Google, and social media platforms, like Twitter and LinkedIn.
It’s also perfect for small businesses, churches, solopreneurs, and any Gmail user to send emails to an audience.
To get started with GMass, download the Google Chrome extension and sign up for free using your Gmail account.
Here are some of the things you can do with GMass:
- Automatically personalize your emails to your target audience, including paragraphs, attachments, images, and links.
- Send automated follow-up emails based on specific behavior, like if the recipient doesn’t open or doesn’t respond.
- Access detailed reports evaluating your email performance like opens, replies, unsubscribes, click-throughs, and more.
- Schedule your emails to ensure they arrive at the best time for maximum engagement.
- Overcome Gmail’s sending limits and send unlimited emails in Gmail using an SMTP server. (Find out everything you need to know about SMTP here.)
- Email API to create email lists, send out email campaigns, create reports, and more.
Final Thoughts
Gmail is a great tool to send and receive emails, organize your inbox, add signatures, perform searches, and carry out chats and meetings.
However, even with its arsenal of features, Gmail falls short when it comes to sending bulk emails, personalizing emails, or generating insights into how recipients engage with your emails.
For that, you need GMass — download the Google Chrome extension today.
Sign up for Gmail and link your account to GMass to boost your email productivity!
Only GMass packs every email app into one tool — and brings it all into Gmail for you. Better emails. Tons of power. Easy to use.
TRY GMASS FOR FREE
Download Chrome extension - 30 second install!
No credit card required

Ajay is the founder of GMass and has been developing email sending software for 20 years.
Boa noite, quantos e-mails eu consigo mandar pelo Gmass por dia na versão gratuita?
how to send pdf as attachement
There should be videos here so show beginners on how to use gmail effectively
Excellent videos thanks for including them.
I have more than one Gmail account. The account I wish to use most does not come up first. In fact, I get the account I deleted trying to change the afore-mentioned order of accounts.
I have read a few articles on the web instructing what I thought would change the primary account to the one i want but to no avail.
Do you have any suggestion that might put the Gmail account t I want to come up first?
I have used emails for over 30 years. This year I changed to Gmail. Imagine my shock, despite using the Labelling system, that my history continues to disappear after about 30 days. I have many important correspondence records that I must keep and I’m finding that I have to print them out and file the old-fashioned way. I’ve gone through all the guides and still cannot find an answer.
What I’m I missing. Do I have to return to one of other email services again – none of which have been a problem in this way i.e. ‘keep’ has always been the default!?!
/JS
I cannot reply to emails from Gmail. they are always returned to me . what can i do?
I can’t even get it to operate, to damn complicated, this for that or that for this yahoo is so much simpler and less headache how the hell do i get anything, bunch of complicated crap
i think your guide sucks, so confused about everything been trying to figure it out for over 6 months about to just give it up, I am not a business, i do not have business meetings or need any of that gargbage
how do you get all of one subject then delete, oh label it ?? lWTF then do something elses just want to delete subjects I don’t need DAMN
how do you get all of one subject then delete, oh label it ?? lWTF then do something elses just want to delete subjects I don’t need then can’t
Why is this so COMPLICATED nothing works right, got one catagorized , cannot READ THE SMALL PRINT IN THE INSTRUCTIONS, IN THE BOXES, who is the idiot who made this up, NOTHING WORKS
There is noticeably a heap of money to use this. I assume you made certain nice factors in options also.
A fascinating discussion is definitely worth comment.
I do believe that you should publish more about this issue, it
may not be a taboo matter but usually people do not talk
about these topics. To the next! All the best!!
Feel free to surf to my homepage … 79King