Personalization is the name of the game when it comes to email outreach.
If you aren’t personalizing, your results are going to be subpar.
Personalized emails deliver a 6x higher transaction rate than non-personalized emails.
According to a study done by Aberdeen, personalized email messages can improve your click-through rates by 14% and your conversions by 10%.
But what is real personalization?
Beyond just [first name] and [company name]?
Most personalization aspects are the norm now.
Meaning they aren’t even a tactic. They’re commonplace.
But that also means that most real personalization tactics take too long.
They take copious amounts of research. And research takes time.
Time that you simply don’t have to waste.
Personalization can be tedious work, too. It feels like busywork that never ends.
Here are a few ways to fully personalize your email outreach while doing the minimum amount of busywork.
What real personalization looks like
Have you ever gotten an outreach email that referenced your latest article?
Or maybe one that said:
I loved your latest [blog post, social post, etc.].
That’s one of the most common personalization tactics in the book.
And while it’s a great start, it’s too common to generate abnormally high conversion rates.
It’s the easy route that many take to save as much time and effort as possible.
But the truth is:
Personalization takes a bit of time.
The only thing you can do is minimize that time with tools of the trade that are scaleable.
Real personalization comes in the form of small-talk-style conversation that would happen in the real world.
For example, talking about sports teams or life events.
Things that people actually care deeply about rather than their latest blog post.
Or talking about a book that was moving and inspirational.
These are some of the toughest things to personalize at scale, but doing so is what separates you from the rest.
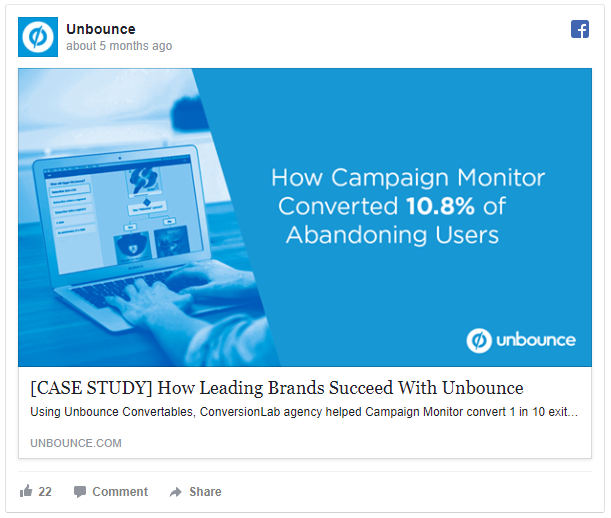
For example, check out this personalization email from Yesware:
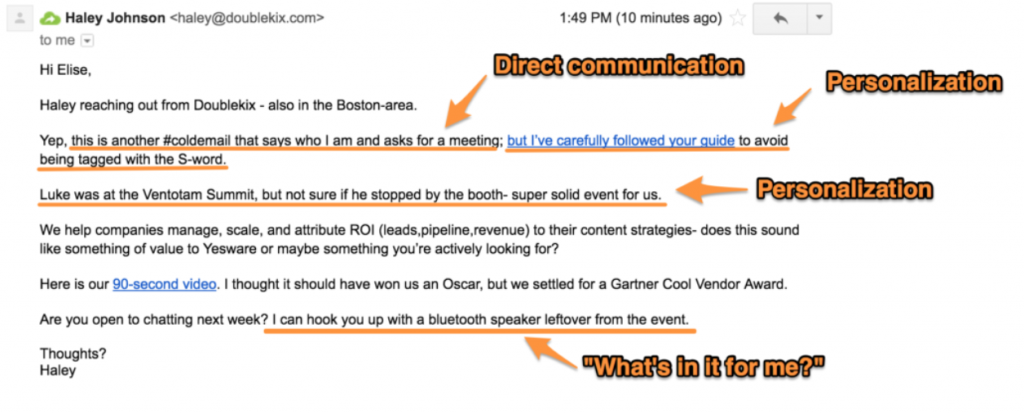
In that example, you can see deep personalization in a couple of spots:
- The reference to the recipient’s own guide to structure the email
- The reference to the event
It excels because it contains real, scalable personalization.
While this may seem overwhelming and time-consuming, it’s not.
With specific tools and tactics on GMass, you can personalize these efforts fast.
Meaning you don’t have to spend all day doing busywork or much research at all.
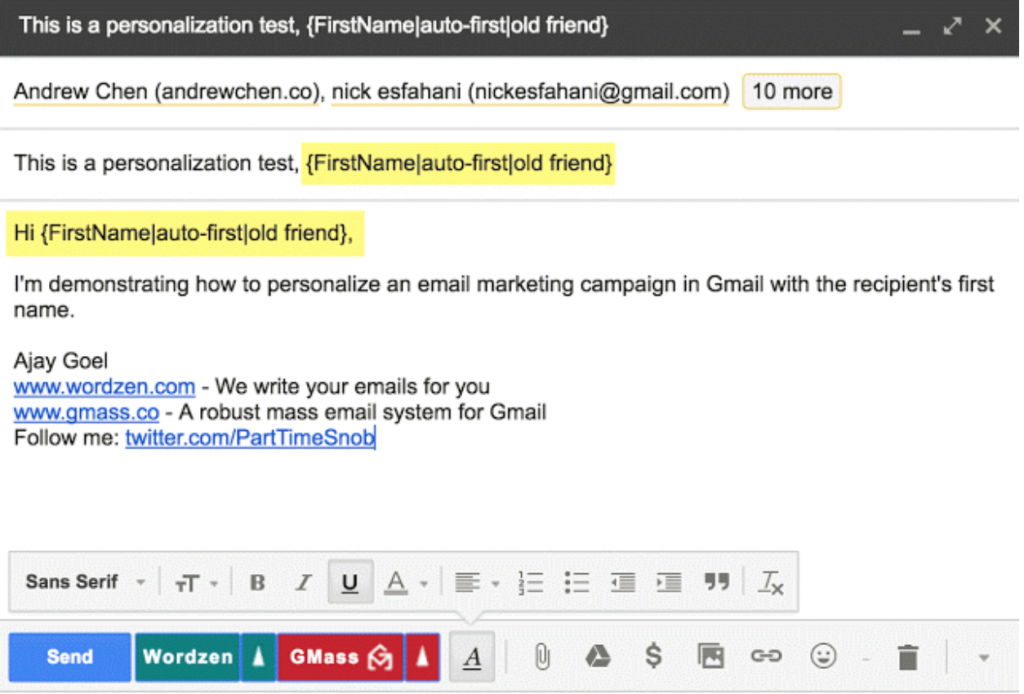
GMass has powerful, custom parameters that allow you to create any insert, similar to standard [firstname] parameters.
With GMass, you aren’t limited to basic customization of [firstname] and [lastname].
With the integration of Google Sheets, you can create any new personalization parameter you desire.
Are you ready to take your personalization to the next level with the minimum amount of busywork?
Here’s how to get started.
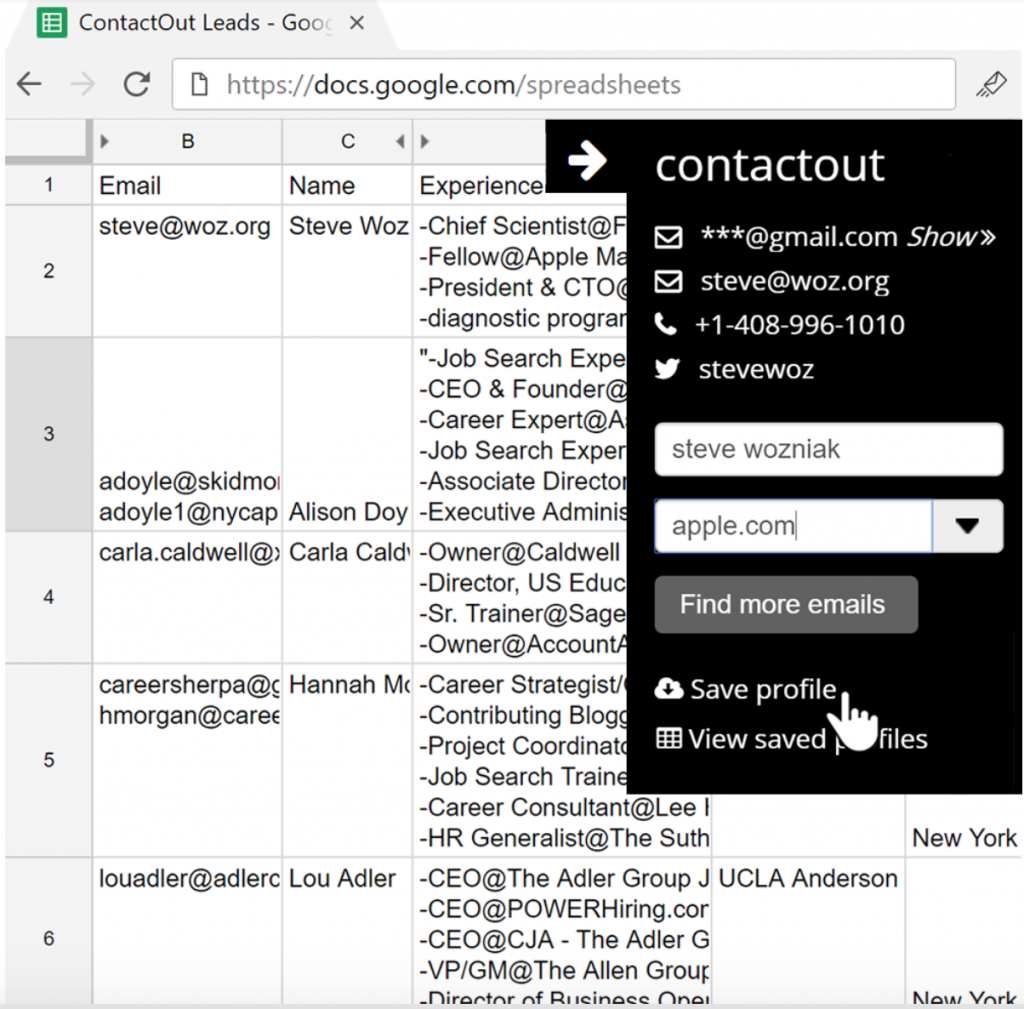
Step 1. Start with a Google Sheet
To get started with full personalization, you need a Google Sheet.
GMass allows you to do personalize at scale in any way that you want.
For example, you can set custom parameters like [favorite sports team] that GMass will utilize in the personalization process of your email.
All you have to do is set this up, and GMass takes care of the rest.
To get started, you need to develop a comprehensive spreadsheet.
The spreadsheet will contain everything from your prospects email to their first and last name, company, and any further personalization you want.
Open up a new spreadsheet and enter the basic information first:

Once you’ve done this, populate your leads into the spreadsheet.
Add in all of their basic contact and name information that would go in a standard outreach list.
From here you can add serious personalization efforts that you can really scale.
Meaning you don’t have to sit on the computer all day typing in new emails to send.
First, you just have to figure what personalization style you’re going for.
For example, do you want to tap into their favorite TV show? Their favorite book? Sports teams?
It all depends on what you’re going for with this campaign.
But I won’t leave you empty-handed.
One of the best personalization tactics follows a popular writing style called PAS:
Problem, agitate, solution.
Here’s a perfect example of PAS in action that you might recognize from reading blogs posts:
Problem: Personalization takes too long.
Agitate: But it generates higher conversion rates. You need it, but you can’t afford to spend all day on it.
Solution: Using XX tools will help you personalize in less time.
PAS is an old-school format that still applies today.
Sales Hacker published one of the best email templates of all time that follows this similar style:
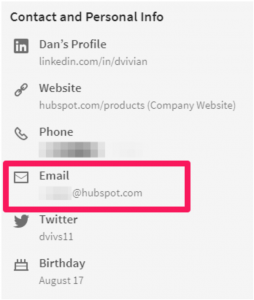
Hi John,
I’m guessing your roof got hit by the hail storm over the weekend. [Situation/Problem]
Jess, our roofing engineer, just completed a repair audit of the building next to yours (Joe’s Plumbing) and found a way to cut repair cost by 50%. [3rd party success]
Do you want me to ask Jess to drop by and take a look at your roof? [Offer]
Best,
Dan
By leading with a problem, you’re tapping into your potential customer’s pain points perfectly.
Showing that you know, care, and can help alleviate that stress from their daily lives.
Next, you showcase social proof in the form of third-party success.
You show that you’ve been able to solve that problem for others.
Lastly, you close with an offer that doesn’t require them to pay you anything up-front.
This effectively eliminates any and all risk from the equation.
And thankfully, this is highly scalable in just minutes.
To get started scaling this template, you need to outline three major things:
1. The recipient’s pain point/situation/problem
2. An example of social proof (i.e., third-party success)
3. Your offer
The great part about these three things is how scalable they are.
When you’re developing a list for outreach, you likely have the same goal in mind:
Driving them to a sale, a signup, or something of that nature.
Now analyze the problem that you’re solving with your product.
For example, if you’re selling or attempting to get signups for an SEO e-book, you’re solving the problem of low traffic numbers.
As your situation/problem, you can write:
Getting sustainable organic traffic is nearly impossible in today’s online landscape.
Next, write out your example of success. You can even draw from case studies for this:
We recently helped a company grow their organic traffic by 30% in just one month.
Lastly, outline your offer:
We crafted this amazing, free e-book to help your business get more traffic. Would you like me to send it over?
And just like that, you’ve personalized on a whole new, scaleable level.
Head back to your Google Sheet and input those three main factors. Customize each pain point to your specific lead so that no two emails are the same:

Repeat this process until you’ve filled out each lead on your Google Sheet.
Remember that you should adjust these values for each lead, too.
If you have differentiated members on your list, simply enter new problems, success examples, and offers.
The goal here is to personalize, not mass produce.
Meaning that you should tailor each problem, success example, and offer.
You can also customize this for almost any personalized topic!
For example, you can tap into your prospect’s favorite sports teams:
Hi [first name],
I noticed that you’re a fan of the [sports team]. You must be excited about their recent [win, event, etc.], I know I am.
Now you can tie that back into your problem, success examples, and offers.
The options are limitless.
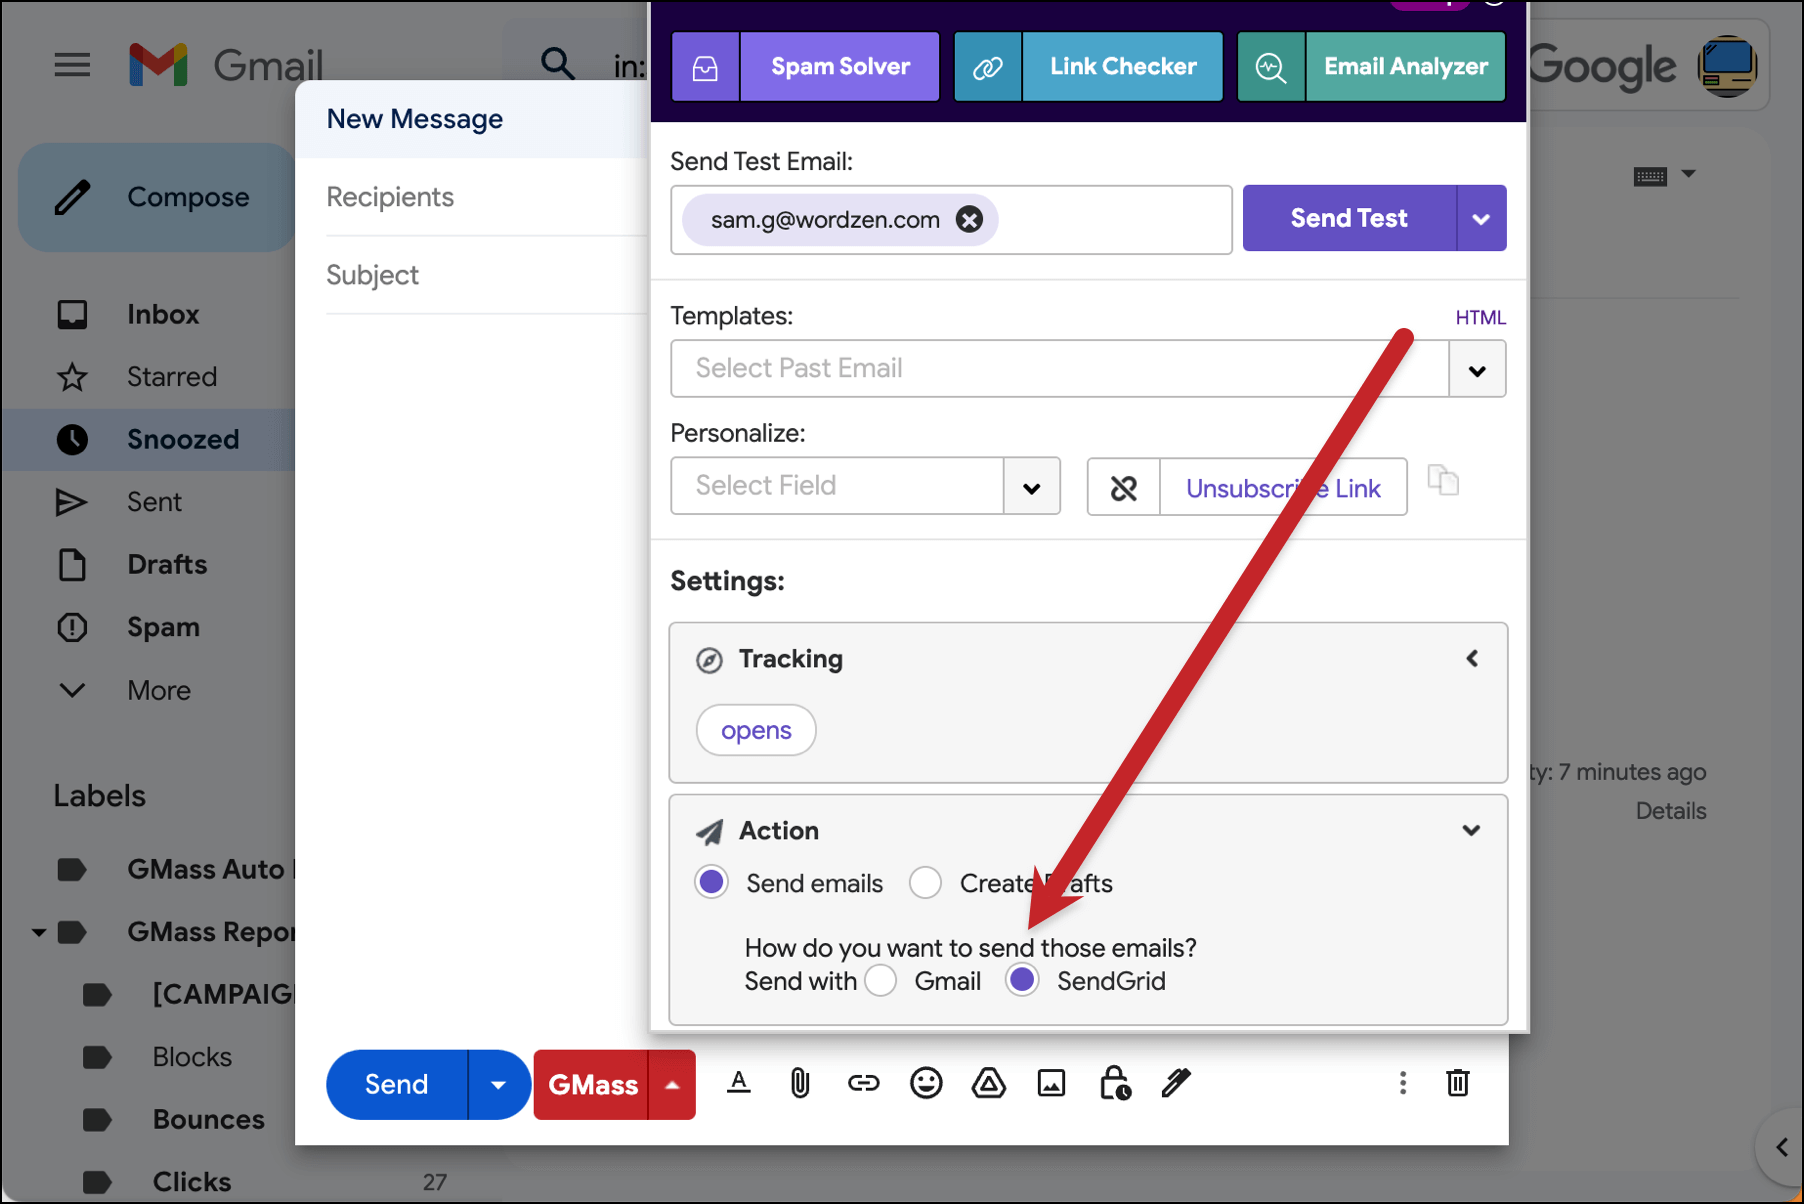
Once you’ve done that, it’s time to integrate it directly into GMass to save you tons of time and effort.
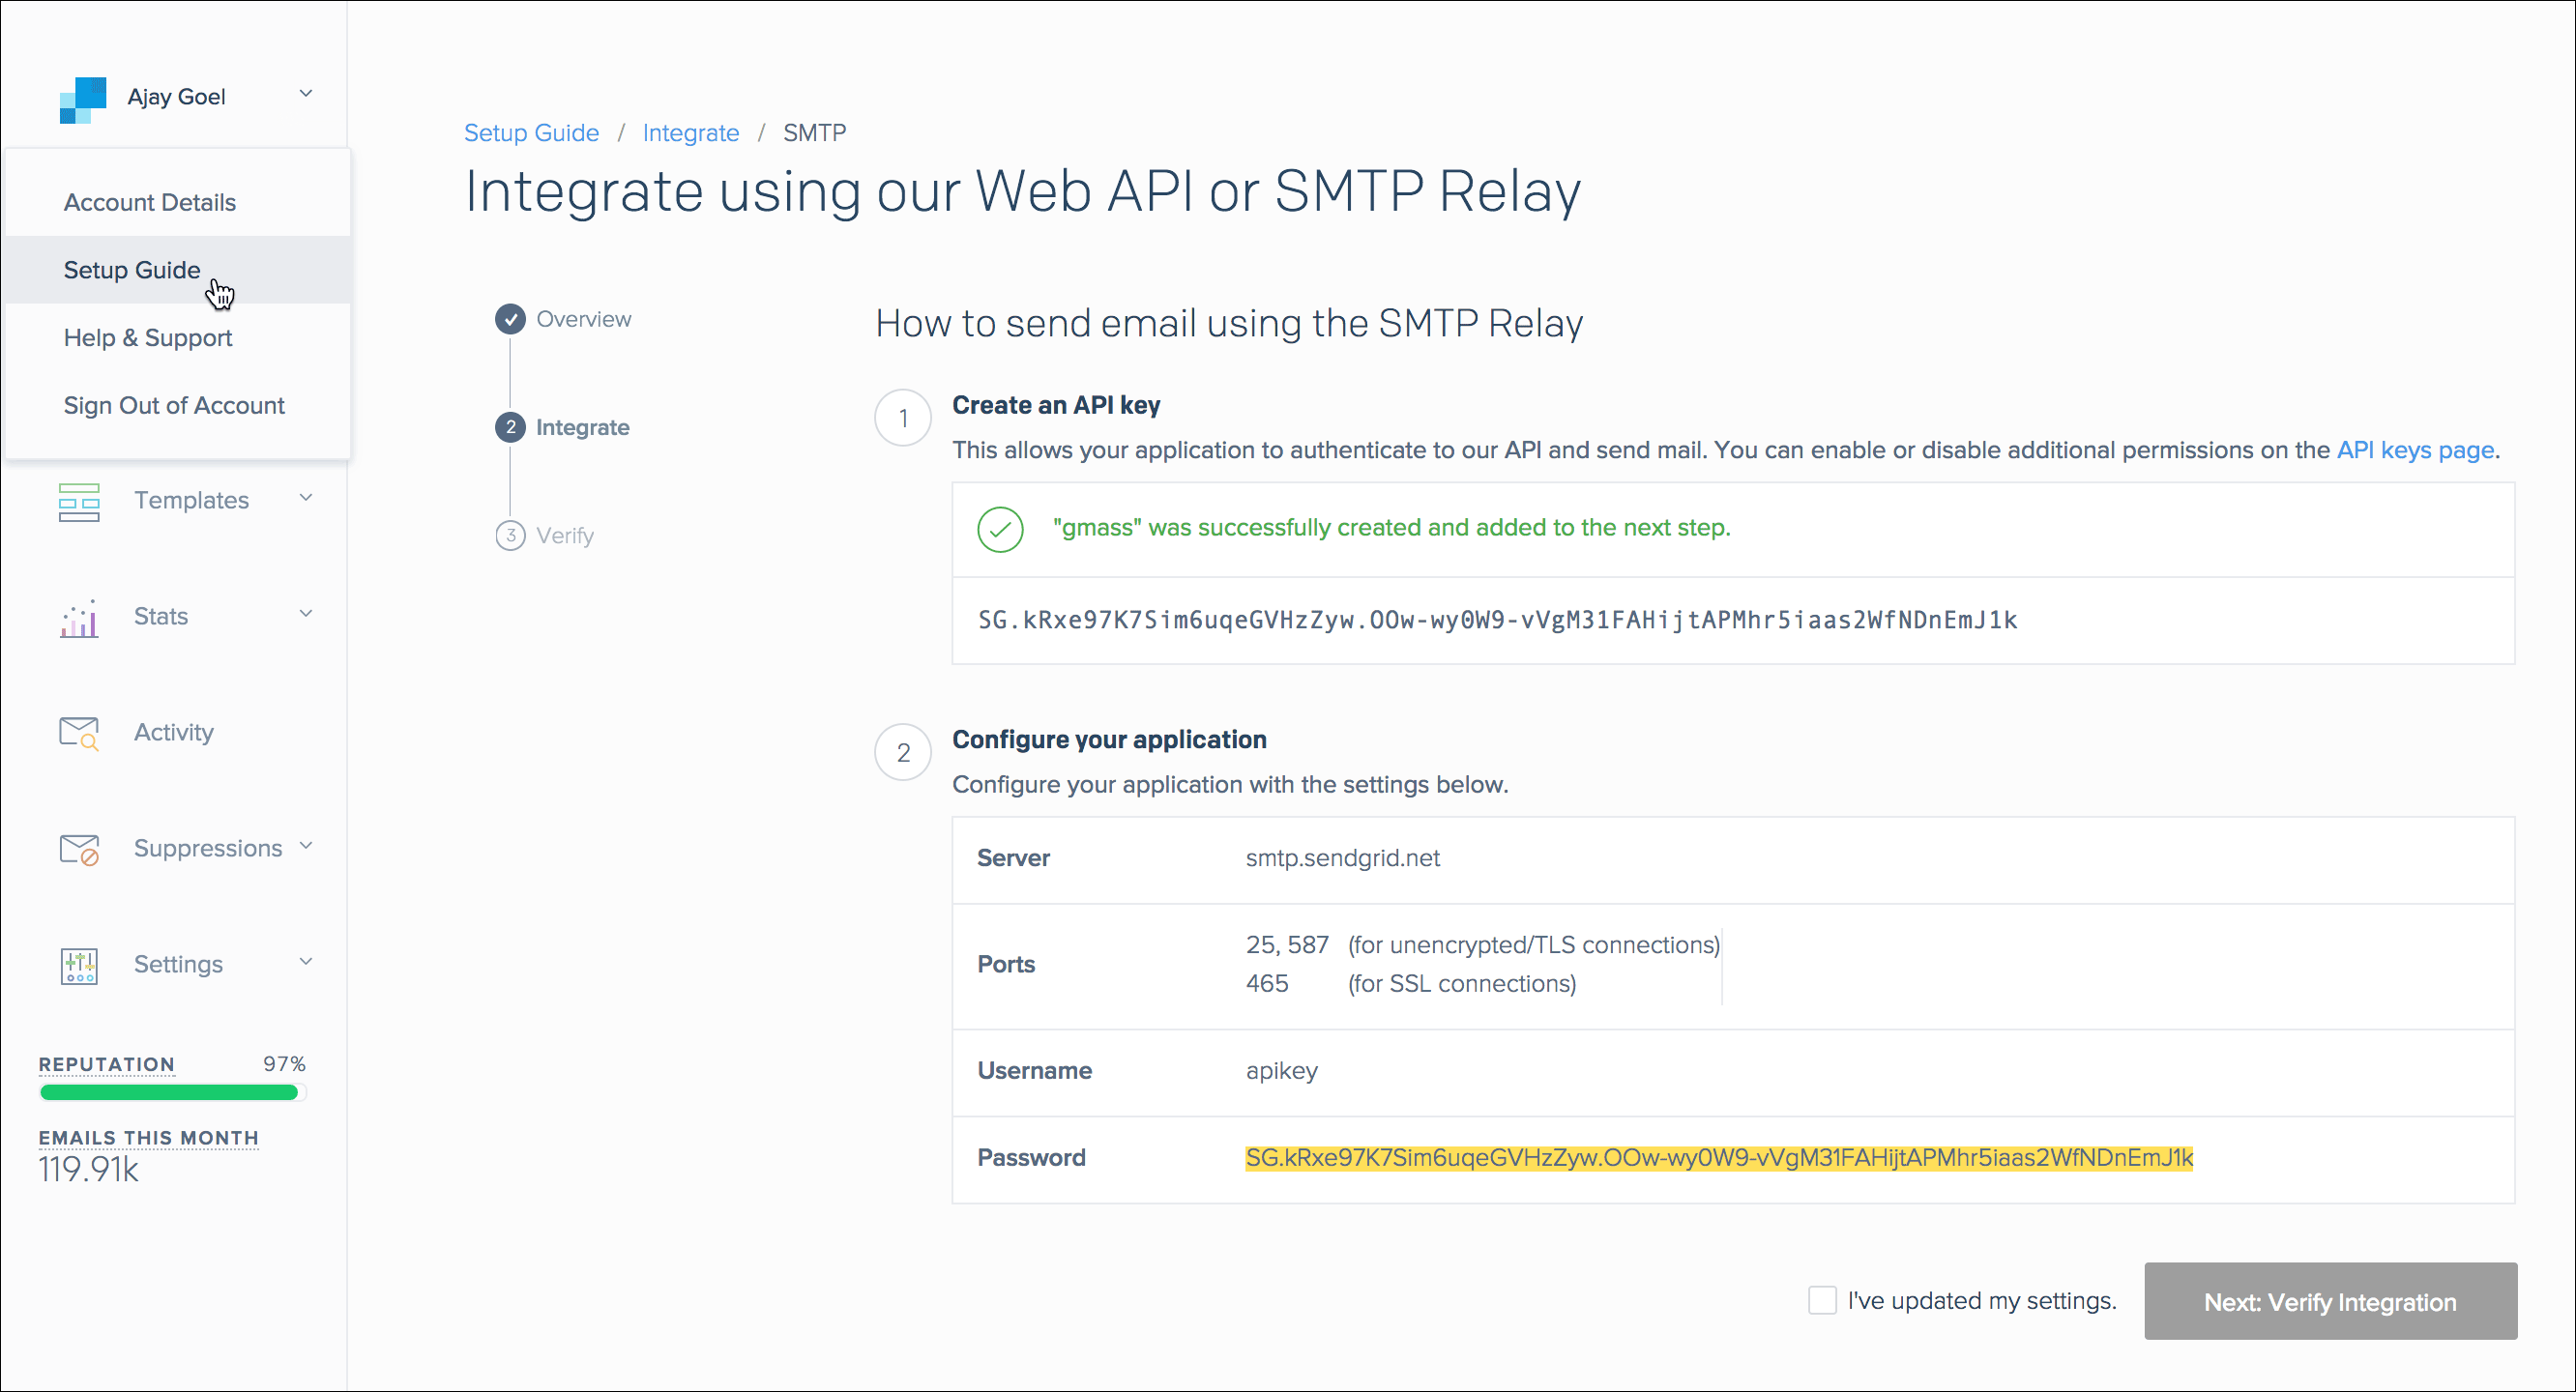
Step 2. Integrate your Google Sheet with GMass
After you’ve compiled your scaleable outreach document, head to your Gmail account and click on the Google Sheet integration:
Select the spreadsheet of your leads that you just created and upload that into GMass.
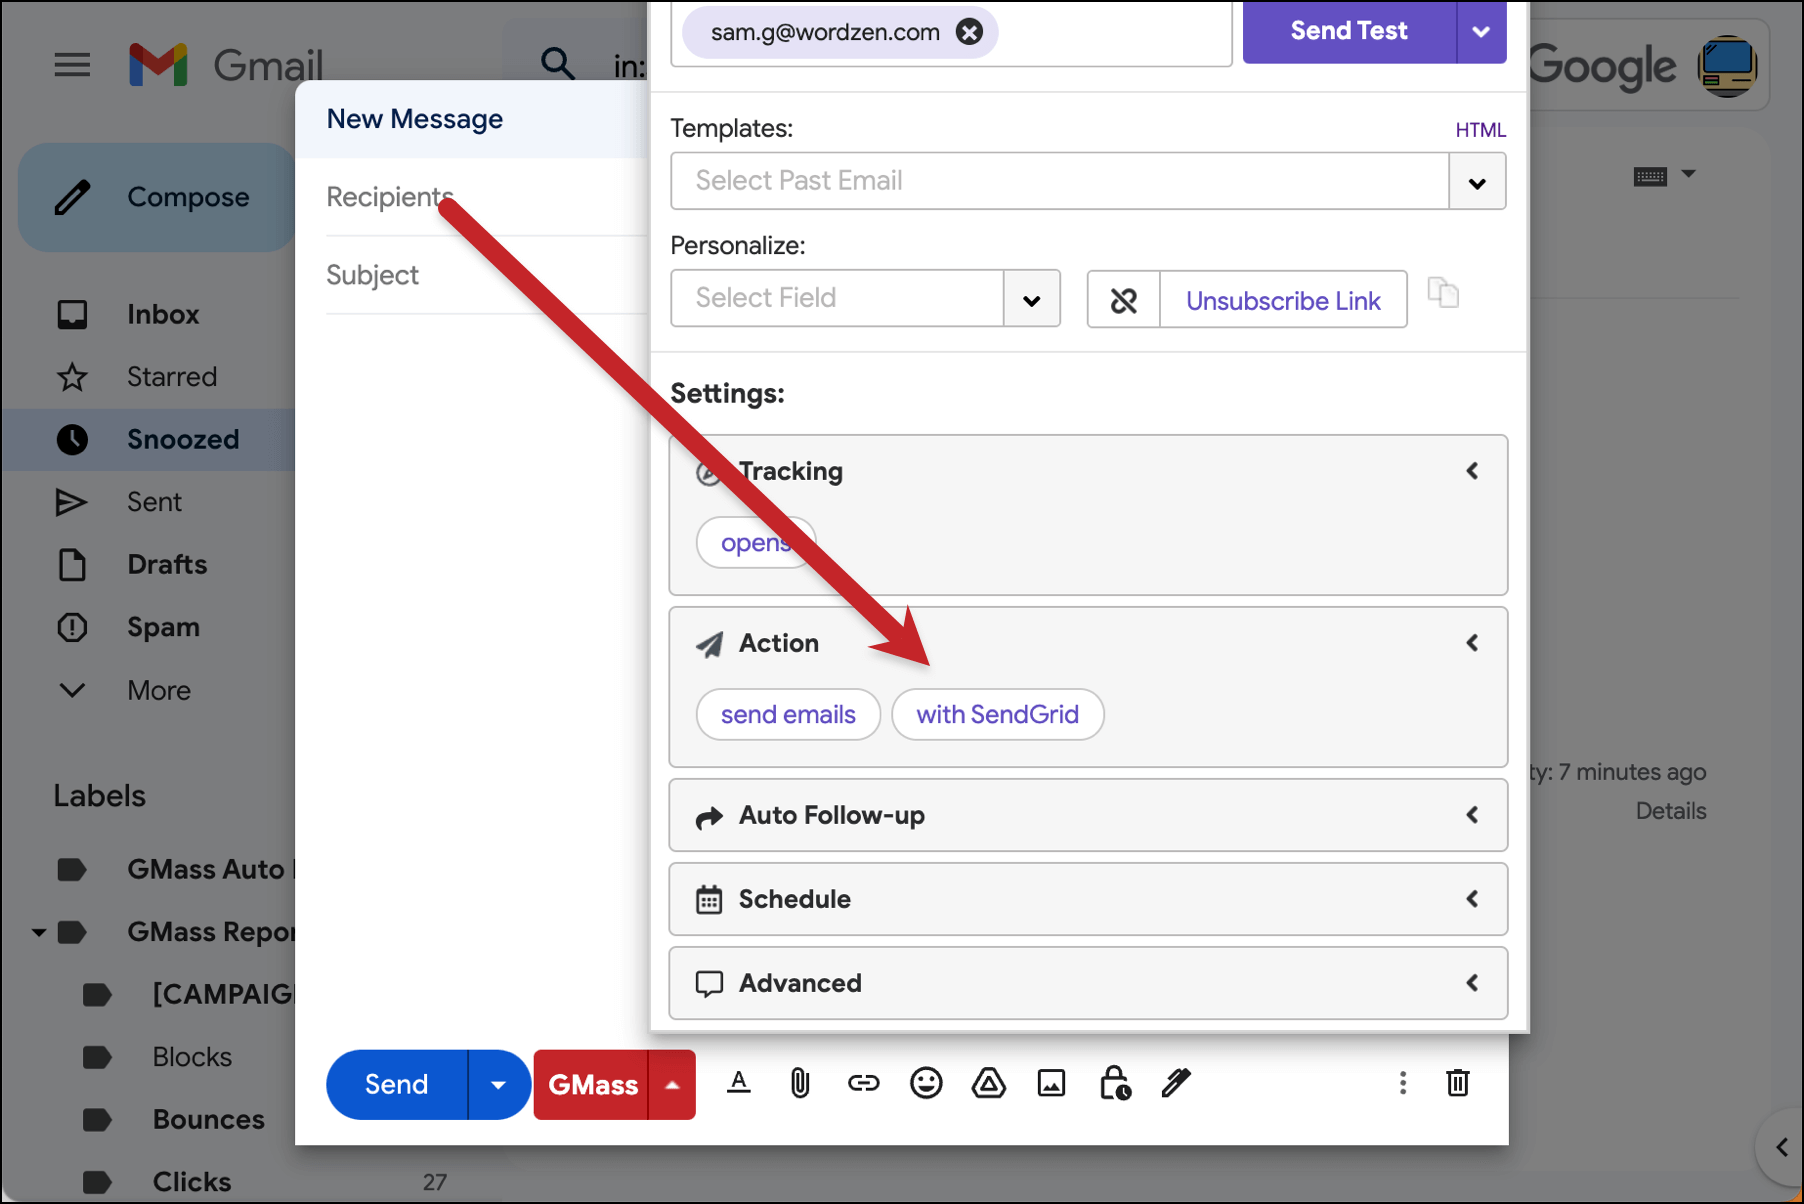
From here, navigate to the personalization settings and make sure that your custom parameters loaded properly:
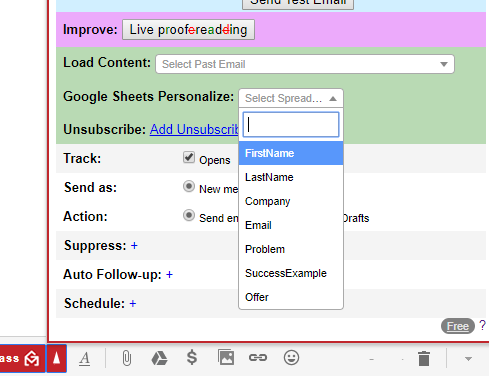
You should see “Problem,” “SuccessExample,” and “Offer,” or whatever custom parameters you chose to create.
Now, use these new parameters and craft a perfectly personalized email for each member of your list.
Insert those custom parameters amongst your text to differentiate each email.
Step 3. Schedule out your campaign
The next step is to schedule out your campaigns for the best success.
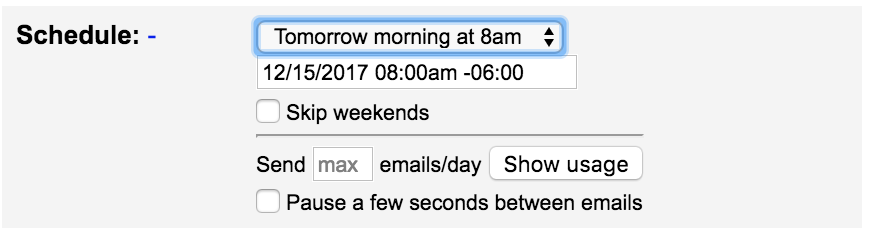
On GMass, click the settings arrow to pull up your dashboard.
From here, select to schedule out your emails for a specific date and time.
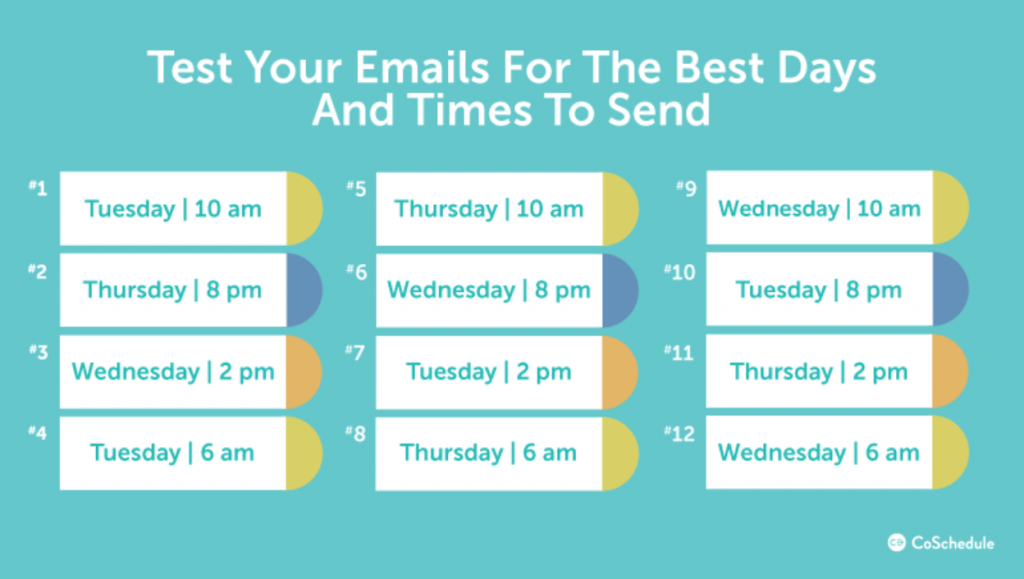
According to CoSchedule, the best time and date to send an email is Tuesday at 10 a.m.
Be sure to schedule your email campaign in advance for the best performance possible.
I personally recommend cutting your email list into two separate Google Sheets.
This will allow you to test two different times to see which performs best.
It’s a small scale A/B test that can give you some powerful insight into how timing will impact your success with your targets.
Lastly, you need to automate if you want to reduce busywork.
Here’s how.
Step 4. Set up auto responses
Drip email campaigns are the bread and butter of automation and time-saving tools.
Personalization takes a long time.
Especially when it’s genuine.
And we know that genuine content and messaging get the best results.
But sending multiple campaigns is busywork.
It’s boring, tedious, and takes hours of manual labor.
Thankfully, you can automate your campaigns with GMass to keep sending emails if certain targets aren’t responding.
Unfortunately, not all leads will respond to the first contact email.
Meaning you need an automated system to send multiple emails until they do respond.
In GMass, you can quickly set this up for your new personalization-based campaign.
Before you send your next campaign, head to the GMass settings and enable the auto follow-up feature:

This will allow you to create multiple “Stages” of emails directed at targets who aren’t responding:
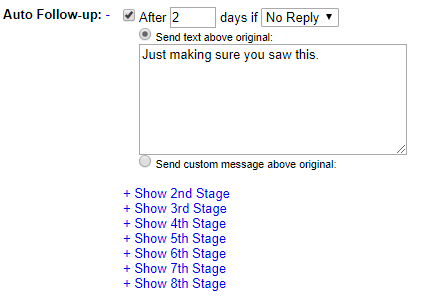
Customize each stage with the goal of getting them to come back and respond.
This should save you tons of time and money that you would otherwise spend writing replies to all your leads.
Final thoughts…
Personalization is necessary.
We all know that.
But it takes far too long to implement in a scalable way.
It takes real research to personalize beyond typical [first name] parameters.
And research takes time that you simply don’t have to waste or offer.
You need to focus on a few personalization tactics that will net you the majority of your results with the least amount of busywork.
The way to start is by creating a customized spreadsheet with all of your lead contacts.
In this spreadsheet, focus on detailed personalization parameters that you can customize.
For example, you can add favorite sports teams, tv shows, books, or anything you can think of.
Try combining that with a formulaic approach that focuses on solving the user’s problem.
Implement this into a new, schedule-based campaign that incorporates drip emails.
It should only take you an hour to set up for hundreds of leads, leaving you the entire day to sit back and watch the responses flood in.
Personalization is changing daily, and keeping up is stressful. Put these tips to use and develop better personalization that lands clients in less time.
Ready to transform Gmail into an email marketing/cold email/mail merge tool?
Only GMass packs every email app into one tool — and brings it all into Gmail for you. Better emails. Tons of power. Easy to use.
TRY GMASS FOR FREE
Download Chrome extension - 30 second install!
No credit card required
Ajay is the founder of GMass and has been developing email sending software for 20 years.
Love what you're reading? Get the latest email strategy and tips & stay in touch.


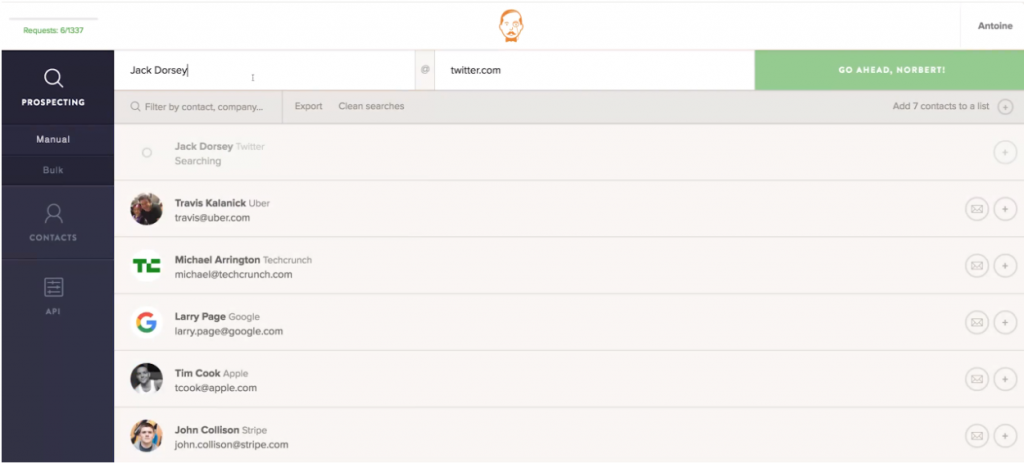
 To get started, create your free account and get 50 free lead searches.