<img height="1" width="1" style="display:none" src="https://www.facebook.com/tr?id=1822615684631785&amp;ev=PageView&amp;noscript=1"/>

A Google Sheets mail merge is the best way to send a personalized email campaign (of any size) through Gmail.

Whether you need to…

  • Send personalized emails at scale.
  • Cold outreach to 500 (or 1,000. Or 50,000!) prospects.
  • Reach out to 200 job candidates.
  • Invoice 50 clients.
  • Invite 25 friends to a party.

Whatever the case, you’re wound up here with me today because you know mail merge is the answer — and you can just kinda sense that Google Sheets and your Gmail account are the ideal tools to make it happen.

They are. We just need to point you in the right direction.

In this article, I’ll walk you through the four methods you can use to send a mail merge with Google Sheets.

I’ll help you figure out which method is right for you — and I’ll even give you a step-by-step guide to sending a mail merge in five minutes flat.

Google Sheets Mail Merge: Table of Contents

What Is Mail Merge?

Just to make sure we’re all speaking the same language before we begin, let’s take a quick moment to define mail merge.

Mail merge takes data from a spreadsheet or other database of contacts and automatically inserts each person’s unique info into a template — creating personalized, individual versions for each of them.

Instead of you having to manually copy and paste 100 first names and 100 personal messages into 100 emails, mail merge does it in seconds.

Each person receives their own message with their specific details.

And yes, “mail merge” is a completely antiquated sounding term but no one has come up with anything better… so we roll with it.

Using mail merge in email

This is what you’re probably here for.

A Gmail mail merge means each contact in your Google Sheet gets their own personalized email — with their name, company, custom pricing, or whatever other data you want in the message.

The key: Recipients see a normal email addressed just to them. There’s no evidence of mass sending and no other recipients visible. It looks as if you personally typed out the message.

You can merge data into subject lines, body text, links, images, and more — pretty much anywhere in an email. The more sophisticated your mail merge tool, the more you can personalize.

Using mail merge for documents, address labels, and the like

Mail merge isn’t just for email.

You can also use spreadsheets to create personalized documents in Google Docs or Microsoft Word — think certificates, letters, or contracts.

The same principle applies here as it did with email: One template, many personalized outputs.

This works for physical printed documents too, like wedding invitations with guests’ names and addresses, shipping labels for your online store, or name tags for events.

If you need to create multiple versions of something with different data, mail merge handles it.

In this article, we’re just focusing on email mail merges. We have other blog posts if you’re looking, say, to figure out how to use Google Docs for mail merge.

Your Four Choices for a Google Sheets Mail Merge

There are four primary methods to use a Google Sheet of data in an email mail merge.

Each has its pros and cons, depending on what you’re trying to accomplish.

Here’s the breakdown.

1. Using a Gmail Chrome extension

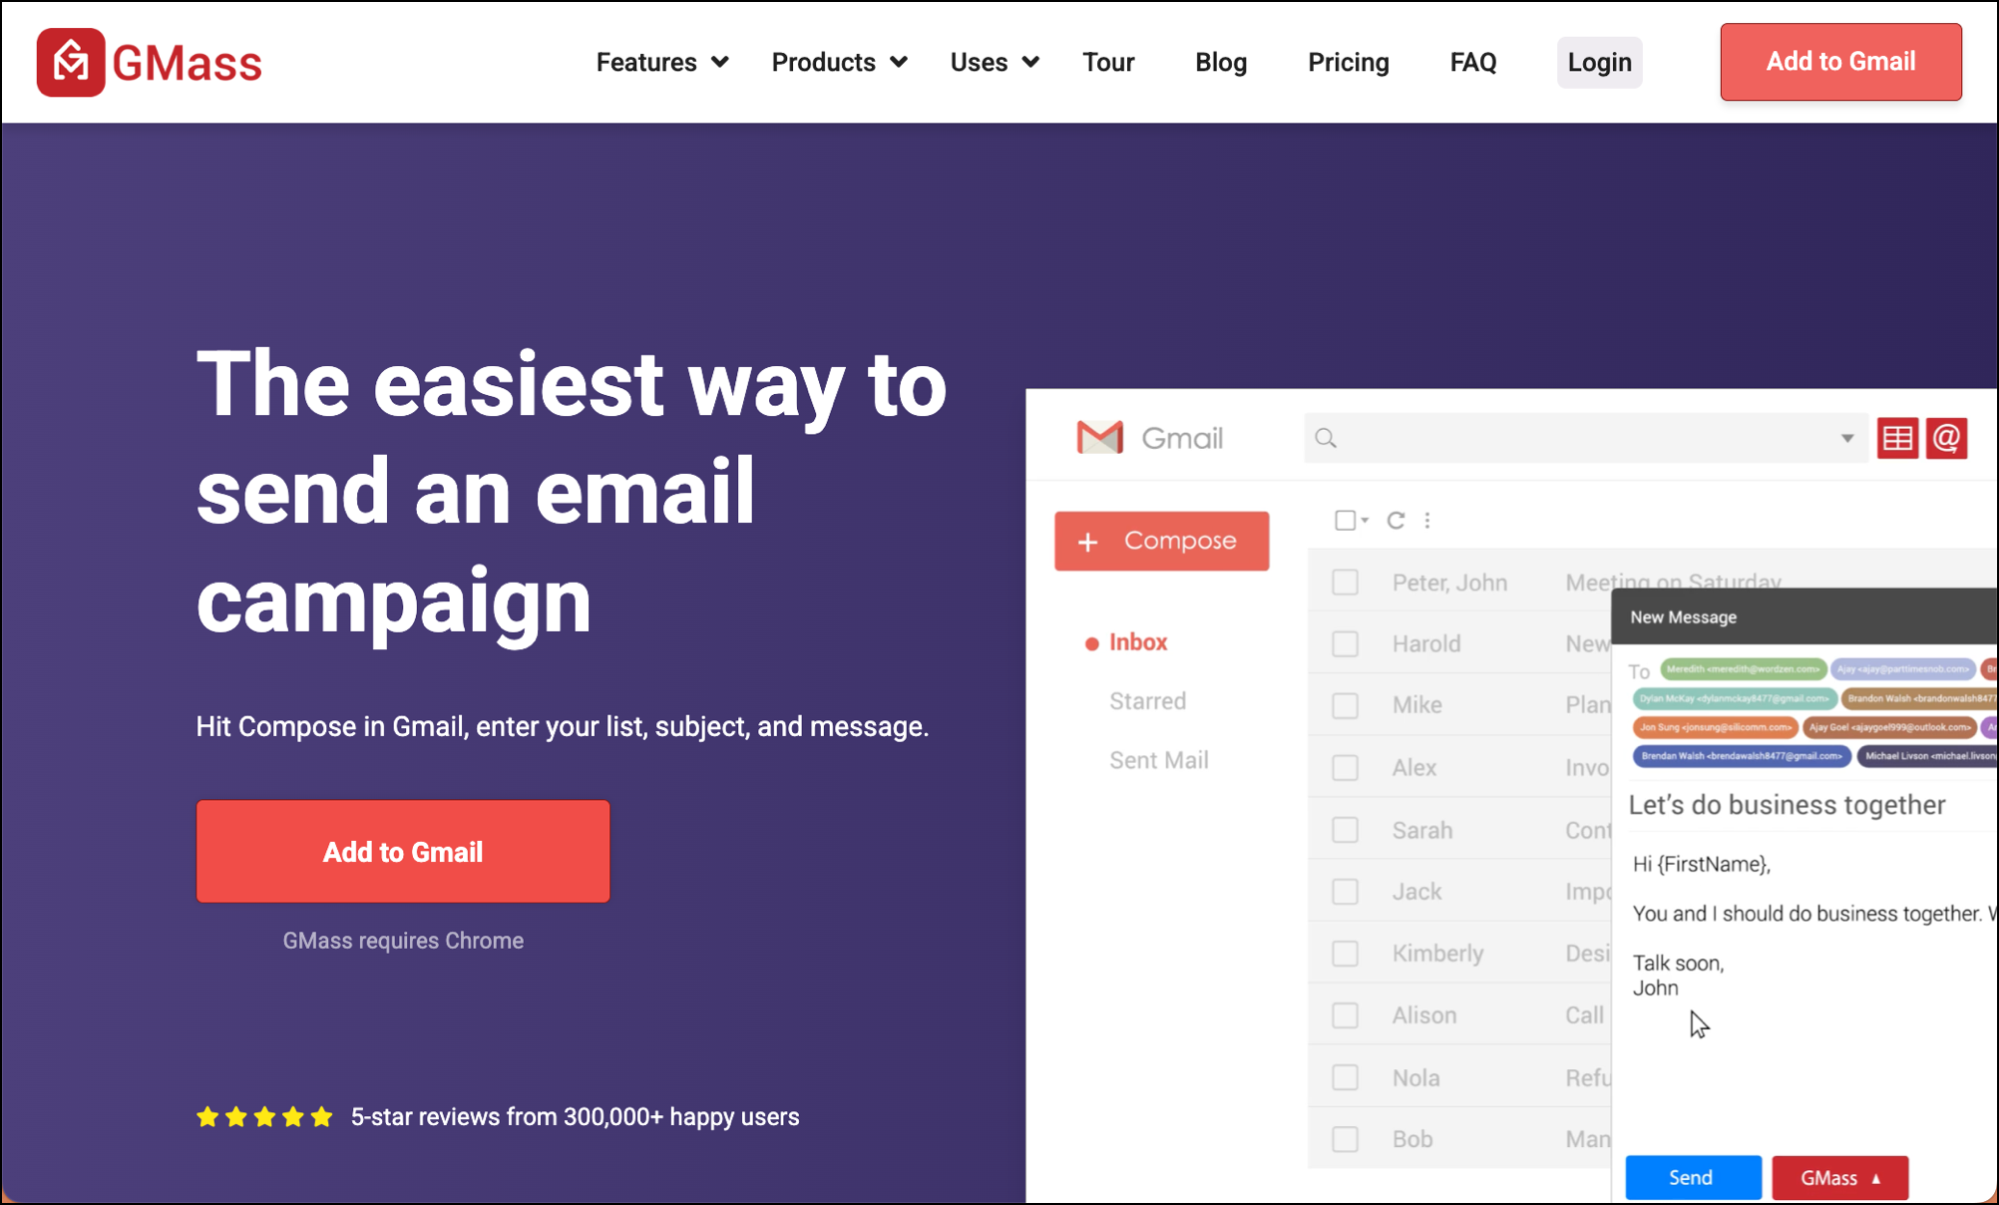
If you’re looking for the highest-quality mail merges or you’re doing anything professional or where quality is non-negotiable, you’ll likely wind up using a Chrome extension to add mail merge features to Gmail.

Chrome extensions like GMass (which was the original Gmail mail merge extension), Yesware, and Mixmax work right inside Gmail.

You connect your Google Sheet, compose in the regular Gmail window, see drafts in the regular Drafts folder, and see your sent messages in the Sent folder.

Again, the goal of Chrome extensions is turning Gmail itself into a mail merge platform.

Top 3 pros

  • Works where you already work. No learning new interfaces. You’re literally using Gmail’s compose window, just with new, extra powers.
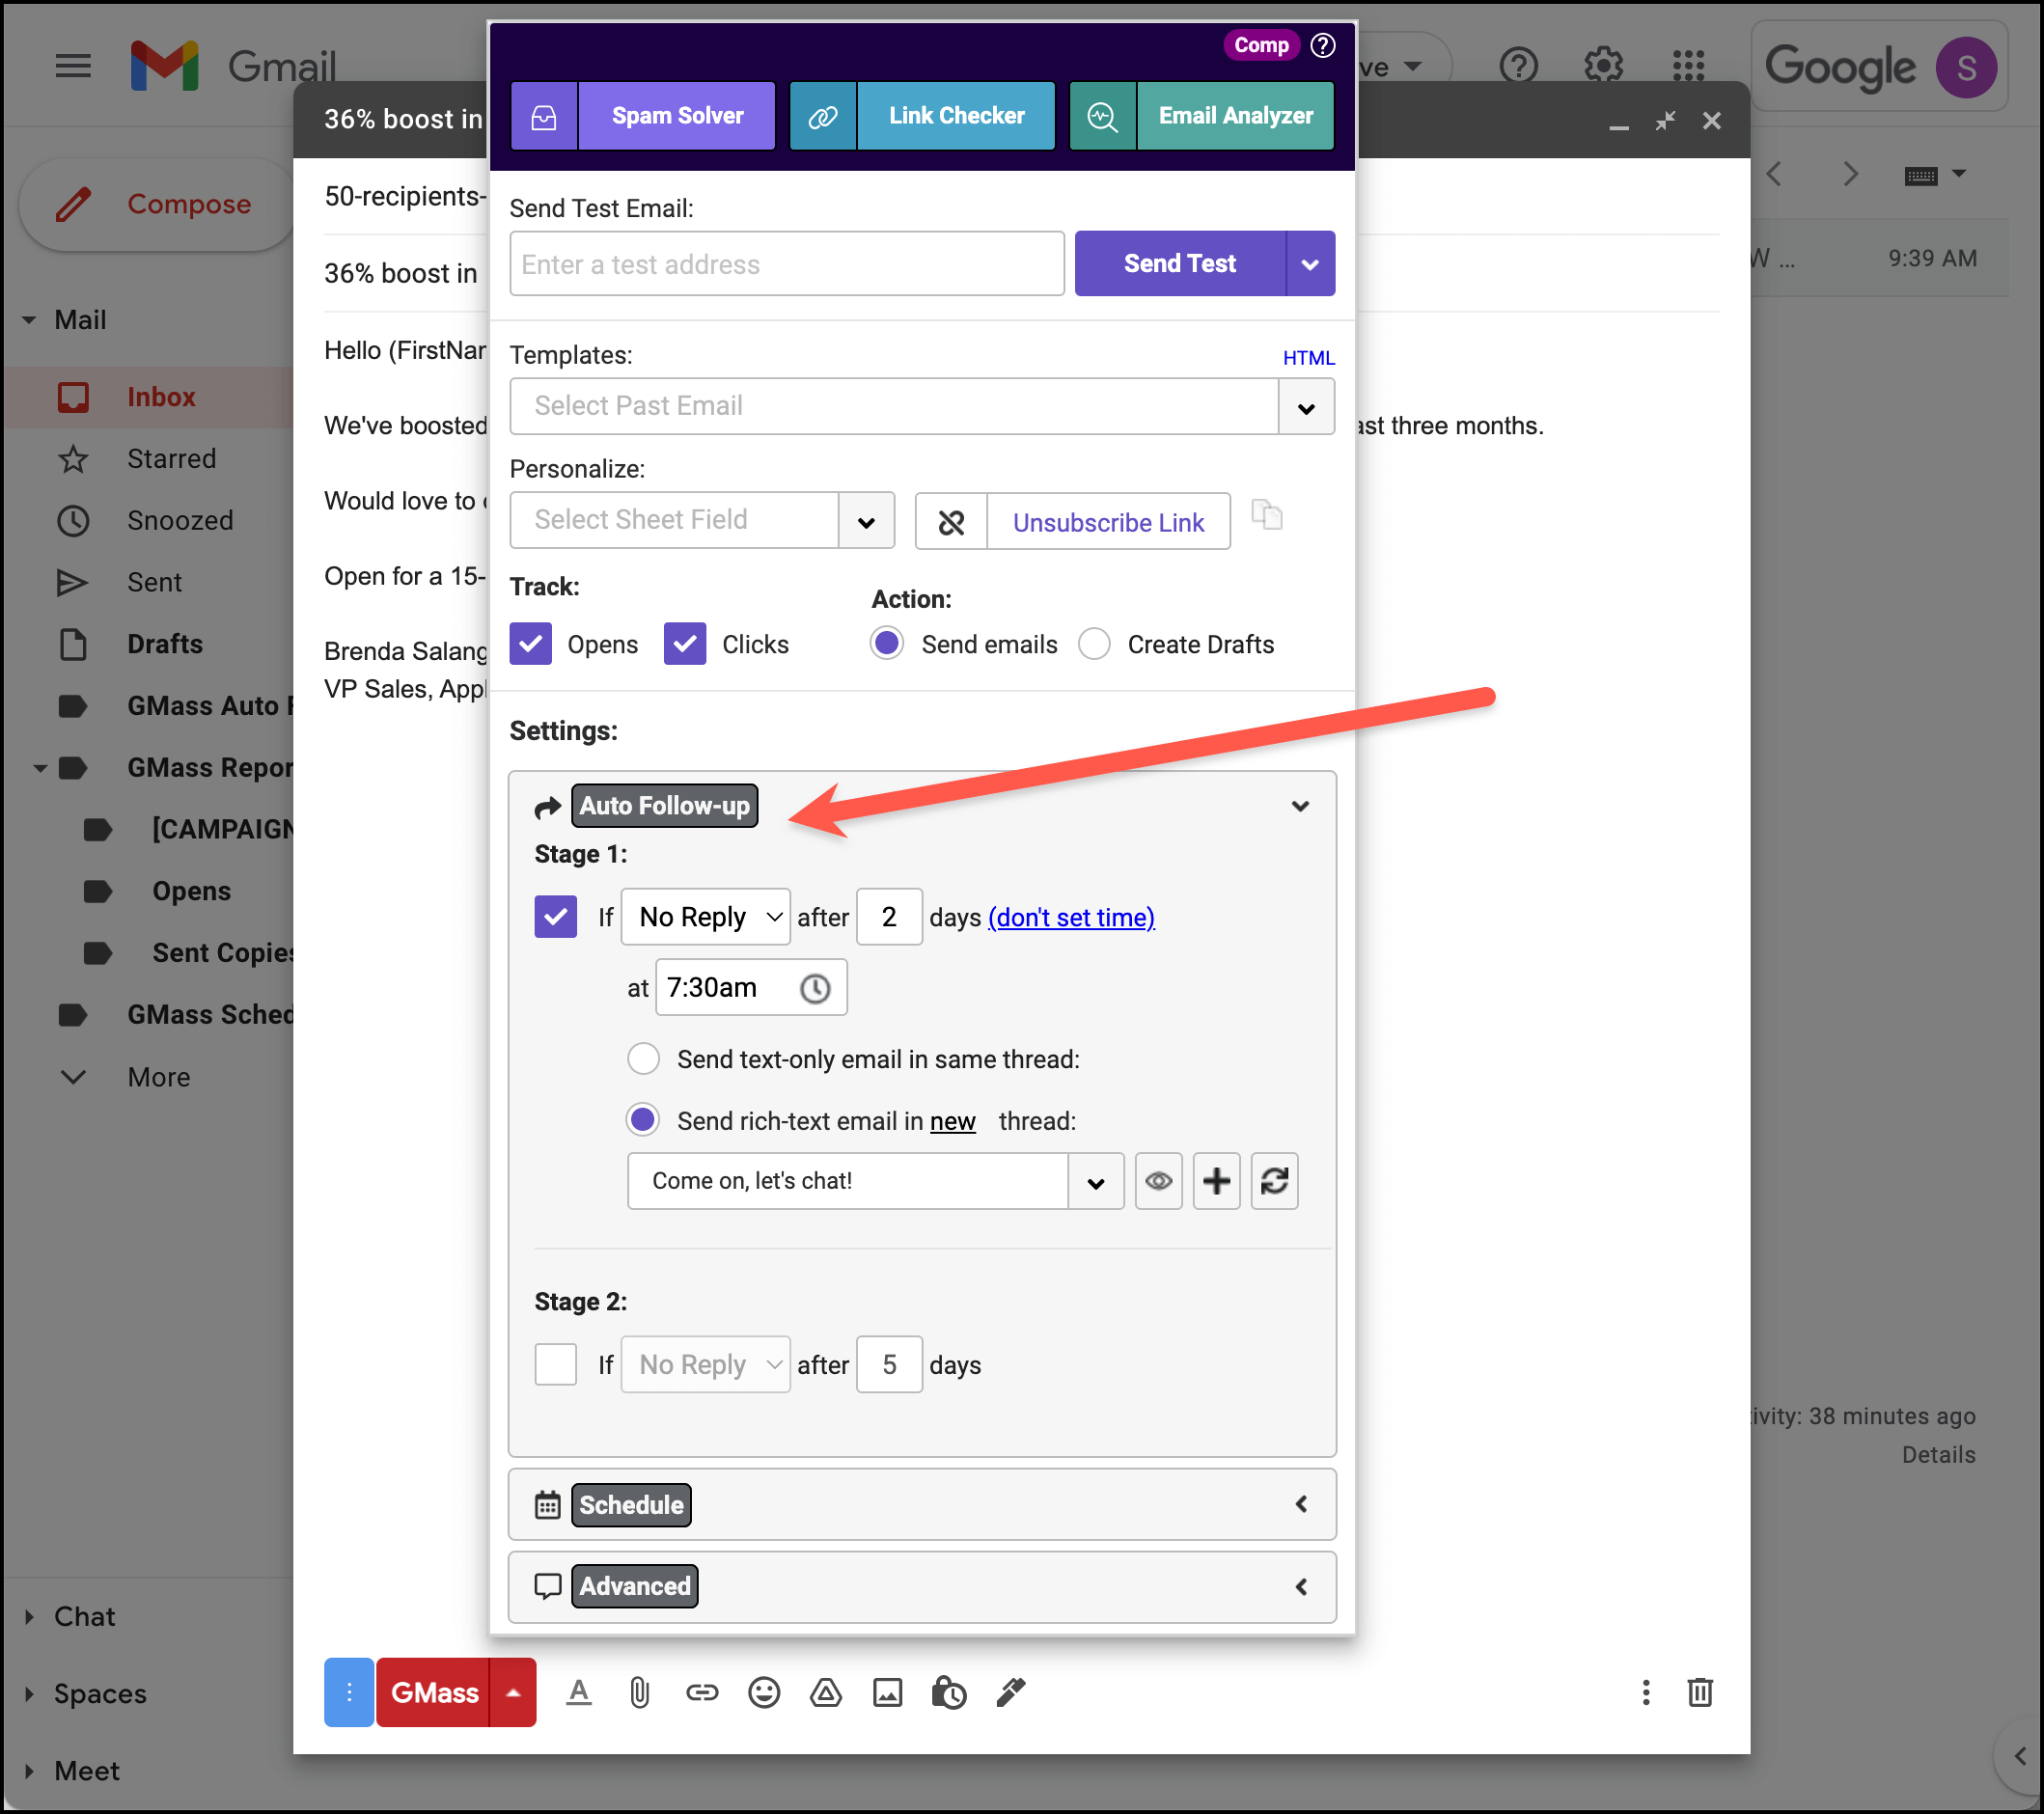
  • Most feature-complete option. Extensions generally include automated follow-ups, scheduling, deliverability tools, analytics — everything you need for professional campaigns.
  • Fastest setup to sending. Install extension, connect sheet, send. Under 5 minutes from start to campaign launch. (Stay tuned in this article to try that yourself!)

Top 3 cons

  • Desktop and Chrome only. Chrome extensions only work in Chrome, and only on the desktop. You can’t create campaigns from your phone. (Though you’ll be able to do things like check campaign analytics on mobile)
  • Costs money for professional use. Free trials exist, but you’ll pay $25+/month for real sending volumes through GMass. (Or way more for Mixmax or Yesware, as they also include significant sales team features.)
  • Gmail exclusive. If you use Outlook or another email client, this won’t work for you.

2. Using a Google Sheets add-on

Google Sheets add-ons

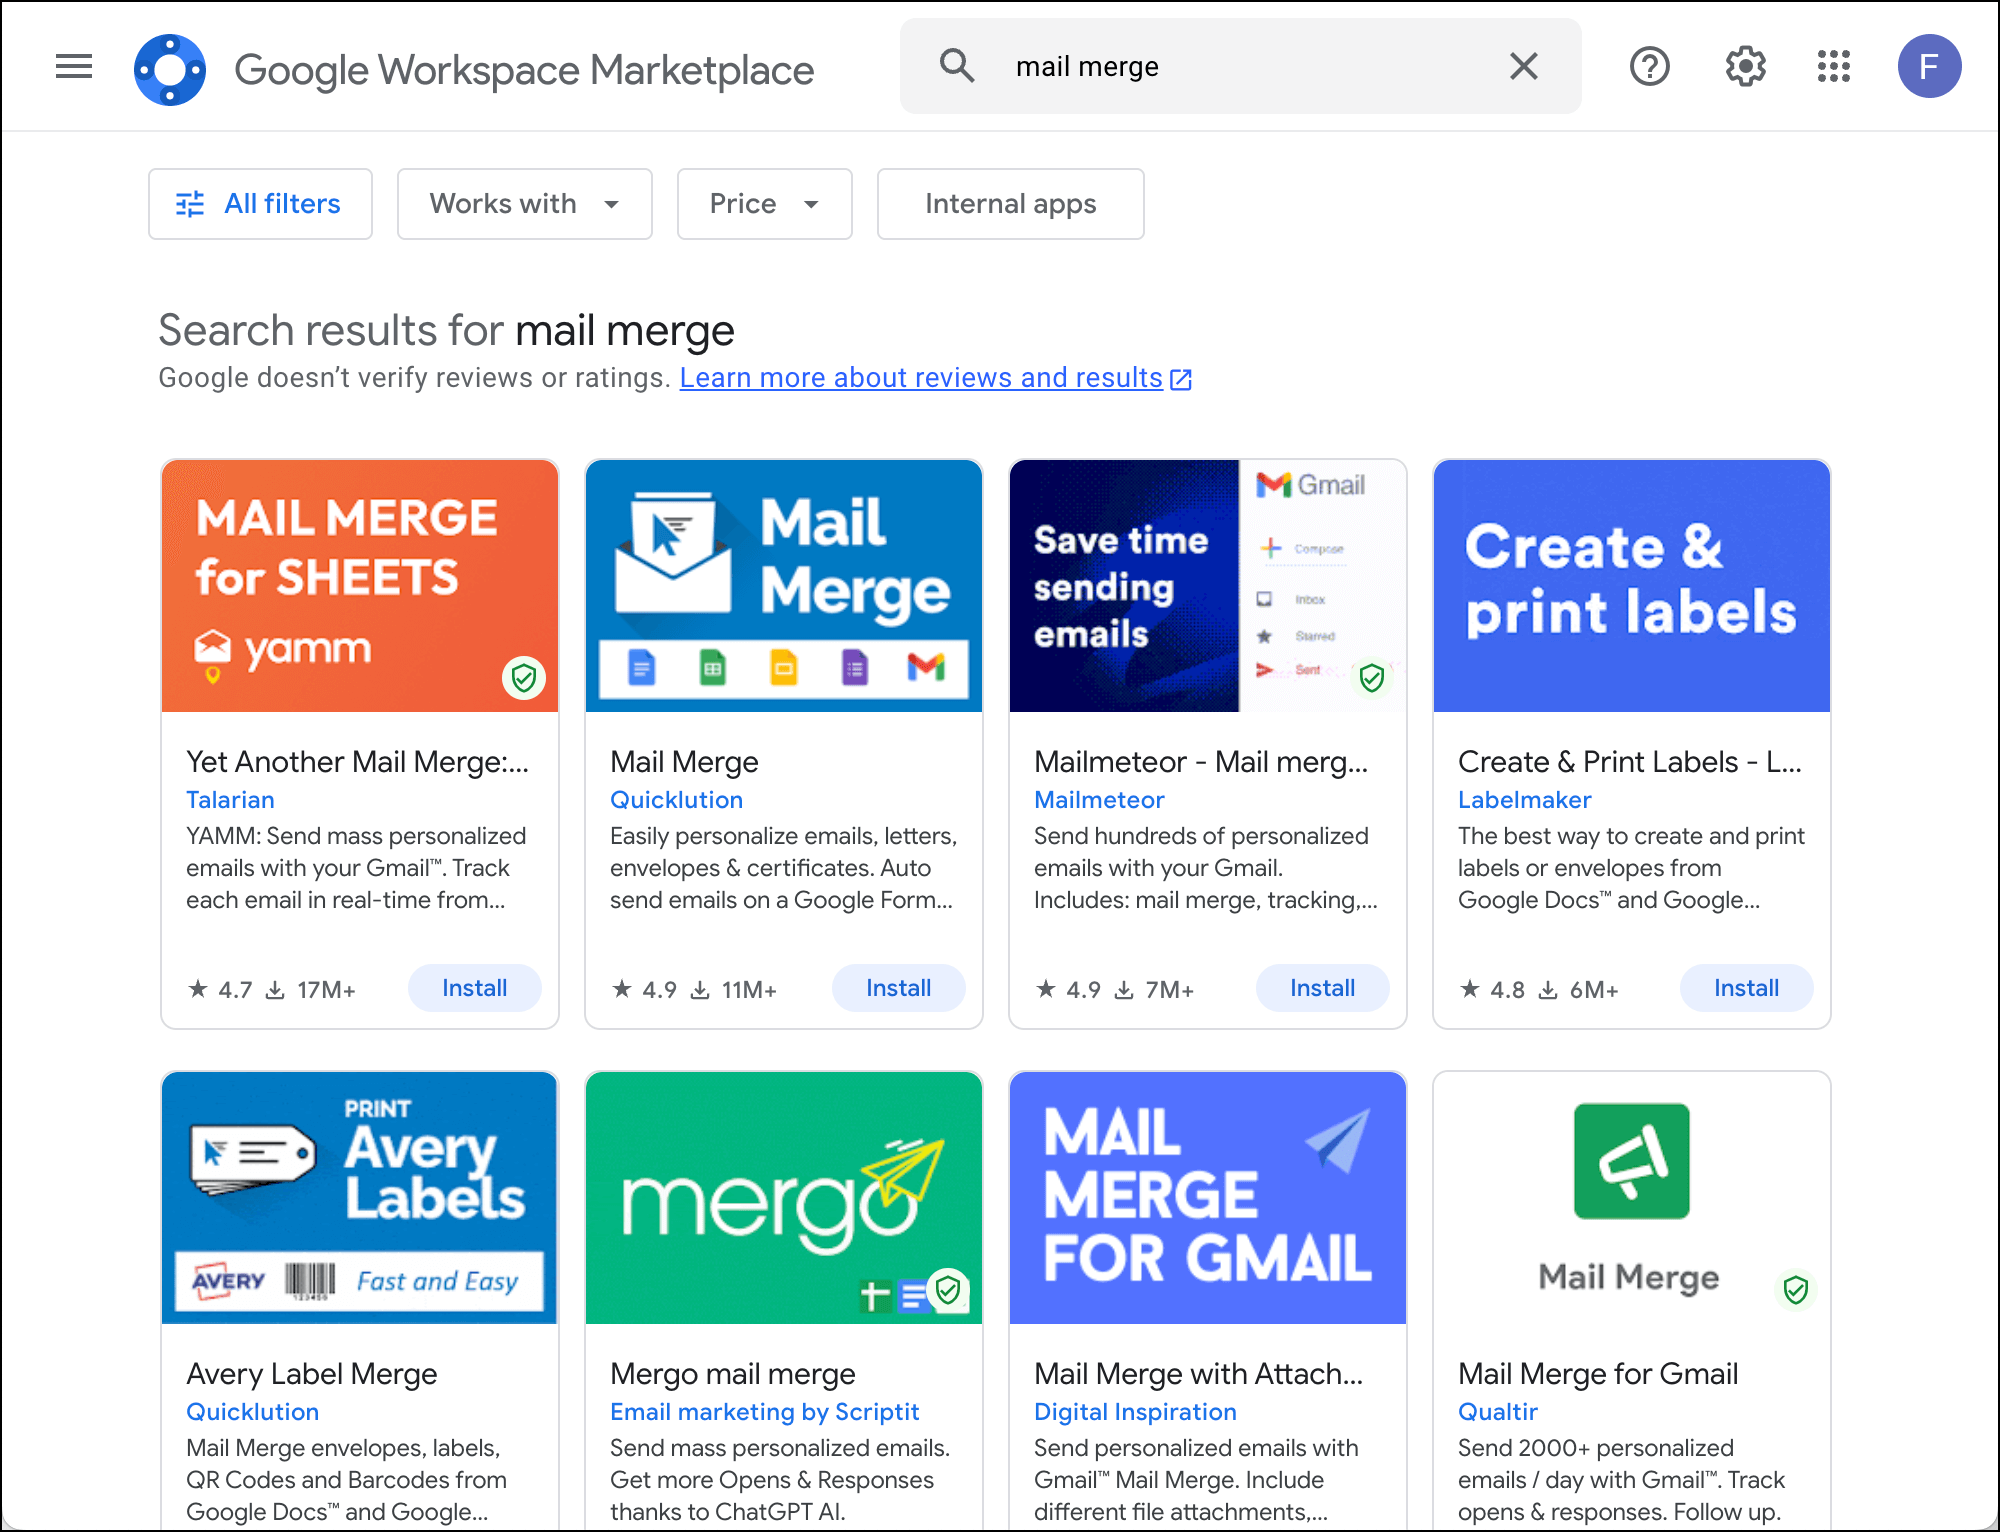
Add-ons like YAMM (Yet Another Mail Merge), Mailmeteor, and Mergo operate from inside Google Sheets. You set up and send campaigns from inside your spreadsheet rather than inside Gmail. (Though there is some going back and forth to Gmail.)

Top 3 pros

  • Cheap plans available. Add-ons for Google Sheets mail merge are much less powerful and include way fewer features than the Chrome extensions. As a result, they’re usually (though not always) cheaper.
  • Works in some browsers besides Chrome. Workspace add-ons play nicer with other browsers than Chrome extensions, so you can likely send your mail merges from Firefox and others.
  • Sometimes you just need the simplest tool. If you just need names merged into emails, these tools handle it fine.

Top 3 cons

  • Limited features. As I said before, the add-ons are underpowered — while the Chrome extensions are essentially full-featured email sending platforms. The add-ons lack features like auto follow-ups, advanced scheduling, and deliverability tools. You get basic mail merge and that’s it.
  • Clunky workflow. Bouncing back and forth repeatedly between Sheets and Gmail to compose, preview, and send feels disconnected.
  • Low sending limits. Even paid plans often cap you at 400-1,500 emails/day.

3. Using Google’s built-in mail merge tool

Google's built-in mail merge

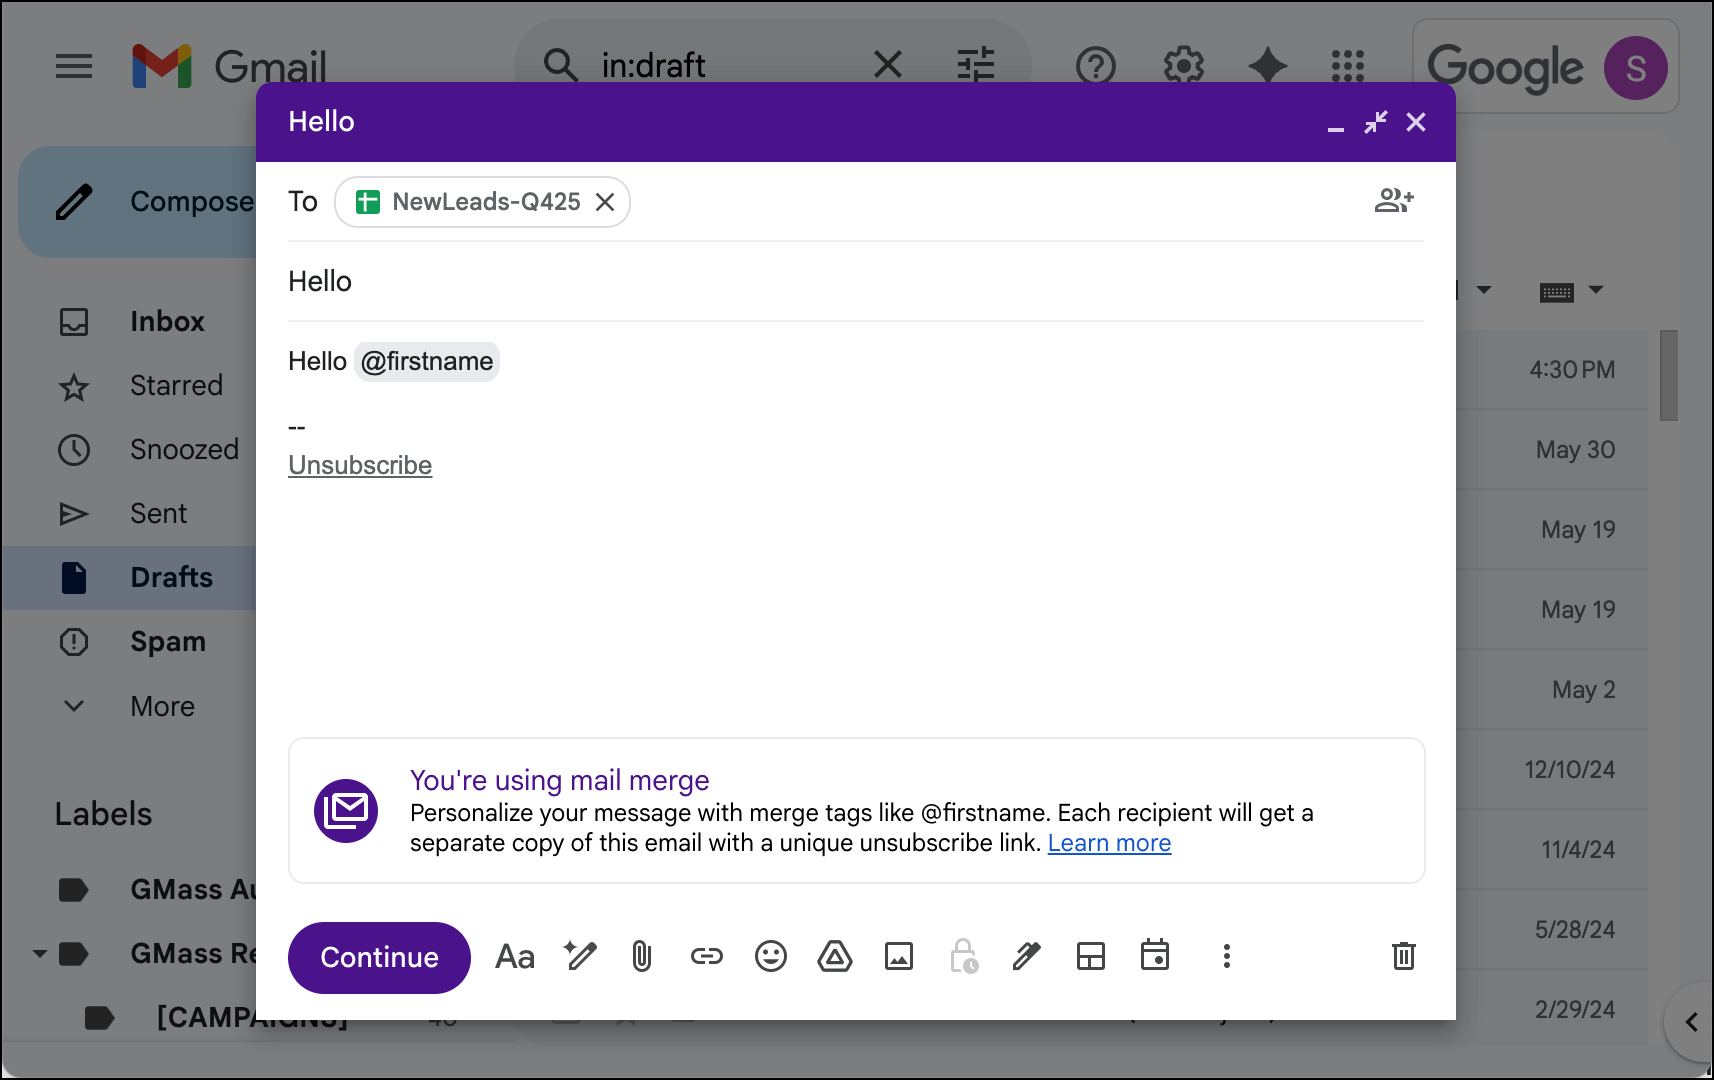
Google added native mail merge to Gmail in 2023. You probably didn’t know that because they gave the release zero fanfare and still essentially never promote the tool (**cough** there’s a reason **cough**). It’s included with certain Workspace plans.

Top 3 pros

  • “Free” with paid Workspace. If you have Google Workspace’s Business Standard plan or higher, mail merge is included. (But if you’re a solo operator or small business, you probably don’t have that plan. It’s $14/month and up.)
  • No installation or third-party tools needed. It’s built into Gmail already.
  • Google-official solution. Some organizations prefer sticking with first-party tools.

Top 3 cons

  • Extremely limited. Remember when I said add-ons had limited features? They do… but Google’s built-in mail merge is even more limited. You can’t schedule sends (yes, with their mail merge tool, it turns off their scheduling tool). There are no follow-ups and no tracking. You can’t even mail merge into the email subject line.
  • Not included on the plan you probably have. Google does not include their mail merge tool in the $7/month Business Starter plan — aka the plan that everyone uses.
  • Hard sending caps. There’s a maximum 1,500 recipients per day, period. No way around it.

4. Writing your own Google Apps Script

Google Apps Script for mail merge

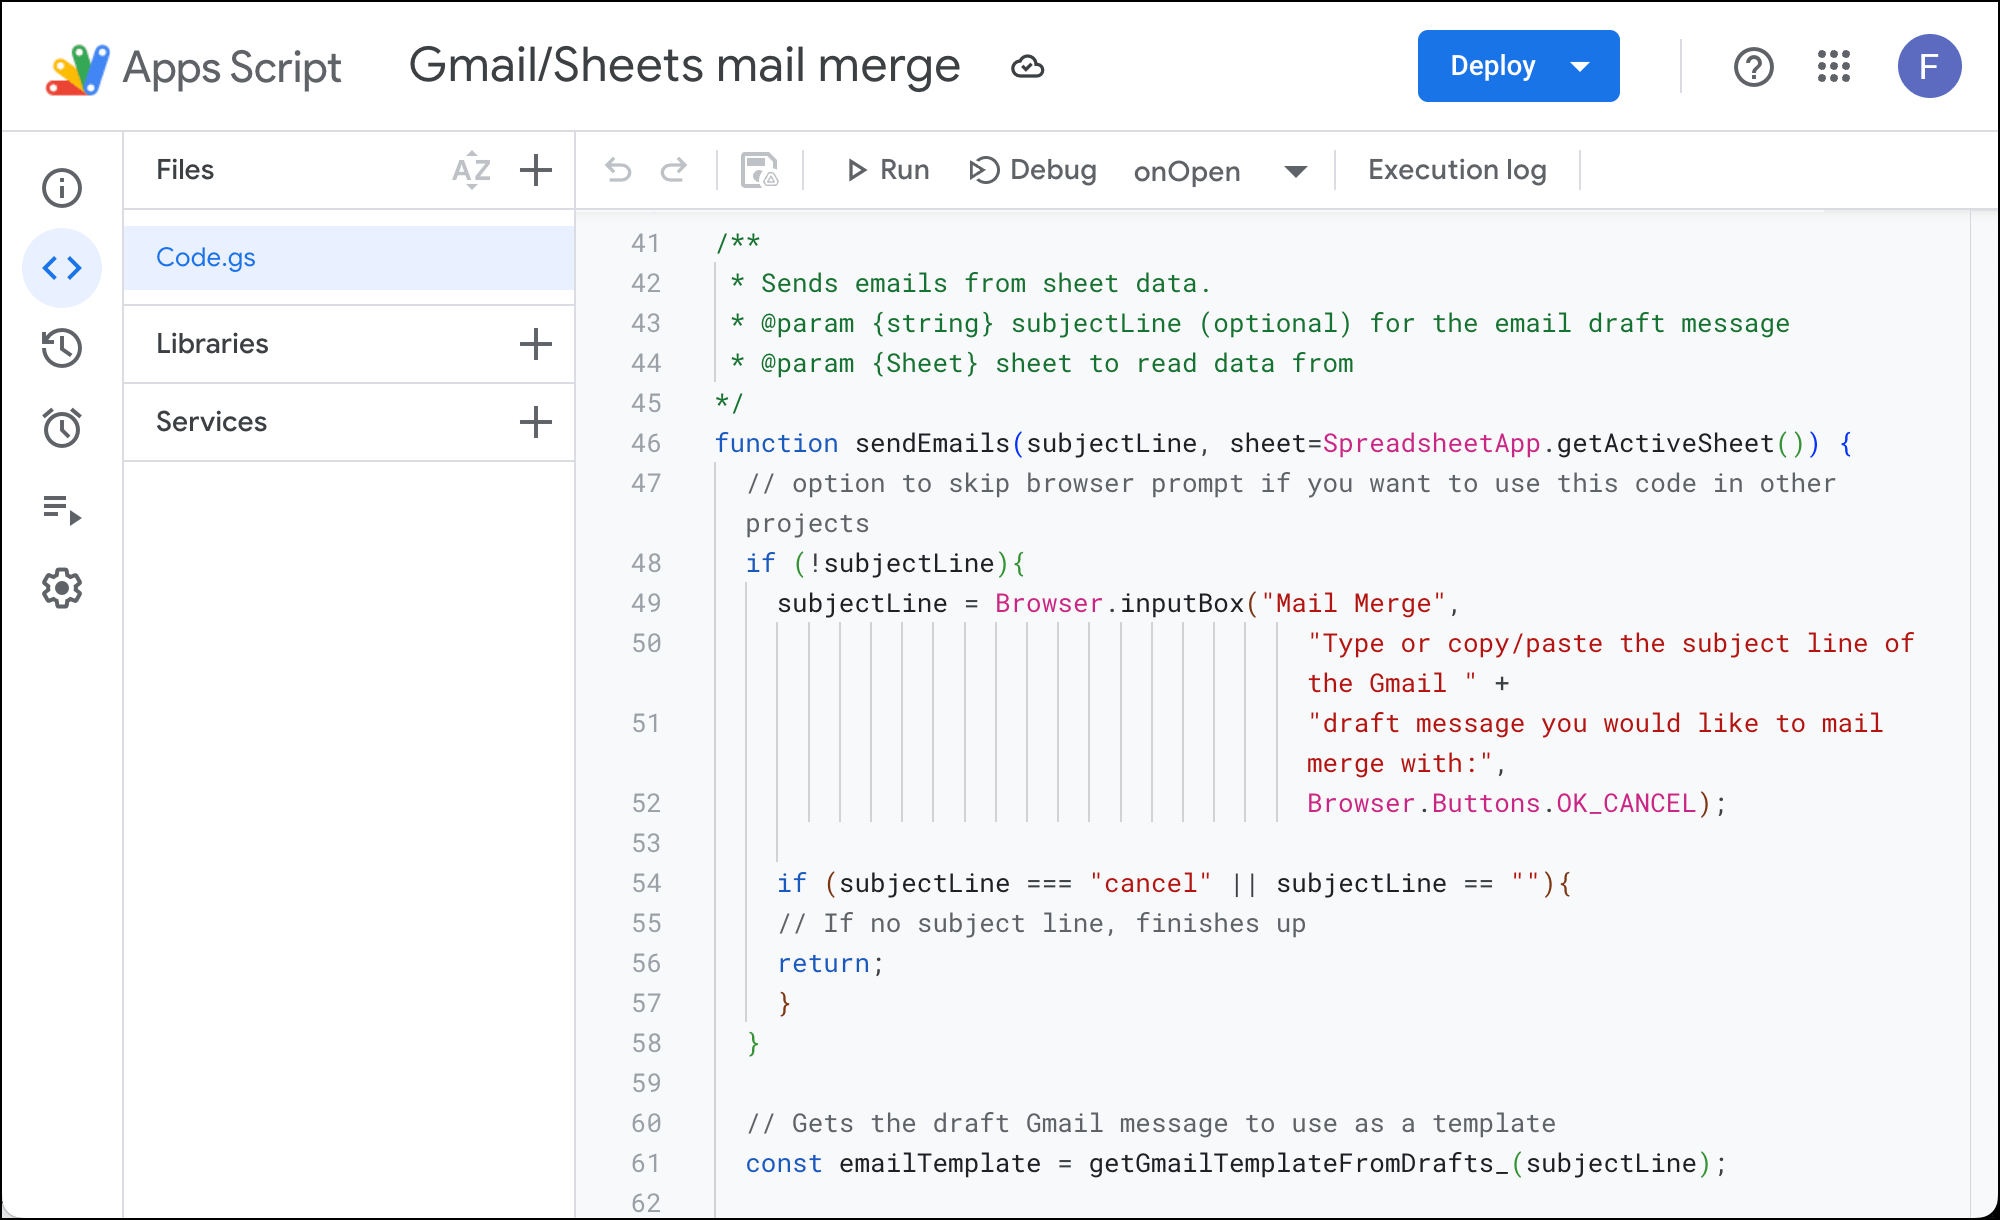
For the technically inclined, you can code your own mail merge using Google Apps Script.

There’s a starter template you can get here. Any modifications will have to come from your own developing work and/or a heavy vibe coding assist from a LLM.

Top 3 pros

  • Completely free. The only cost here is your time and expertise.
  • Total customization. Build exactly what you need, nothing more or less.
  • Learning opportunity. This is a good project for if you want to develop Apps Script skills. I dunno. I needed to get to three pros to keep this article symmetrical and this was the best I could dream up for a third one.

Top 3 cons

  • Requires coding knowledge. Though it seems like you can just cut-and-paste in the provided script… you can’t. JavaScript experience (or a lot of patience to vibe code with an LLM) is mandatory. This isn’t for beginners.
  • Time-intensive setup. Expect hours of work for a basic mail merge tool, or days of development for anything beyond basics.
  • No support or updates. When Google inevitably changes something and your script breaks, you’re on your own.

How to Decide Which Mail Merge Technique for Google Sheets Is Right for You

Alright. So those are your four options. How do you choose?

These are the three major questions you should ask yourself to assess:

1. Do you need your mail merge to be professional quality?

If you’re sending professional emails — cold outreach, customer communications, invoices, resumes, donation requests — you need professional features.

That means tracking, follow-ups, scheduling, advanced mail merge, and deliverability tools.

Chrome extensions are your best bet here. None of the other methods give you the features I just mentioned.

For birthday invitations or one-time personal use? A Google Sheets add-on will probably work fine. So would Google’s built-in tool, but I’m assuming you don’t have access in your plan.

2. What are you willing to put up with to save a little money?

Here’s some of what you give up with free or cheap tools, like most of the Google Sheets add-ons or Google’s built in tool…

You can’t schedule sends for optimal times. You can’t set up automatic follow-ups (which can 3x your response rates). You don’t get real analytics. You can’t test if your emails are going to go to spam. You can’t verify email addresses before sending. You can’t A/B test.

Basically, if you’re wondering if you can do something… odds are, you can’t.

There’s also a lot of back and forth between Google Sheets and Gmail, so the sending process is inefficient.

But, yes, these tools are cheap. In some cases, absurdly cheap.

So if saving around $15-$20/month is worth the trade-off on features and efficiency, go with YAMM or Google’s built-in option.

But calculate the time cost; if these limitations add two hours of work once a month, you’re valuing your time at $7.50 to $10/hour.

(And for the free route, think about the time it would take to set up your own mail merge apps script.)

3. Do you send out any other types of professional emails at scale?

This is the hidden consideration. If you’re doing mail merge, you probably also send cold emails, newsletters, or other email campaigns.

Tools like GMass handle all your different types of email campaigns from one place. Instead of paying for a mail merge tool AND a cold email tool AND an email marketing platform, you can just use your Chrome extension for everything.

Quickstart Guide: Sending Out a Google Sheets Mail Merge in the Next 5 Minutes

Alright, decision time is over. We are people of action.

Let’s get you sending.

I’ll use GMass since, based on the above criteria, you’ll probably wind up picking it (or you’ll try one of the others and then end up there eventually). Most important, it’s the fastest path from zero to campaign.

Start that timer…

1. Install the GMass Chrome extension (30 seconds)

Go to the Chrome Web Store and click “Add to Chrome“. Grant the permissions when asked — GMass needs access to Gmail to add its features.

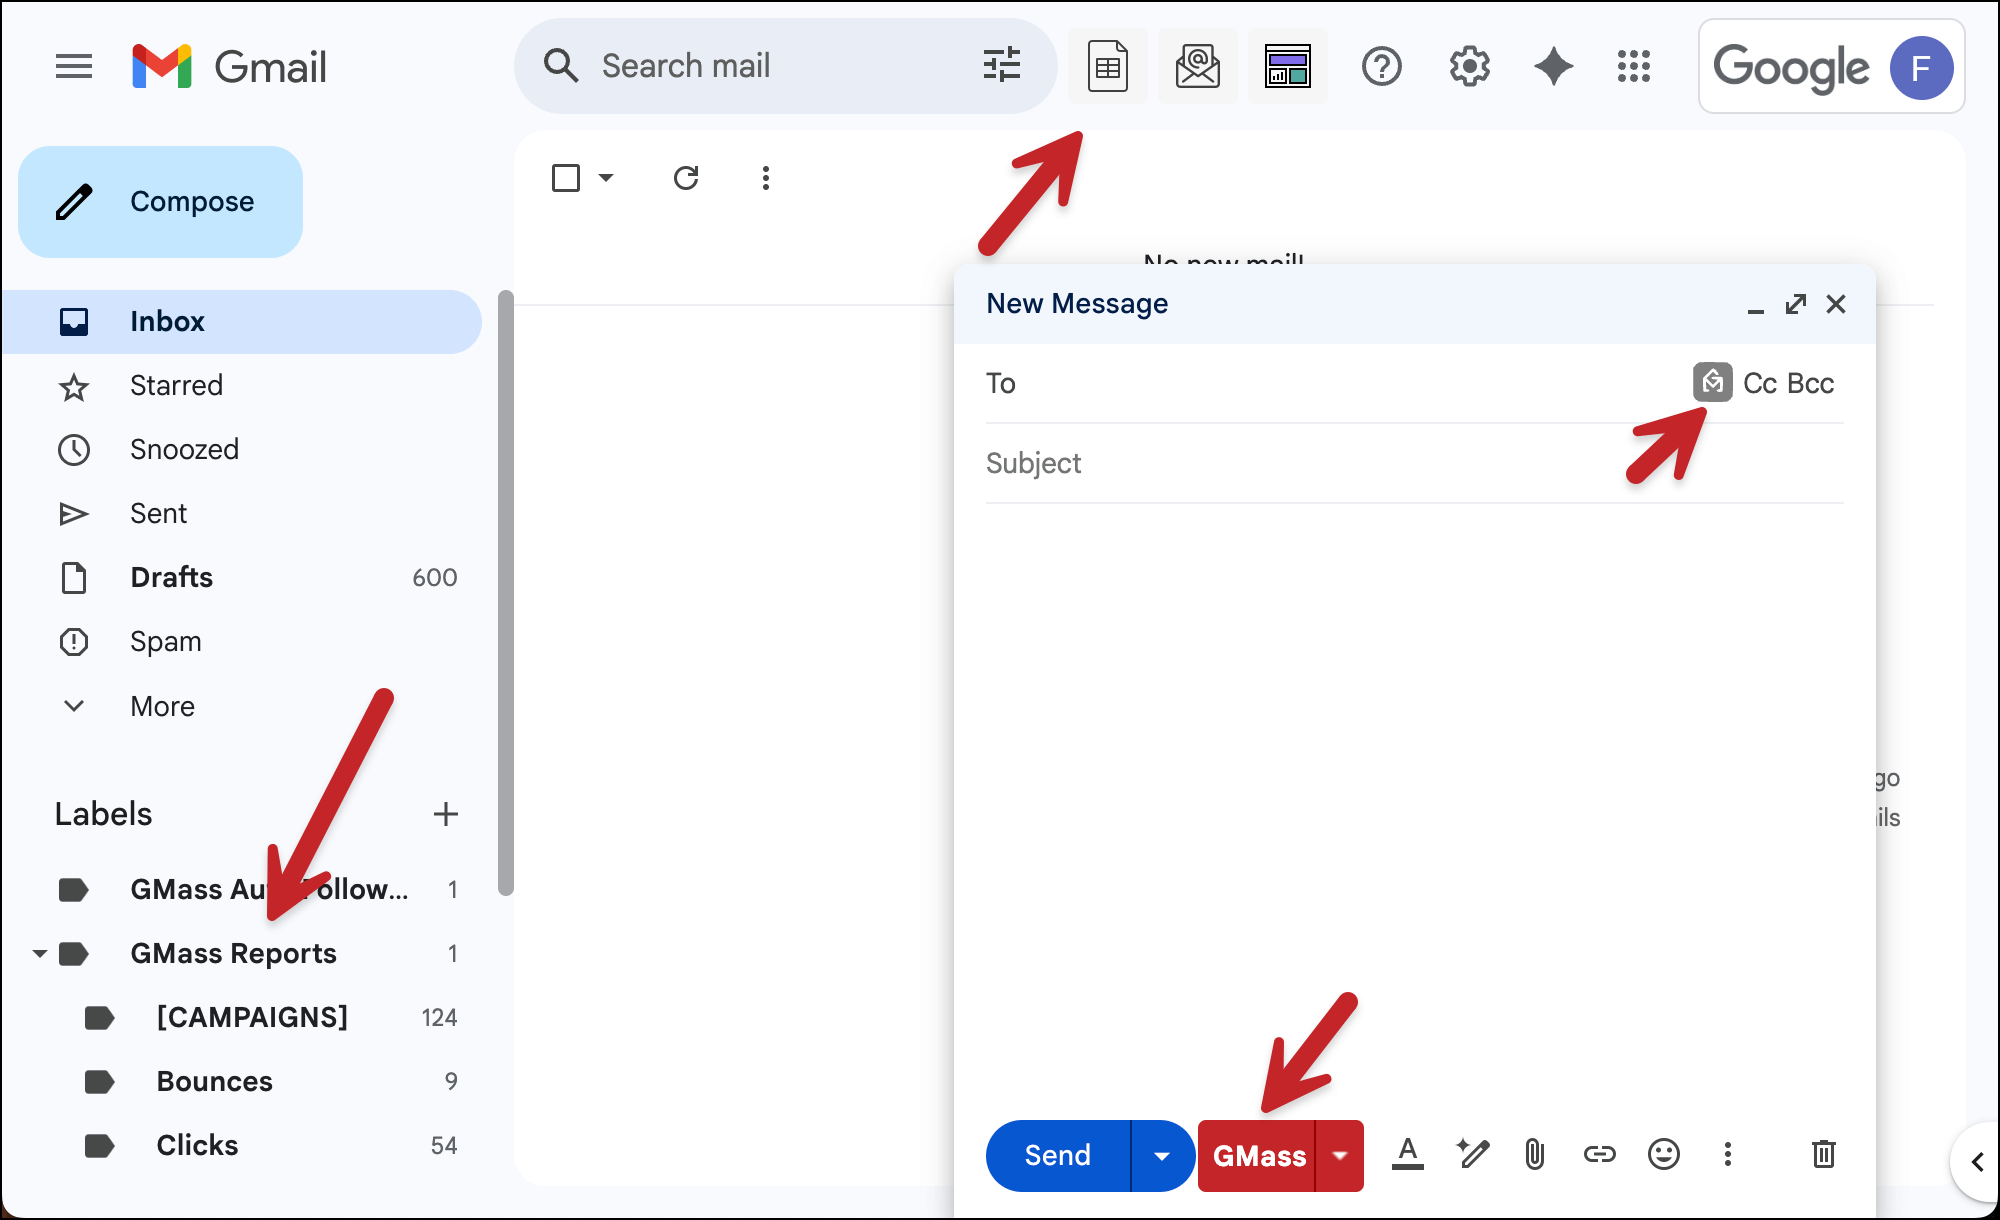
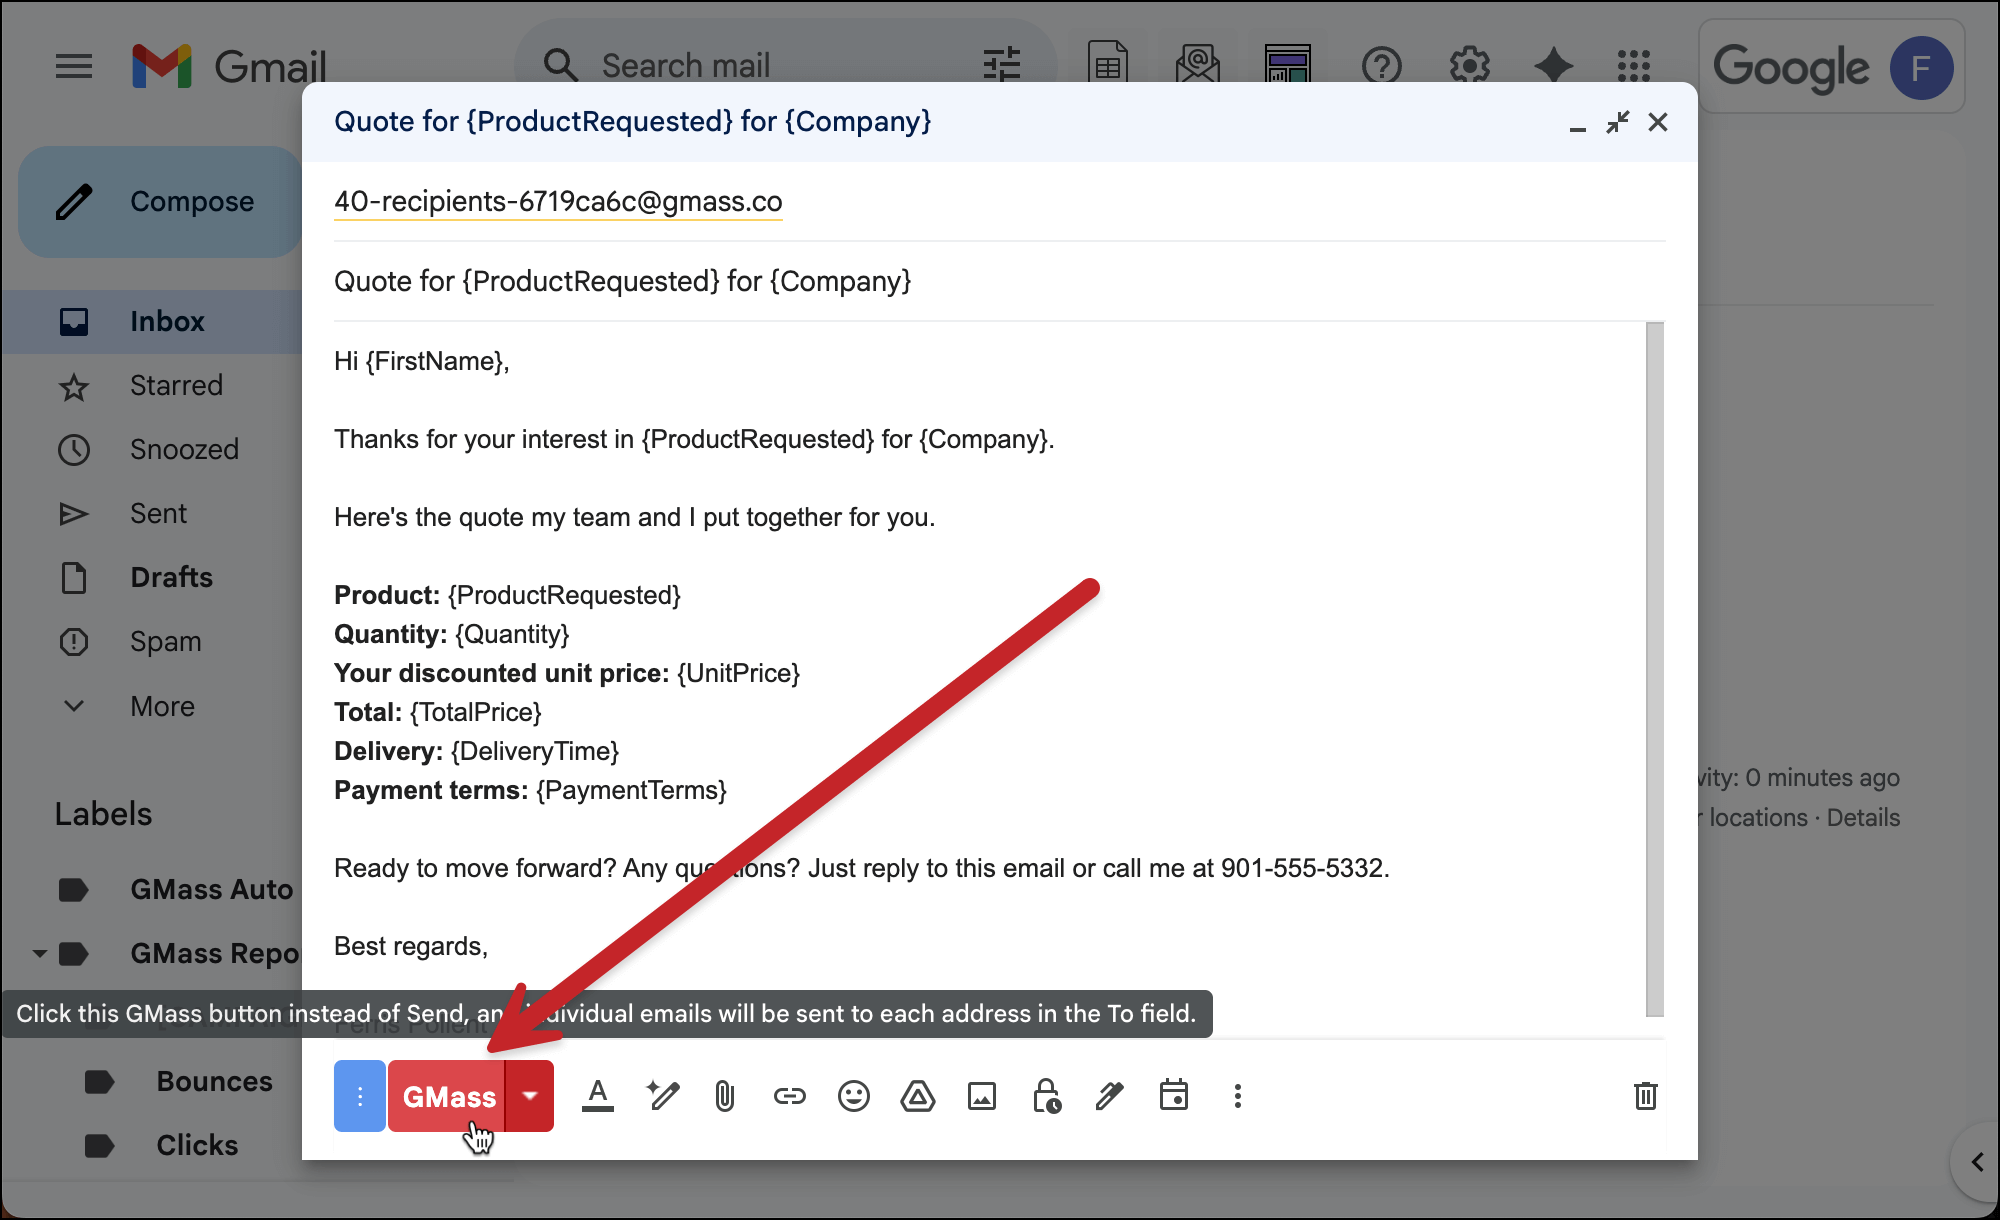
Refresh your Gmail tab. You’ll see a new red “GMass” button next to the regular blue Send button in the Gmail compose window and a few other new buttons added to Gmail.

GMass adds a few little things to the Gmail interface.

Skip the onboarding tour for now. I can’t believe I’m saying that, since I meticulously built that onboarding tour and I think it’s incredibly useful — but we don’t have time. You can always do it later.

2. Make sure your Google Sheet is ready for merging (1 minute)

Your Sheet needs:

  • Column headers in row 1 (like FirstName, Company, and Email)
  • An email address column (can be named anything)
  • One recipient per row, starting in row 2
Prepare the data for your Google Sheets mail merge

Quick advice: Remove spaces from column headers. Use “FirstName” not “First Name” — it’s cleaner for merging.

We don’t have time now during this five-minute sprint, but I did recently write a guide of all the best practices for formatting your Google Sheet for mail merge. Read it later, then share tips from it to impress people on dates.

3. Connect your Google Sheet in Gmail (1 minute, including granting permissions)

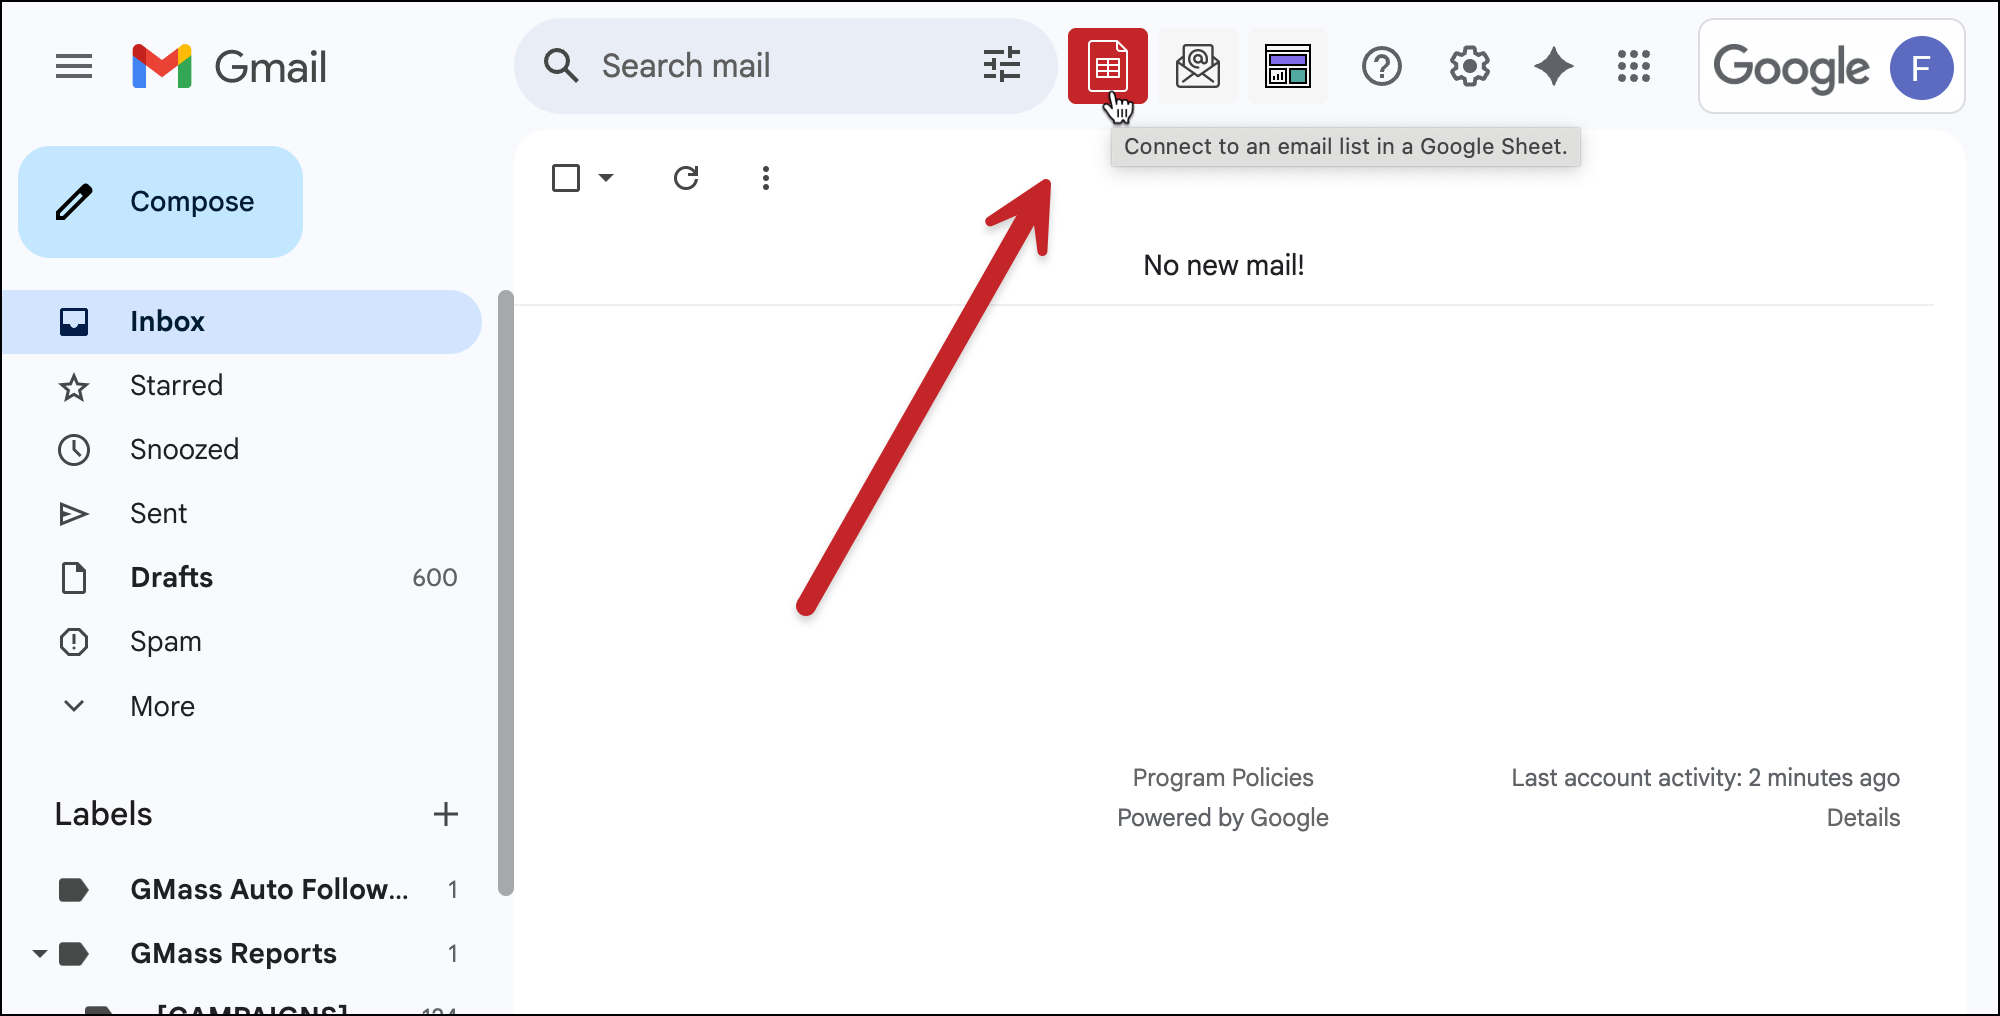
Click GMass’s sheet icon in Gmail (it appears next to the Gmail search bar after you’ve installed GMass).

Connect to your Google Sheet

If it’s your first time, you’ll grant GMass permission to read your sheets.

Select your Google Sheet from the dropdown, then click the button marked Connect to Spreadsheet.

Select your Google Sheet from the dropdown

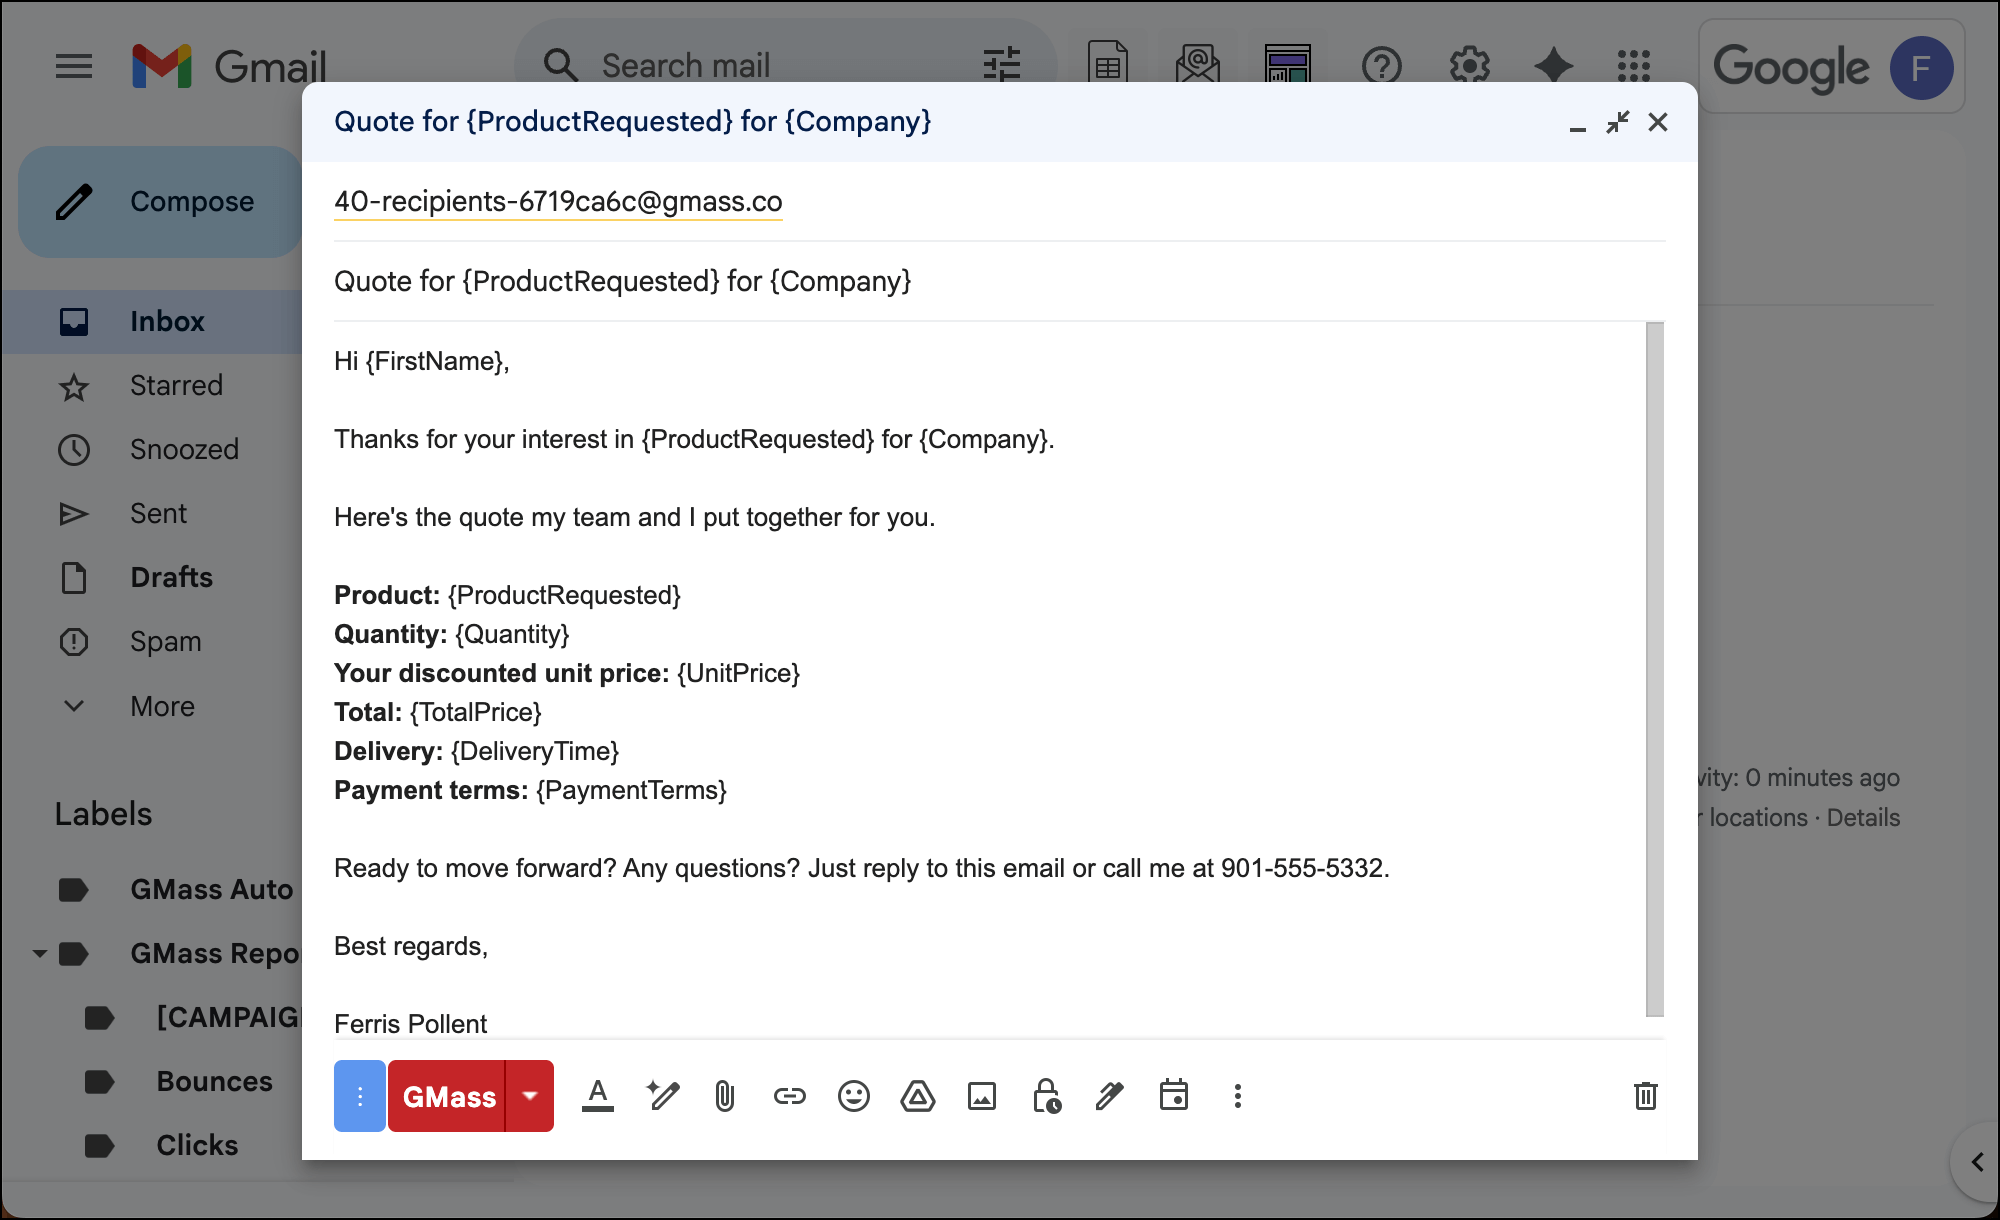
GMass instantly pulls your email addresses into the To field and compresses them all into one alias address to keep things neat.

4. Compose a quick email (2 minutes)

Type your subject line. Include merge variables using {FirstName} or whatever your column headers are.

Type in your template in Gmail

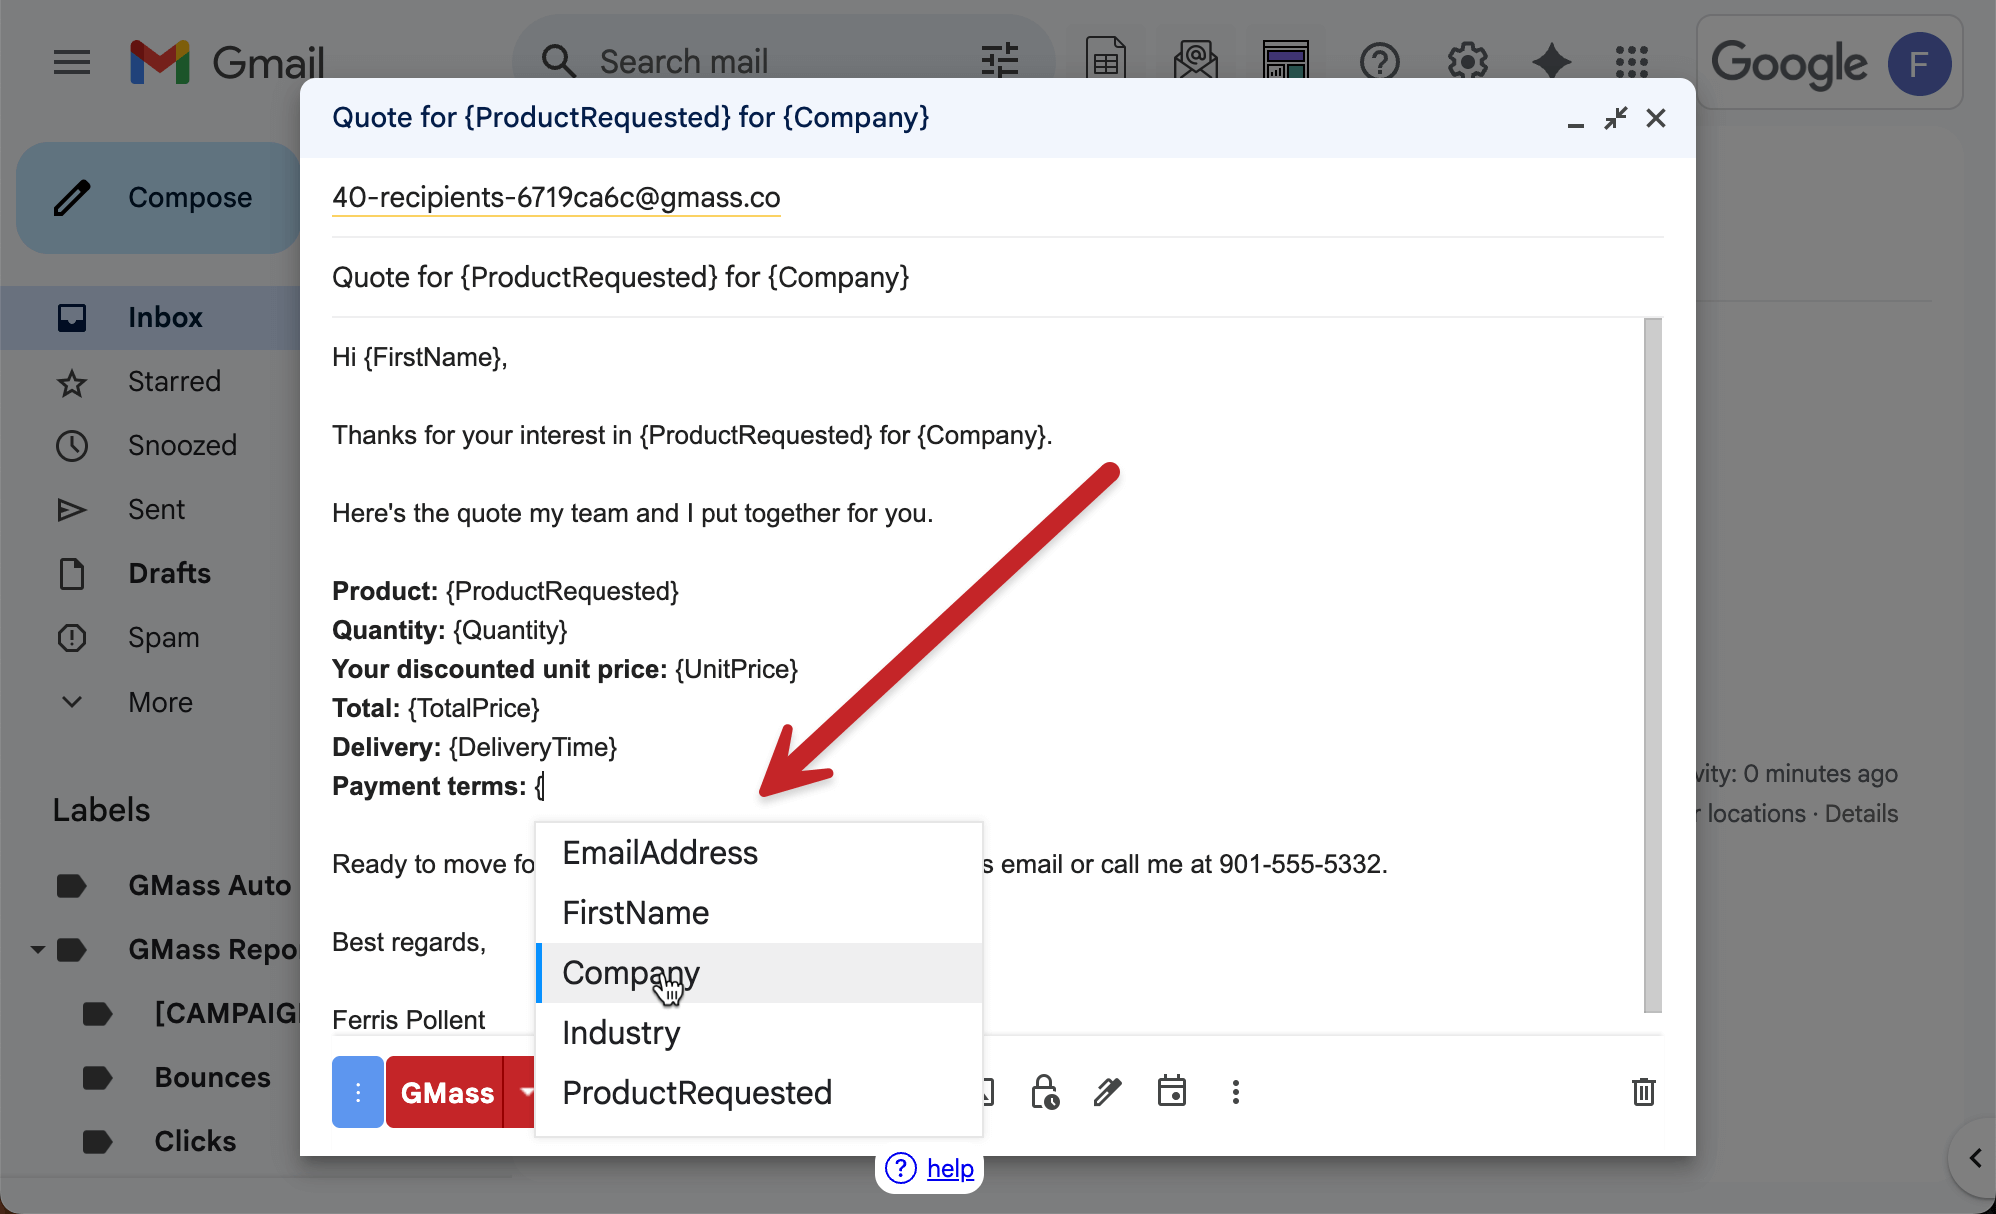
No need to go back and forth to your Google Sheet to remember them. Just type a left curly brace { and GMass will show you all your column headers. You can click on any to insert it.

A left curly brace brings up your mail merge options

Example: “Quick question about {Company}’s marketing strategy”

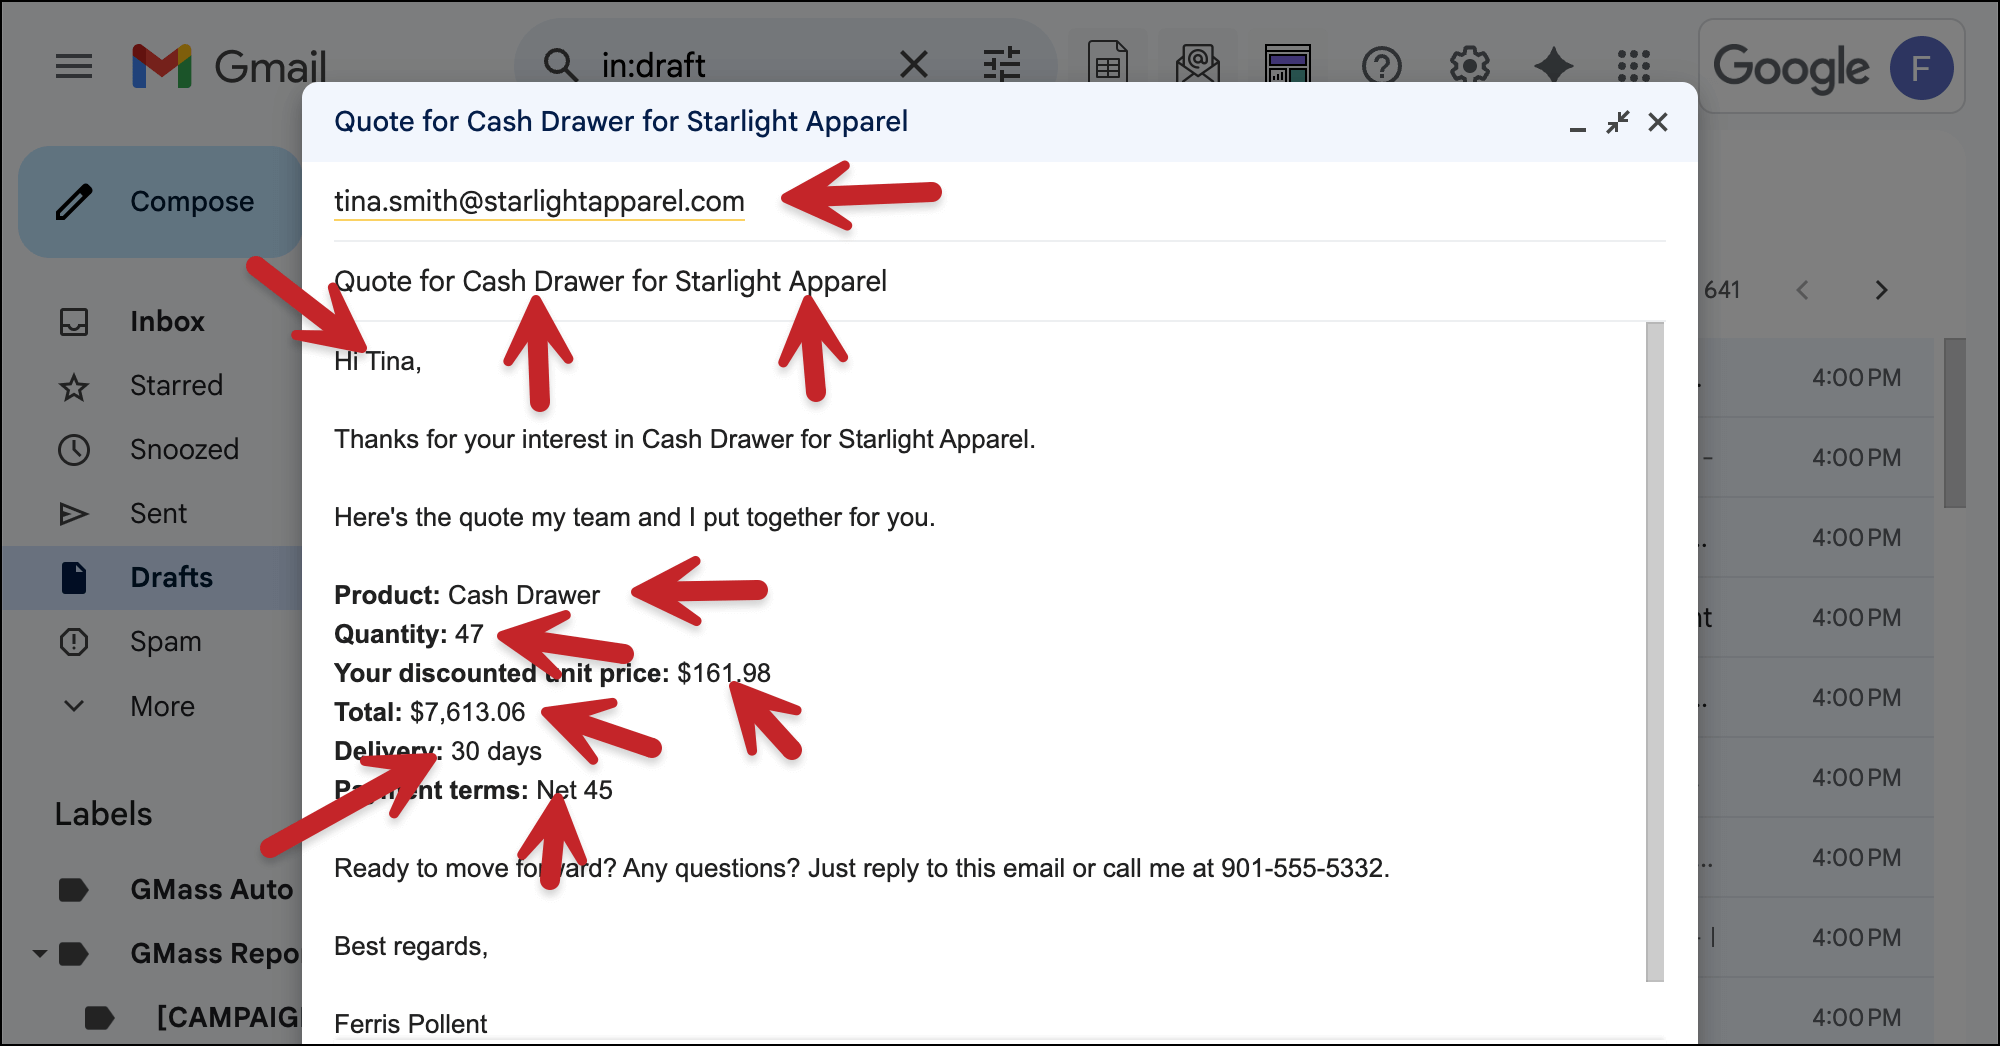
In the body, personalize naturally: “Hi {FirstName}, I noticed {Company} just launched a new product line…”

The curly brackets are how you merge in the data from your sheet. Each recipient will see their own specific information.

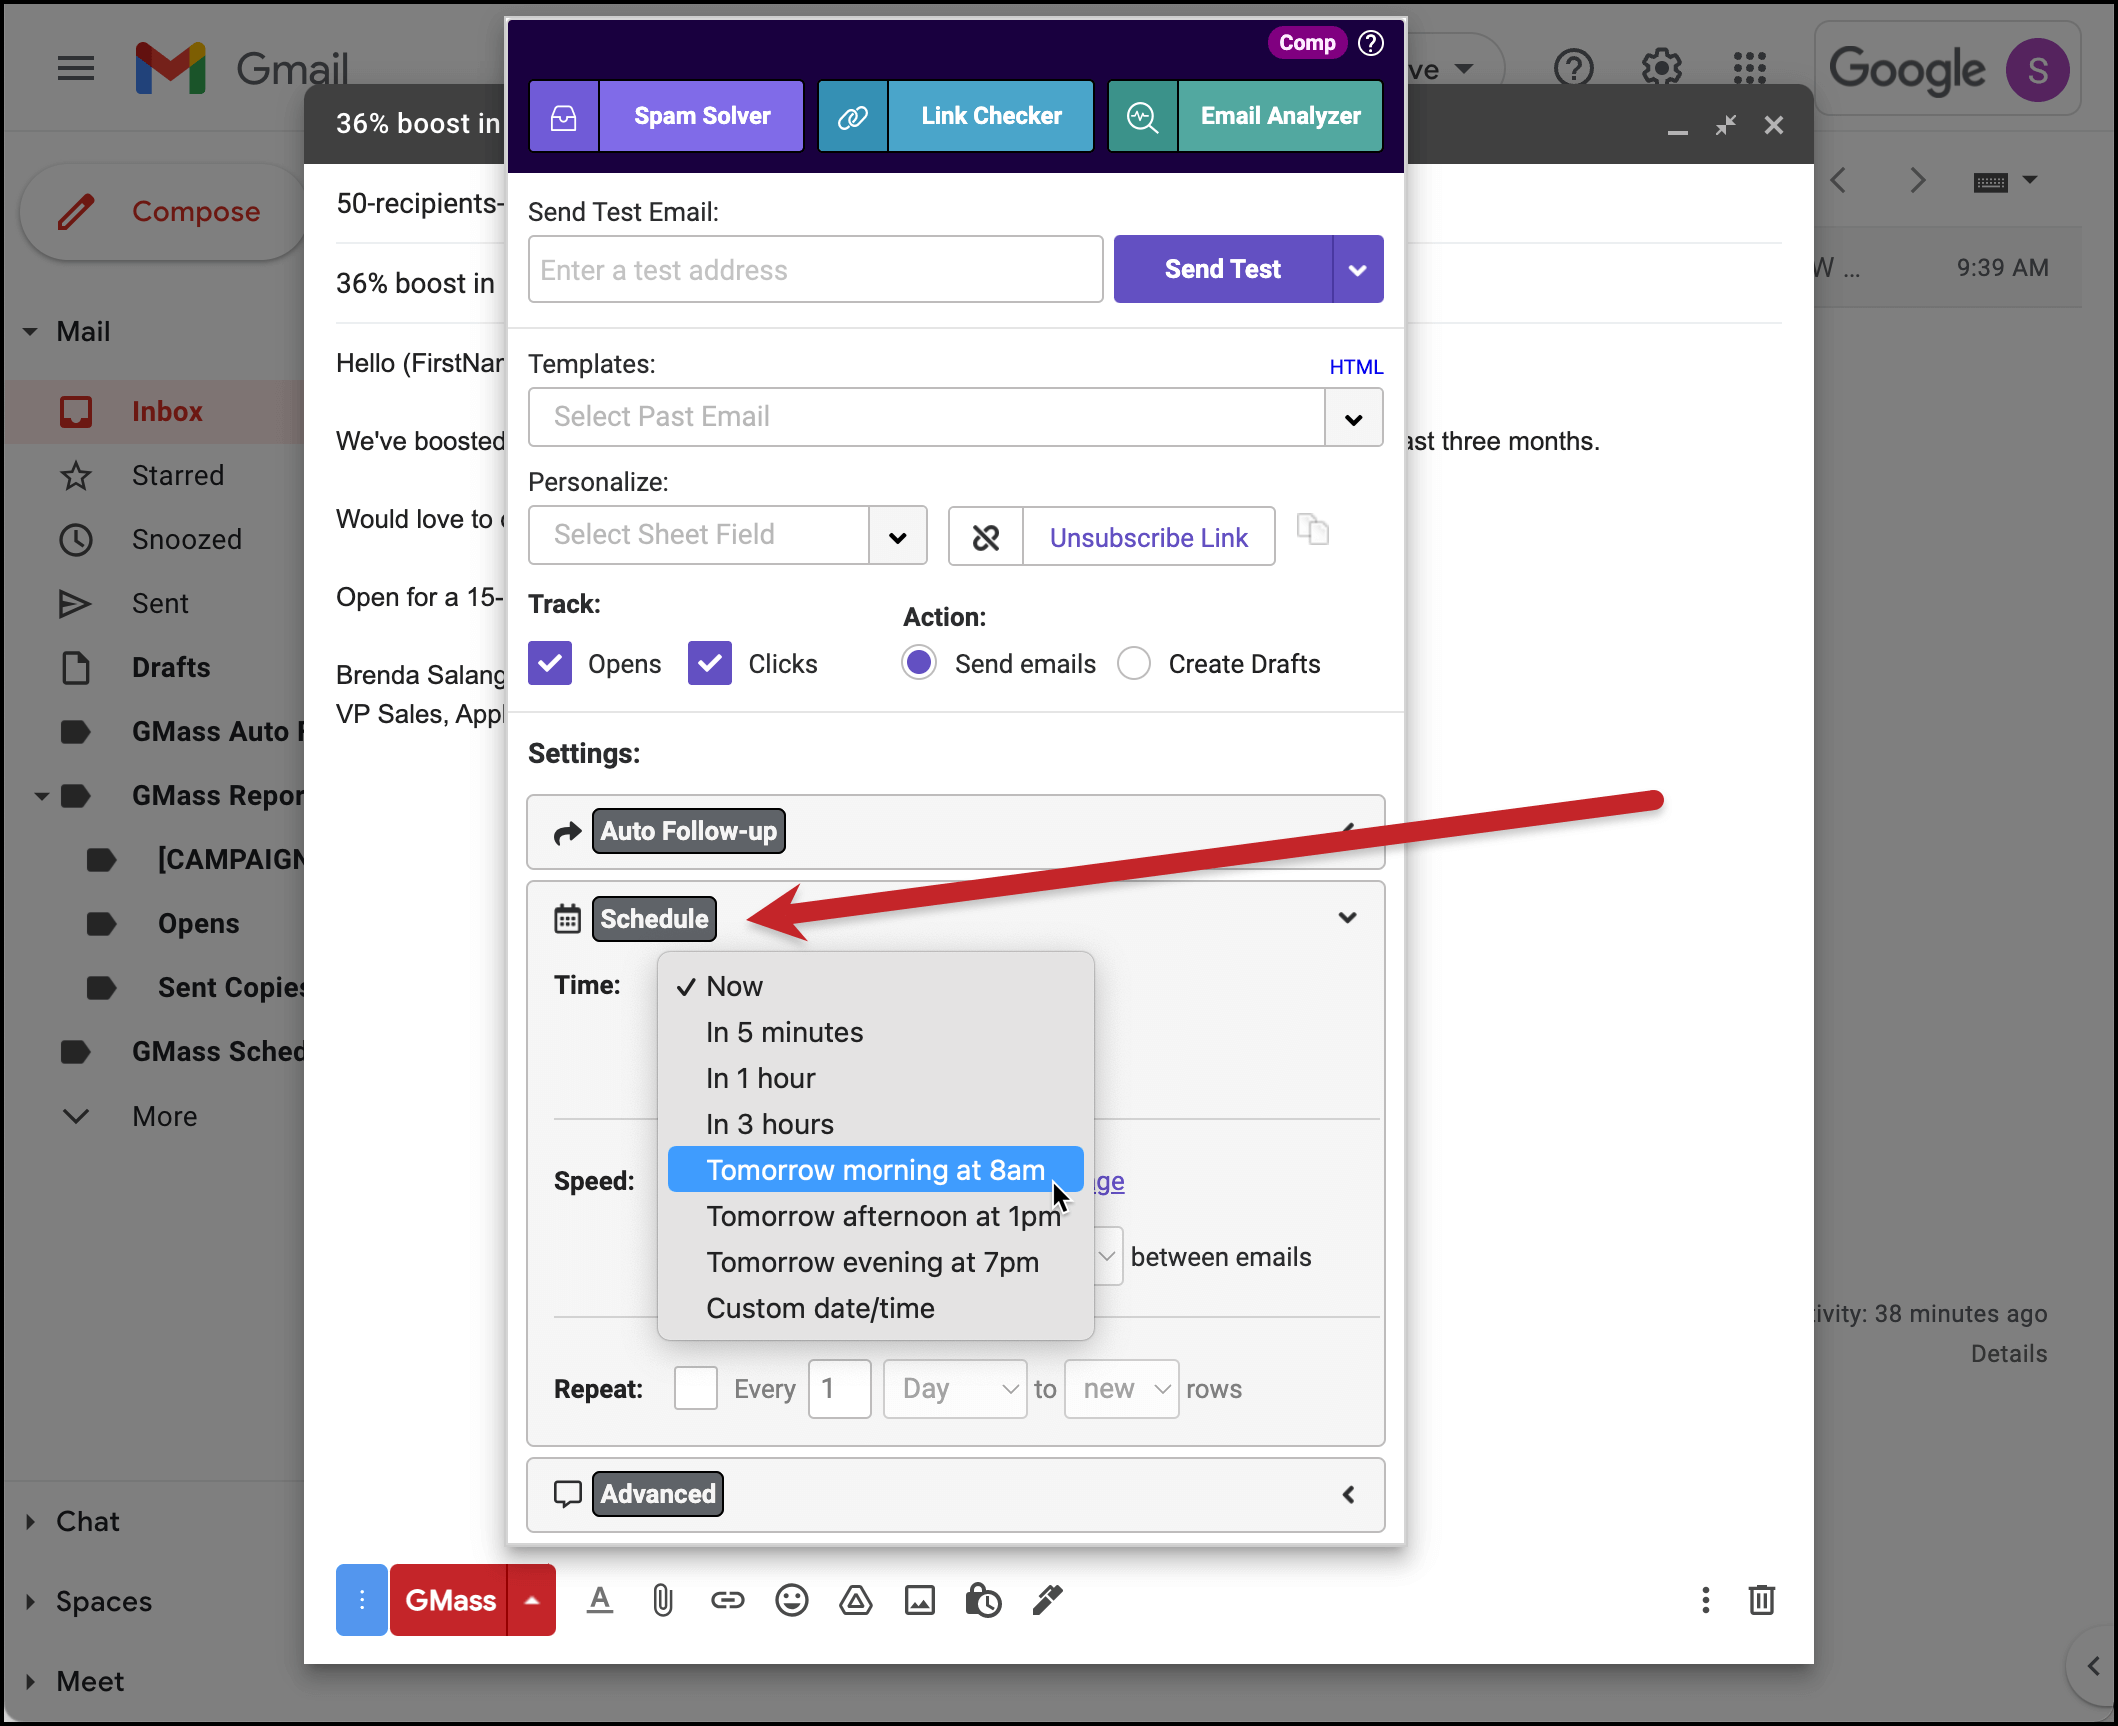
5. Send your mail merge campaign (30 seconds)

Normally, we’d want to test a mail merge before we send but that adds some time. So we’re going to YOLO this and send. (In the future, though, please do test your mail merges.)

Hit the red GMass button to send your campaign (NOT the blue Gmail send, or the mail merge won’t work).

Click the red GMass button to send

That’s it. Each person gets their personalized email individually.

See your result with the mail merge inserted

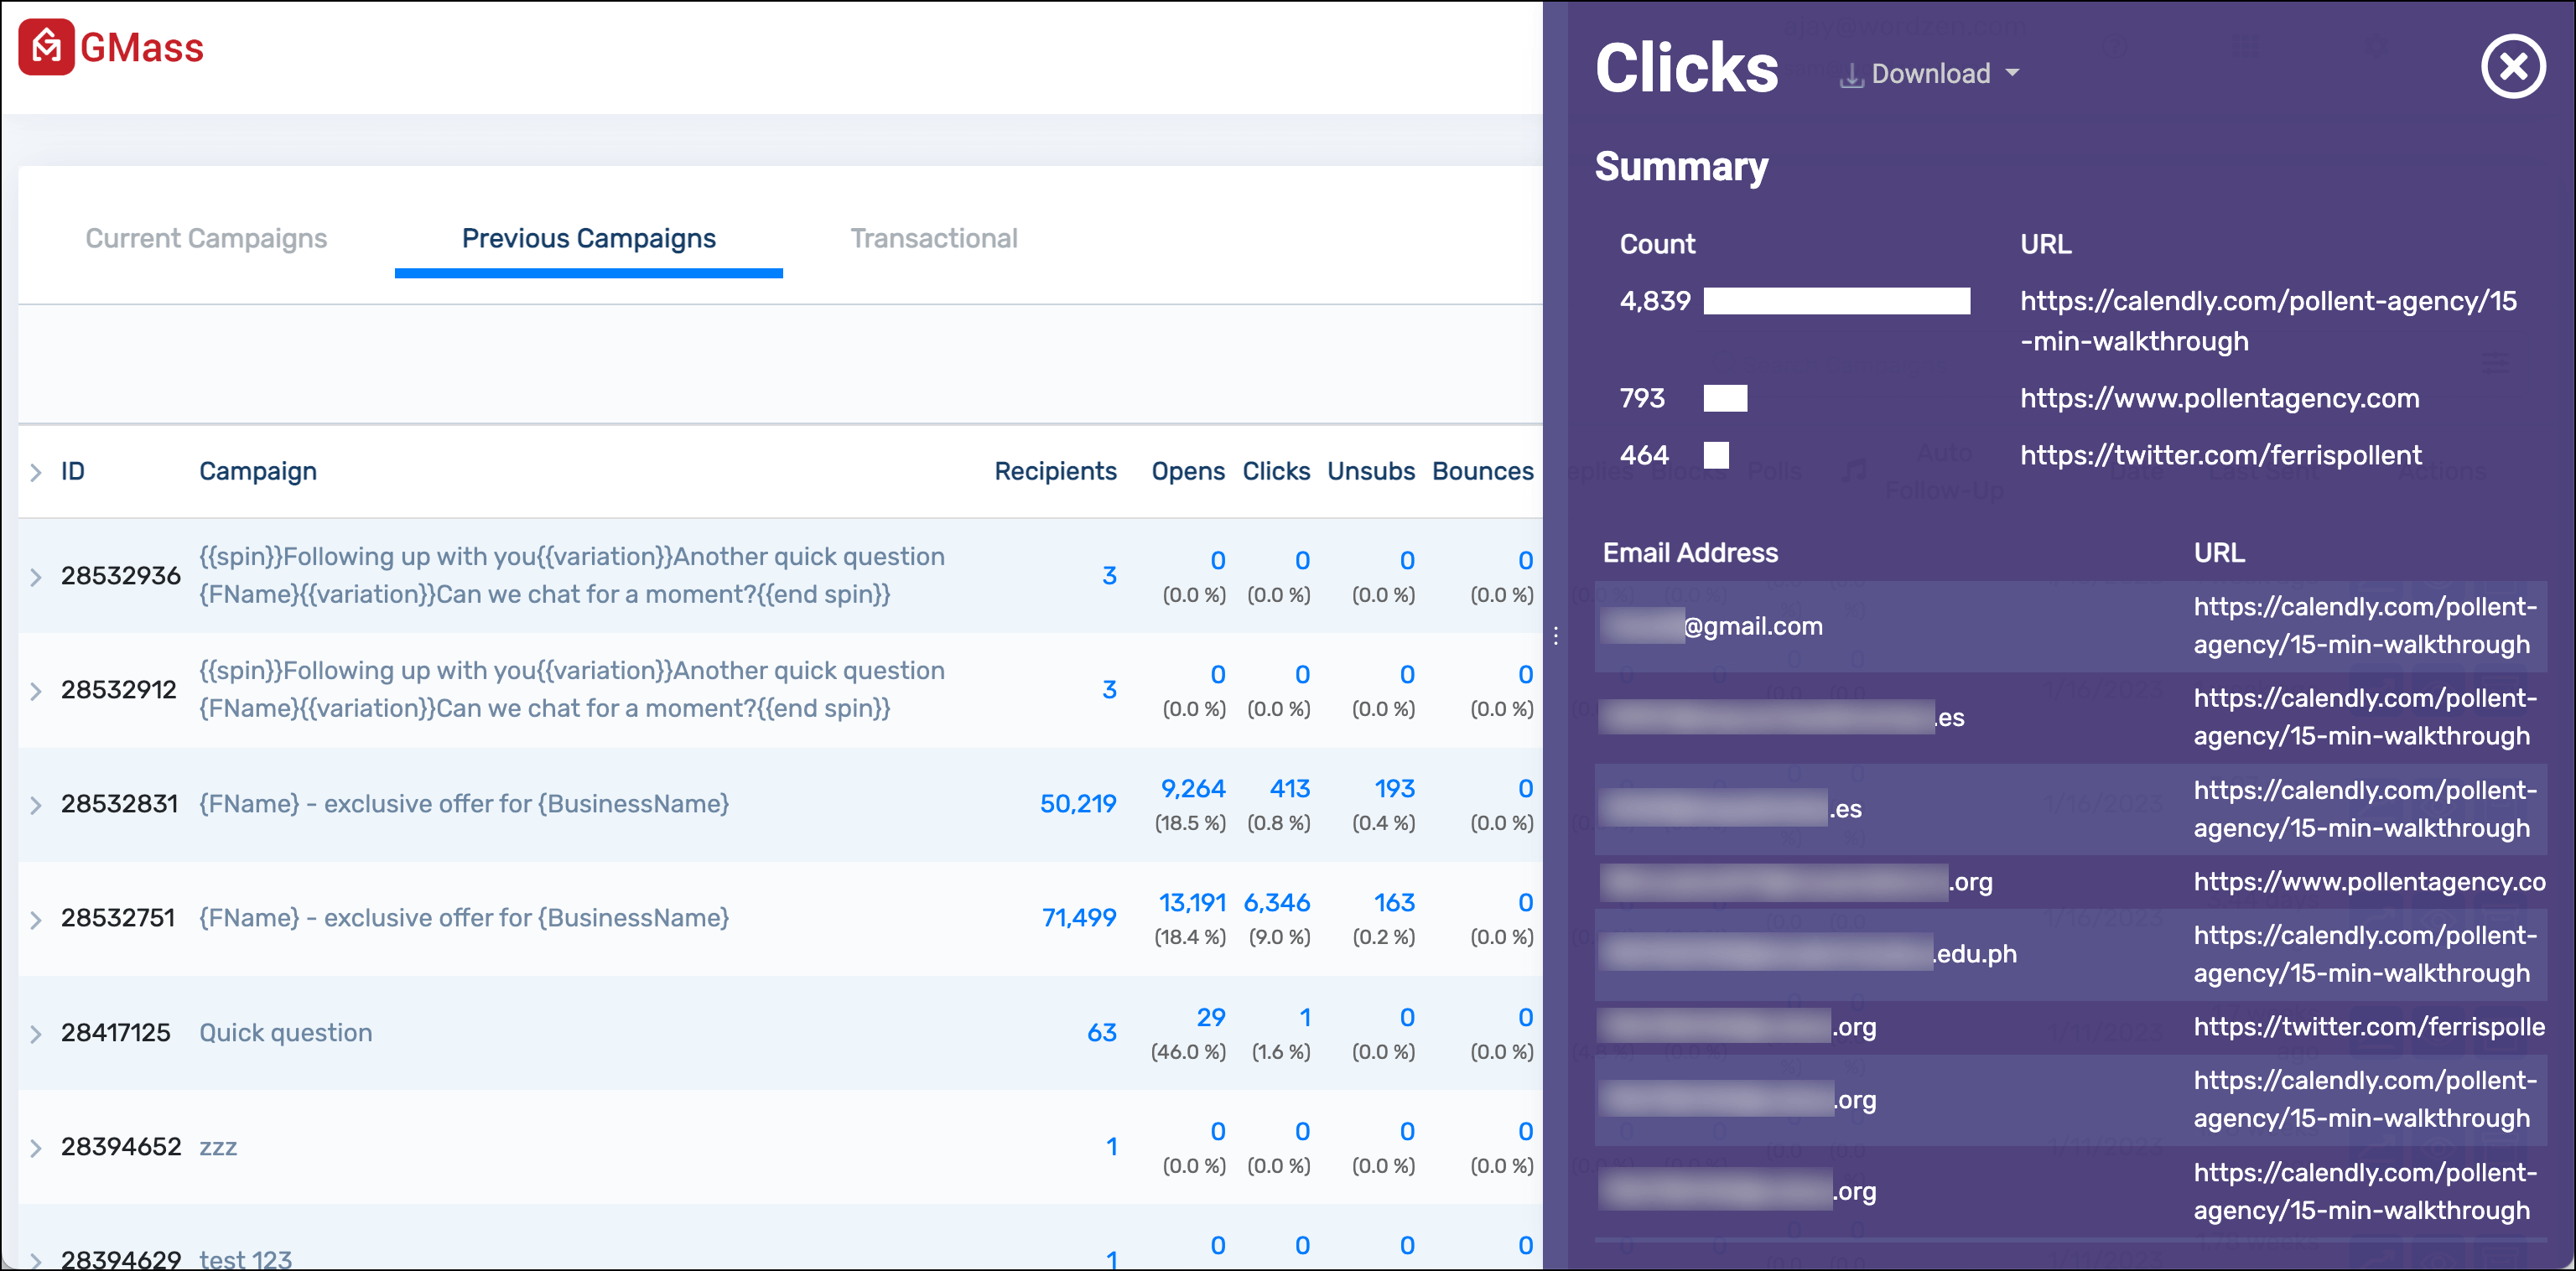
You can track opens, clicks, and replies in your GMass reporting dashboard.

Get Started with GMass

If you’re ready to run professional mail merges that actually deliver results, GMass gets you there faster and easier than any other option.

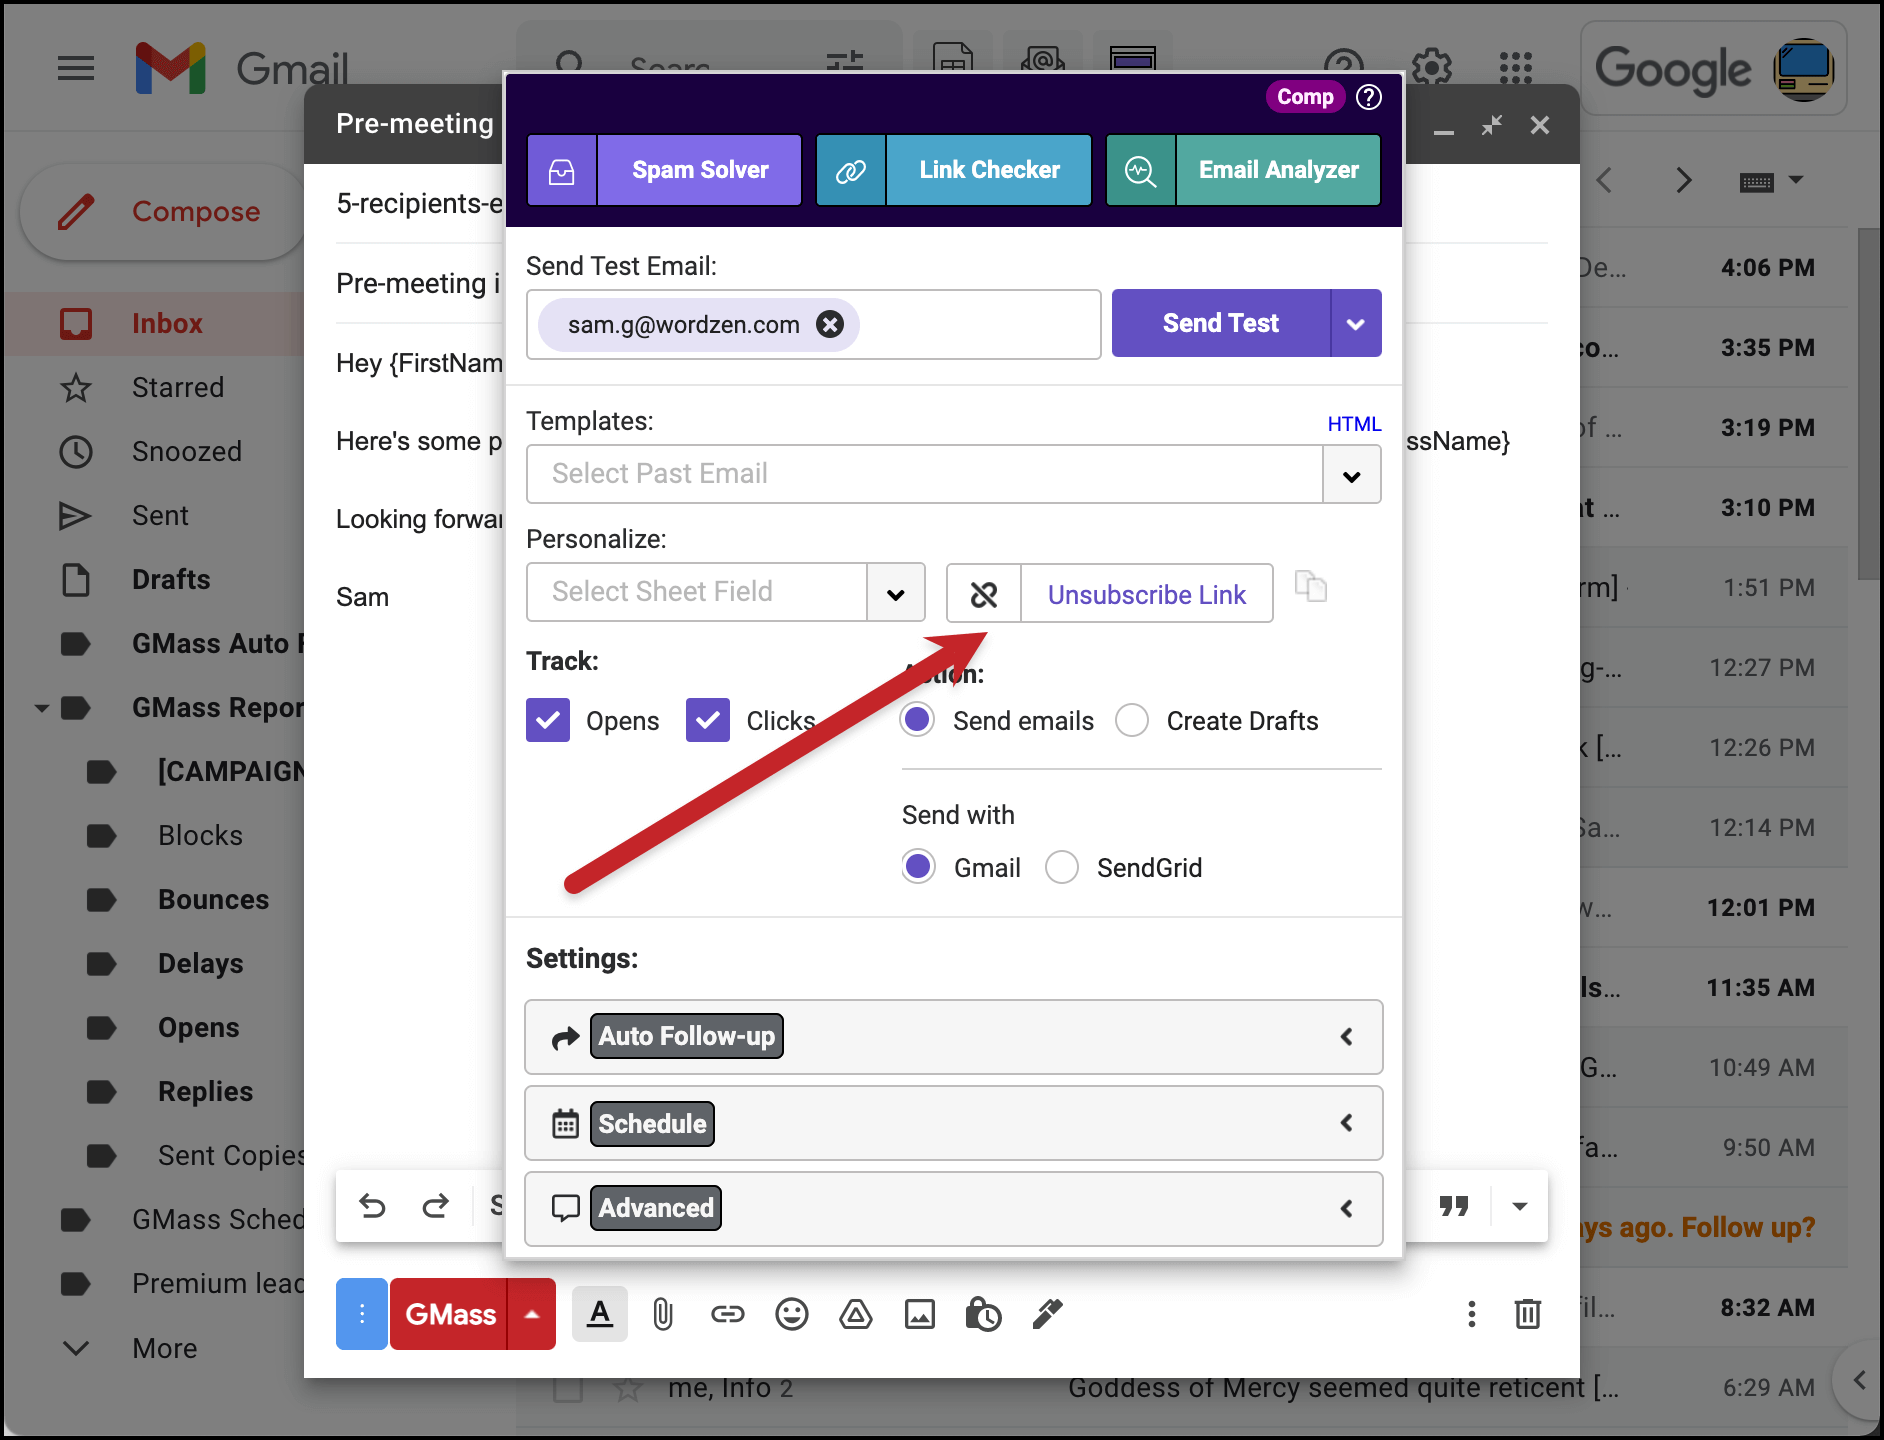
I haven’t even had a chance to cover a whole bunch of GMass’s other unique and powerful features like Spam Solver (fix your email if it’s destined for the spam folder)… the ability to break Gmail’s limitsunlimited auto follow-ups… and so much more.

All for less than you’d spend on lunch for two — and all inside of the Gmail interface you’re already comfortable with using.

Install the Chrome extension, start your free trial (no credit card required!), and send your first campaign in the next 5 minutes.

Advanced Mail Merge Techniques: Beyond Basic Text

Once you’ve mastered basic mail merge, these techniques take your campaigns to the next level.

Mail merging PDFs or other attachments

This is a technique few people know about — but you can actually send unique attachments to every mail merge recipient as well.

Add a column called “Attachment” to your Google Sheet. Put the full file path or URL for each person’s unique document.

When GMass sees this column, it automatically grabs the right file and attaches it to the recipient’s email.

This is perfect for sending personalized invoices, proposals, or reports.

Mail merging images

Create a column with URLs to different images (wrapped in HTML — don’t worry, there are instructions to help if you don’t know how to do that).

Then each of your recipients will get their own personal image in their message.

This works great for individual product recommendations, custom QR codes, or including your recipients’ company logos in your emails.

Mail merge with unique CC and BCC addresses

Need different people CCed on each email? Add “CC” and/or “BCC” columns to your sheet.

Common use: Looping in specific account managers or copying assistants on client emails without manual work.

Recurring mail merge automations

Mail merge campaigns don’t have to be one-time sends.

You can set up a campaign that goes out automatically every time you add a new contact to your Google Sheet.

You can set up the automation in just a few clicks. GMass will monitor your sheet hourly (or daily, or weekly, or whatever time frame works) and send your campaign to any new entries.

This is perfect for welcome sequences, onboarding emails, drip campaigns, renewal reminders, and more.

The Wrap-Up: Mail Merge with Google Sheets Like a Pro

There are four primary methods to mail merge Google Sheets data into emails.

Pick the best one for you based on your needs:

Need professional features? Chrome extensions like GMass give you everything — advanced mail merge, tracking, follow-ups, deliverability tools, and unlimited sends.

Sending occasionally for personal use? Super cheap tools like YAMM or Google’s built-in option work fine.

Want total control for free? Build your own with Apps Script.

Ultimately, if your emails really matter — if you’re trying to land clients, serve customers, or grow your business — invest in the right tool. The difference between 2% and 10% response rates pays for professional software hundreds of times over.

GMass takes 5 minutes to set up and costs less than a streaming subscription. You get the same mail merge powers that Fortune 500 sales teams use, right inside Gmail.

Start your free trial and see why 400,000 users trust GMass for their mail merge needs — and why they rate it an average of 4.8 out of 5 stars across tens of thousands of reviews.

Google Sheets Mail Merge FAQ

And finally, answering a few questions you might have about mail merging with Google Sheets and Gmail.

Can I use mail merge with a free Gmail account?

Yes. Most tools work with both free @gmail.com and paid Workspace accounts. Workspace accounts just have higher sending limits (2,000/day vs 500/day).

(There’s also a little tweak that has to happen if you’re sending massive bulk quantities; here’s how GMass solved that problem.)

What happens if I have blank cells in my Google Sheet?

Most mail merge tools give you the option to use fallback values.

For example, if “FirstName” is blank, you can default to “there” with {FirstName|there} so your email says “Hi there” instead of “Hi .”

Can I mail merge into subject lines?

Yes… but not with Google’s built-in mail merge tool. It inexplicably doesn’t allow mail merge tags in subject lines.

With Chrome extensions like GMass or add-ons like Mergo, yes, you can mail merge in subject lines.

Will recipients know I used mail merge?

Not if you do it right. Each person gets an individual email with no other recipients visible. Avoid obviously templated language and you’re golden.

How many mail merge emails can I send per day?

Gmail caps you at 500 (free) or 2,000 (Workspace) daily emails. Virtually all platforms will cap you around there.

GMass is the exception — it helps you (legally) break these limits to send 10,000 or more messages in a day.

Ready to transform Gmail into an email marketing/cold email/mail merge tool?


Only GMass packs every email app into one tool — and brings it all into Gmail for you. Better emails. Tons of power. Easy to use.


TRY GMASS FOR FREE

Download Chrome extension - 30 second install!
No credit card required
Love what you're reading? Get the latest email strategy and tips & stay in touch.


You now have the option to insert an Unsubscribe link into your email marketing campaigns with GMass.

Adding an unsubscribe link in GMass

To insert an unsubscribe link, just click the Unsubscribe Link button in the Settings box, and a link will be added at the cursor in the body of the message.

Inserting an unsubscribe link

We recommend that an unsubscribe link be added to all mass emails containing promotional or marketing content, but the decision is up to you. If you don’t have regular back-and-forth email correspondence with the people whom you’re emailing, it’s wise to include an unsubscribe link.

If a recipient clicks the link, their email address will be placed on your GMass account’s Unsubscribe List. You’ll also be notified via a report that will appear in the GMass Reports –> Unsubscribes Label in your Gmail account. (You can also check unsubscribes on a per-campaign basis in the reports in the GMass dashboard and on the web.)

When you send future mass emails with GMass, your email list will be checked against your Unsubscribe List, and anyone found on the unsubscribe list will be removed automatically as a recipient. You don’t have to manually remove people that have unsubscribed from your source email list because GMass handles the elimination of unsubscribed addresses from campaigns for you.

Changing the default unsubscribe link text

By default, when you click the Unsubscribe Link button in the GMass settings, GMass will insert “You may unsubscribe to stop receiving our emails.” The link on the word “unsubscribe” is takes the recipient to the unsubscribe confirmation page.

You can change that default text in the GMass dashboard.

In the dashboard, click on Settings, then Unsubscribes. Then click on Set custom unsubscribe link.

If you’re editing your custom unsubscribe link for the first time, you’ll see the default text in there. You can then change it to make your unsubscribe link text/section whatever you want. (You could also include things like regulatory text in here.)

Click the Save unsubscribe link button.

Now, whenever you click Unsubscribe Link in the GMass settings box for a campaign, your new text will appear.

And you can always edit your custom unsubscribe link by returning to this area in the dashboard.

What your recipient will see

When your recipient clicks on the Unsubscribe Link, he/she will be taken to an unsubscribe page that looks like this and asks for confirmation:

GMass Unsubscribe Page
This is what your recipient sees after clicking the Unsubscribe Link.

For free accounts, a text link to GMass is also included on this page. For paid accounts, as shown in the screenshot above, there is no link to GMass.

Important notes about the GMass unsubscribe link

  1. To re-subscribe an address, the subscriber must click on the re-subscribe option after unsubscribing. One can re-subscribe anytime by clicking on any unsubscribe link from any past GMass email. Note that deleting an unsubscribe report from the GMass Reports section will not remove an address from your unsubscribe list.
  2. If you wish to manually insert the unsubscribe link into the body of your emails, so that it flows with your email design, create a link to:https://www.gmass.co/gmass/u?u=OUTBOUNDThe “OUTBOUND” part will be replaced with a unique identifier at the time the email is sent, and the “www.gmass.co” part will be replaced with your account’s tracking domain. It’s highly recommended you set a custom tracking domain to use here.

Managing your unsubscribe list in the GMass dashboard

You can manage your unsubscribe list by going to the GMass dashboard, clicking Settings, then going into the Unsubscribes section.

Unsubscribes settings in the dashboard

In the Manage unsubscribed addresses section you can search to see if certain addresses are on your unsubscribe list, add new addresses to that list, or remove addresses so they’ll begin receiving your emails again.

The Manage unsubscribed domains level allows you to unsubscribe entire domains (like unsubscribing everyone at uber.com). You can also remove unsubscribed domains so emails to those companies or organizations will resume.

Also note that in the unsubscribe settings, you can choose “Ignore unsubscribes”, “Use global unsubscribes”, and/or “List-Unsubscribe Header”.

“Ignore unsubscribes” tells GMass to ignore your unsubscribe list and send your emails to everyone, even if they’ve opted out.

“Use global unsubscribes” activates GMass’s global unsubscribe feature. When that feature is activated, GMass will suppress any emails you try to send to addresses that are on the unsubscribe lists for everyone else in your Google Workspace organization and/or on your Team plan.

And List-Unsubscribe Header allows email clients to add an easy unsubscribe option at the top of your sends.

What if you just want to “unsubscribe” addresses from one specific campaign?

What happens if you want to remove some contacts from one specific campaign — but don’t want to add them to your unsubscribe list to keep them from receiving all emails?

Rather than unsubcribing those email addresses, you can do campaign-level unsubscribing with GMass’s suppression features.

Suppression settings in GMass

You can find the suppression options for your campaign in the Advanced section of the GMass settings box.

Here, you can suppress recipients for that campaign in three different ways:

  • Suppress emails to people who were part of prior campaigns. You can choose a prior campaign or multiple prior campaigns from the dropdown box that appears when you click into the “People in these campaigns” field.
  • Suppress emails to specific domains or email addresses. You can manually enter domains and/or email addresses in the “These domains and email addresses” field.
  • Suppress emails to people you’ve recently emailed. Set the number of days in the “People I’ve emailed in the past n days” field. GMass will only send your new campaign to contacts who haven’t received anything else from you in the specified time frame.

Now you’ve temporarily “unsubscribed” people from one campaign — but you can still email them in the future with no problems.

Our goal with unsubscribes in GMass is to make everything as simple for you as possible. Add an unsubscribe link to your emails with one click. Manage addresses from your dashboard. And never worry about manually removing people who unsubscribe from your lists — GMass will just automatically suppress emails to those contacts.

Download GMass from the Chrome web store to get started for free and let us take on a huge chunk of your unsubscribe management.

Email marketing, cold email, and mail merge inside Gmail


Send incredible emails & automations and avoid the spam folder — all in one powerful but easy-to-learn tool


TRY GMASS FOR FREE

Download Chrome extension - 30 second install!
No credit card required
Love what you're reading? Get the latest email strategy and tips & stay in touch.


What is Email Click Tracking and How Does it Work?

With email click tracking, you can measure how many times recipients click on links within email messages.

One way to track email links is by using UTM parameters in Google Analytics, but setting them up can be difficult. GMass simplifies the process with its built-in click tracking capabilities and easy Gmail integration.

GMass converts standard email links to trackable links in its campaigns. When a person clicks on these links in an email, GMass will automatically track them and report them into the GMass Reports -> Clicks section of your Gmail account. (You can also see clicks in the other GMass reports, including the report in the GMass dashboard as well as the web-based report.)

This article will guide you through the steps required to enable email click tracking using GMass. You will also learn how to set up email URL tracking using Google Analytics and its limitations.

The Benefits of Click Tracking

Click tracking provides real feedback, which can be used to continually hone your email marketing strategies. With click tracking, you have the data necessary to determine whether or not your emails are being opened and clicked on – allowing you to pinpoint what works and what doesn’t work in order to improve performance over time:

1. Monitor your email strategy by seeing what happens with clicks

One benefit of tracking email clicks is reduced guesswork and a greater understanding of ROI. Tracking link click-through rates in email campaigns will give you a good idea of which content your audience prefers and what messaging resonates with them best. This information can be used to create more targeted campaigns or set up automation so customers who engage with your messages receive relevant content based on their preferences.

You can also use this information to A/B test different subject lines and content for maximum engagement. You can then send out emails that resonate more with your audience.

2. Boost your conversion rates by following up on leads that are more likely to convert.

It’s challenging to follow up with people without knowing if your email was opened or if the recipients clicked on any links in your email.

With click tracking, you can improve your email list conversion rate because you can manage follow-ups more accurately. Click tracking reveals how interested each recipient was in your email and you can use that information to create better follow-up sequences.

Click tracking allows you to identify interested customers by monitoring link clicks, so you can follow-up only after someone has shown interest. This means you won’t waste your time by sending messages and follow-up emails to uninterested people.

Implementing click tracking in your emails can also give you insight into how leads are viewing the content of your messages. If you included links or attachments in an email, prior to a meeting, you can see if your contact has viewed them.

3. Know the best time to follow up with a prospect.

Reach the right customers at the right time by sending emails only when they’re relevant or needed.

Timing can be a crucial factor in the success of an email campaign. If you send different types of emails, some hours fit better than others. Click tracking helps you find the best window to send your follow-up.

4. Create automated workflows

If you want to set up a comprehensive and robust email marketing funnel, you need automated workflows. Using data from the email click tracking system, you can build workflows that are triggered by different behaviors in your outgoing emails, like clicks on specific links.

This gives you the power to be creative at a deeper, more strategic level of your email marketing funnel.

For example: You can email a contact with a personalized follow-up only after they’ve clicked a particular link.

How to Enable Email Click Tracking with GMass

Mail merge campaigns sent via GMass can now be click-tracked. To turn on click-tracking for a mail-merge campaign, just check the box in the Settings box before clicking the main GMass button. Note that click-tracking is turned on by default.

Enable click tracking in GMass settings

All hyperlinks will be converted to trackable hyperlinks, though certain links will be left alone and not tracked, including “mailto:” links and “tel:” links. All other regular web hyperlinks will be converted to trackable links if click tracking is on.

Additionally, previously tracked URLs will not be tracked again. For example, if you track a link in one campaign, and you copy/paste that tracked URL into another campaign, it will be left alone and not converted again.

Skipping certain links

There are cases where you may not want a particular link tracked. Learn more here.

Reporting

When someone clicks on a link in an email campaign, a report will go into the GMass Reports -> Clicks label in your Gmail account.

You’ll also be able to check click tracking data in your other reports, in the GMass dashboard:

Click tracking in the GMass dashboard

and your web-based report:

Click tracking in the web-based report

And when you click on the number of clicks in either of those reports, the fly-out panel on the right will show you how each link in your campaign performed. You can also see the raw data on who clicked what.

Click reporting

Not all links are tracked

If you’ve sent mail merge campaigns with your Gmail account and have used GMass’s click-tracking feature, you’re used to having all of your clickable URLs altered to be tracked. In certain cases, however, phishing scanners were flagging the tracked links when a URL was used for the anchor text. Many email marketing experts have already written about this issue, so I won’t expound upon the history of phishing in this post.

The important change to be aware of is that GMass’s click tracking feature now skips tracking on links where the anchor text itself is a URL rather than a word or a phrase.

Meaning, if your links looks like this:

Go to http://www.wordzen.com for an awesome email editing service!

where the links is a URL itself, then we won’t track that link.

If your links looks like this, however:

Go to Wordzen for an awesome email editing service!

the anchor text is now “Wordzen” instead of “http://www.wordzen.com”, and so GMass will track this link.

You’ll also notice that if you’re a Google Apps user, the clickable links now point to our new domain gm.ag instead of gmass.co.

Interestingly enough, we tested other popular email marketing services to assess how their click tracking functions worked, including MailChimp, Constant Contact, and Campaign Monitor. Surprisingly, none of these services skip click-tracking on links where the anchor text is a URL, meaning emails sent from those services will get flagged by phishing scanners if click tracking is enabled and links with URLs as anchor text are present in the message.

I believe GMass, despite doing it differently than these other popular email marketing tools, is now implementing click-tracking the proper way. We hope that the rest of the email marketing industry will soon follow suit.

Using a custom tracking domain

We recommend you set up a custom tracking domain for click tracking — as a shared tracking domain can often be the biggest reason for deliverability issues. Plus a custom domain is better for branding and can ultimately improve your click-through rate.

You can follow our instructions for setting up a tracking domain here — it’s usually a pretty simple process that includes adding one DNS record, then pasting your tracking domain into the GMass settings.

GMass is also one of the handful of email service providers — and (we believe) the only cold email platform — that serves tracking links securely over HTTPS rather than HTTP. That step helps deliverability even more.

We filter out certain User Agents

A few years back, we noticed false clicks of links in email campaigns from the Yahoo! Slurp User Agent, and in the since then we’ve noticed a new bot clicking links in users’ mail merge campaigns: BLEXBot.

The User agent for BLEXBot looks like:

Mozilla/5.0 (compatible; BLEXBot/1.0; +http://webmeup-crawler.com/)

We are now filtering out clicks from this bot, meaning they won’t count towards your campaign clicks. We aren’t sure yet how the BLEXBot is getting access to the unique tracking links that are included in click-tracked email campaigns sent by GMass users, but we’re working on finding out. It might be the result of a data sharing agreement between Google and the folks who control BLEXBot.

As for Yahoo!’s Slurp Search Bot, it has the User Agent:

Mozilla/5.0 (compatible; Yahoo! Slurphttp://help.yahoo.com/help/us/ysearch/slurp)

or a click notification that looks like this:

Yahoo! Slurp Bot
A sample click notification from GMass where the click came from the Yahoo! Slurp Bot.

Why is this happening?

Yahoo!’s Slurp search spider has been around for a while but a few years ago, Yahoo! made a change so the spider is now clicking the links in the email messages of all Yahoo! Mail users, where it previously did not auto click all the links within emails. So if you’re sending email campaigns to @yahoo.com users or any address hosted by Yahoo! Mail, or to an address that forwards to such an address, you may be getting false clicks from the Slurp spider.

What change did we make?

On August 14, 2017, we modified our click tracking handler to ignore clicks from the Slurp search spider, so you shouldn’t see any more clicks generated by the spider.

And we’ll continue to monitor for “bad bots” that inaccurately inflate click track counts to continue to filter them out.

Email Click Tracking with Google Analytics

Google Analytics is not the perfect solution for email tracking; it has some limitations. It won’t be able to generate reports as comprehensive as GMass.

With Google Analytics, you won’t be able to:

  • Know who opened your email (except for some demographic data). GMass provides click tracking data, which typically includes the email ID, time, and IP address.
  • Check the total number of email addresses that clicked at least one link in your campaign (If you turned on click tracking in GMass).
  • Get immediate notifications and instant reports of email click activity in real-time
  • Easily check email click tracking reports using Gmail on your desktop or on your mobile device.

If you’re still interested in tracking email clicks with Google Analytics, then here are the steps:

Google Analytics tracks activity via a series of UTM tags linked-to URLs. When someone clicks on an assigned URL, Google records the click with data collected from UTM parameters.

For this, please navigate to Campaign URL Builder tool

Here’s how to fill out these form fields:

  • Campaign Source (utm_source): Use this to identify the origin of the traffic, whether it is coming from a search engine, email campaign, or any other source. (Type “Newsletter” here, for example.)
  • Campaign Medium (utm_medium): utm_medium is used to identify a medium such as email or PPC campaign. (Enter “Email” here, for example.)
  • Campaign Name (utm_campaign): This is used to identify a specific campaign. (Enter the name of your email marketing campaign here, for example.)
  • Campaign Content (utm_content): Use utm_content to differentiate links that point to the same URL on a website. You can also use this to A/B test the content-targeted ads.

Use GMass to track your email clicks with its dedicated reporting dashboard and real-time notifications. You’ll also be able to easily check your email click tracking reports using Gmail on your desktop or mobile device or with any of the other GMass reports.

To start using GMass, download the Chrome extension and sign up for free using your Gmail account.

Ready to transform Gmail into an email marketing/cold email/mail merge tool?


Only GMass packs every email app into one tool — and brings it all into Gmail for you. Better emails. Tons of power. Easy to use.


TRY GMASS FOR FREE

Download Chrome extension - 30 second install!
No credit card required
Love what you're reading? Get the latest email strategy and tips & stay in touch.


You can now schedule a mass email in Gmail to be sent at a future date and time.

Scheduling a mass email in Gmail with GMass

Schedule an email for the future

Access the Scheduling settings by clicking the GMass “arrow” to open the GMass Settings box when you’re composing a mass email.

You can choose from a list of pre-configured future times, or you can enter a custom date/time as well. All times are in the local timezone of your computer. (Though you can change that and set a default time zone for your GMass account if you’d like.)

After you have selected a date/time, click the main GMass button as normal to schedule your email. At the scheduled time, your emails will be sent.

You can also specify an end time for your campaign. In that case, GMass will send in between your scheduled start and end times.

If, after scheduling an email, you want to alter the date/time or want to just send it now, find the email in your Drafts folder. All scheduled GMass campaigns will also have the label “GMass Scheduled” applied to the Draft. From there, click the GMass settings “arrow” again, and adjust the date/time or choose now, and afterwards, click the main GMass button again.

You can also edit the campaign before the scheduled send time or adjust the other settings, such as Open Tracking or sending as new messages versus replies.

After the mass email has been sent, the original draft with the label “GMass Scheduled” will be deleted from your account.

Scheduling an auto follow-up series in GMass

Scheduling auto follow-up sequences in GMass

You can also fine-tune the scheduling on your automated follow-up sequences with GMass. As you set up each email in your auto follow-up series, schedule when you want to send the email (relative to the first email in the series) and set the time of day to send the follow-up.

While your auto follow-ups don’t have their own unique end times, they will inherit any end time you set for your campaign.

You can use the choose specific days feature in the Schedule settings if you only want your follow-ups to go out to contacts on, say, weekdays. You also have the option to skip sending on holidays (and you determine what those holidays are, or choose from a default set).

Scheduling in GMass versus Gmail’s built-in scheduling

Google held out a long time on adding scheduled sending to Gmail — they didn’t roll out their Scheduled send feature until 2019. Plus, for the limited built-in mail merge that Gmail offers, there’s no scheduling option.

At GMass, we’re always working on improving our scheduling tool to make it far more powerful than that native Google tool (or a lot of the third-party scheduling tools out there, most of which have stopped development since Scheduled send debuted in 2019).

With scheduling for automated follow ups, the ability to skip weekends and holidays, and intelligent sending to make sure Gmail’s sending limits don’t get in the way of your email schedule, we hope you’ll find GMass to be the ideal option for scheduling your emails — whether it’s one email, 1,000 emails, 100,000 emails, or an ongoing automated series.

You can download GMass at the Chrome web store to get started today for free.

Ready to transform Gmail into an email marketing/cold email/mail merge tool?


Only GMass packs every email app into one tool — and brings it all into Gmail for you. Better emails. Tons of power. Easy to use.


TRY GMASS FOR FREE

Download Chrome extension - 30 second install!
No credit card required
Love what you're reading? Get the latest email strategy and tips & stay in touch.


Welcome to GMass — the easiest way to send mass email campaigns through your own Gmail account.

I built GMass to be a dead-simple mass email system for Gmail. I started researching and building GMass out of my own frustration one day while needing to email five different candidates about an open position at my company. There was no easy way to do that, without exposing them to each other or BCC’ing them. GMass lets you send mass emails to your existing Gmail contacts or a Google Sheet full of contacts. It also tracks and reports email opens, clicks, replies, and more. You can build an instant recipient list based on search results. And the real killer feature is the ability to have your emails go out as replies to the last conversation you had with each recipient, instead of a new message. Stay tuned to this blog for updates and new features. Many of them are in progress right now.
Ready to transform Gmail into an email marketing/cold email/mail merge tool?


Only GMass packs every email app into one tool — and brings it all into Gmail for you. Better emails. Tons of power. Easy to use.


TRY GMASS FOR FREE

Download Chrome extension - 30 second install!
No credit card required
Love what you're reading? Get the latest email strategy and tips & stay in touch.


GMass